
I bought a 1955 house which needed a lot of love but I immediately saw the potential it had. Everything needs to be redone and brought up to new standards: electricity, plumbing, insulation, ventilation, finishing, etc. But with a little “elbow grease”, anything is possible. This will be an opportunity to write a few posts on the renovation.
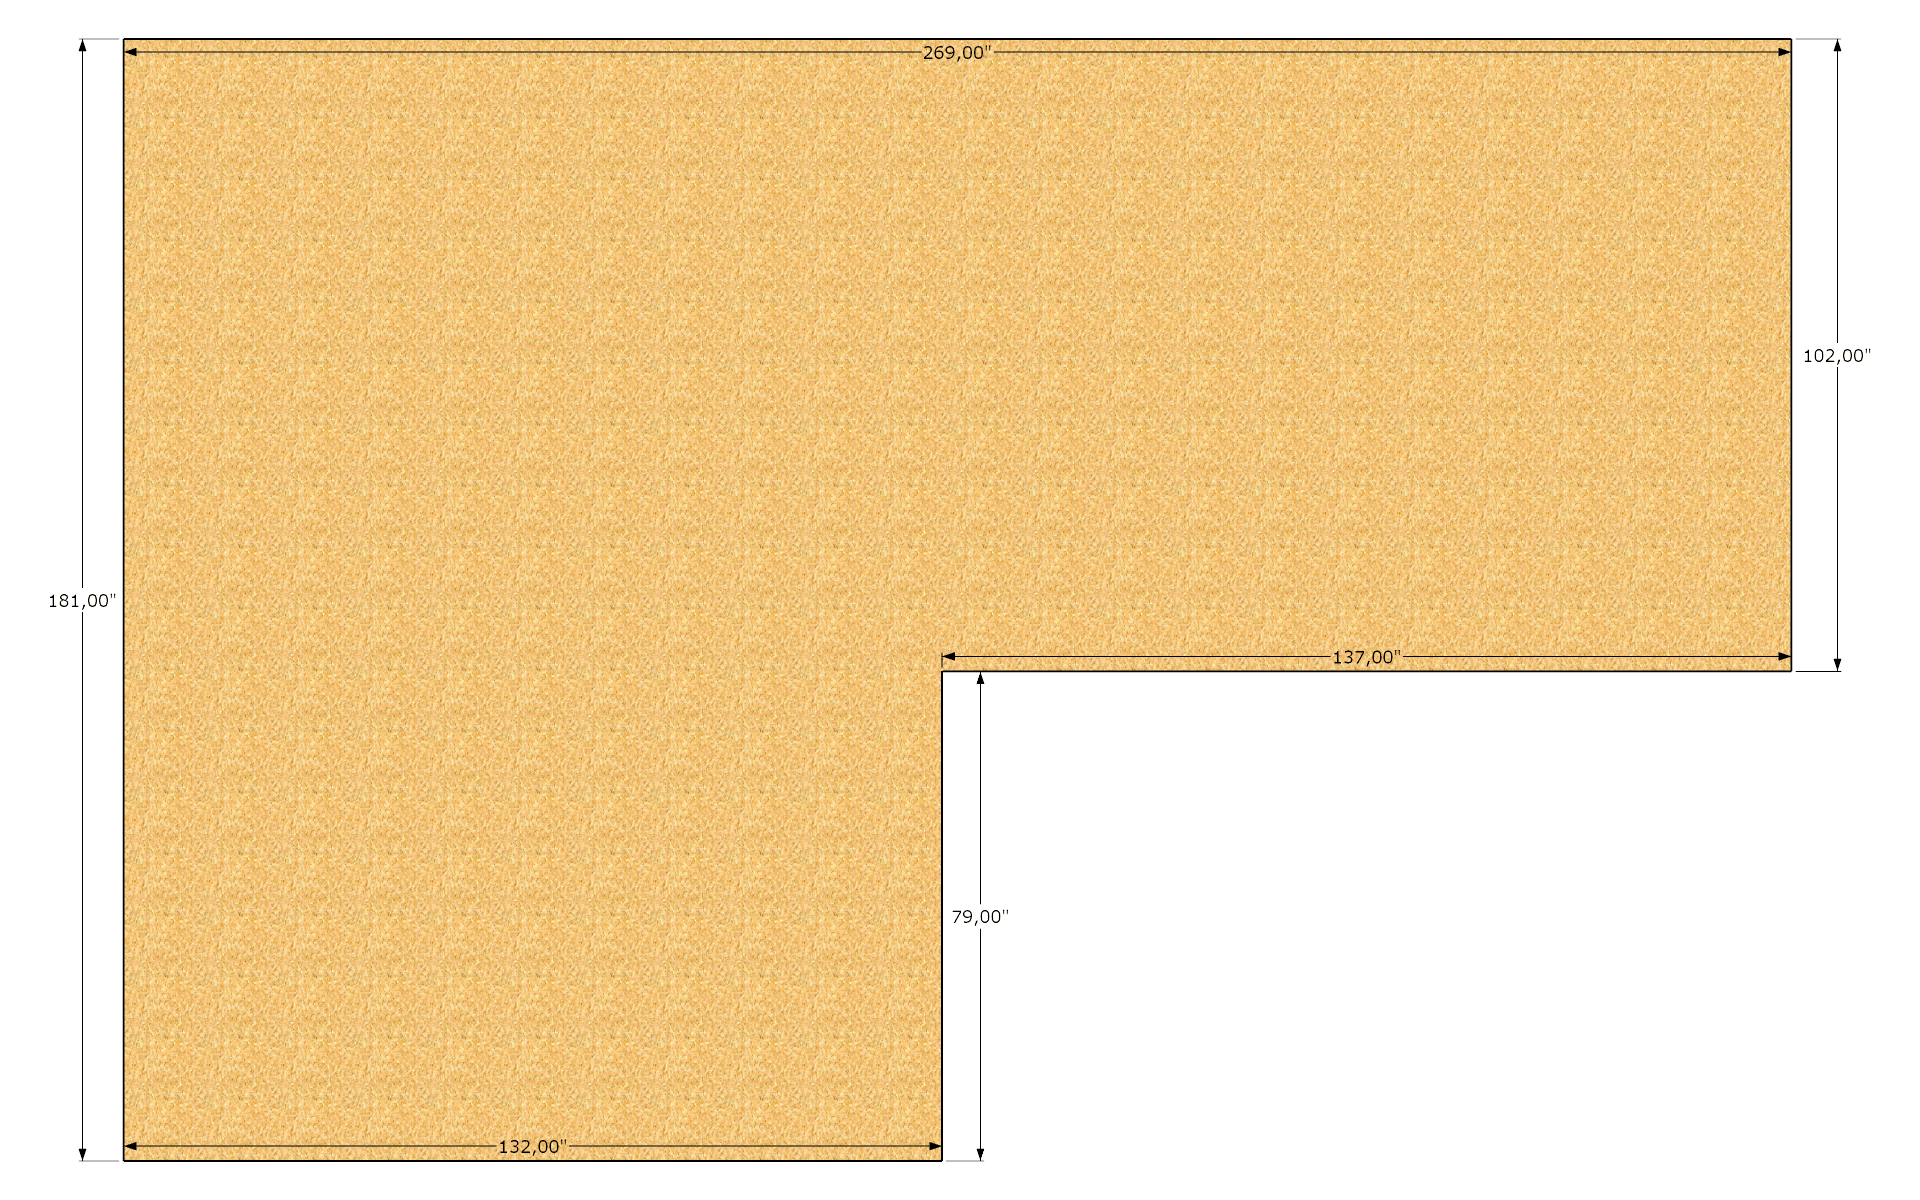
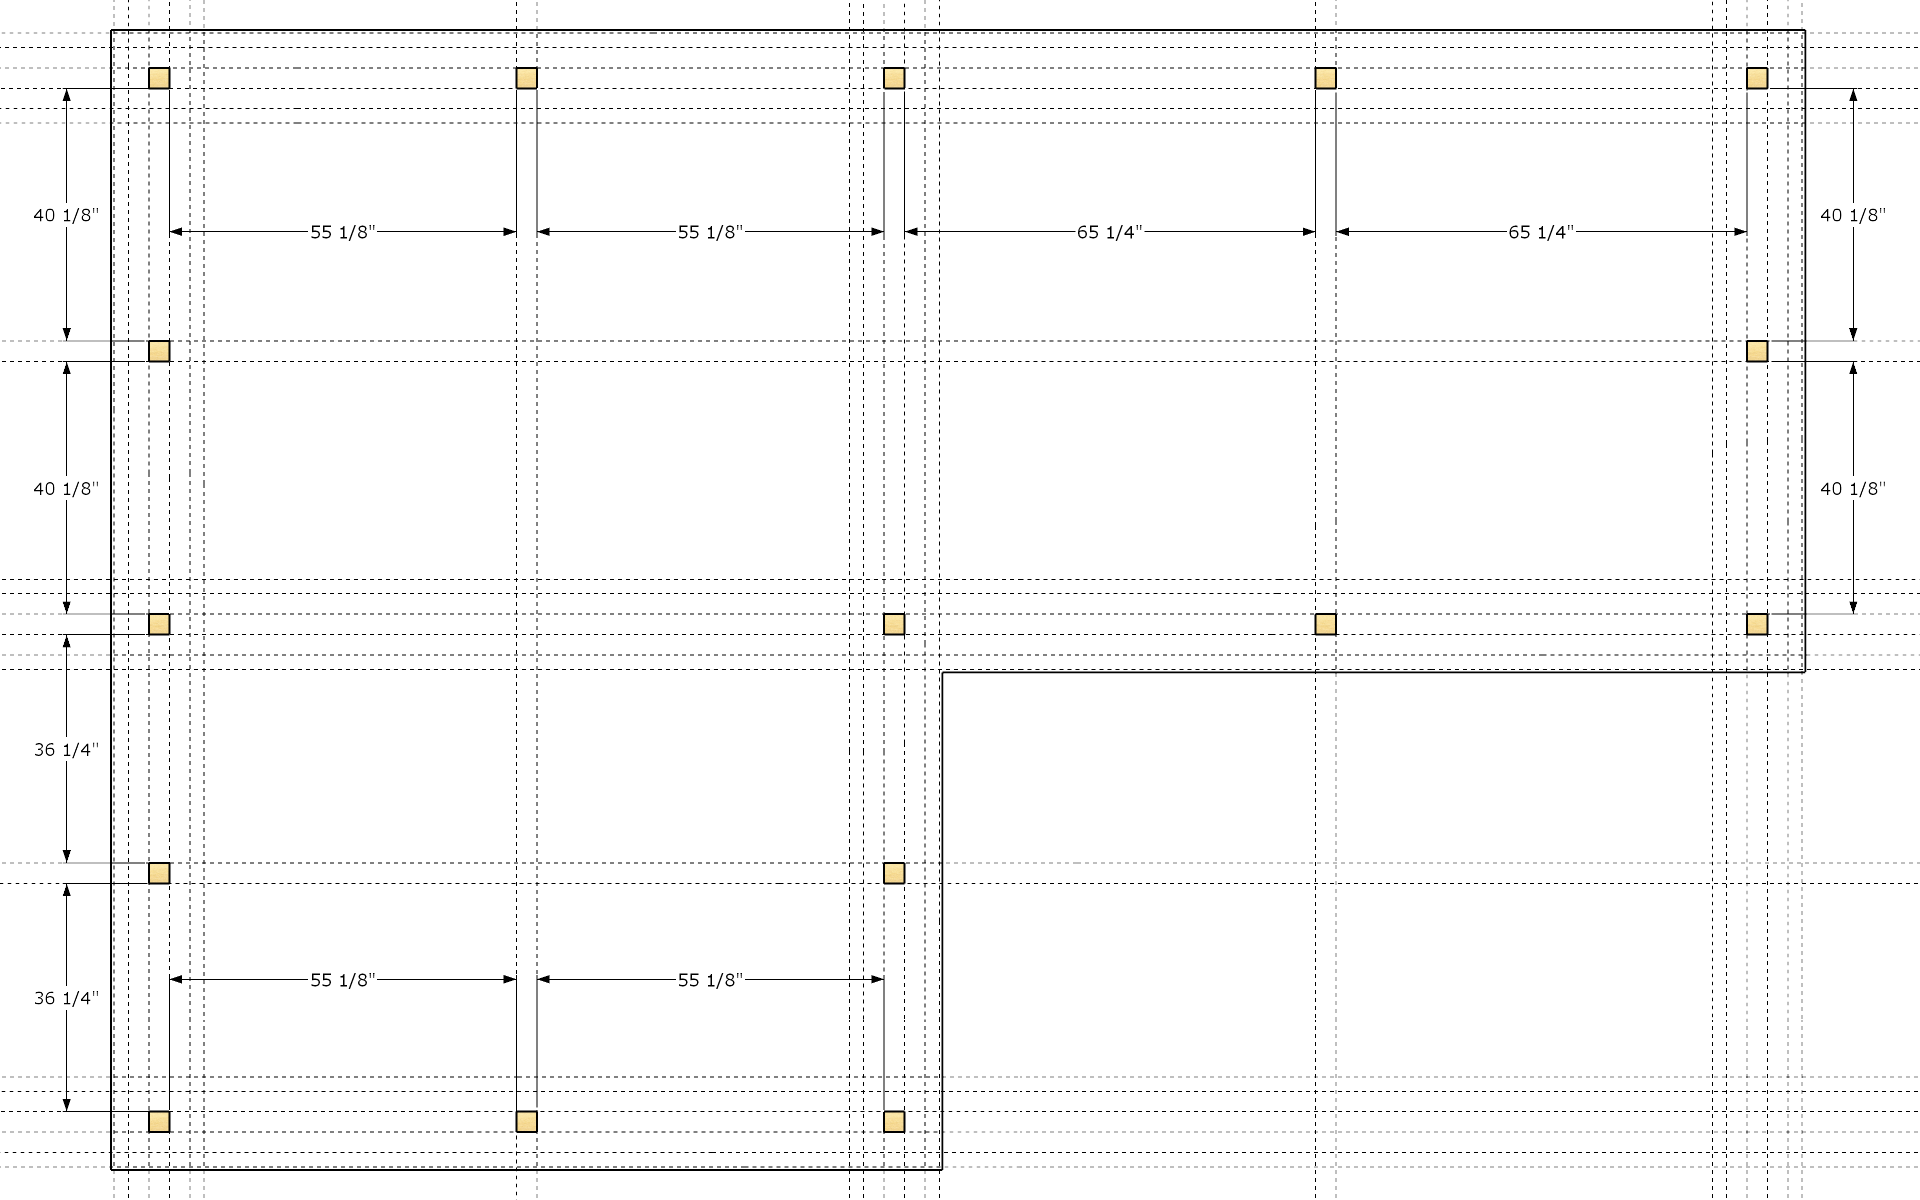
I started by renovating the dining room which the carpet needed to be replaced first. This one is in the shape of an inclined “L” whose dimensions are 269″ x 102″”x 137″ x 79″ x 132″ x 181″ or approximately 683 cm x 259 cm x 348 cm x 200 cm x 335 cm x 460 cm.
When I started this project, I was single. You will see a few shifts in ideas as you read this post. 🙂
1. The floors
I wanted to replace the carpet with an exotic hardwood floor like Jatoba* or Sapele*. Hardwood is less allergenic and maintains better. And as long as doing things, you might as well have a little fun. I did not want a standard floor installation. I have nothing against that but I wanted something out of the ordinary. So I learned about the different floor laying techniques and the floors themselves.
*Jatoba and Sapele are respectively called Brazilian Cherry and African Mahogany.
1.1 floating floor
It is more of a type of installation than a floor covering. It is mostly made of synthetic materials but some models have a layer of real wood. The floorboards are not fixed to the ground, they are simply placed and fitted together. Which makes it, probably, the easiest to install. It requires no glue, nails or staples and few tools. It is the entire weight made up of the assembly that keeps it on the ground.
Although the quality of floating floors has evolved a lot in recent years, it only lends itself to an English laying.
- Economic;
- Very easy to install;
- Suitable for all rooms;
- Possibility of radiant heating.
- Fears moisture;
- It will sand less than a solid floor;
- Poor soundproofing.
1.2 Hardwood Or Solid Flooring
It has been around for centuries. These are boards made of 100% wood species, native or exotic. Robust, it has proven itself over time and has a long lifespan. It can be nailed or stapled.
- Renewable natural material;
- Very wide variety of choices;
- Easy to install;
- Can be sanded several times;
- Lends itself to all poses;
- All things considered, it is less expensive than engineered flooring;
- Robust.
- Not suitable for all rooms;
- No possibility of radiant heating.
1.3 Engineered Floor
It is a plywood board covered with a layer of hardwood. Newest to the market, its popularity is growing and its structure is more stable. It can be nailed, stapled. glued or laid floating.
- Suitable for all rooms;
- Good moisture resistance;
- Possibility of radiant heating for certain species.
- More difficult to install;
- It will sand less than a solid floor;
- More expensive.
Some sellers claim it is more eco-friendly because it uses less solid wood. This is debatable given that its manufacture requires more processes and certain chemicals such as glue. But I will not enter into this debate because it is not the subject of this article.
2. Pattern Styles
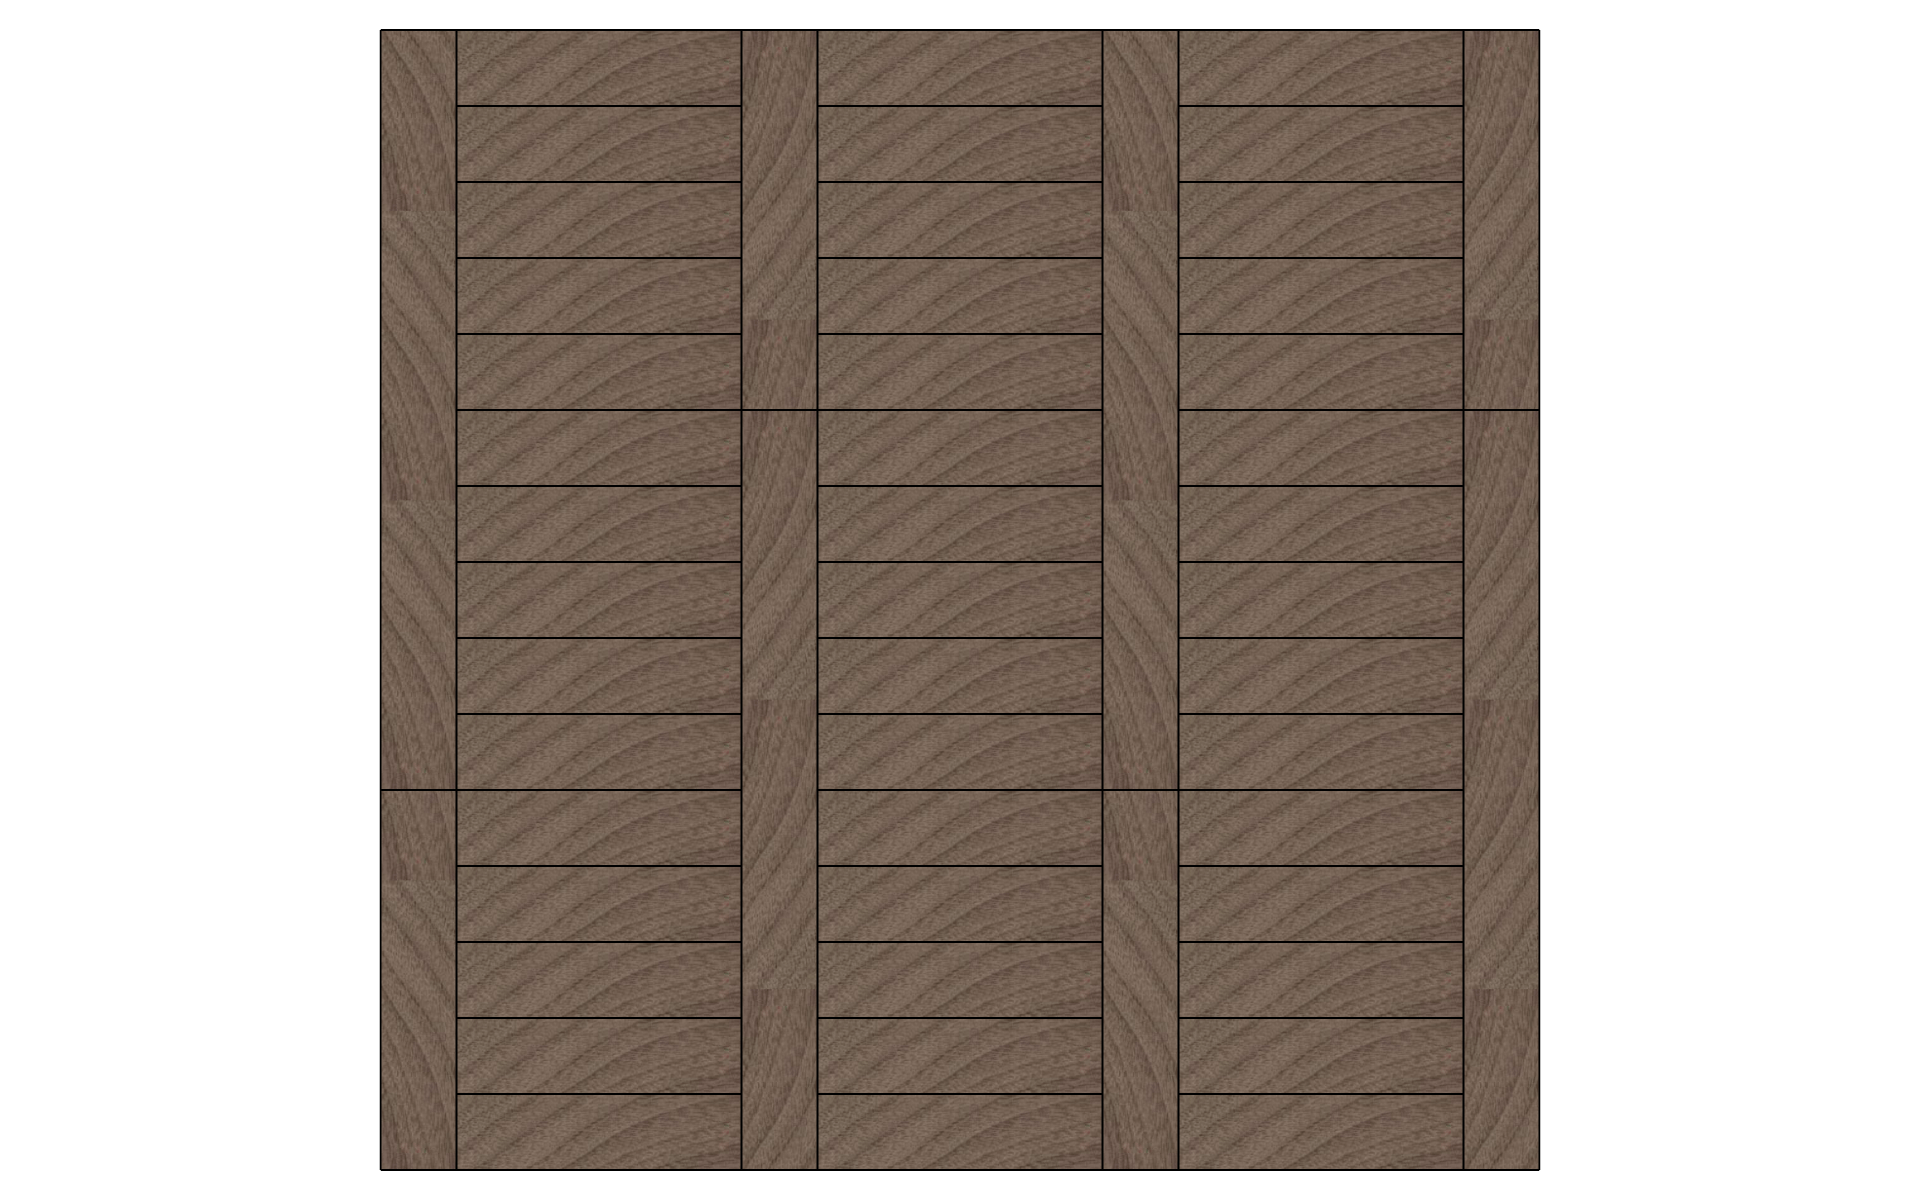
Let’s get to the fun part. Nowadays, most wood floors are installed by placing the boards parallel to each other, called “English laying”, but there are a multitude of patterns for laying the floors. Here are a few that I found during my research.
2.1 English Pattern
The great classic and, probably, the easiest and fastest to make. The boards are the same width but not the same length. As a general rule, we start the new row with the remain of the last board cut.
It is also called “staggered or lost joint patterns”.
2.2 French Pattern
The boards are parallel to each other but are of different length and width. Two narrow boards are interposed then a wide board.
2.3 Brick Pattern
It’s the same principle as the English pattern except that the boards all have the same length. As for a brick wall, the joints arrive in the middle of the board of the next row.
2.4 Ladder Pattern
Short slats of the same length and parallel to each other are intercalated between longer slats and placed vertically. Thinner blades can also be mixed with short blades to accentuate the scale effect.
2.5 Hungarian Point Pattern
Very common in Europe, the boards are all the same length and are placed at an angle varying from 45 to 60 degrees. This is one of my favorites.
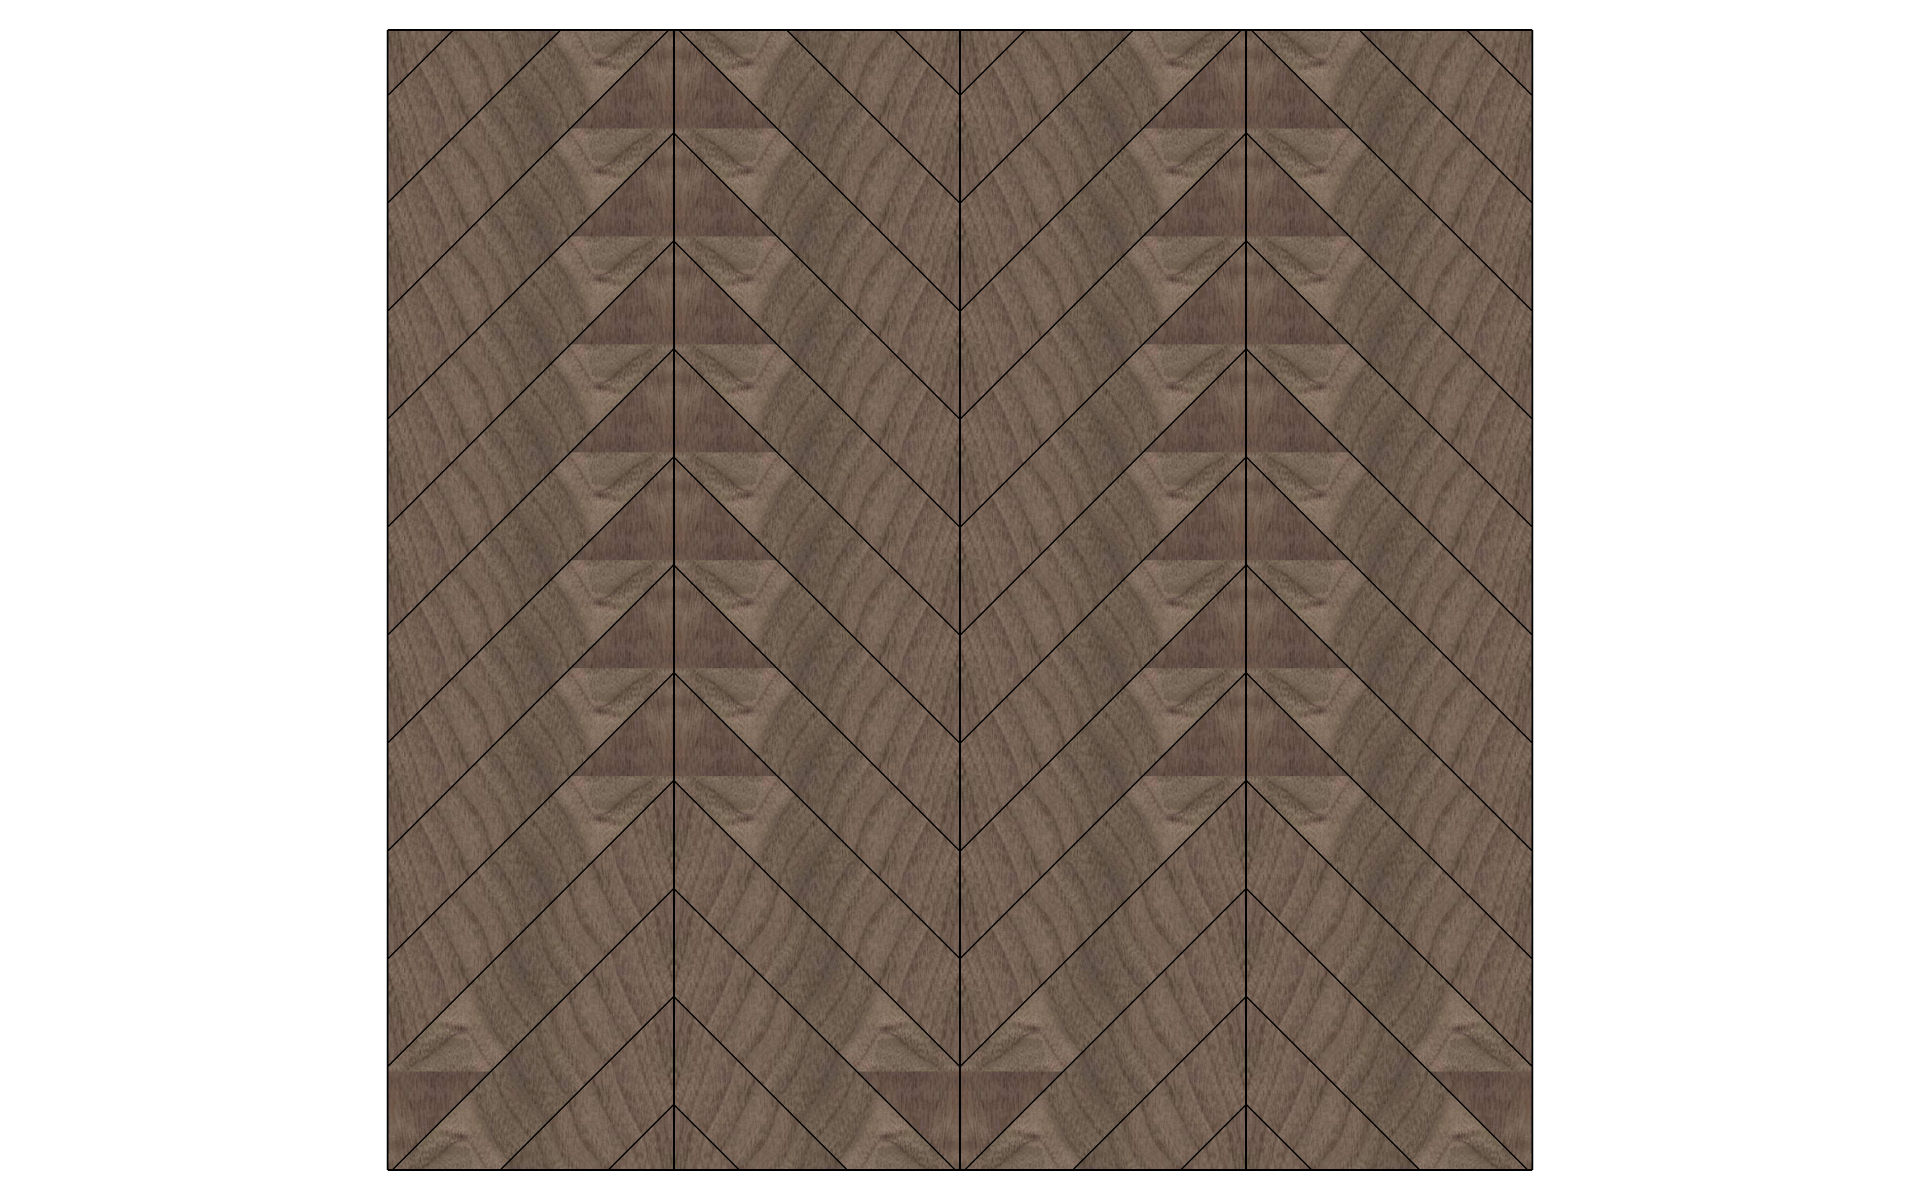
It is also called “Chevron Pattern”.
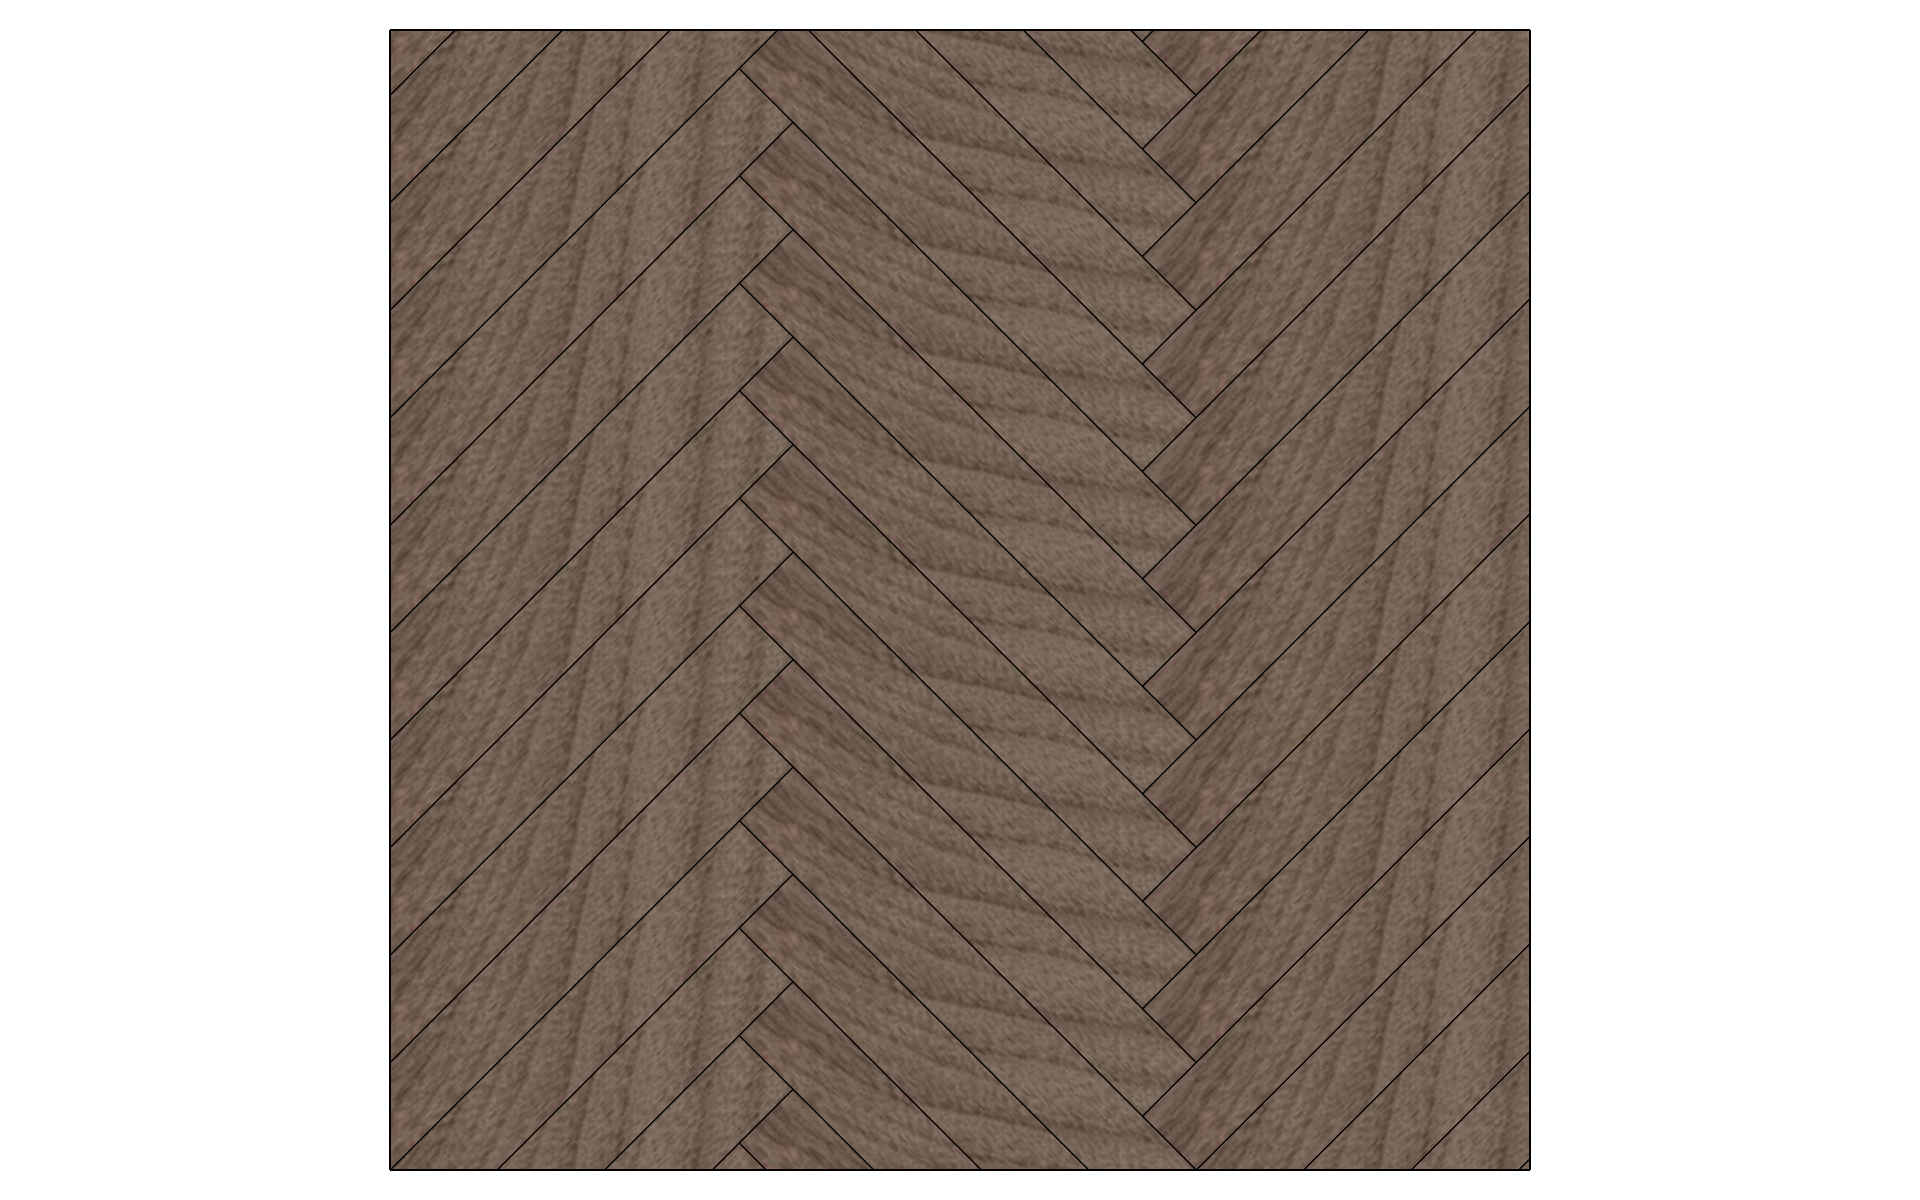
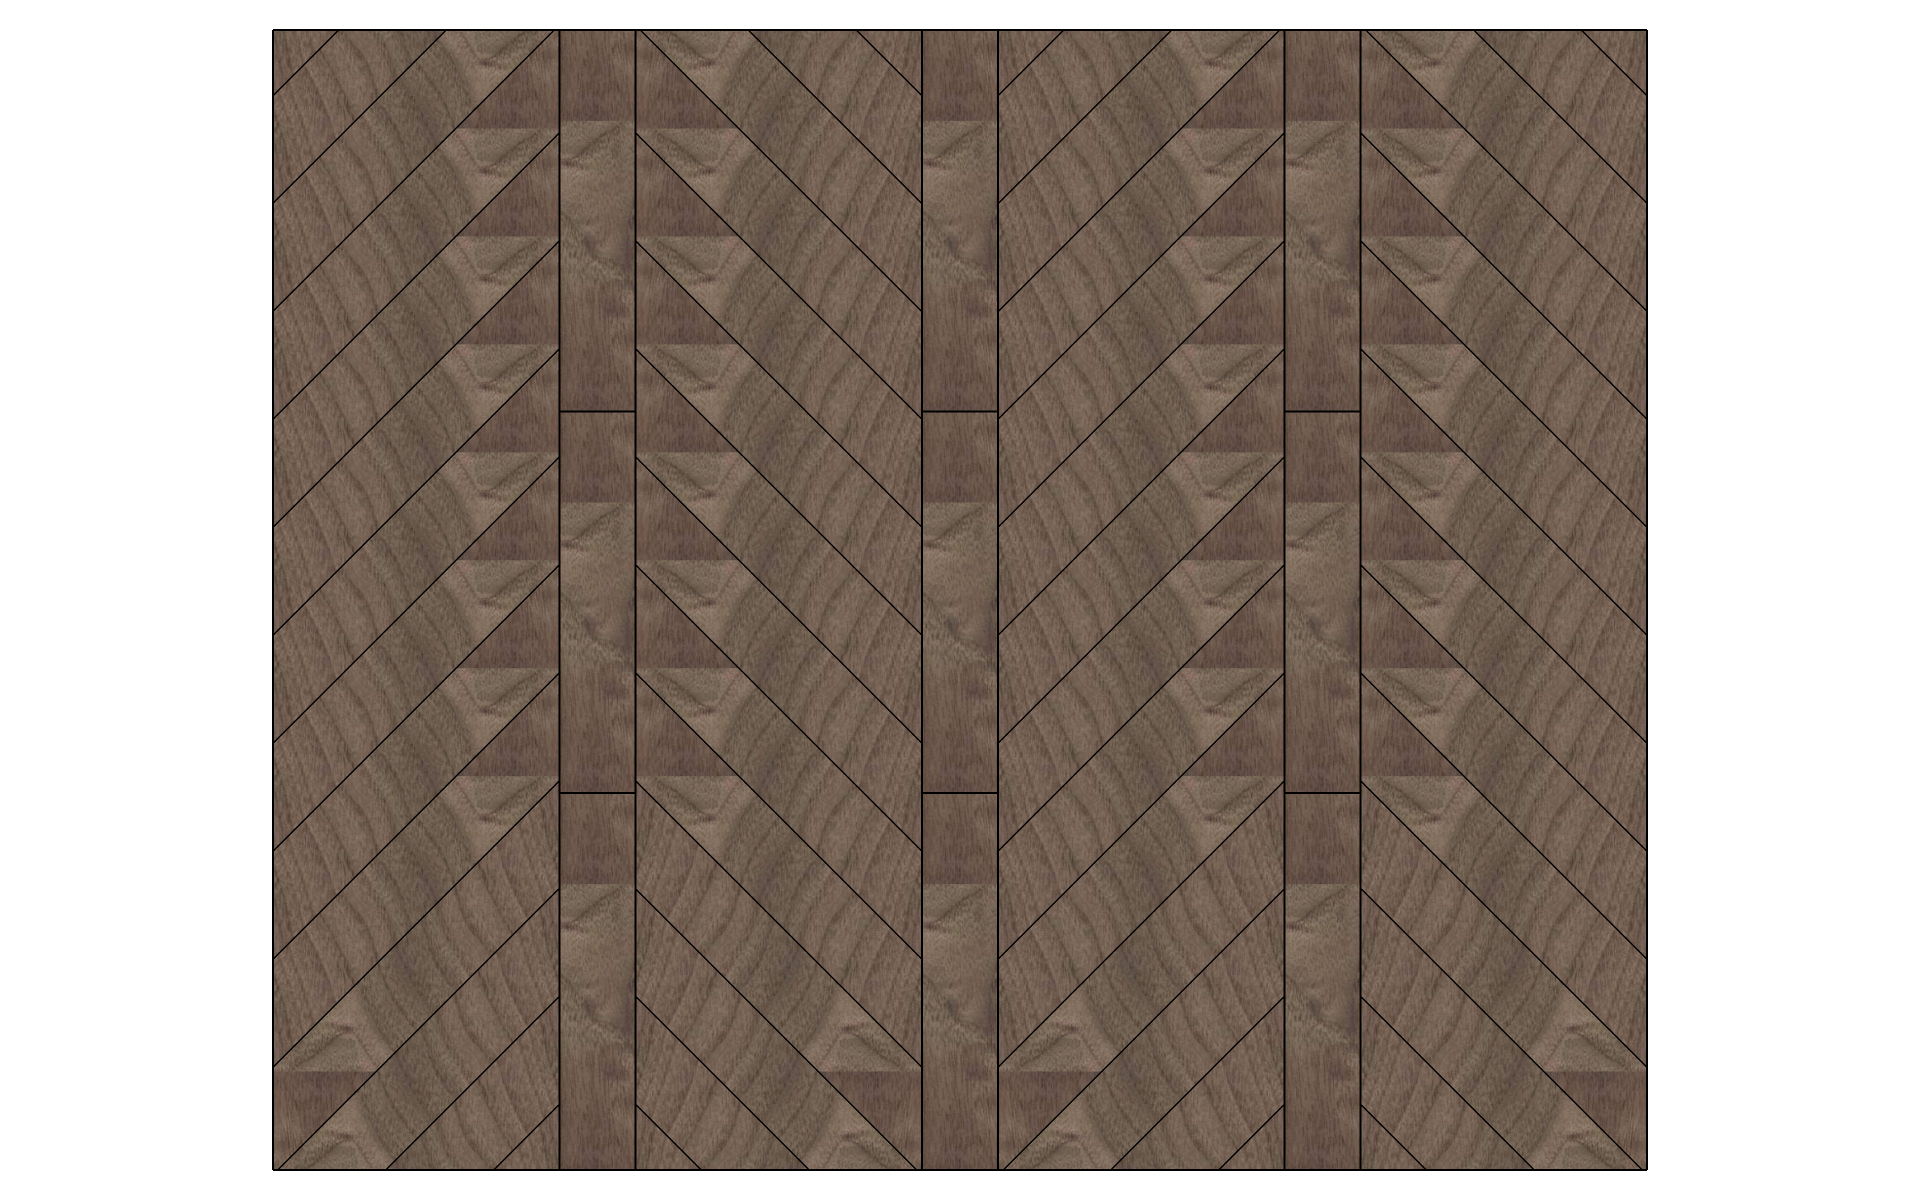
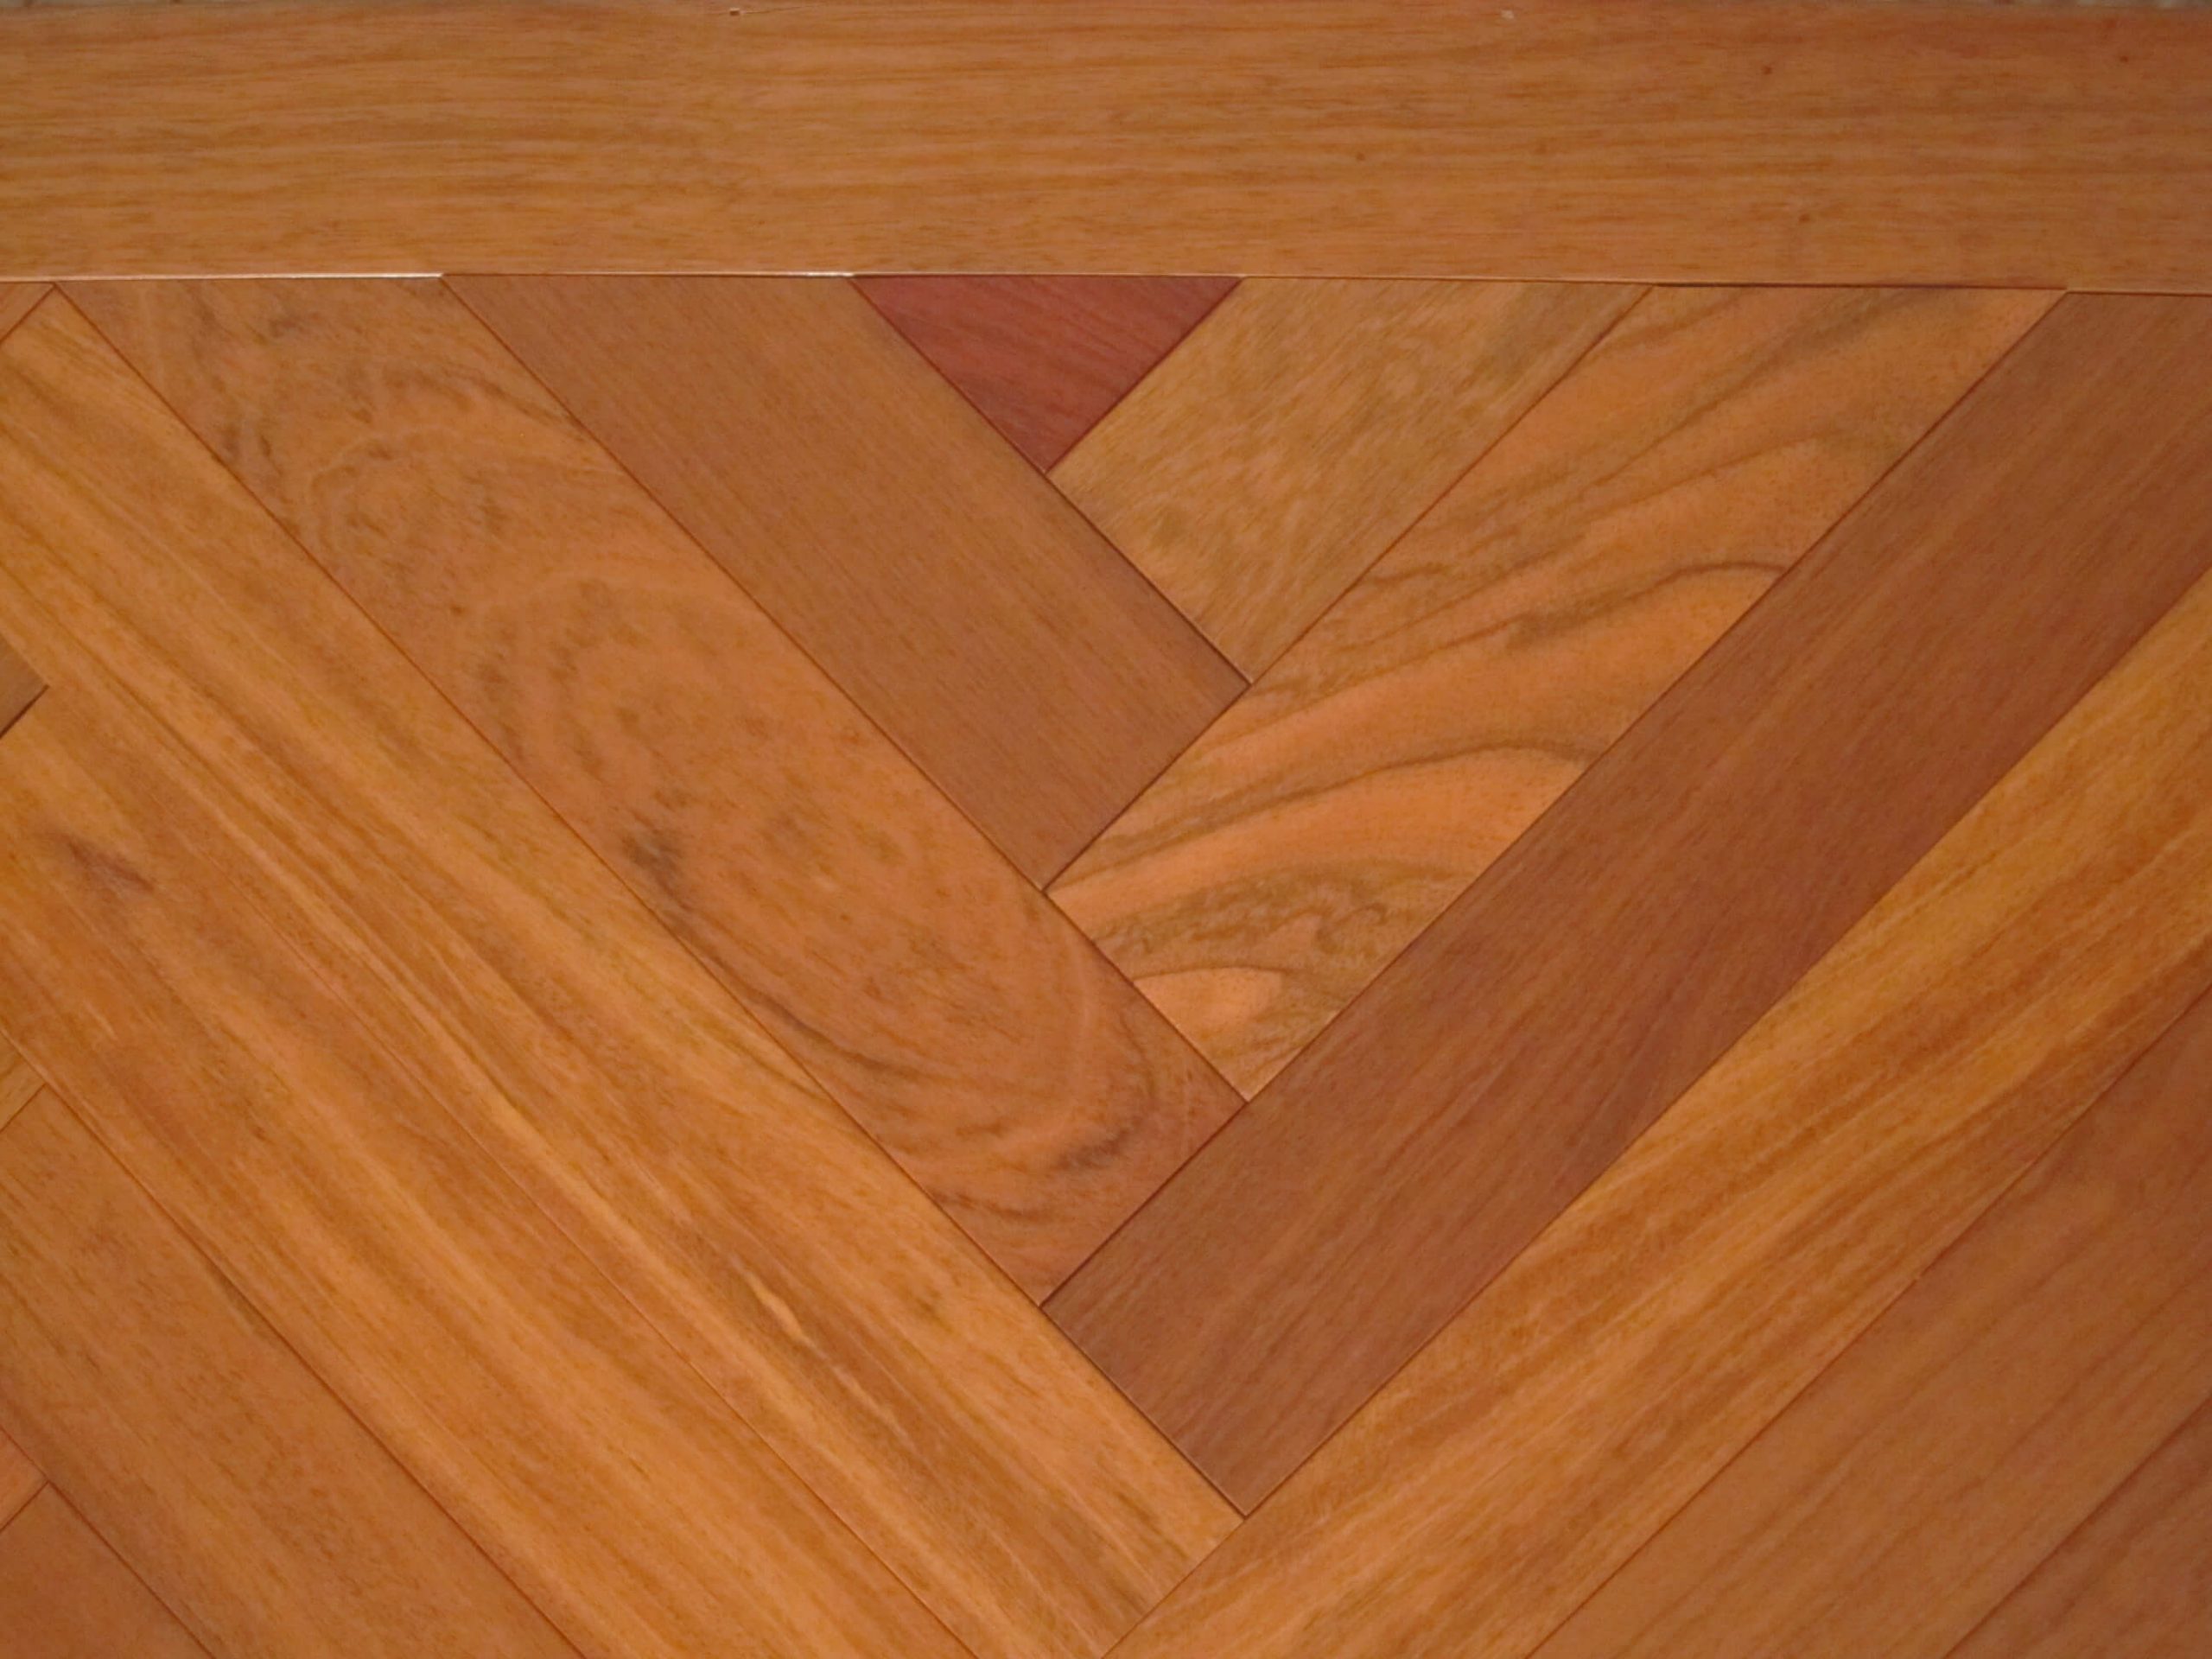
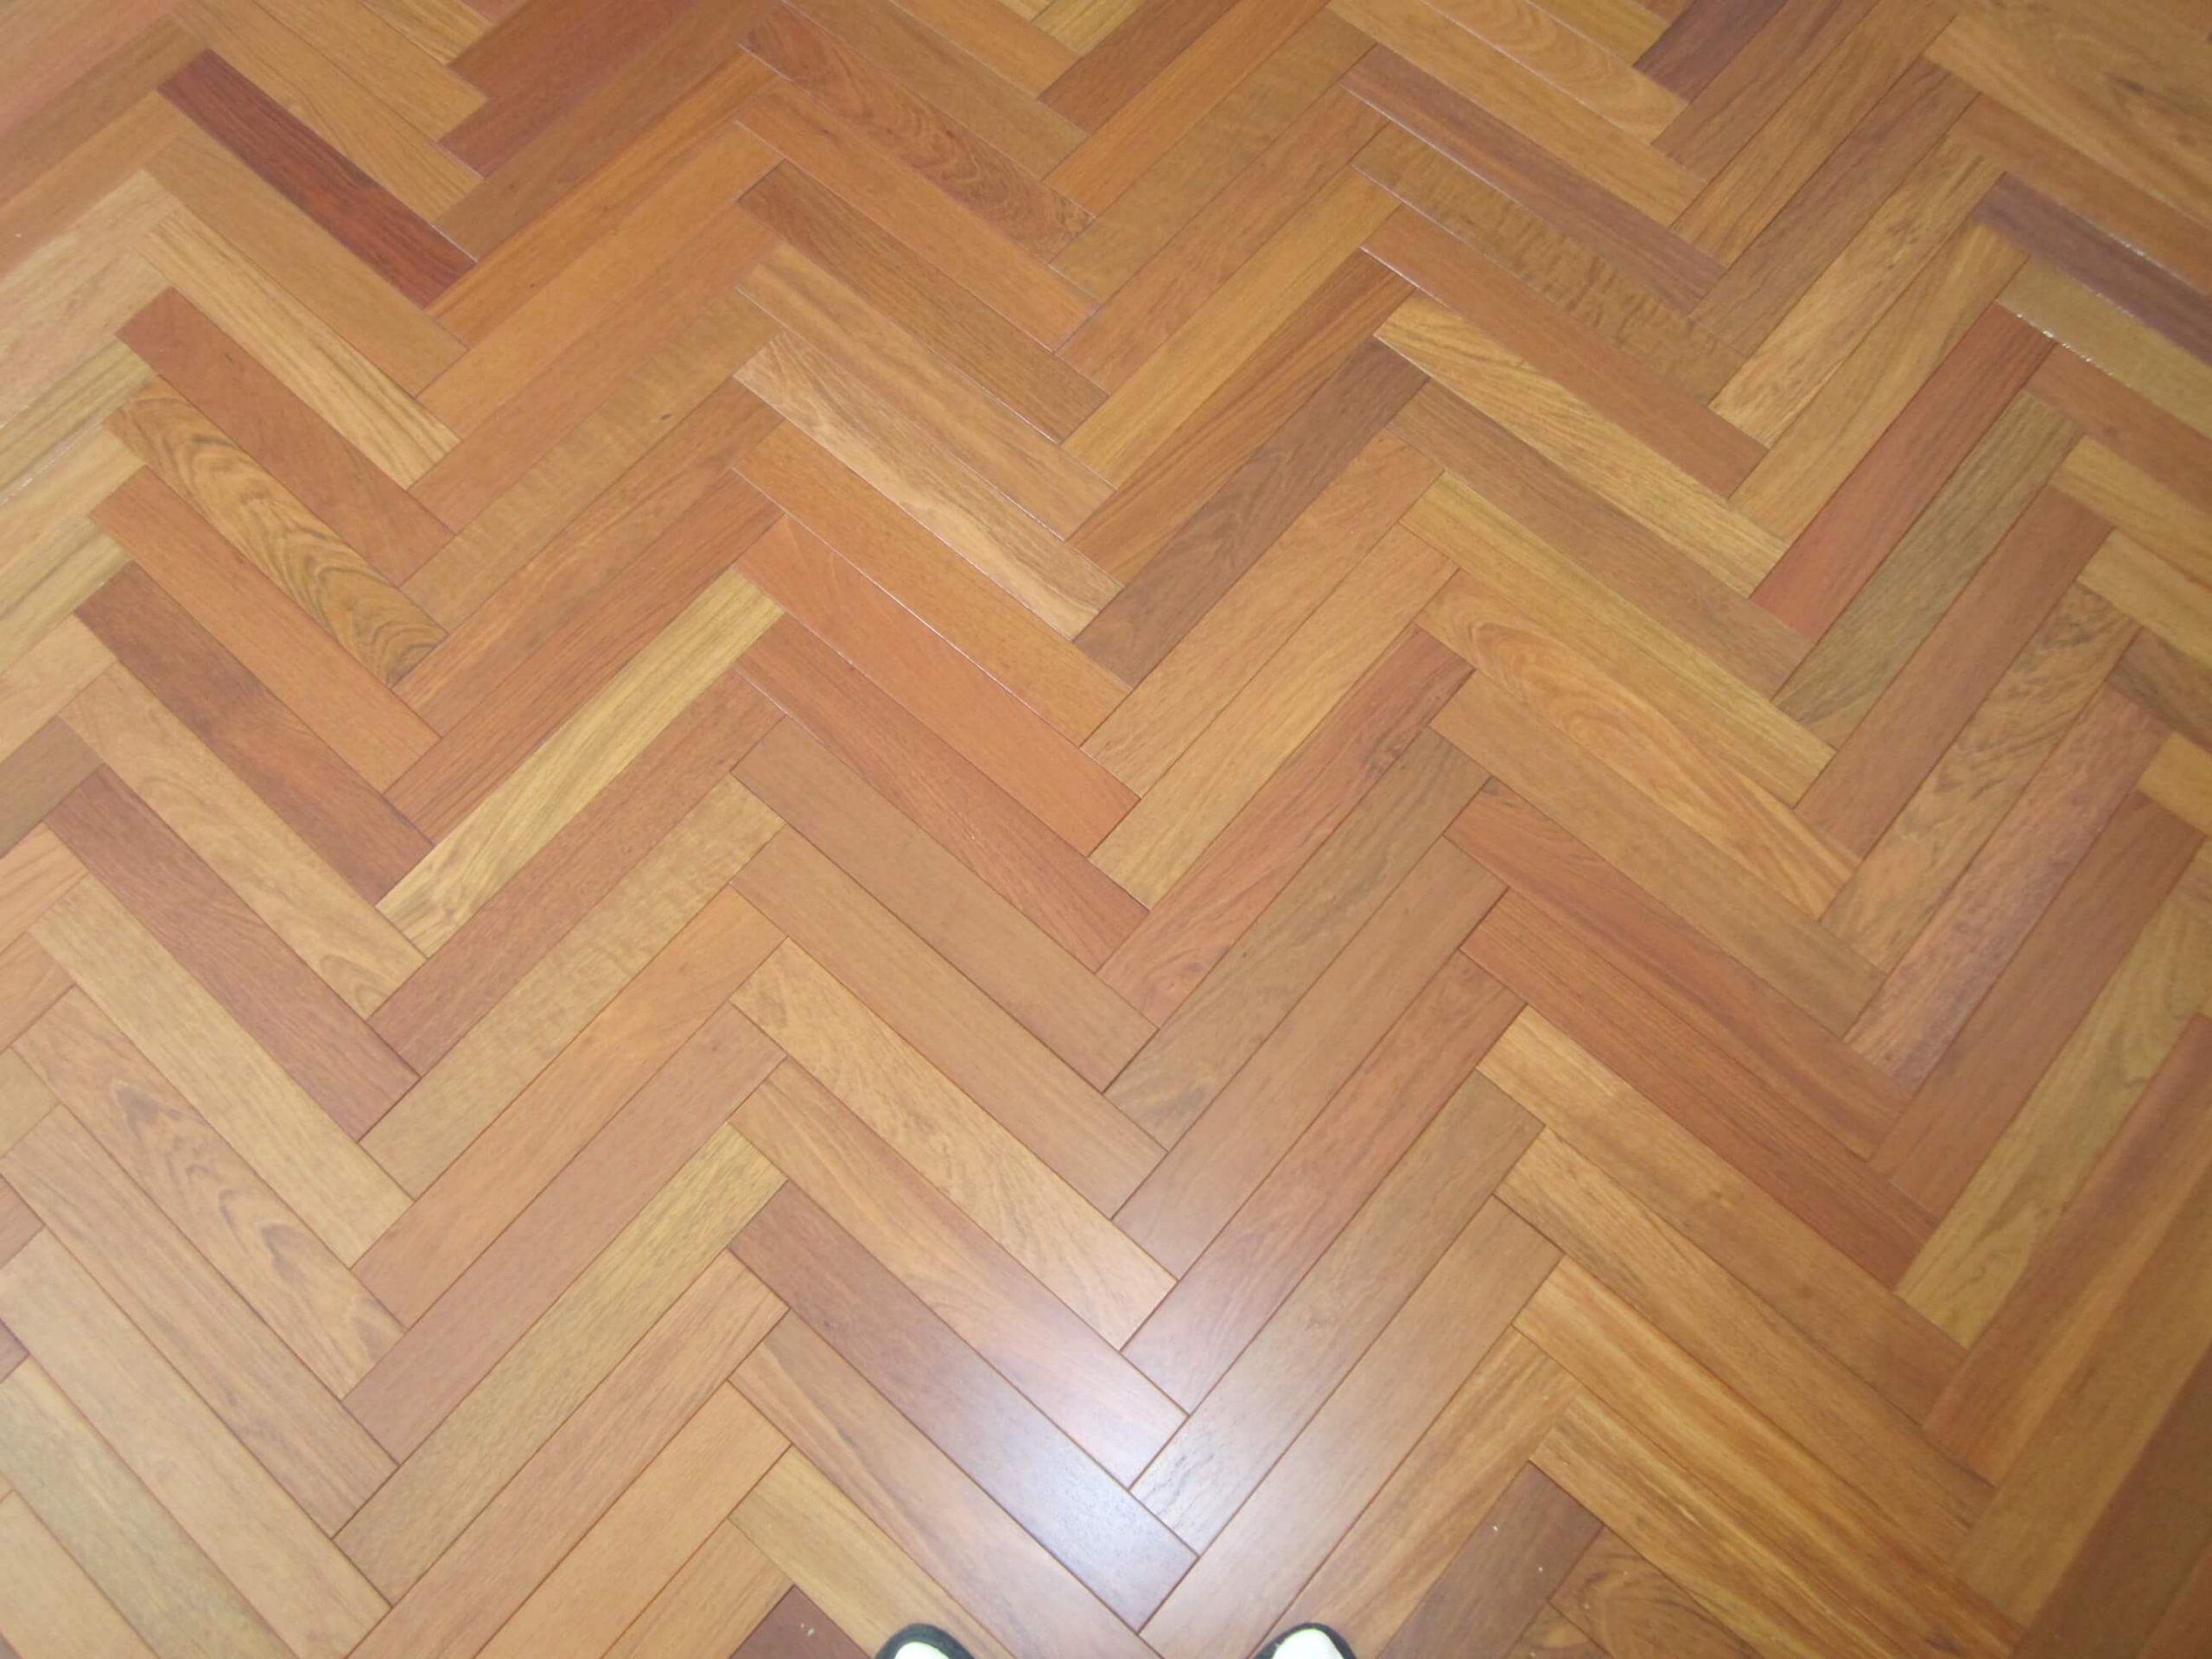
2.6 Single Herringbone Pattern
Close cousin of the herringbone pattern except that the boards are laid in staggered rows and edge to edge. I really like the effect.
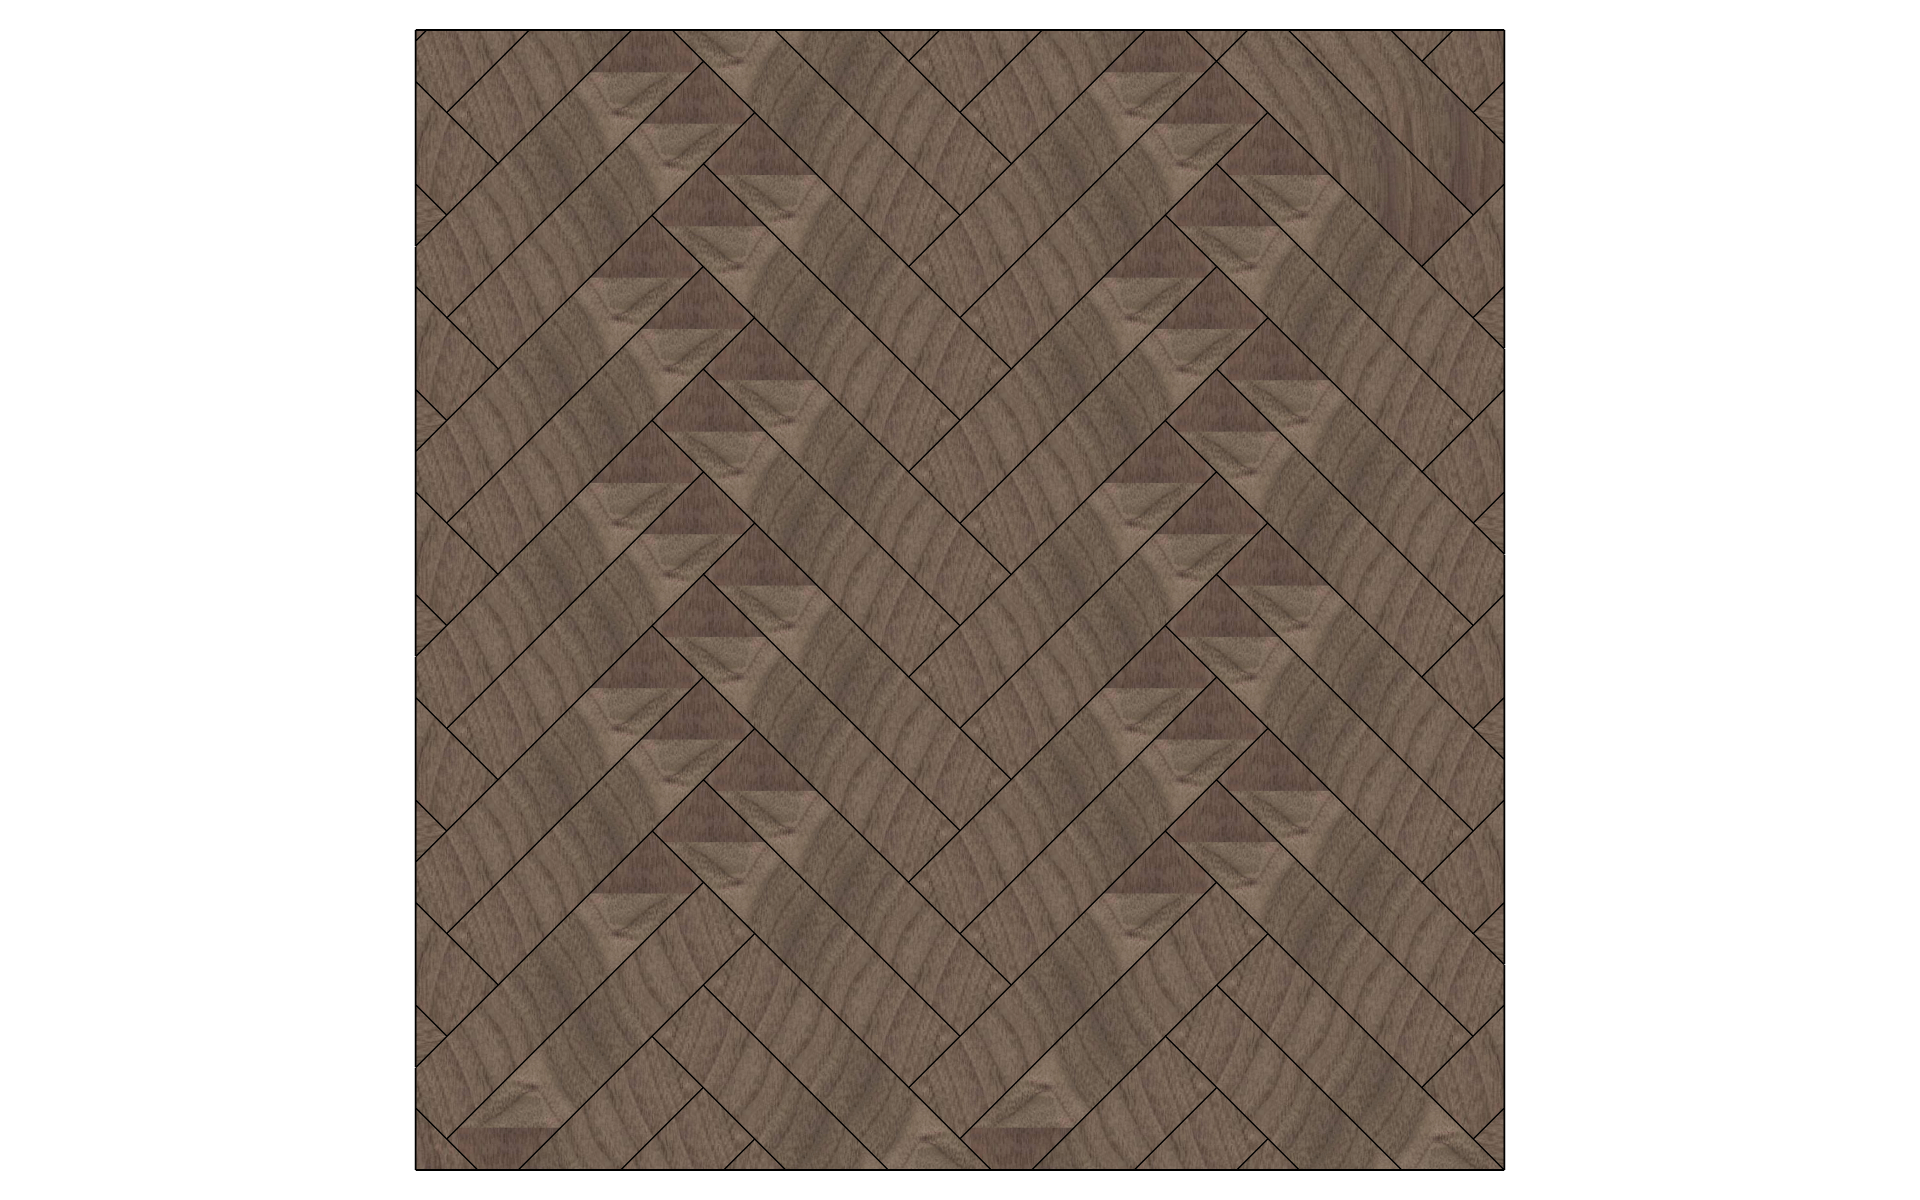
2.7 Double Herringbone Pattern
A variant of herringbone pattern.
2.8 Ferns Pattern
It follows the same principle as the Hungarian point pattern except that the rafters are separated by vertical blades.
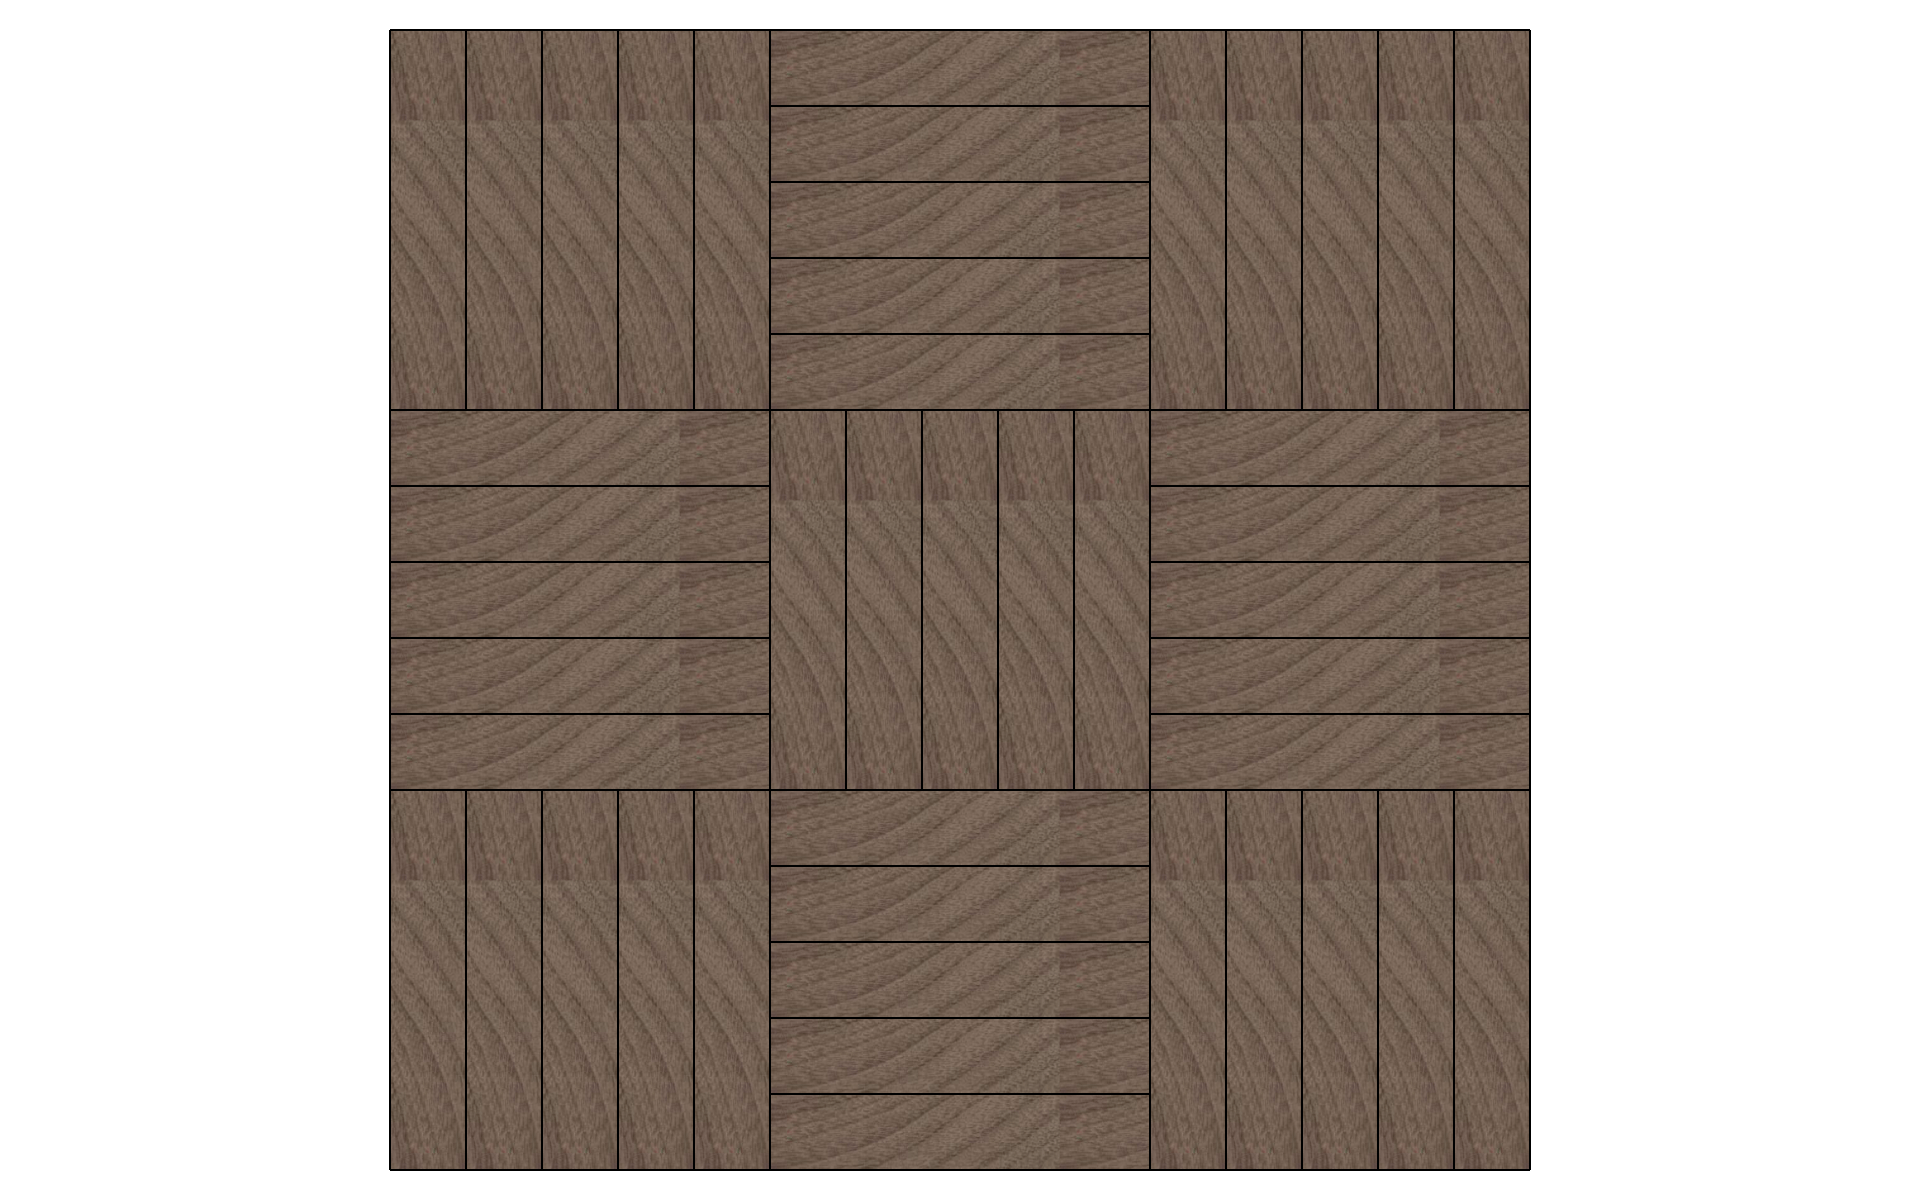
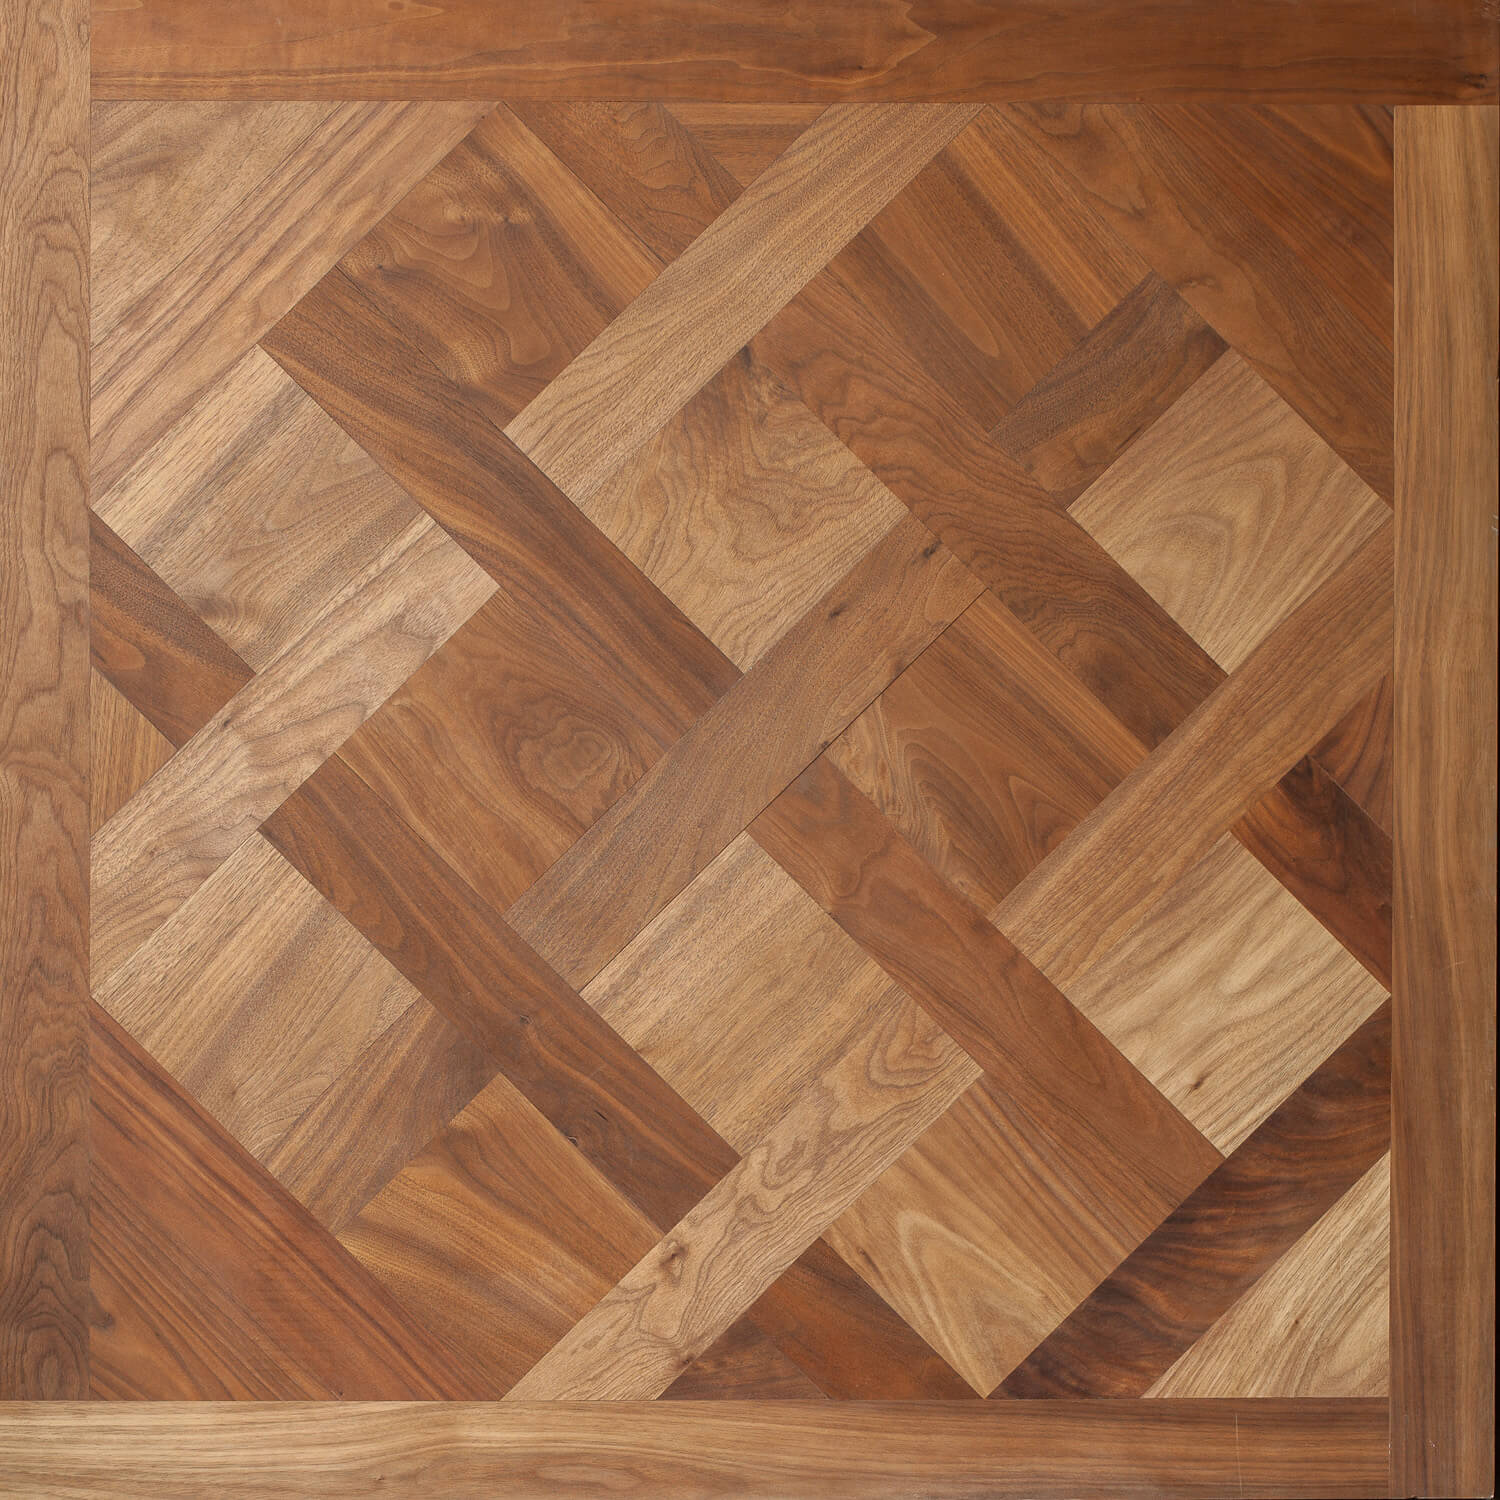
2.9 Square Basket Pattern
All the boards have the same length but the sum of the widths of the last ones must give a perfect square. For example, 5 boards of 4″ (about 10 cm) will give you squares and boards of 20″ (50.8 cm). Then alternate the direction of squares laying.
All of the above patterns can also be laid diagonally.
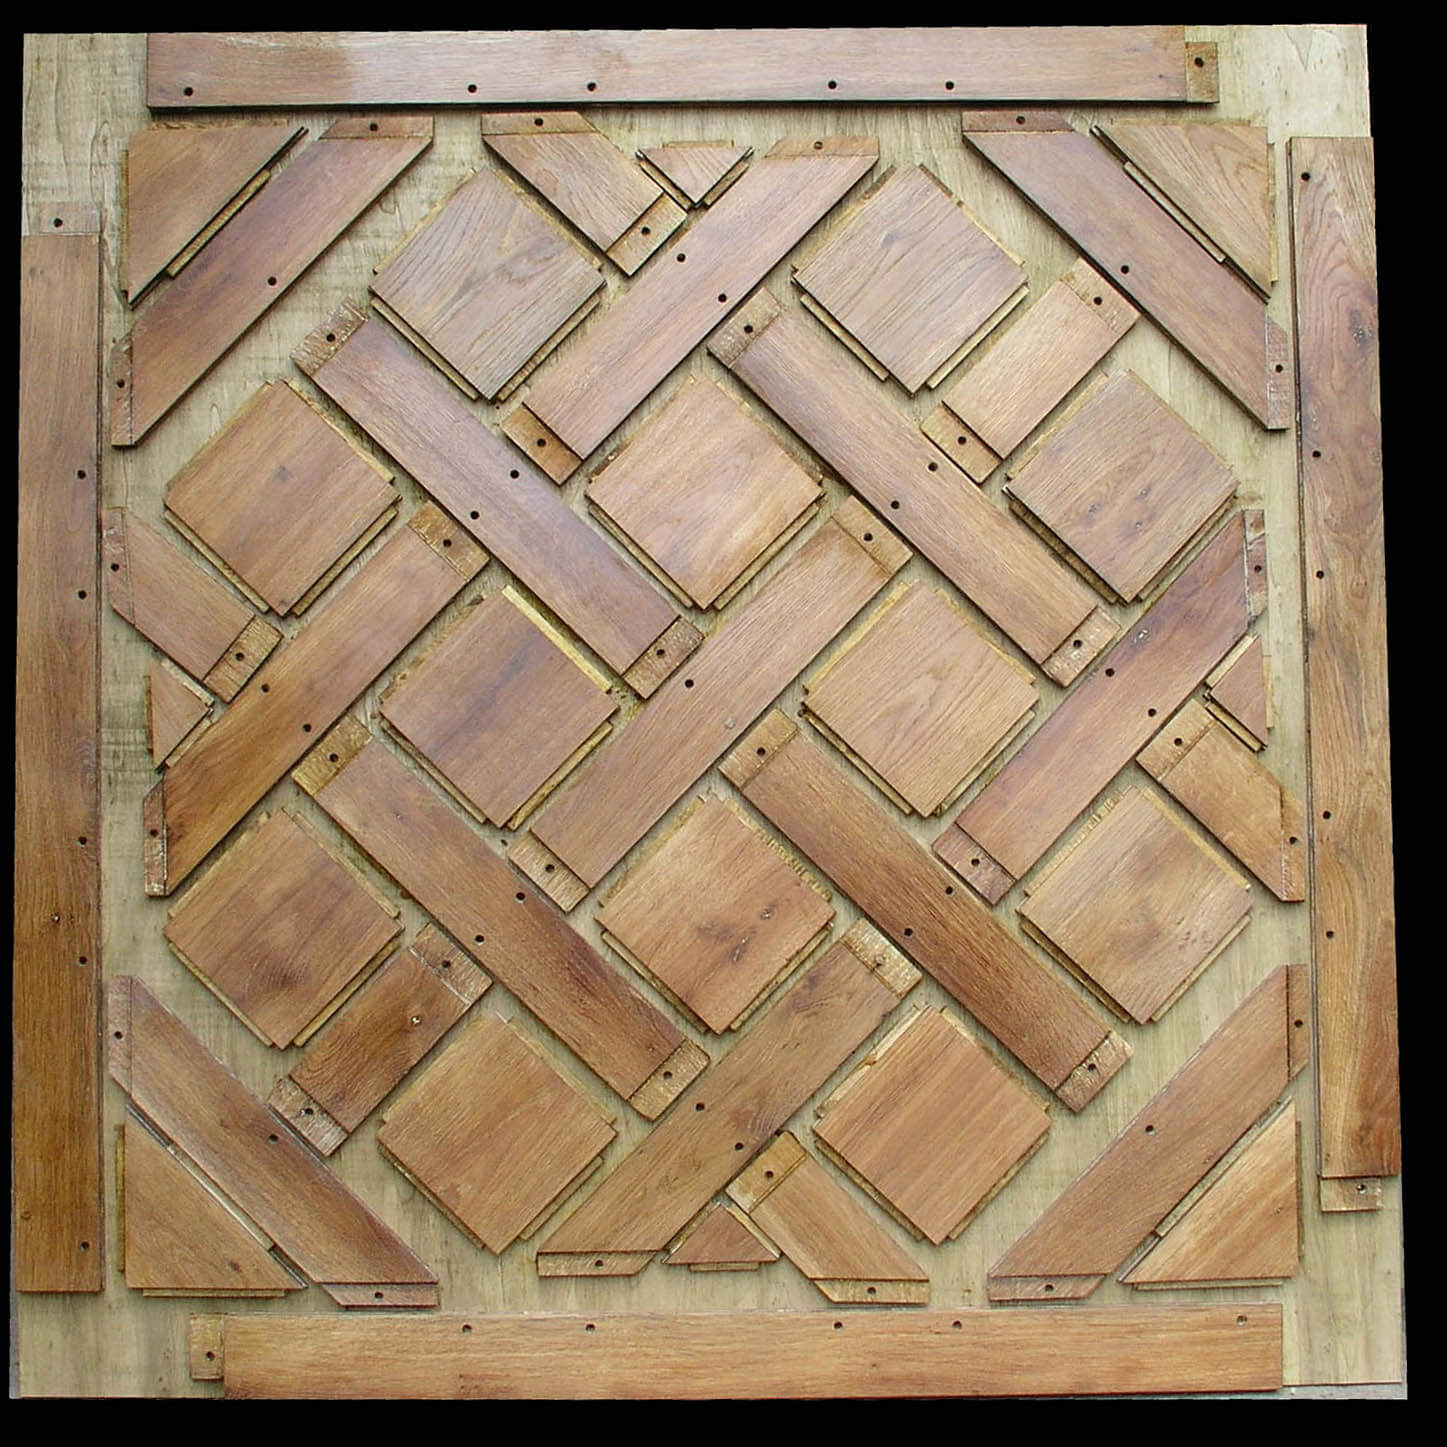
2.10 Versailles Parquet Floor
It takes its name from the famous castle. A picture worth a thousand words, here is an exploded view of a piece making up the Versailles parquet floor.
Photo credit: parquet-de-versailles.com
It can be made of a single species of wood, such as oak, or a combination of these.

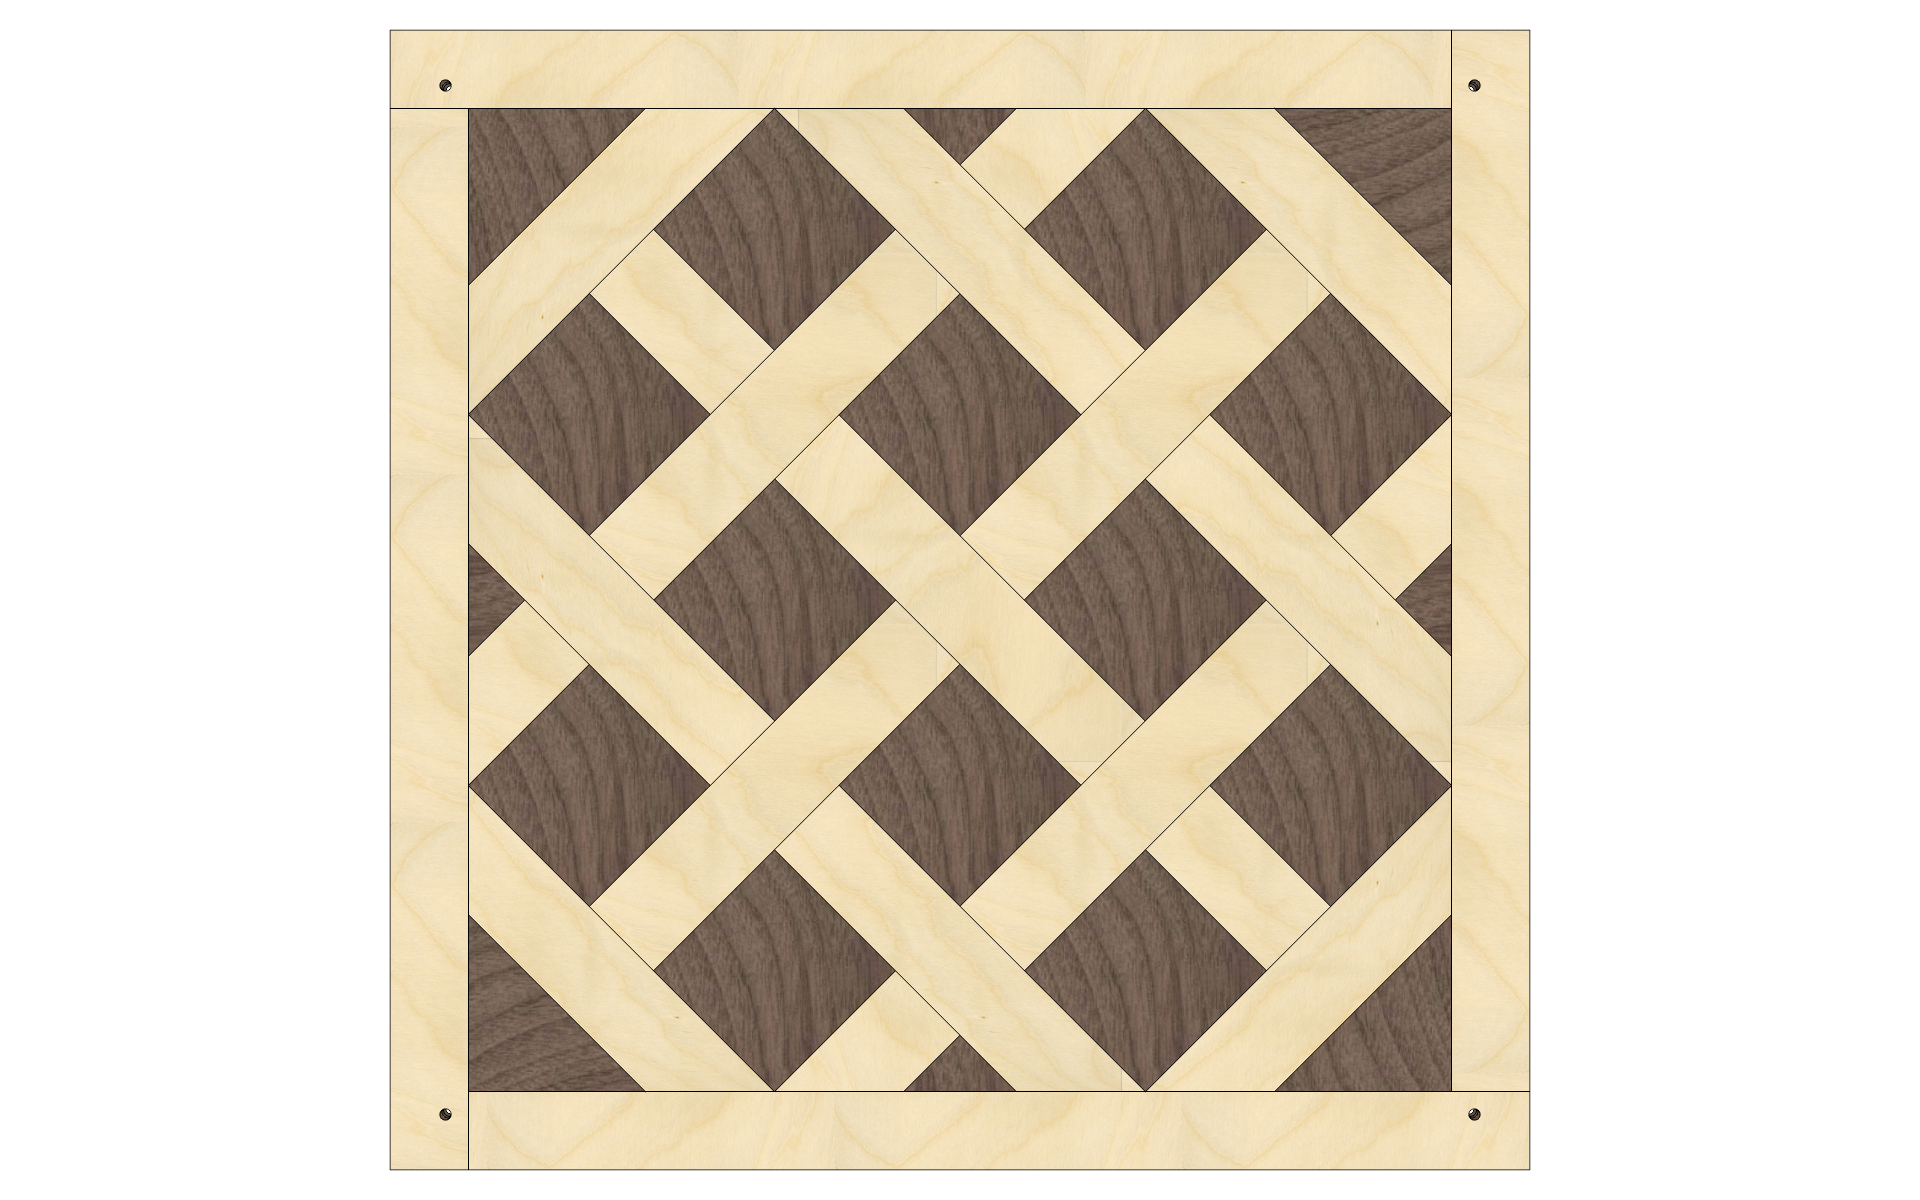
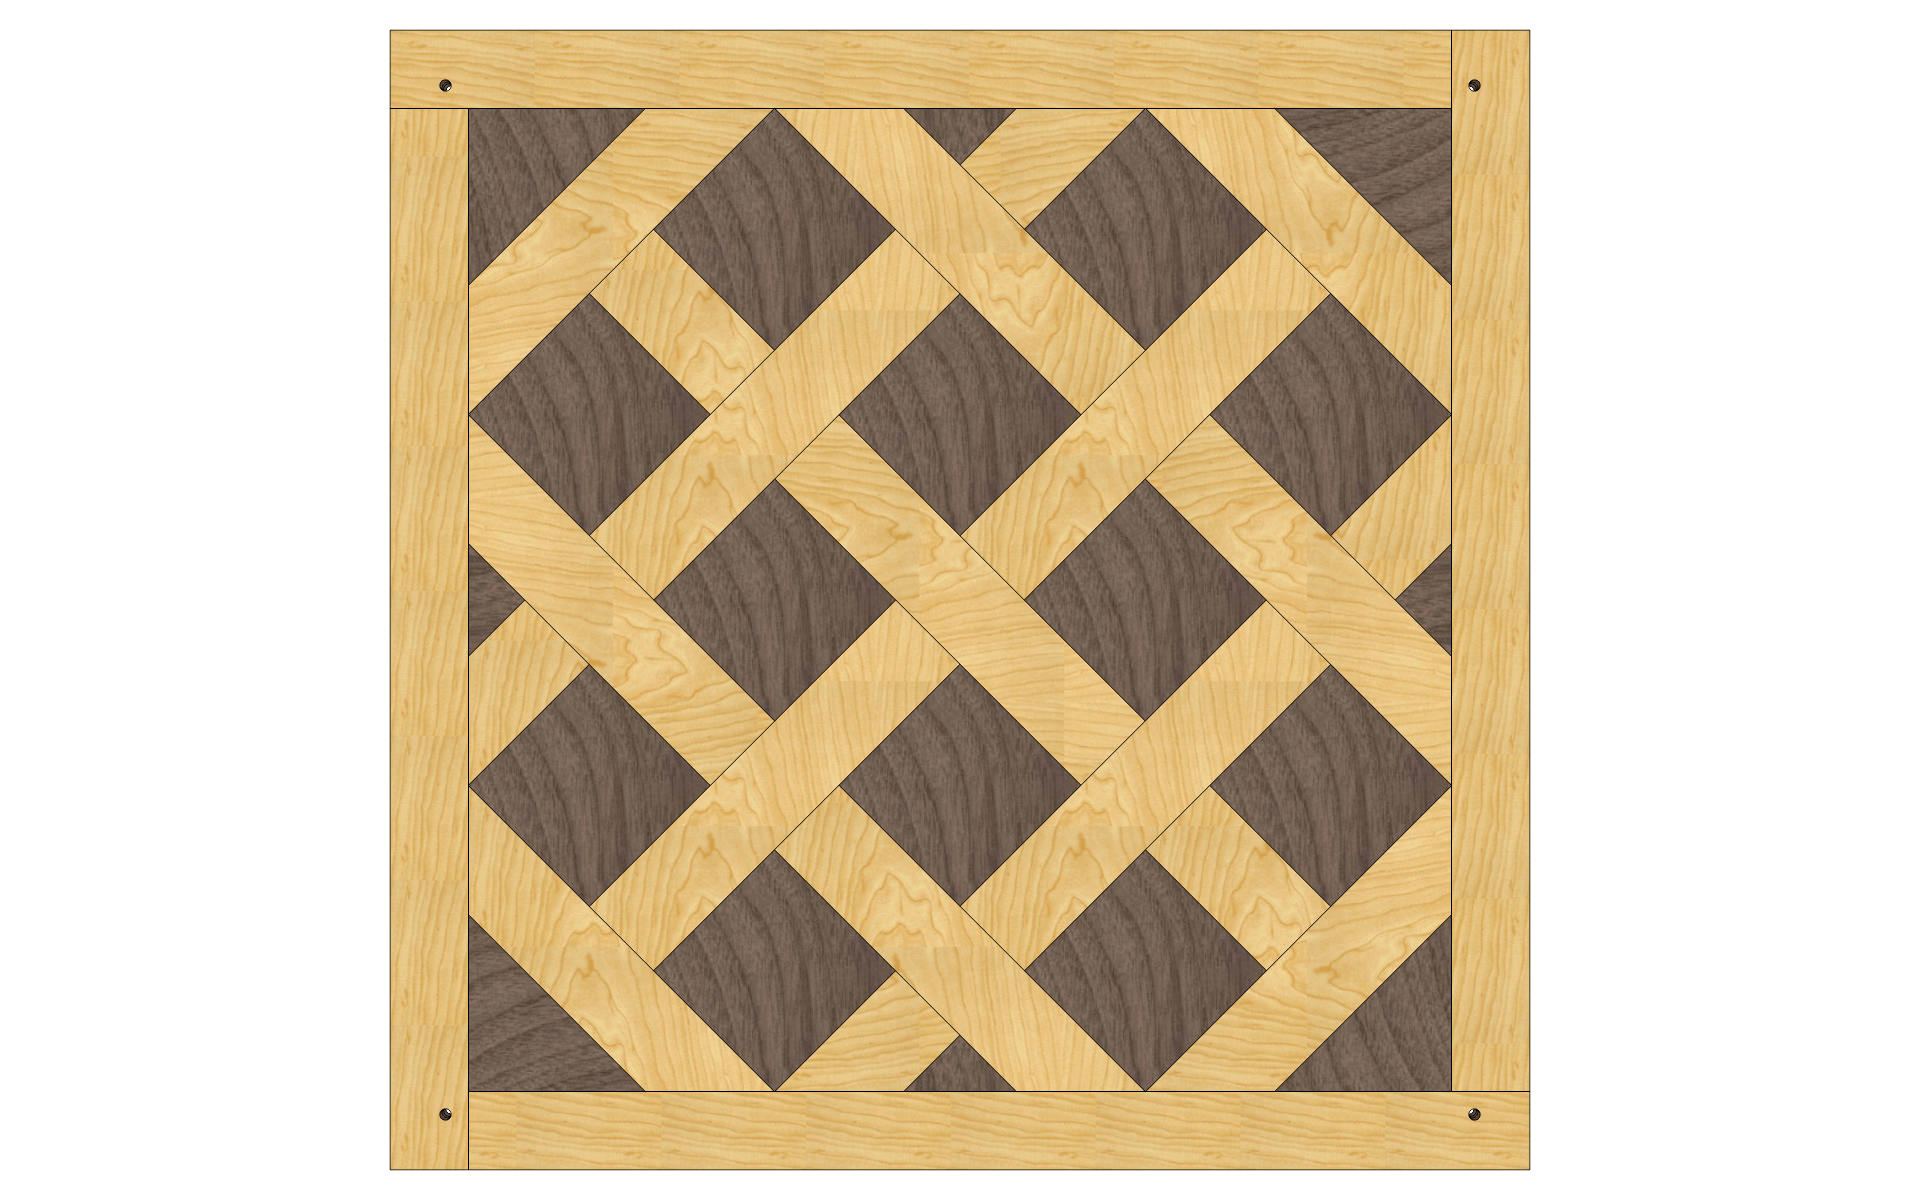
According to the rules of the art, a Versailles parquet tile is made up of:
- 42 mortises;
- 42 tenons;
- All assembled without glue by 42 pegs (Respect!);
- The tiles are laid diagonally to the wall!
- They usually measure 1 m on each side.
Wonderful ! I love it! Alas, my house does not lend itself to this floor. Imagine the know-how and the patience that was needed at the time. Electric tools did not exist, everything was handmade. Hats off!
If you are interested in the Versailles parquet floor, I recommend you the site “Parquet-de-Versailles” by Mr. Christian Pingeon, which is most interesting.
2.11 And So Many More
There are many other patterns, all as beautiful as each other, here is a non-exhaustive list:
- The Aptenia Parquet Floor;
- The Aremberb Parquet Floor;
- The Boulot Parquet Floor;
- The Chalais Parquet Floor;
- The Chaumont Parquet Floor;
- The Chantilly Parquet Floor;
- The Lapusa Parquet Floor;
- The Marisy Parquet Floor;
- The Montalembert parquet;
- The Little Versailles Parquet Floor;
- The Riglana Parquet Floor;
- The Saint-Fargeau Parquet Floor;
- The Stela Parquet Floor.
Each pattern brings its share of complexity. Remember that wood is a living material and will move with the seasons. The room where it will be installed must also be taken into account. The basement versus an upstairs bedroom will not have the same humidity level.
Moreover, errors are cumulative. They will repeat and amplify on each slide and row. Especially on angled poses. Imagine that on a Hungarian point pose, you realize that the alignment no longer works in the second row. In addition to the frustration, the situation should be corrected. Think carefully before you start…
3. Design
3.1 Colors
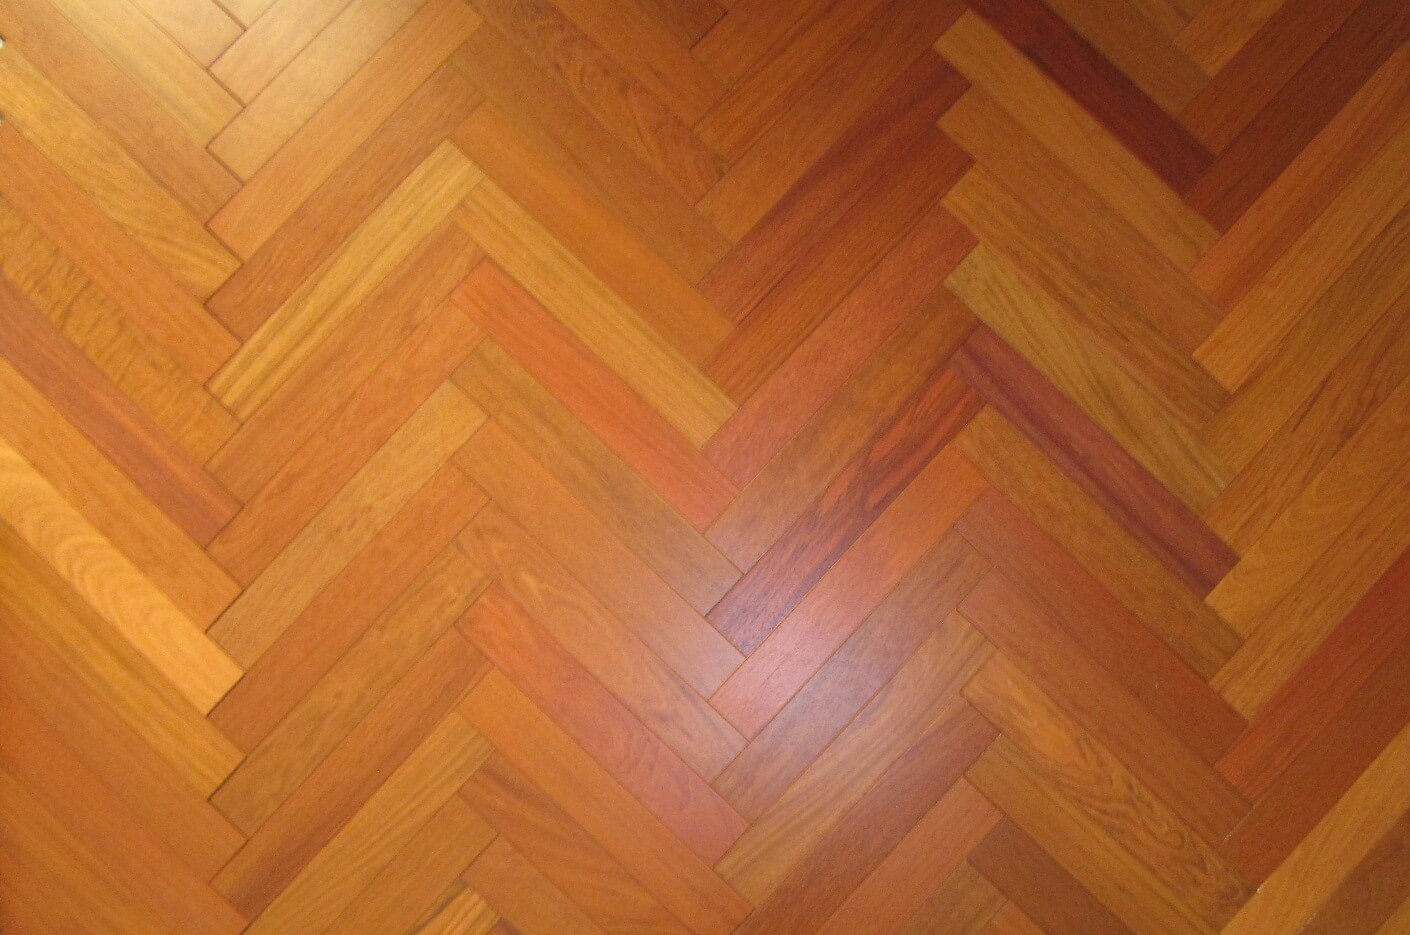
I wanted to mix wood species to play on color contrasts. So, I chose maple and jatoba. Two essences that I particularly like and that go very well together. In addition, the boards will all be hardwood and 3 1/4″ wide.
I also liked other species, such as American black walnut or sapeli, but unfortunately they did not fit into my budget.
Let’s talk a bit about budgeting and planning: “while to do” is your worst enemy. We often say to ourselves, along the way: “Hey! As long as you do this, why not add this, that or replace this material with another”. And we end up with exploded deadlines and an unfulfilled budget that has burst the ceiling. This is a source of frustration and ultimately demotivating. My advice is to “walk before you run”. Plan things well and stick to them. Start by delivering a “1.0” version even if it means modifying it later.
3.2 Patterns
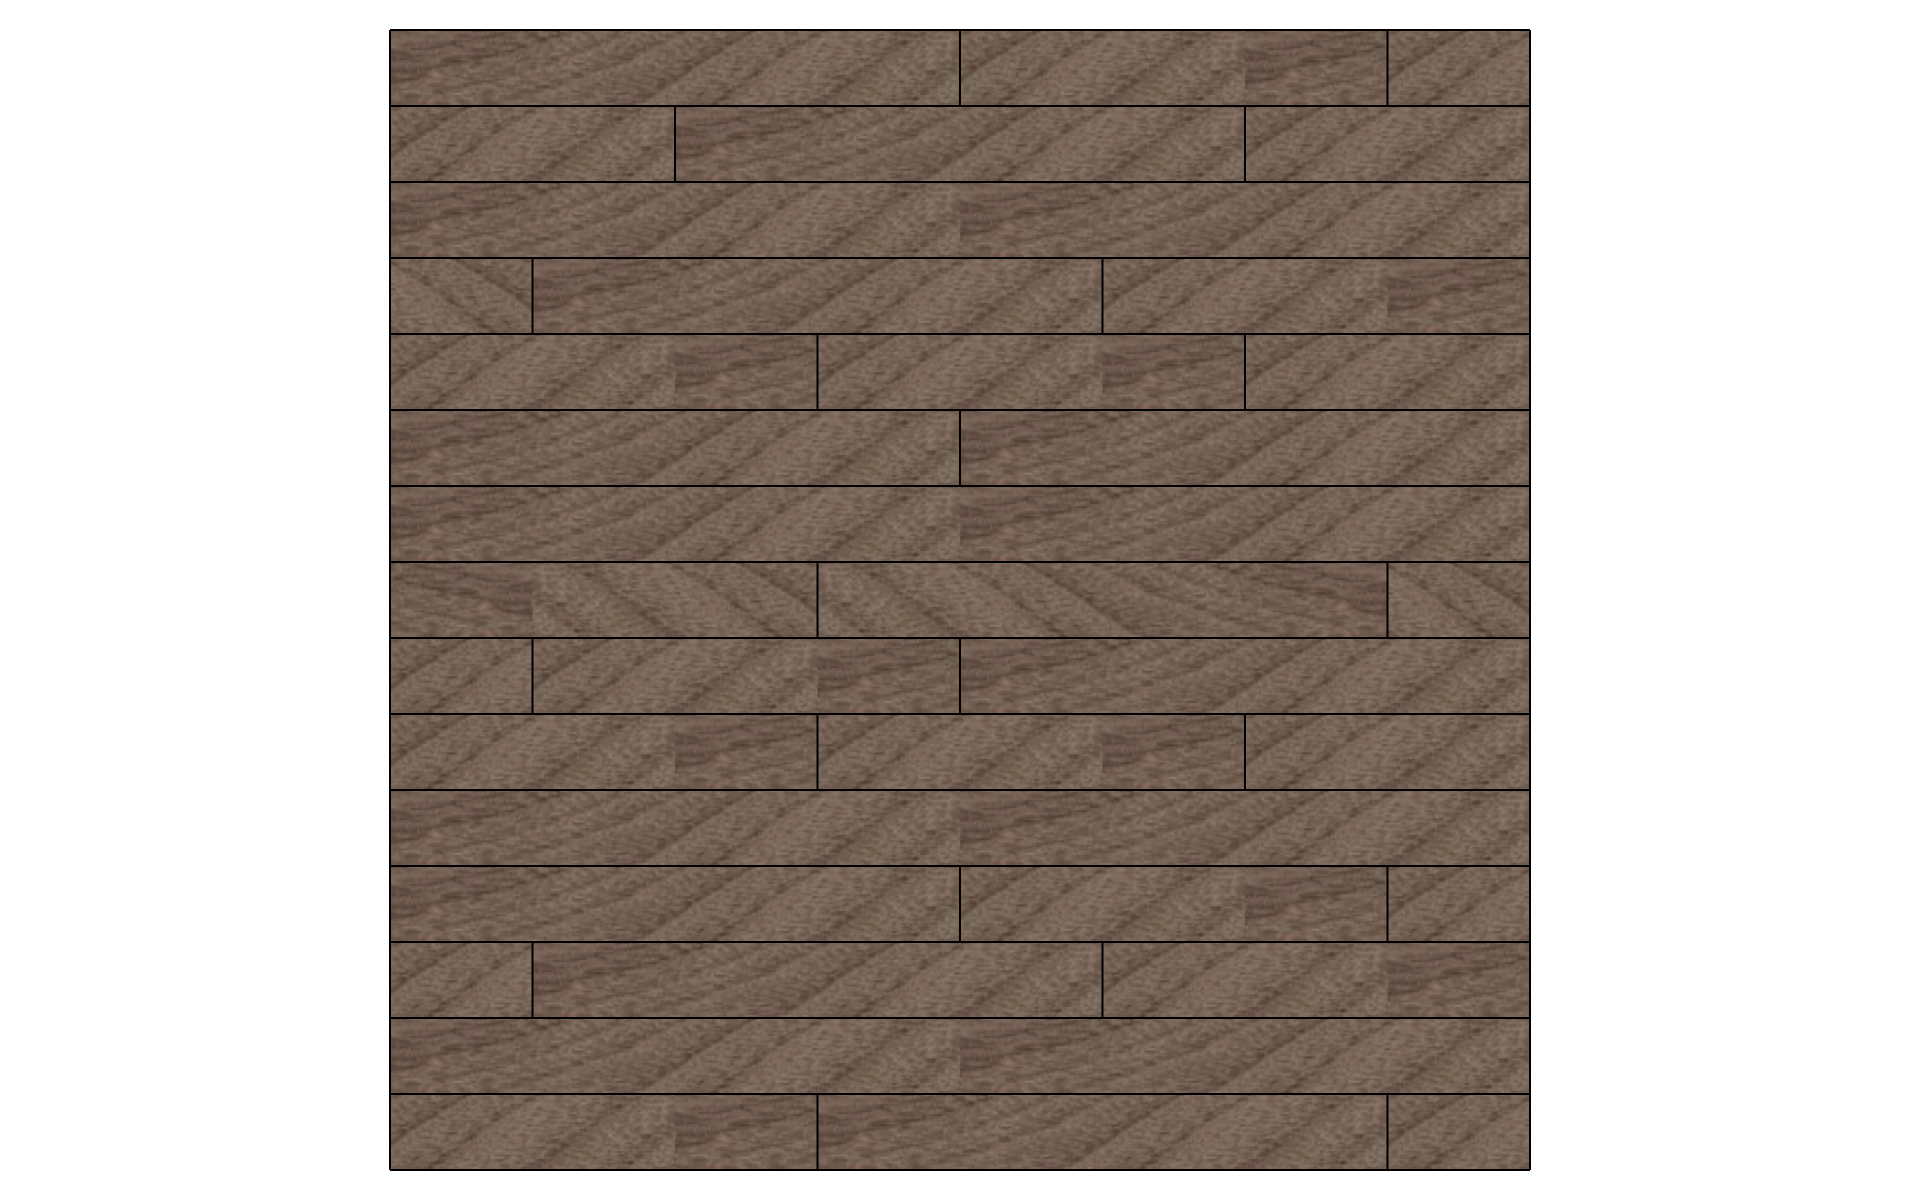
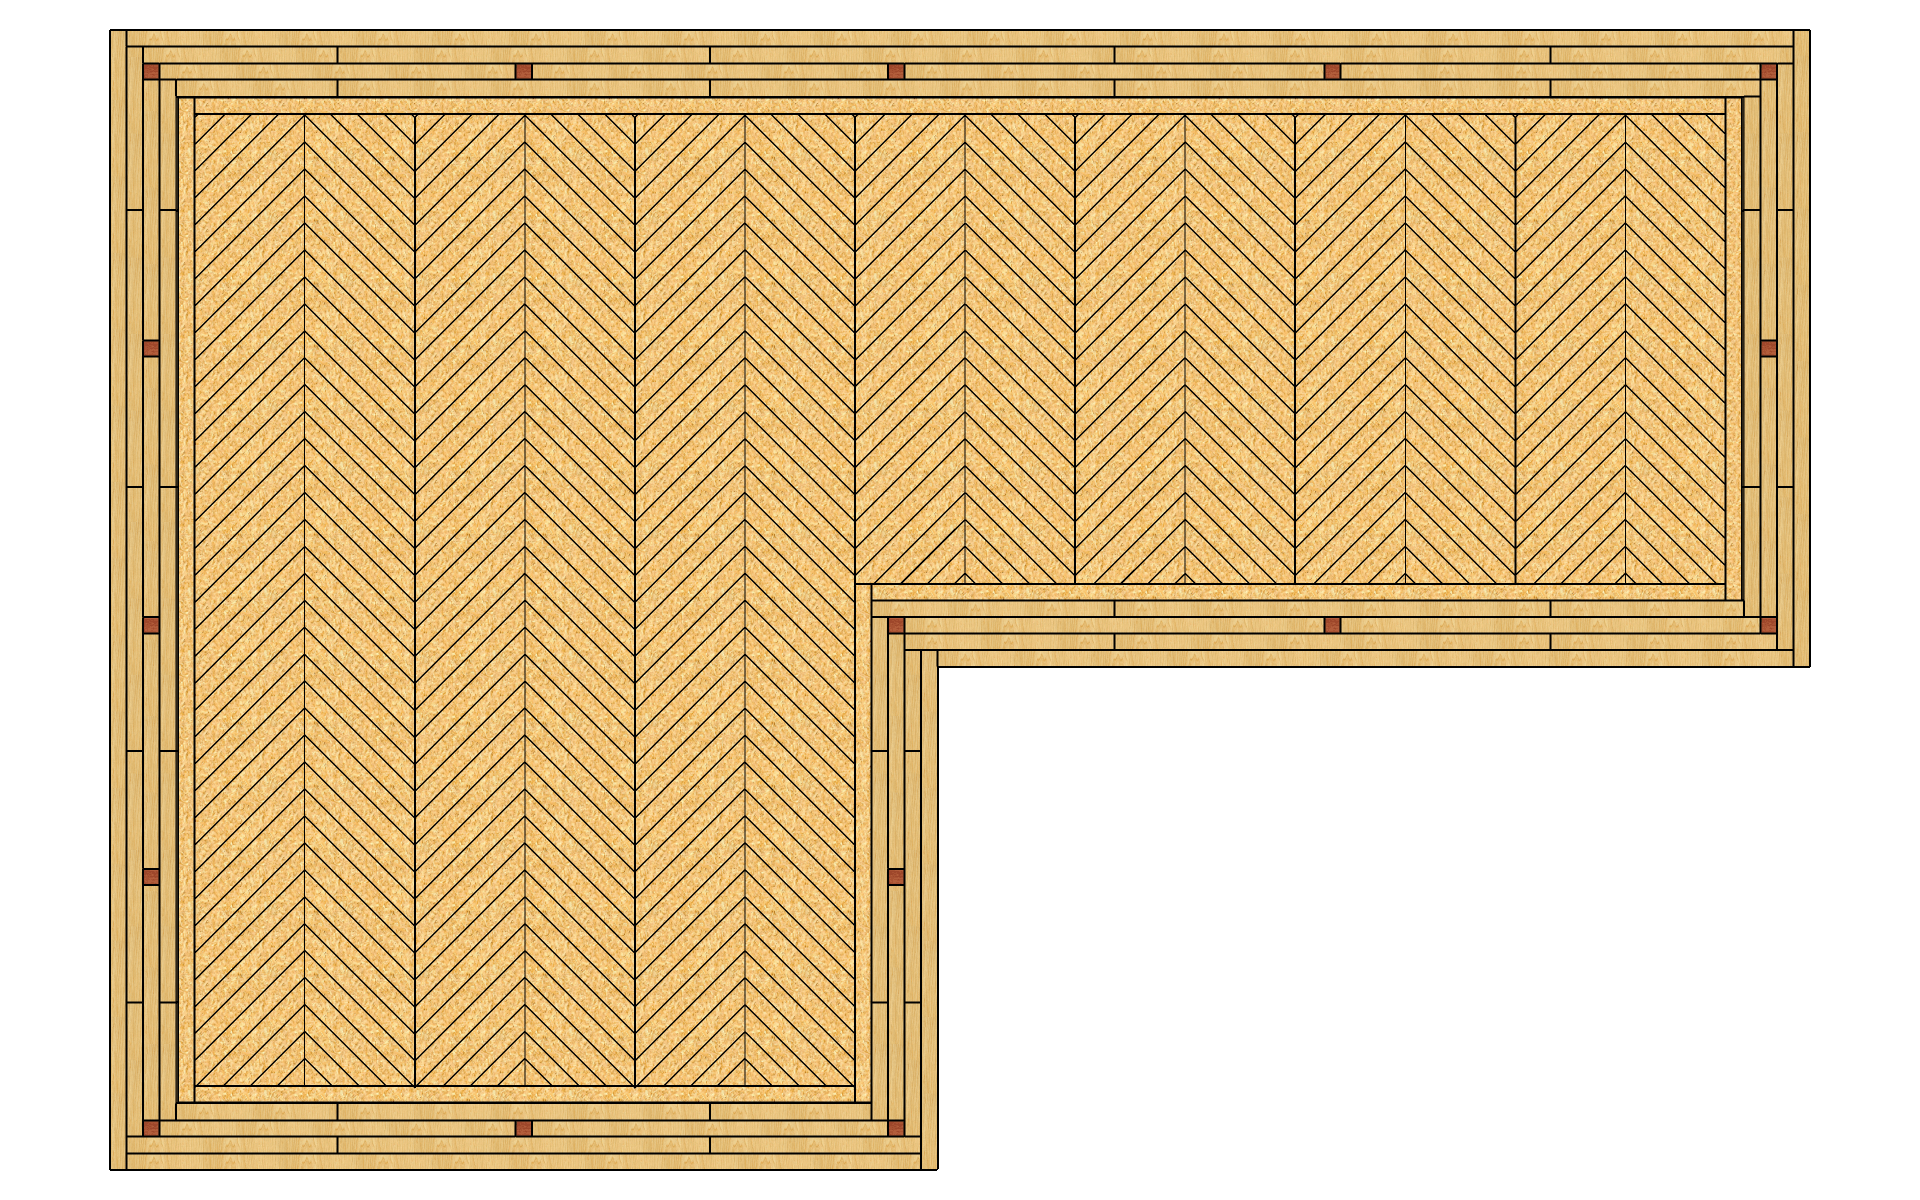
I designed a matrix of the shape of the piece to be able to play with its symmetries and visualize the different possibilities of the patterns.
For the central motif, my first choice was on the point of Hungary and my second on the herringbone. It remained to determine the dimensions of the rafter and the direction of the installation, either in the direction of the width or in the direction of the length of the room.
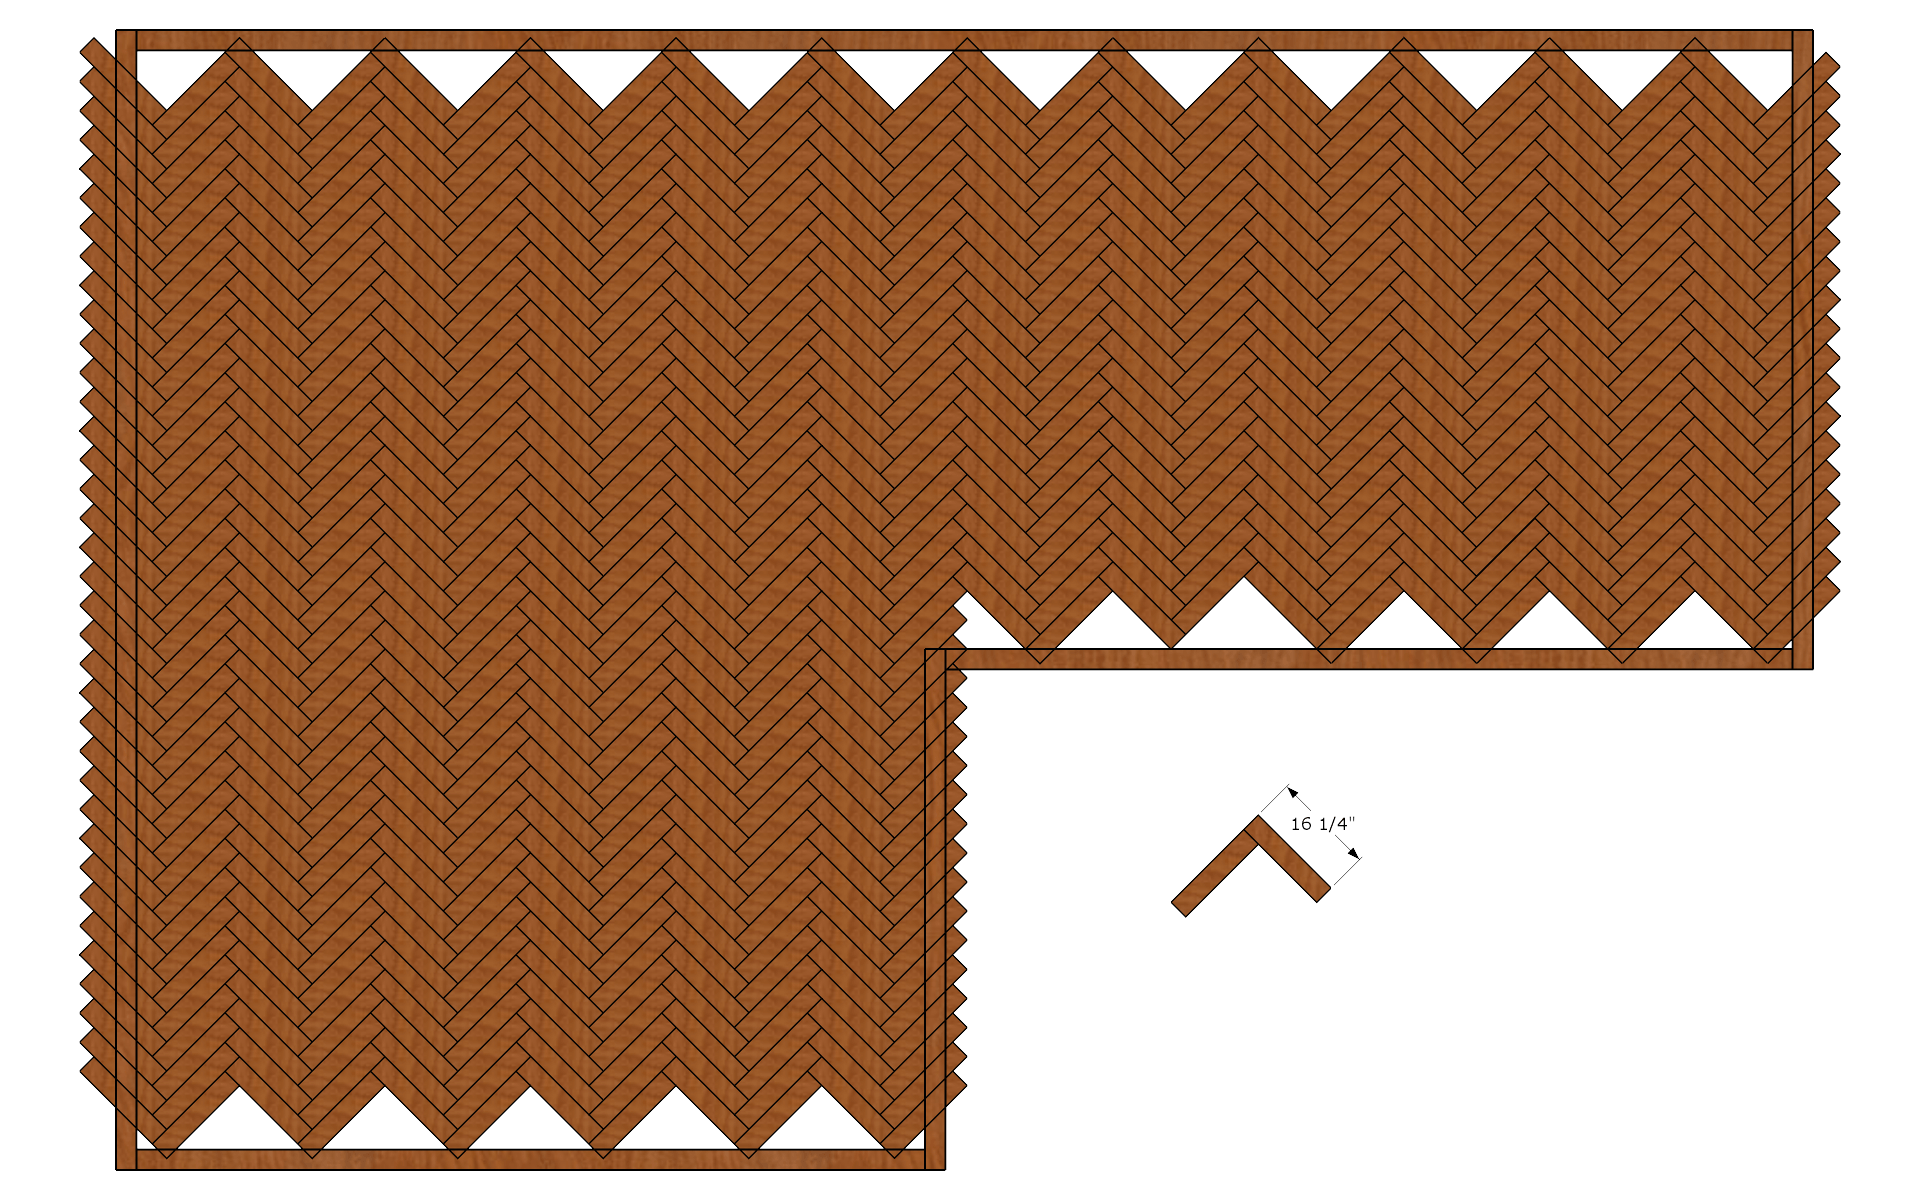
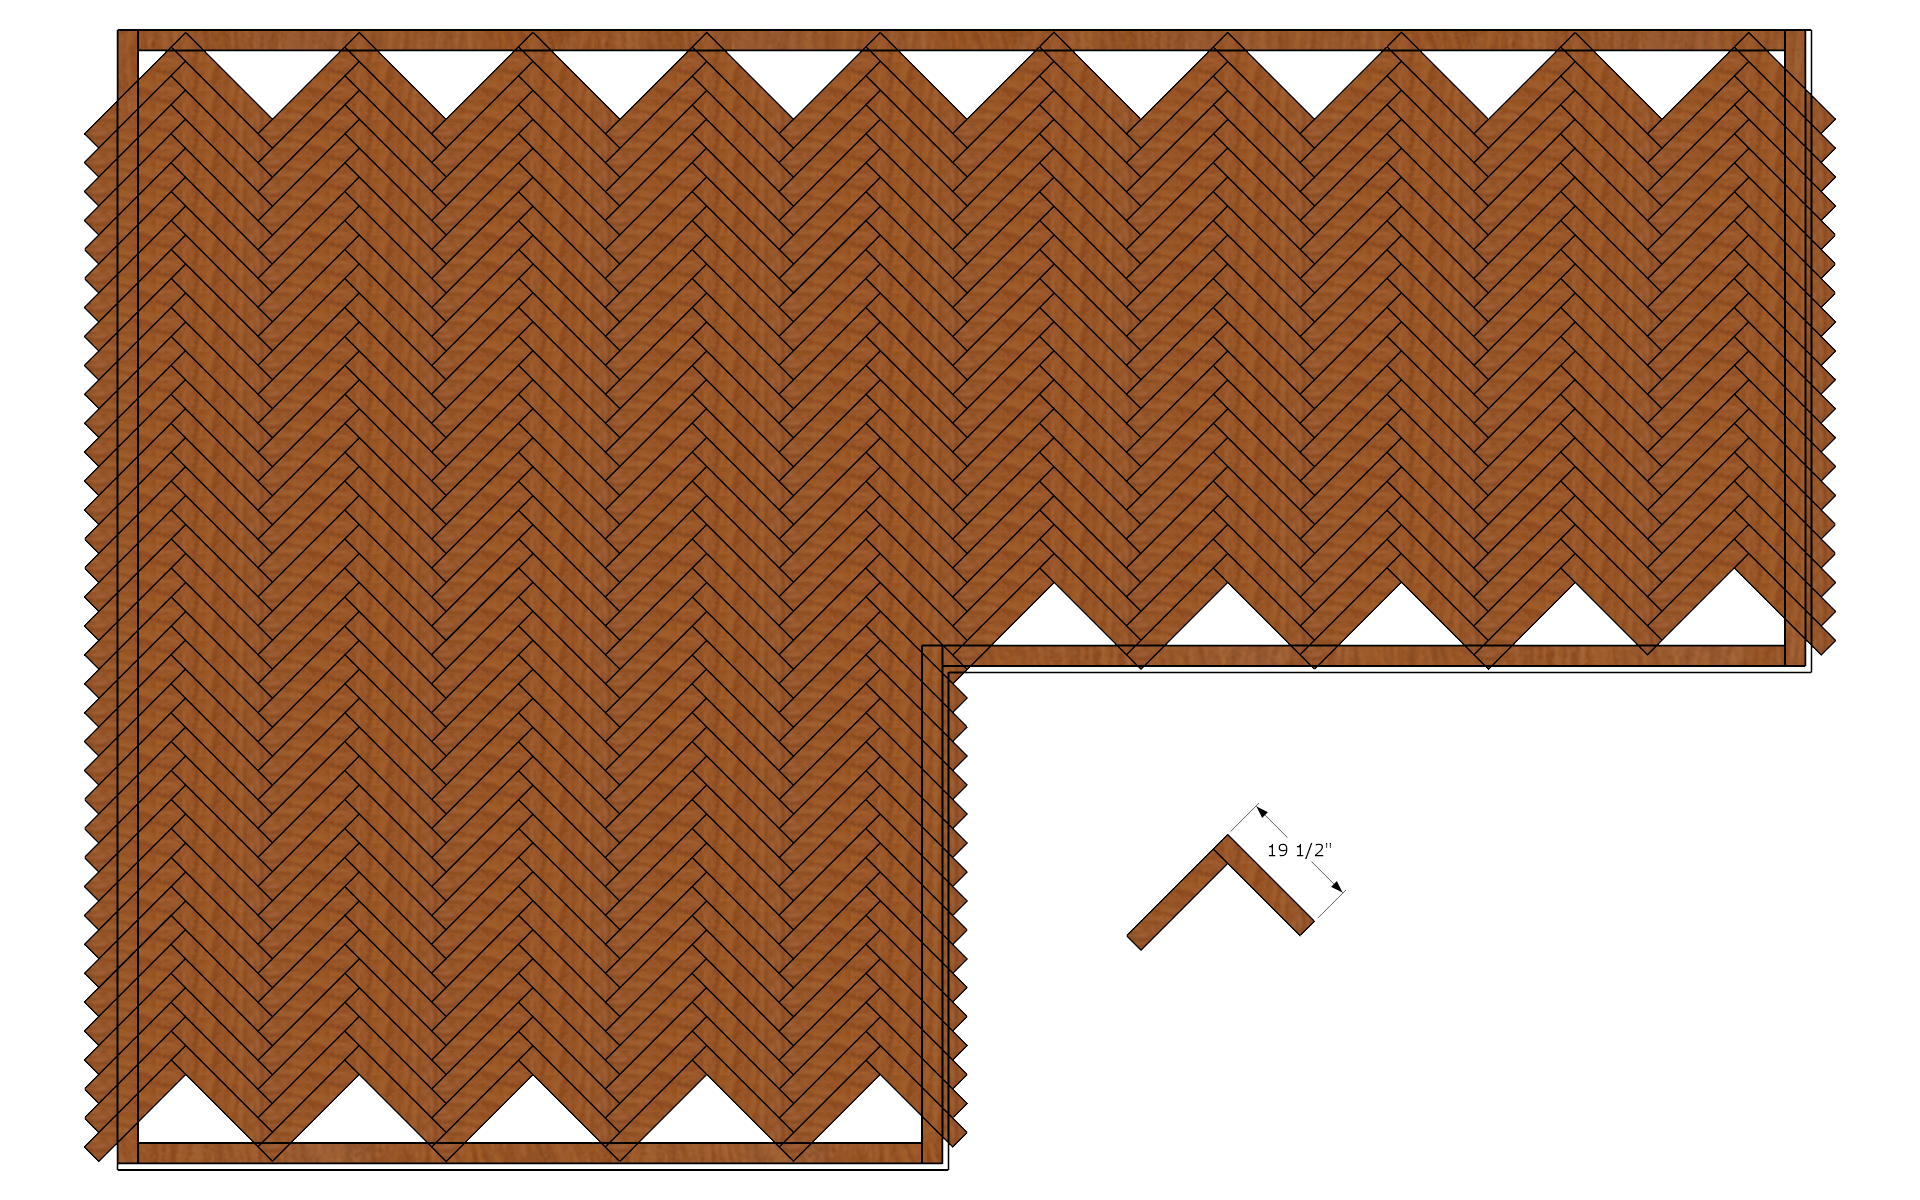
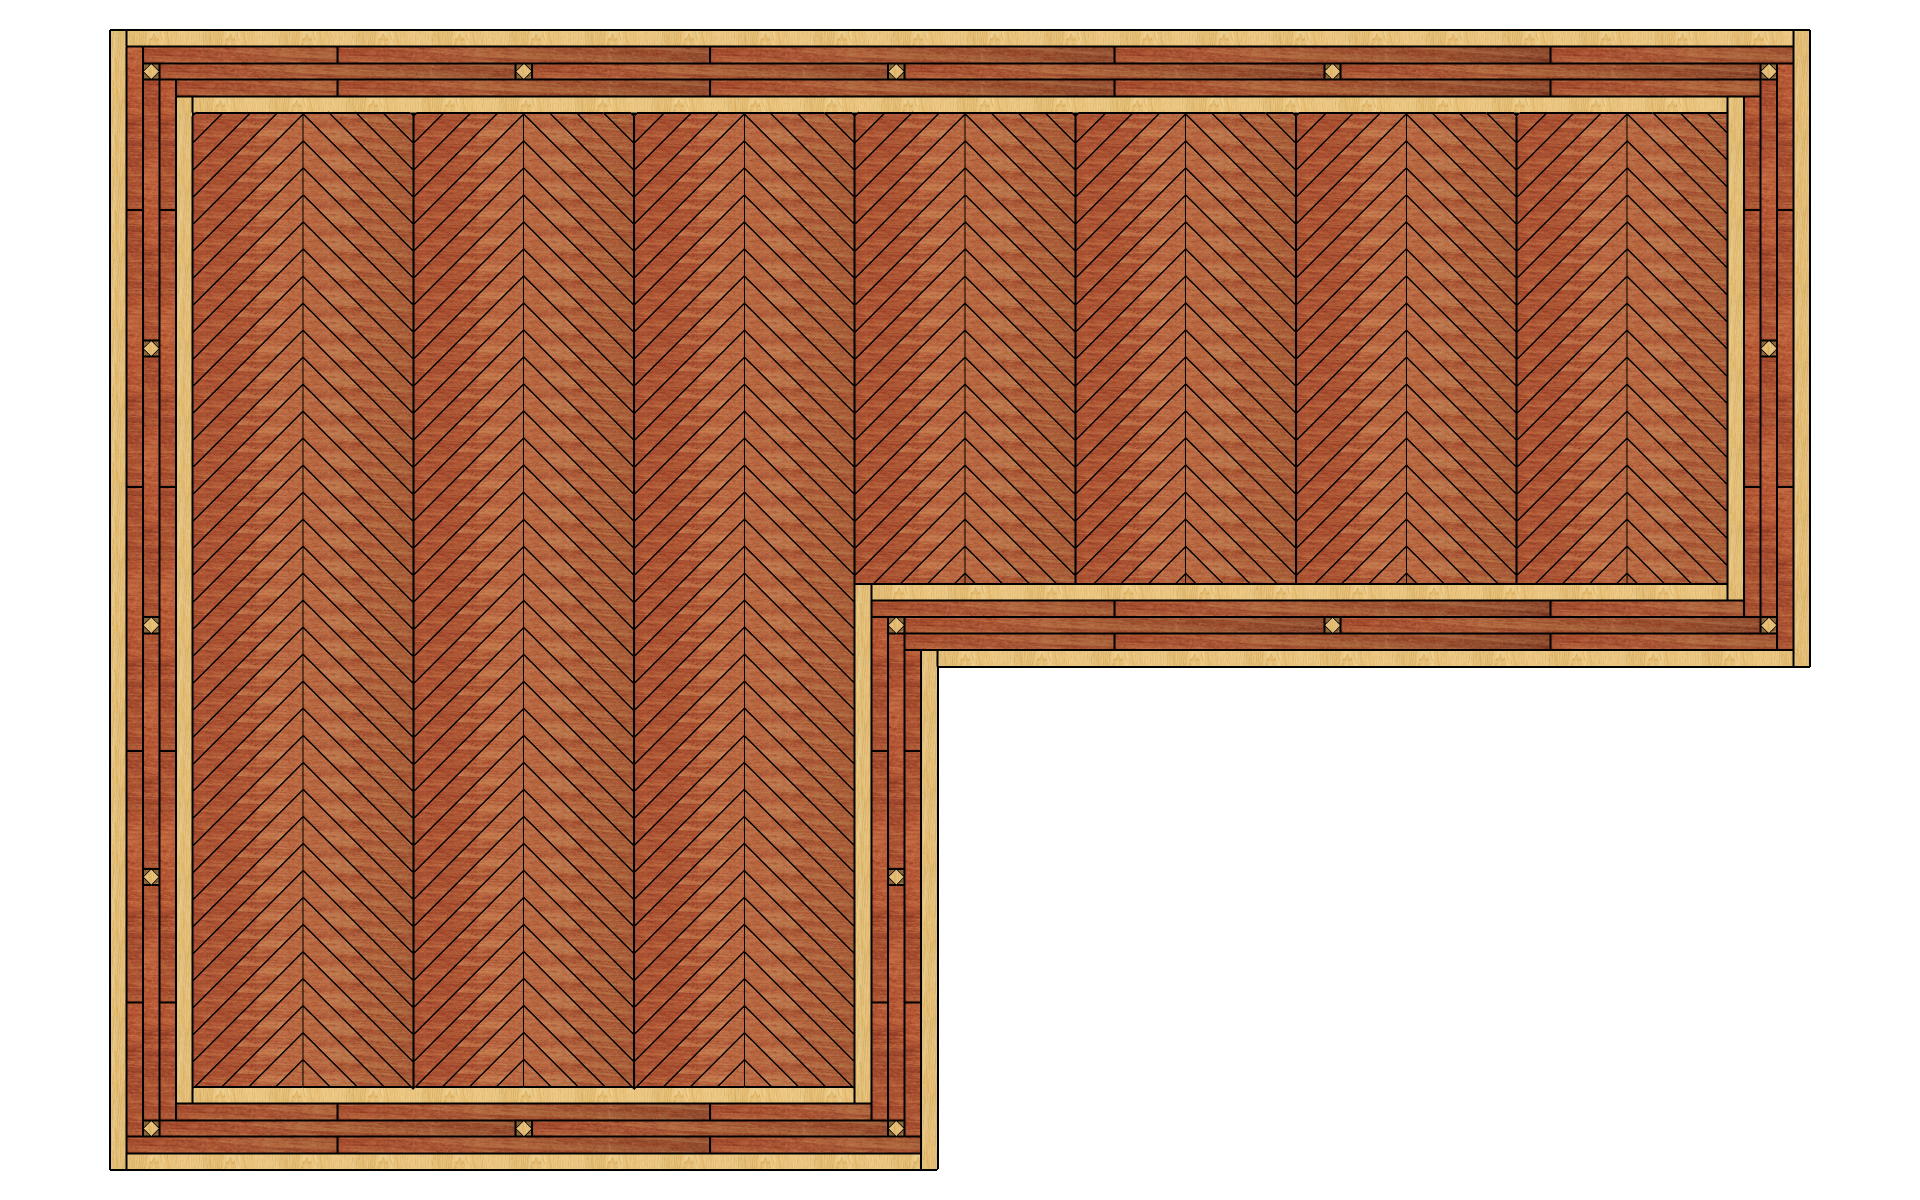
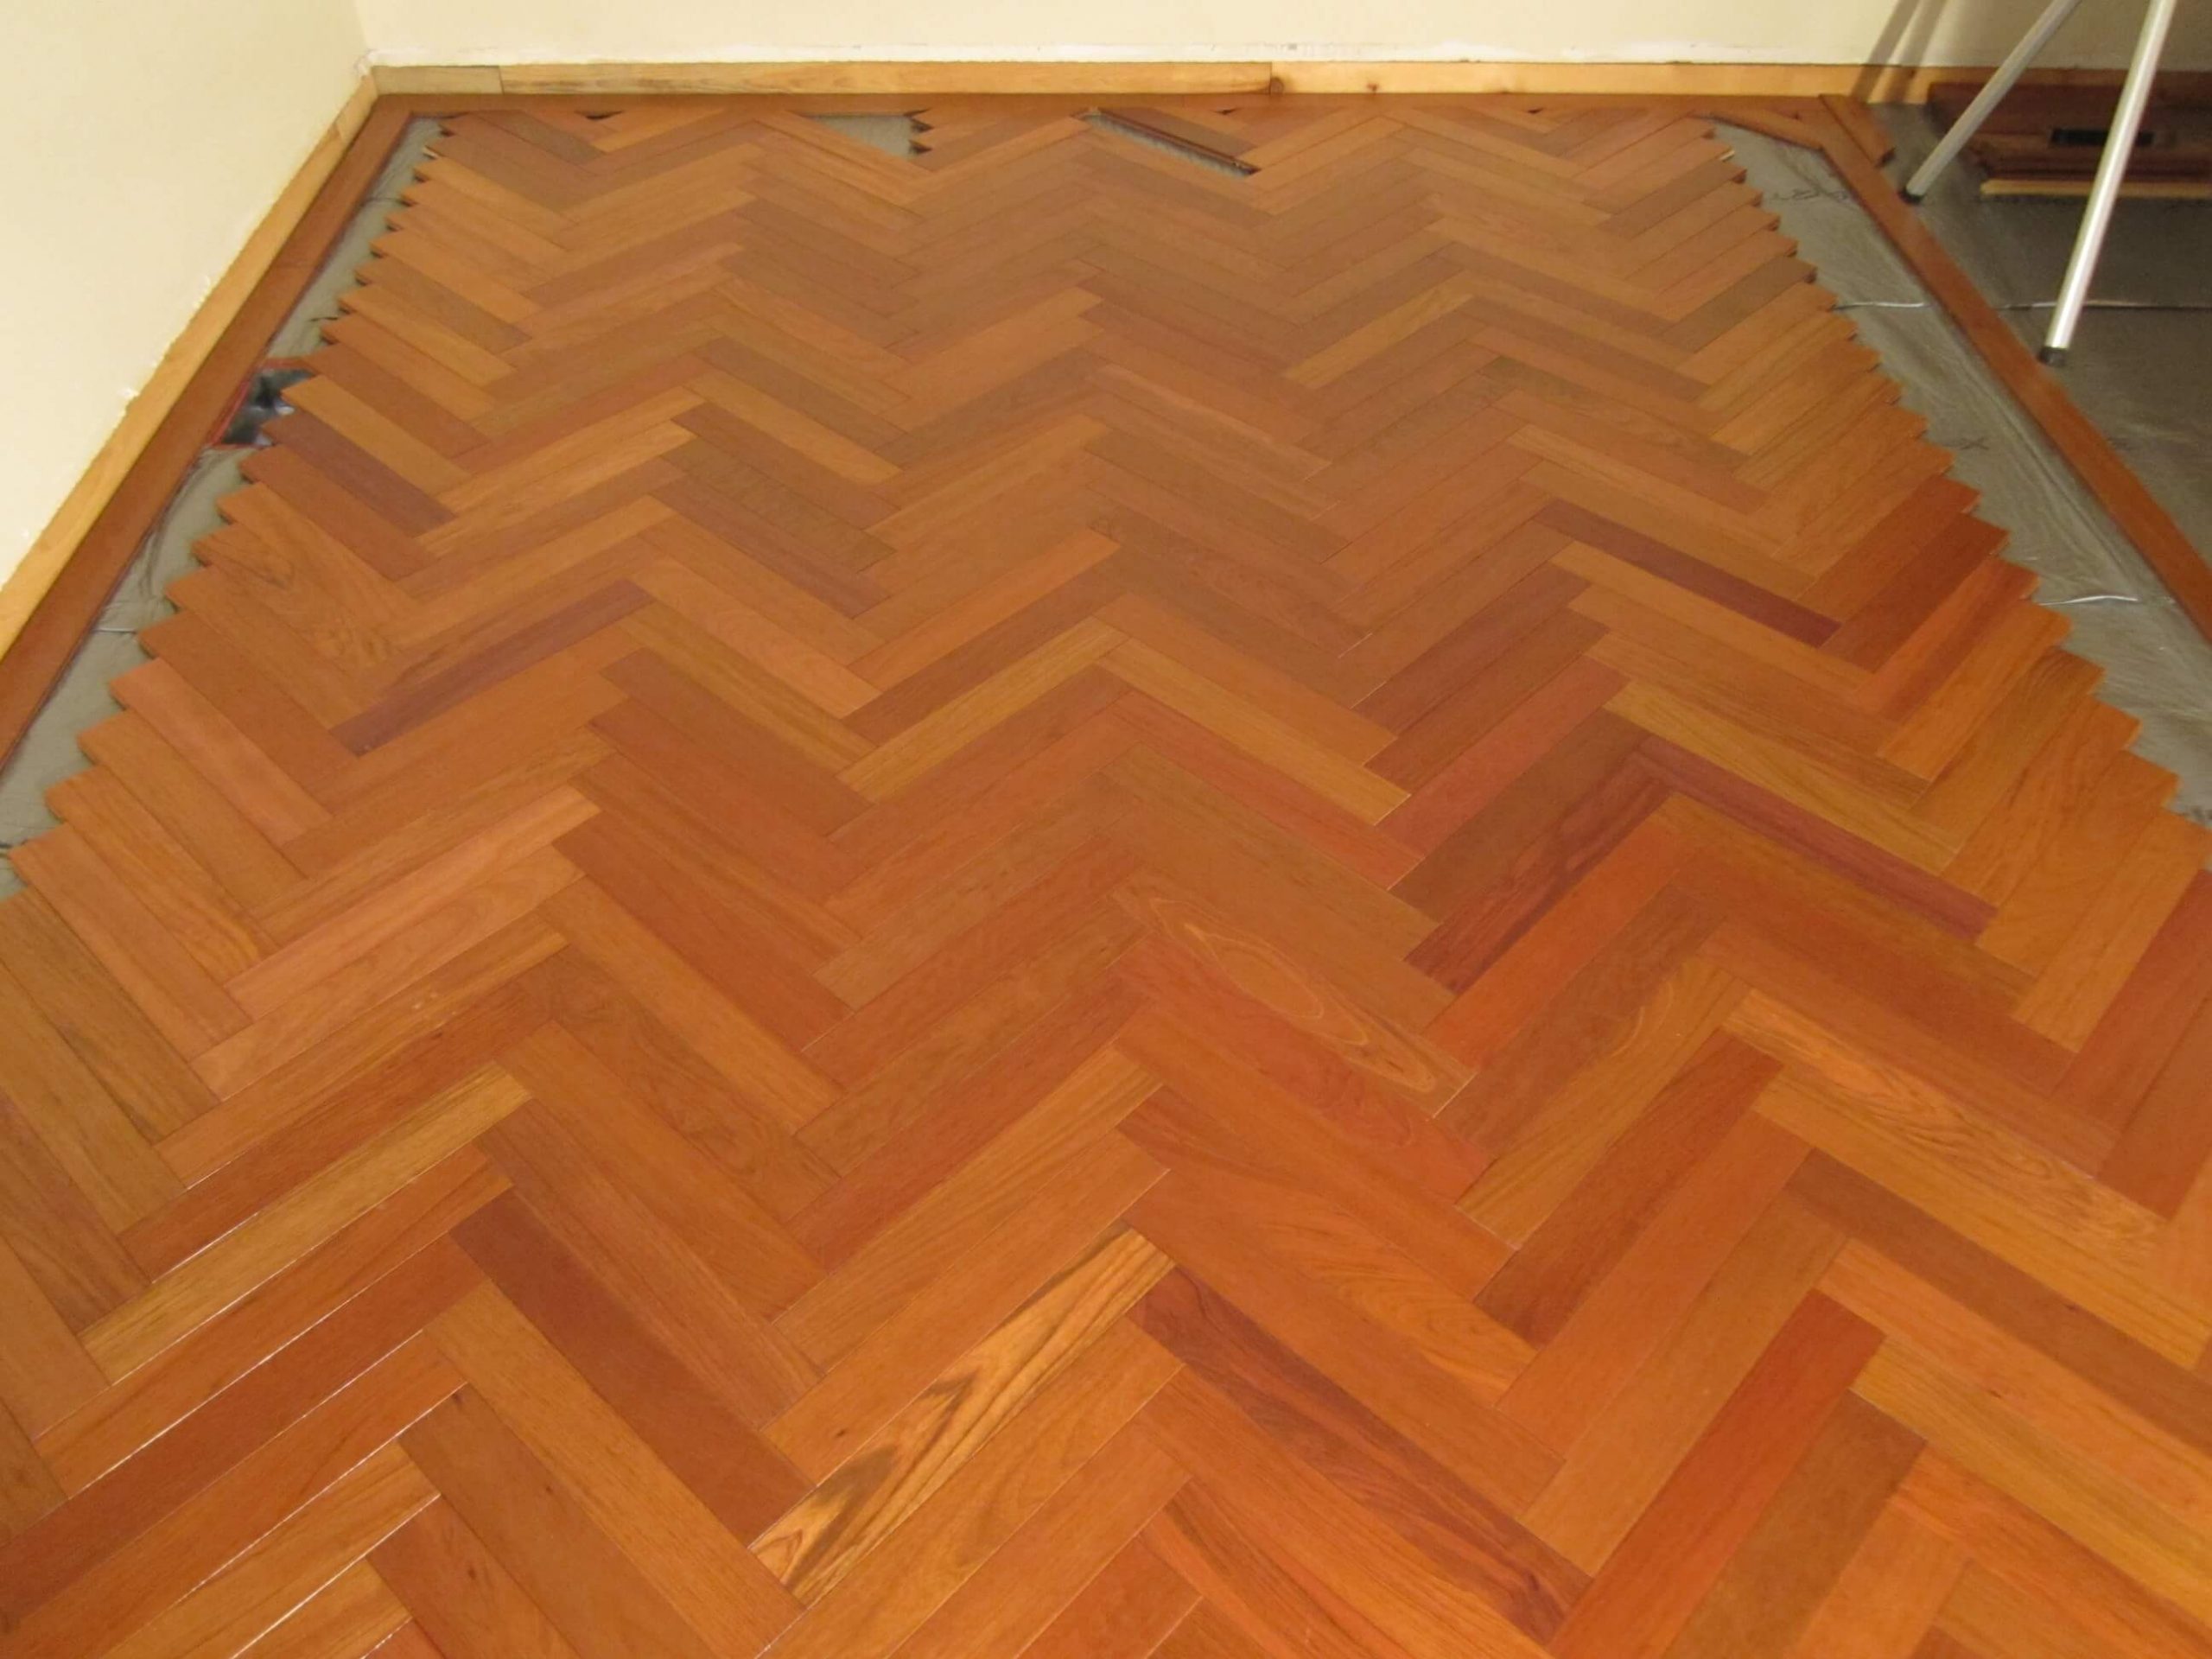
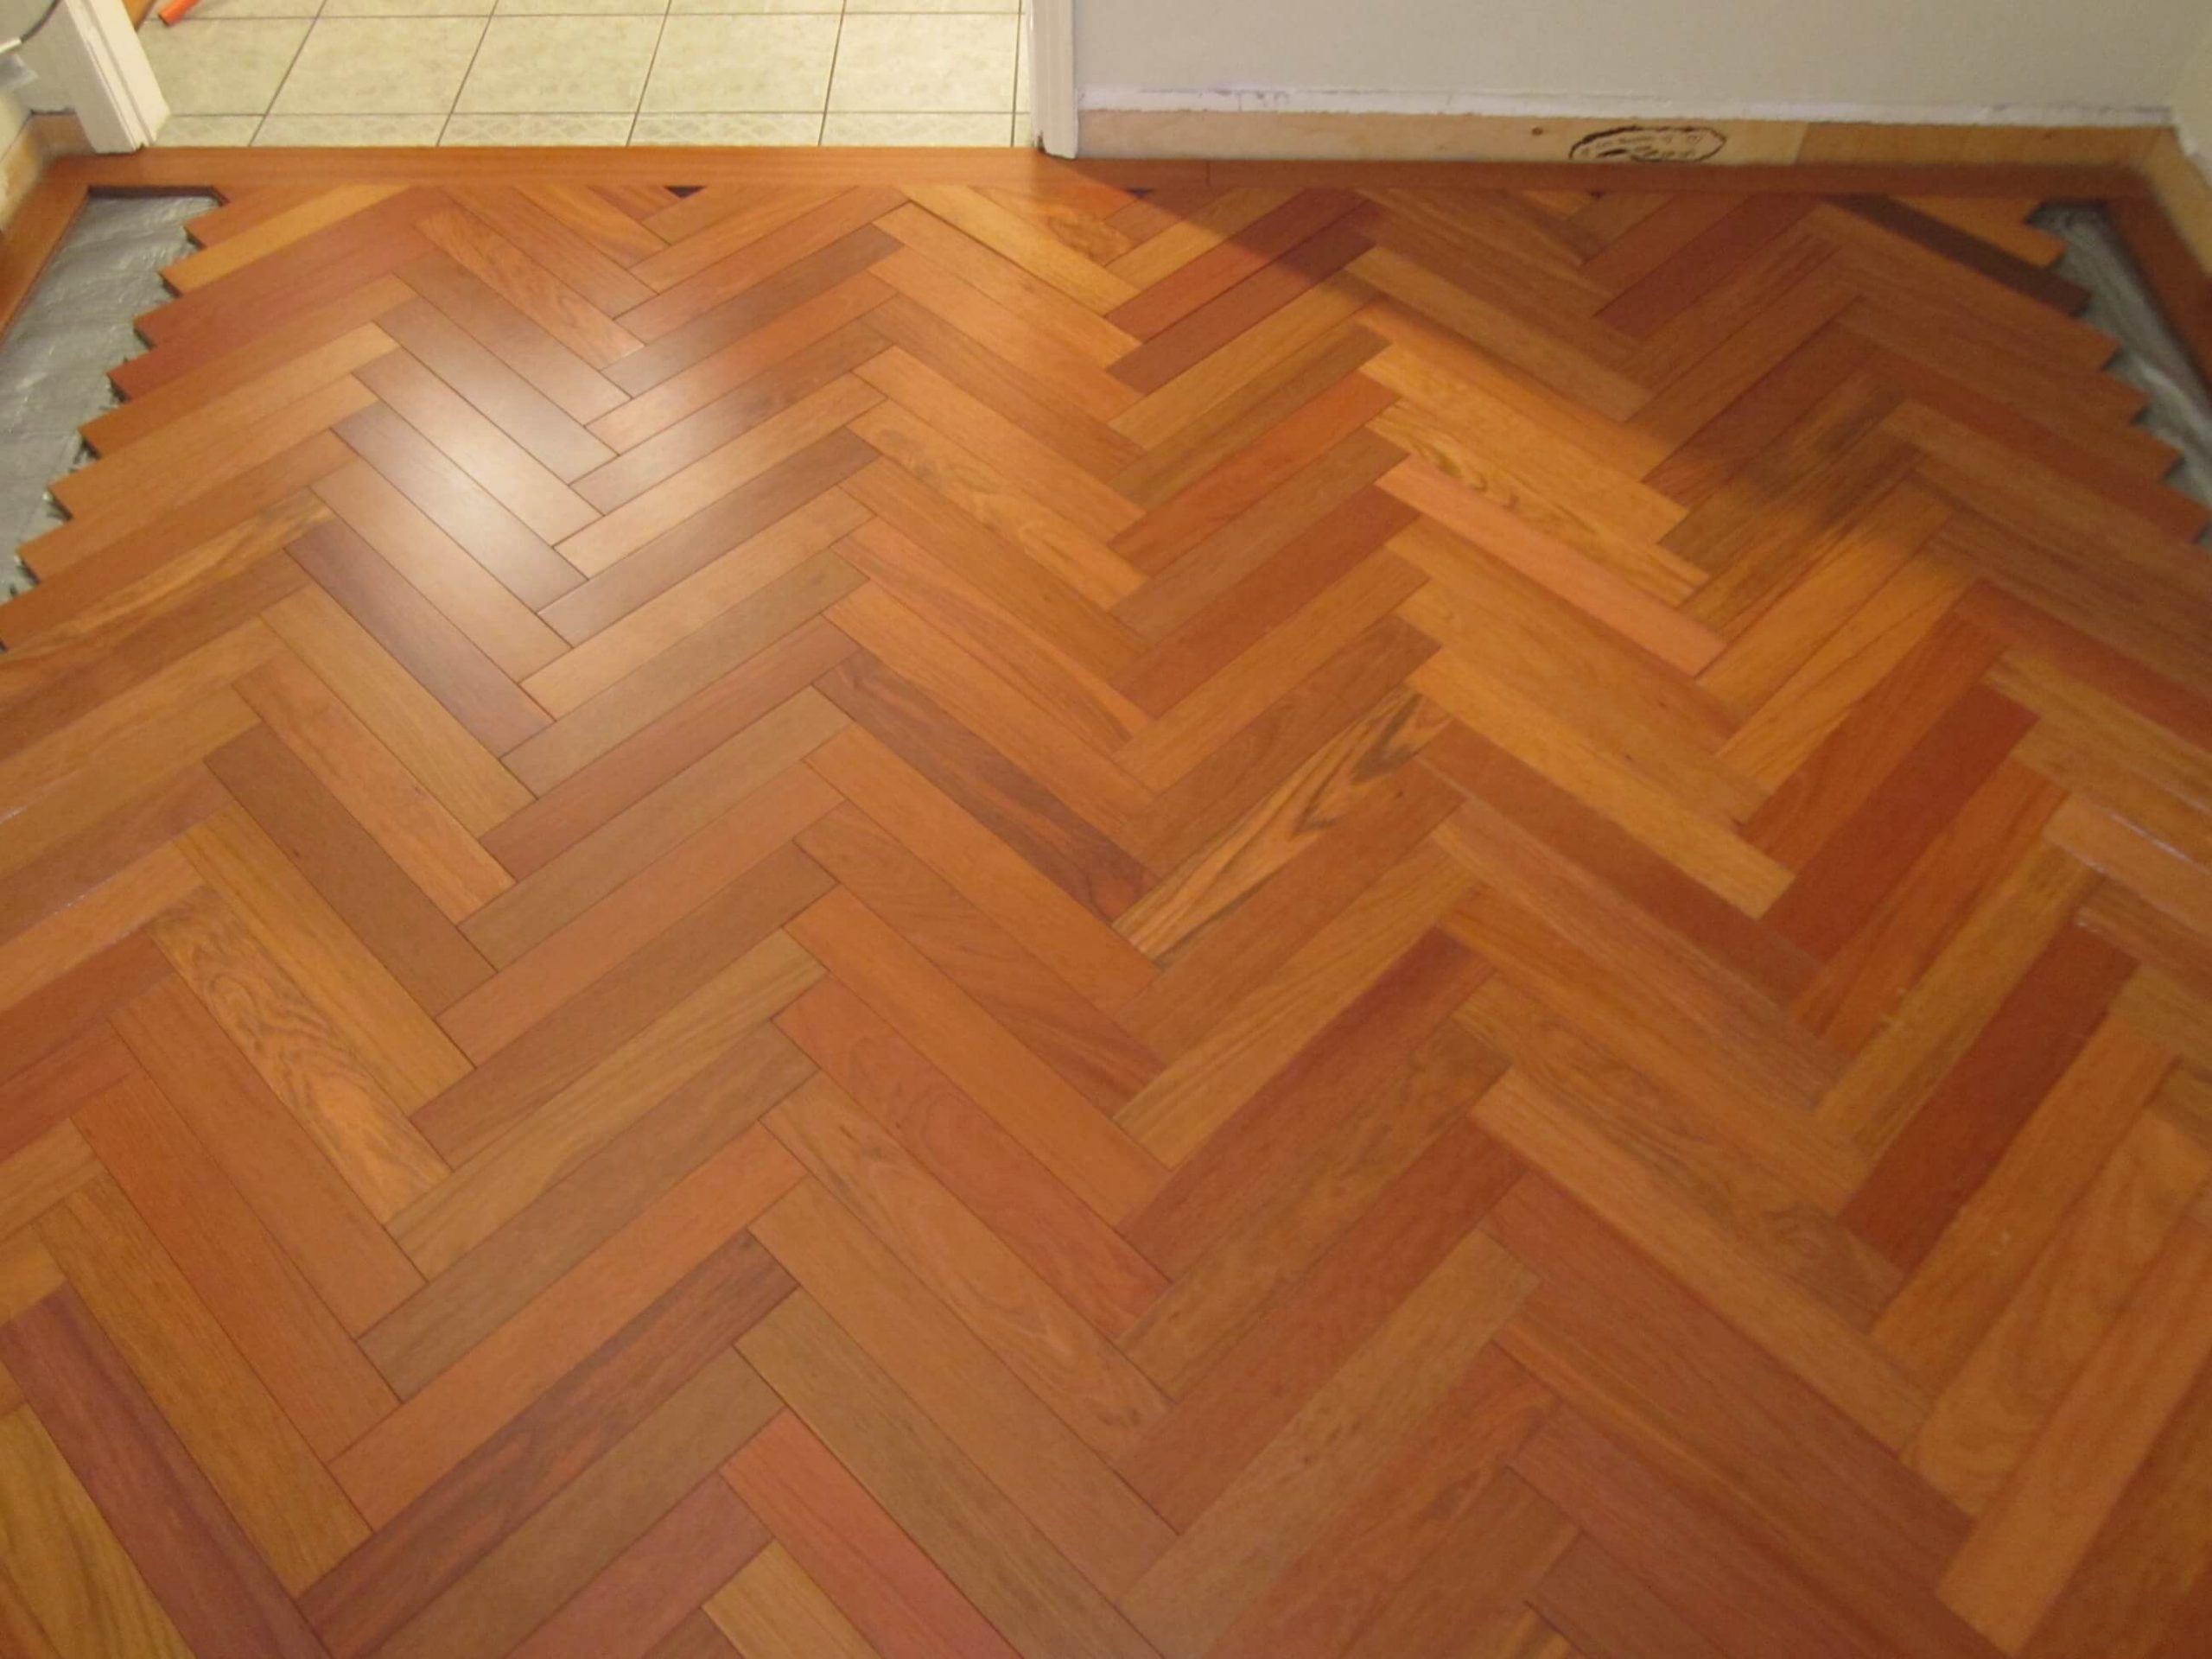
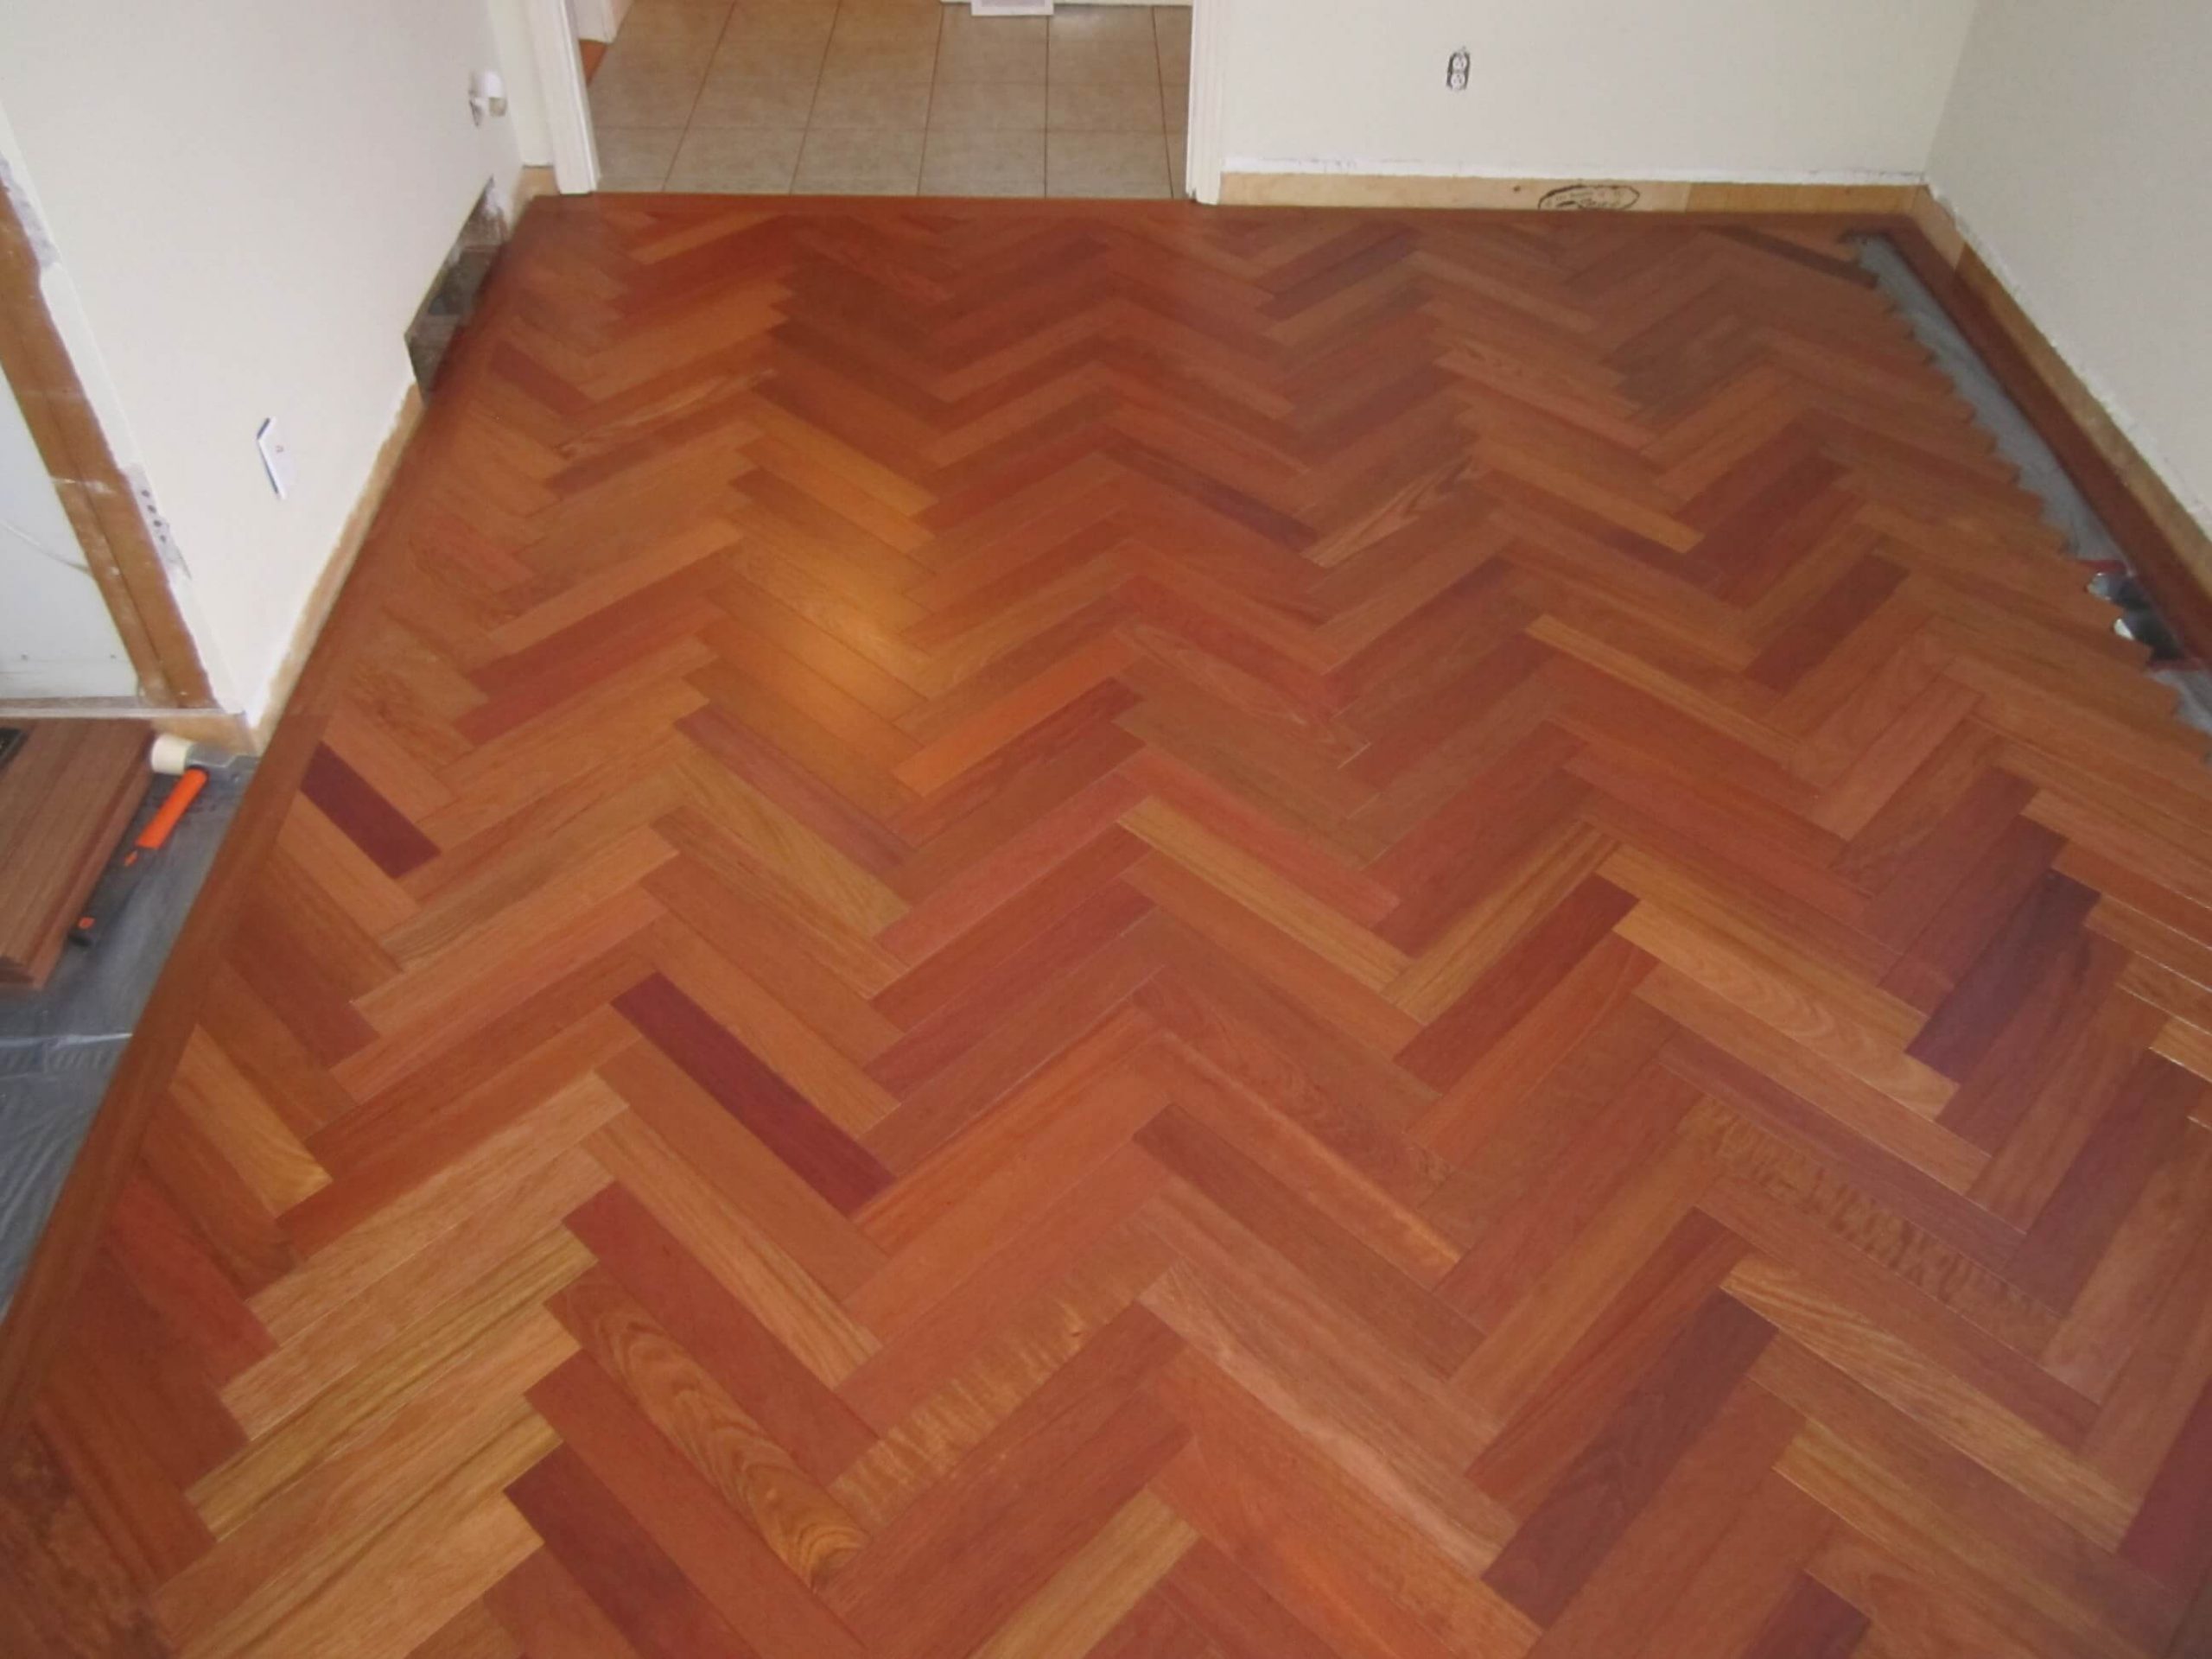
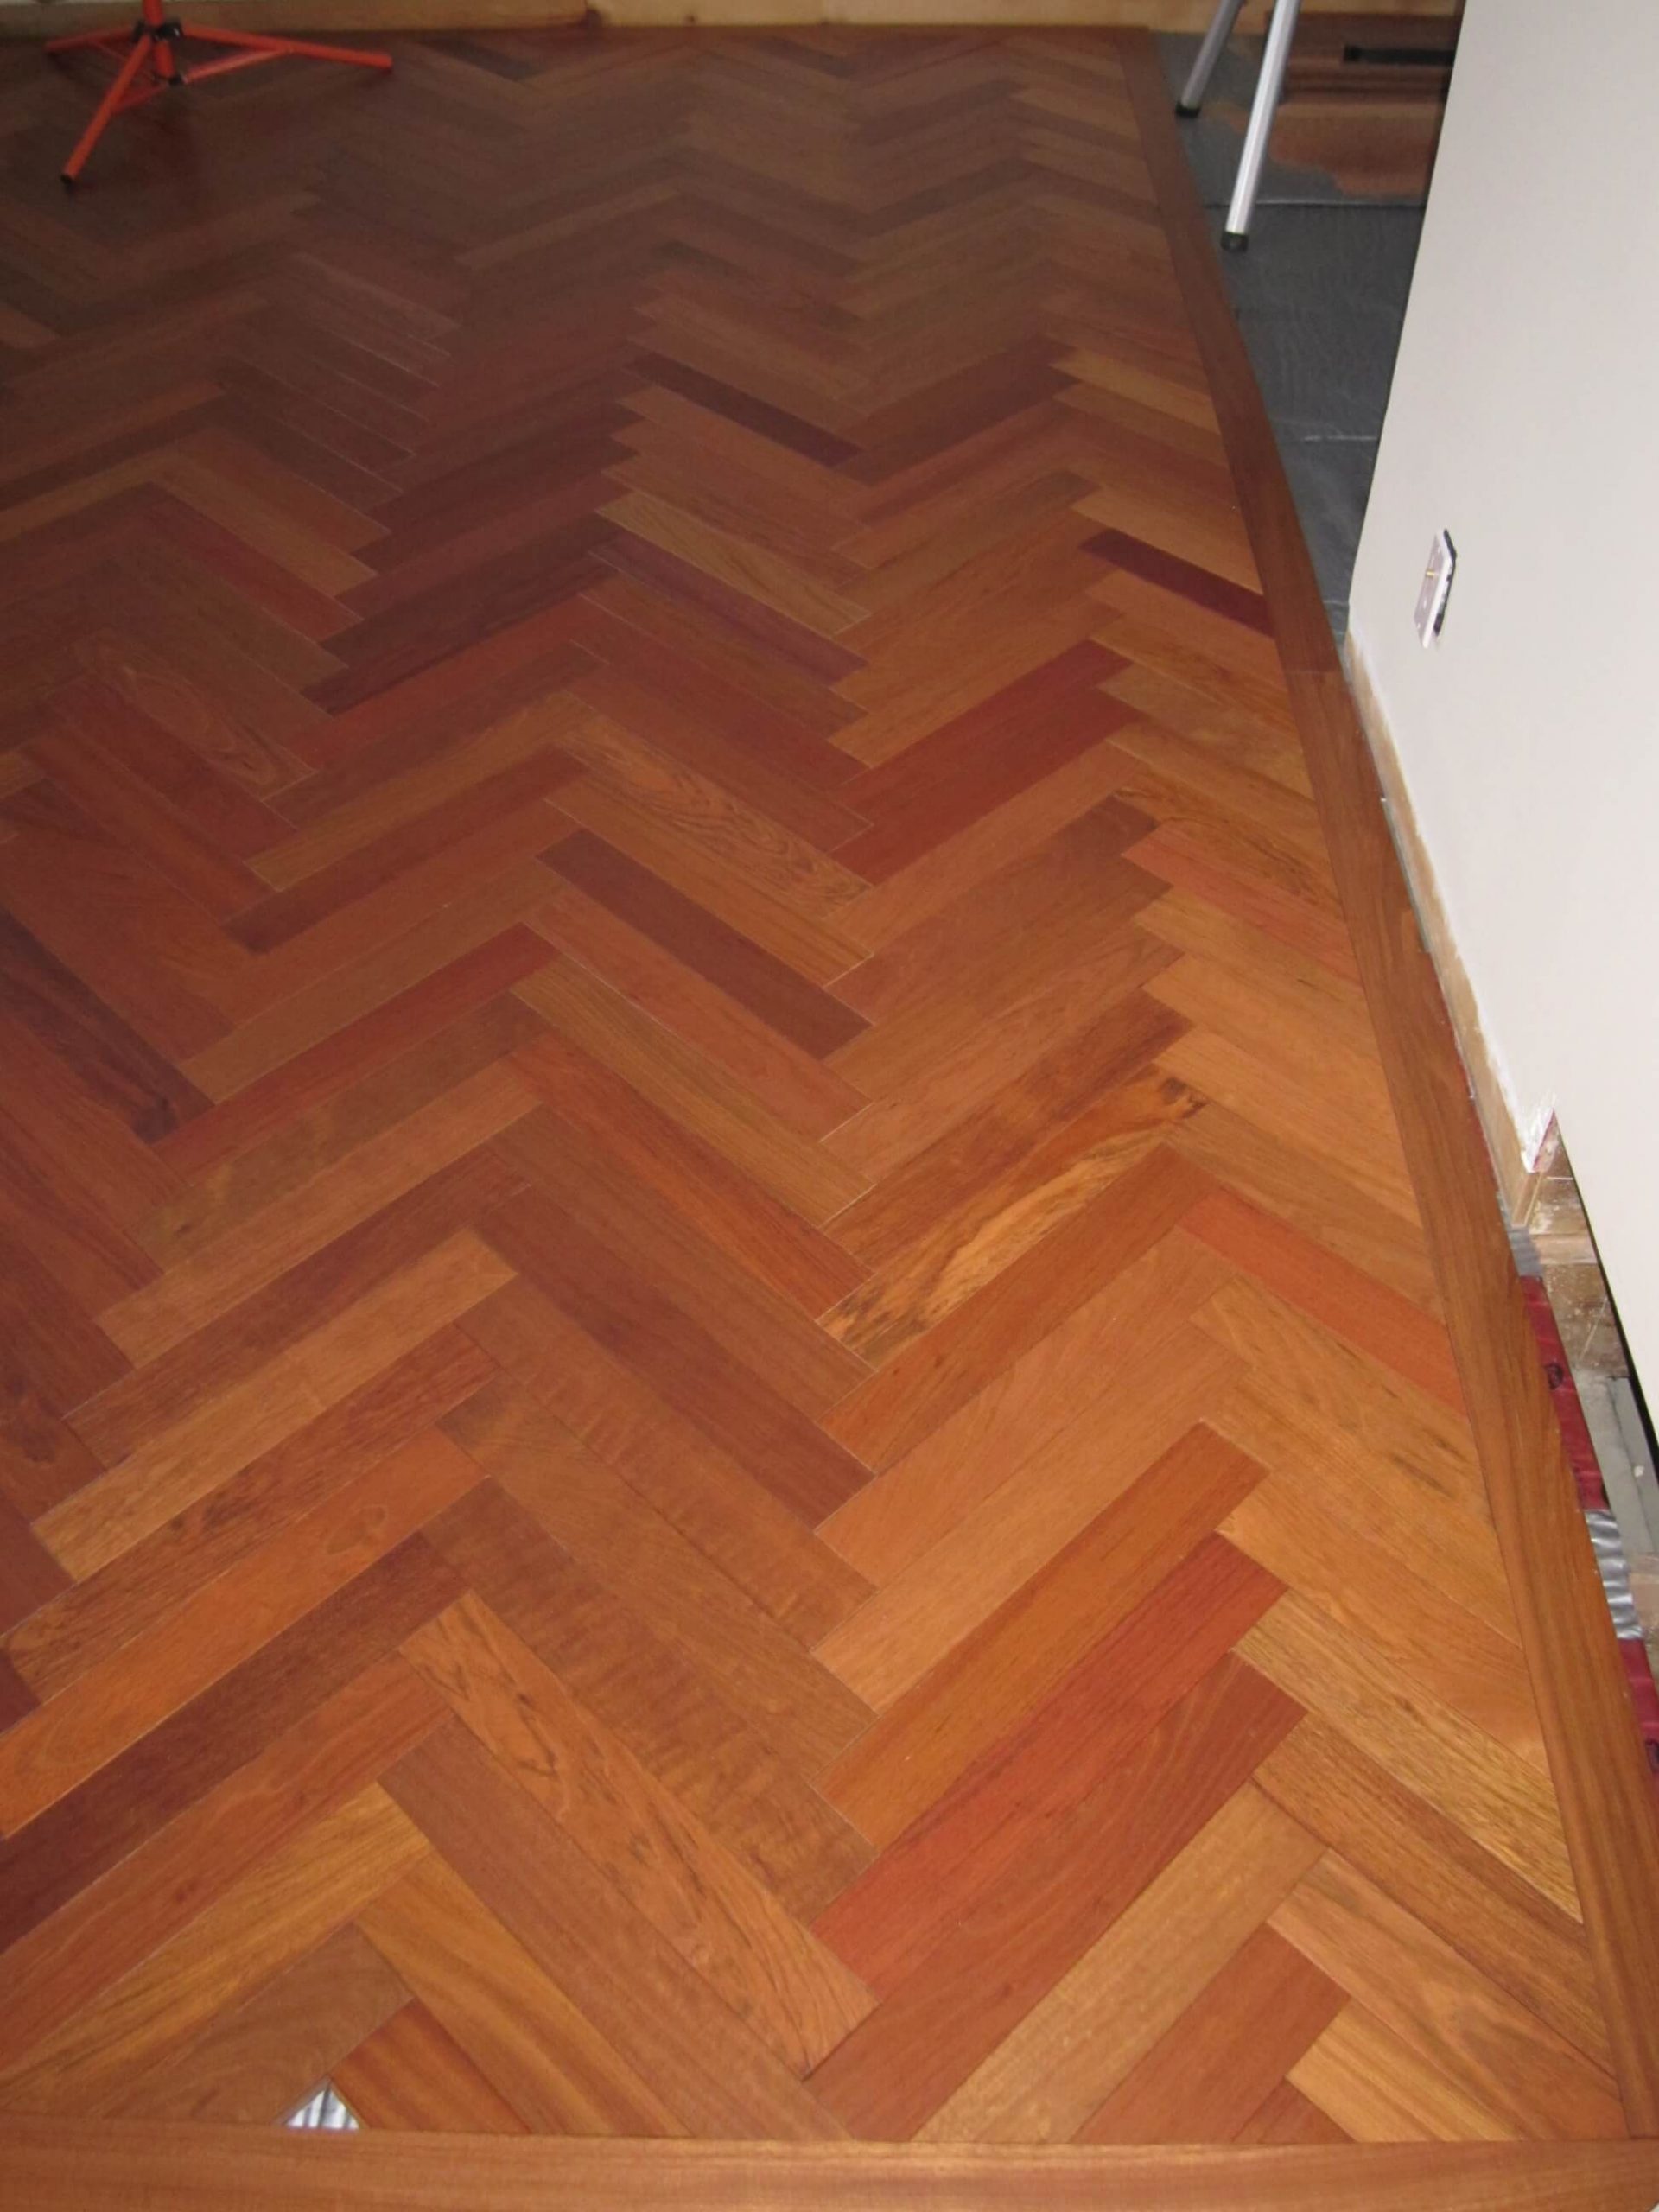
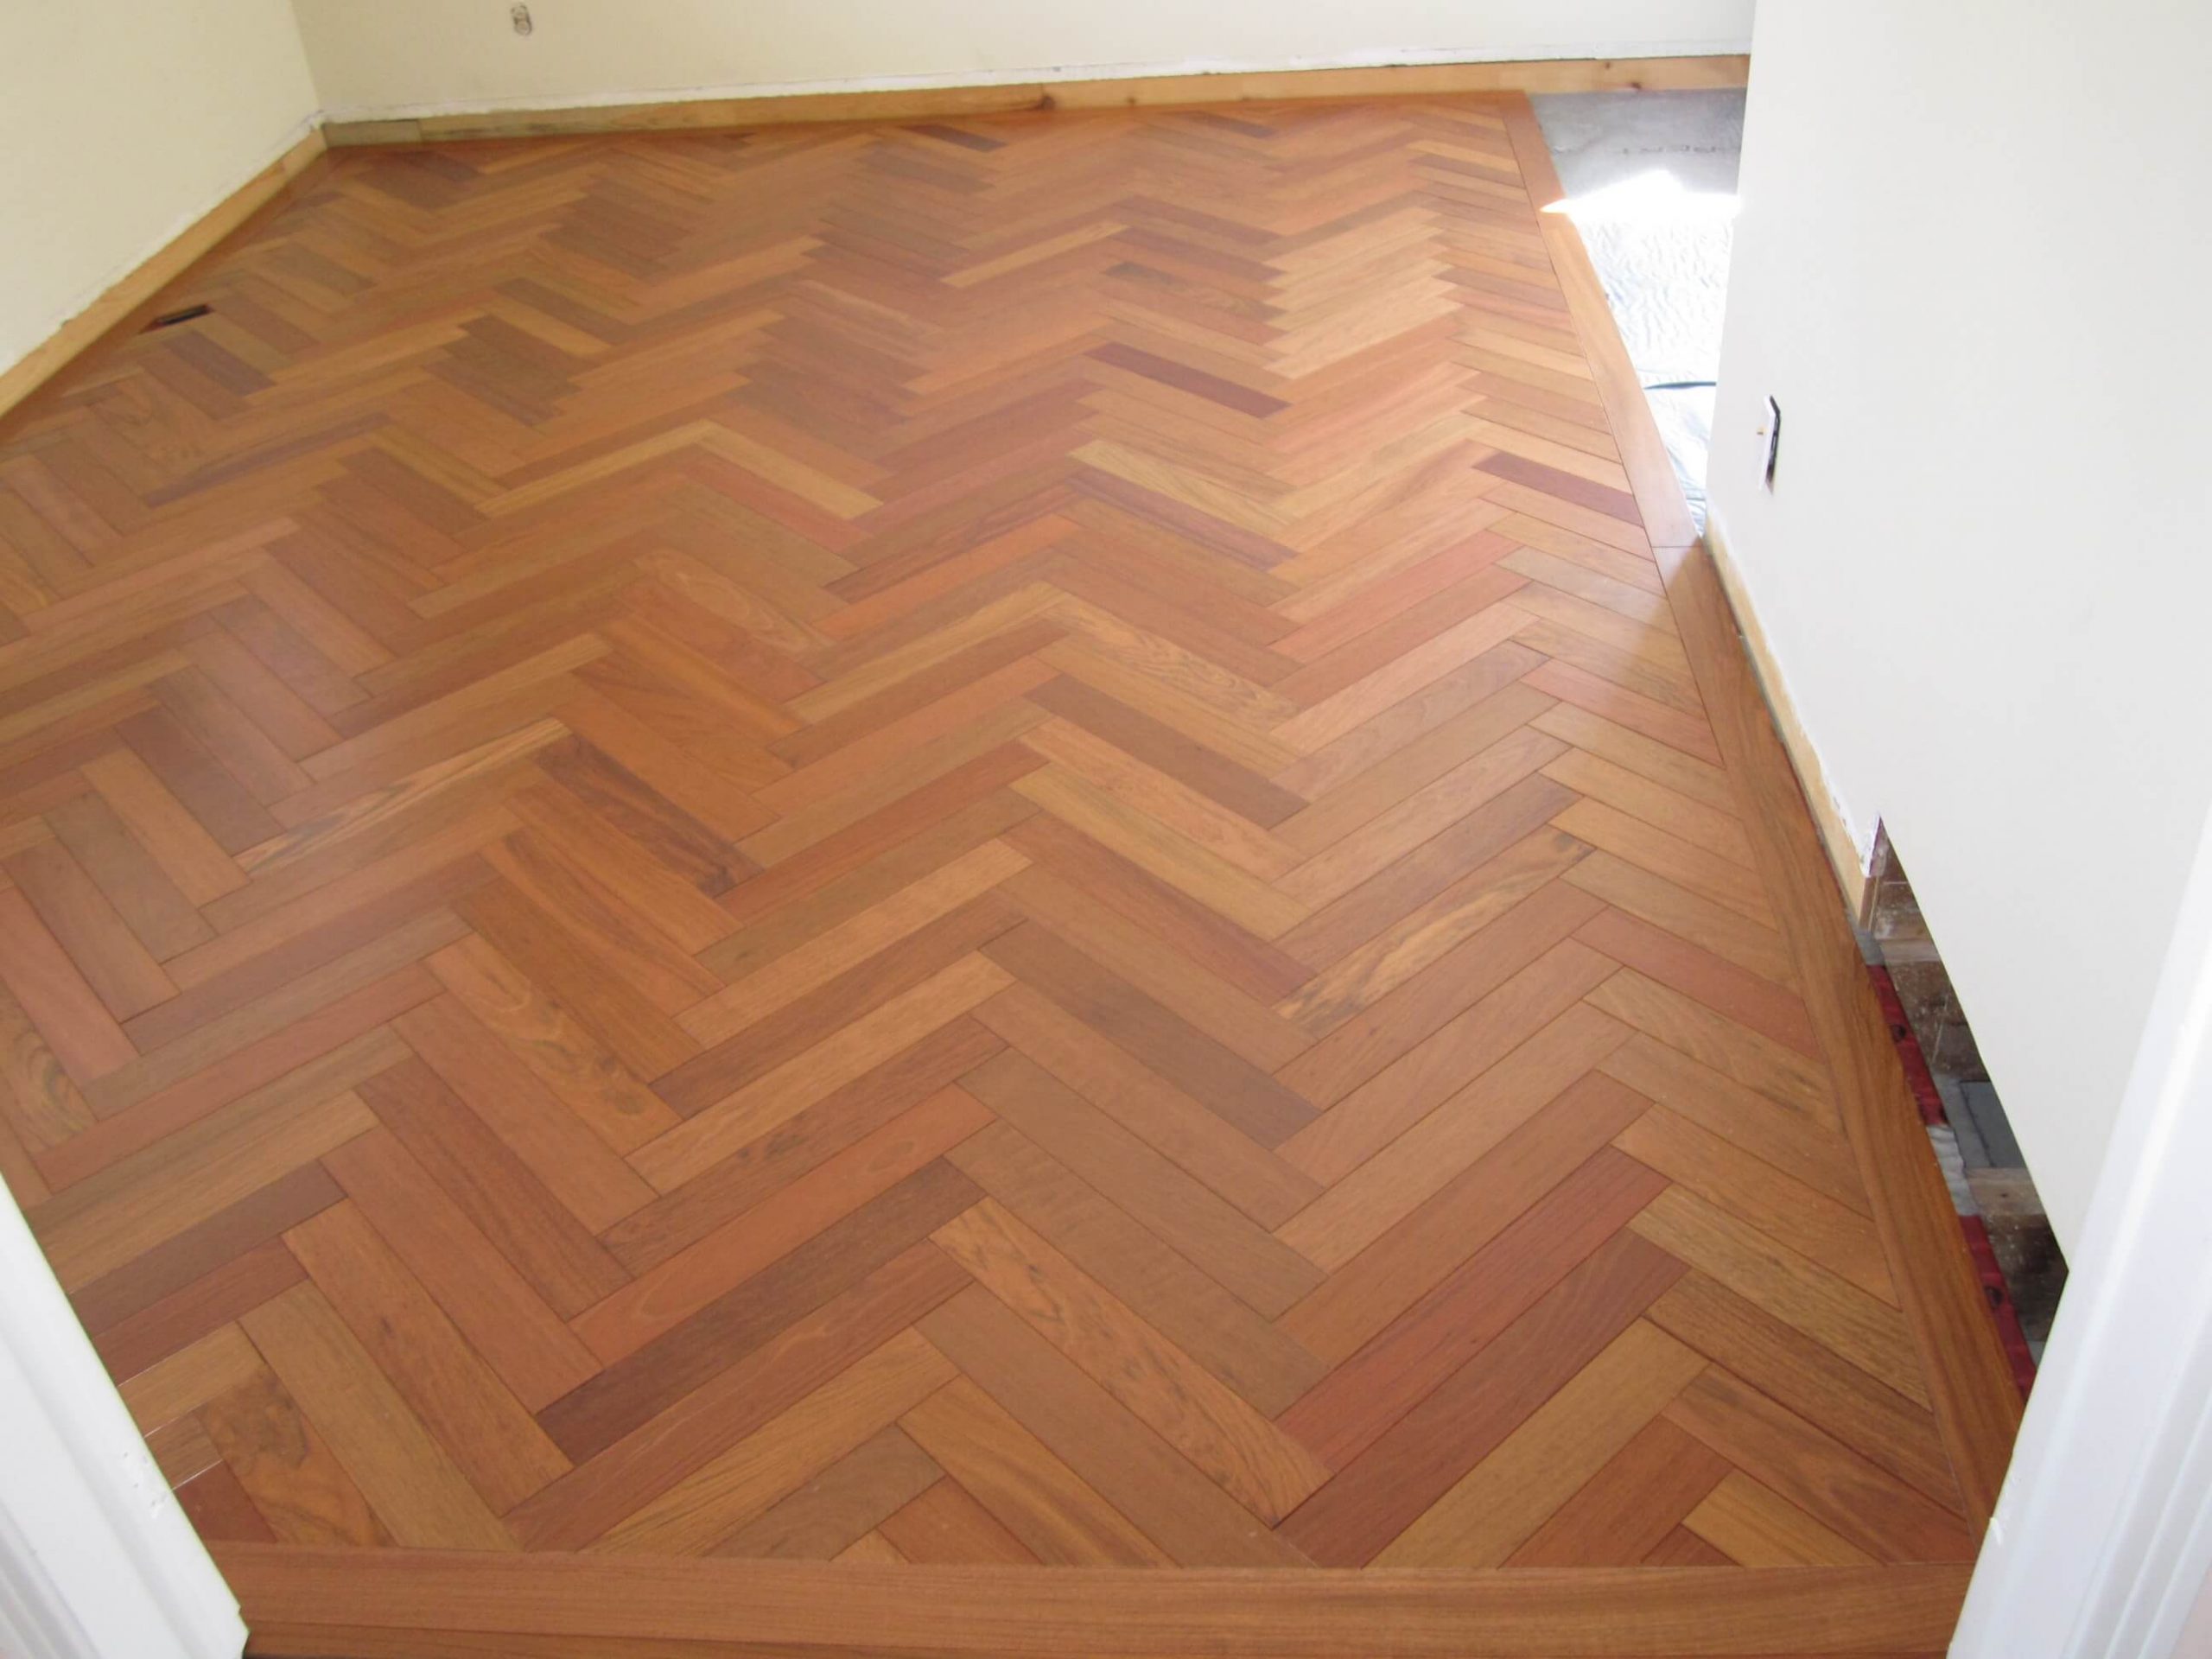
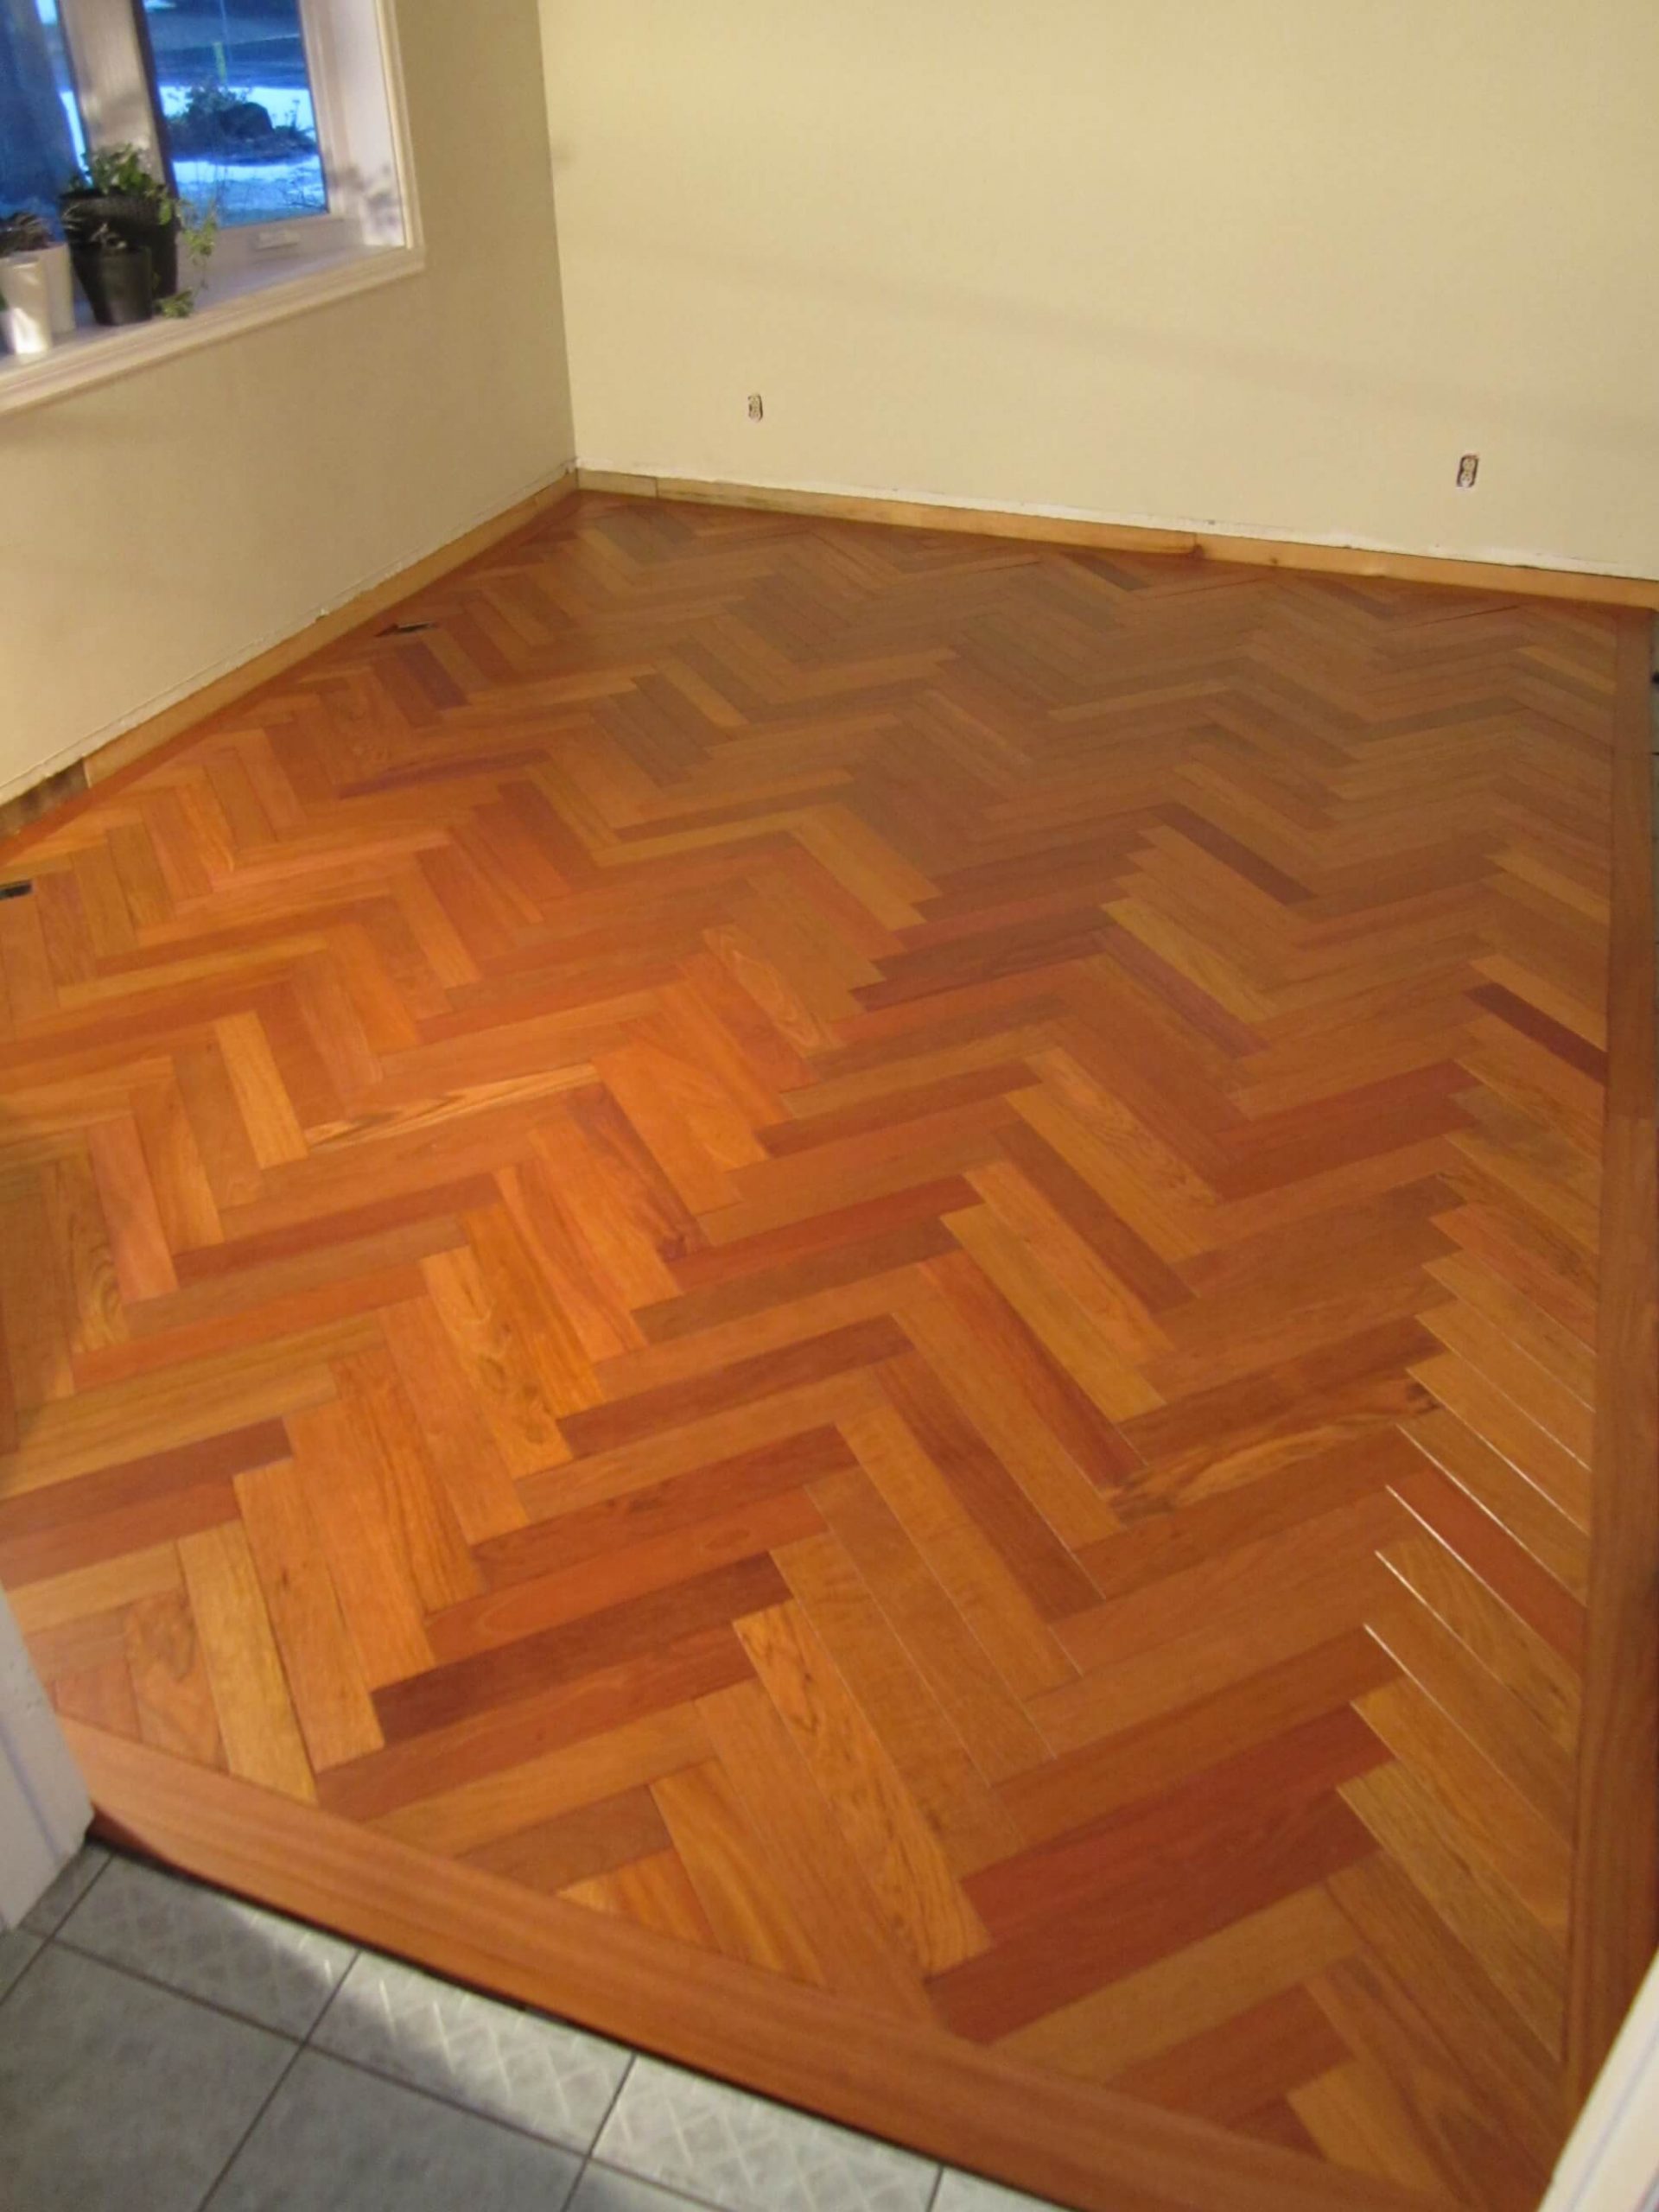
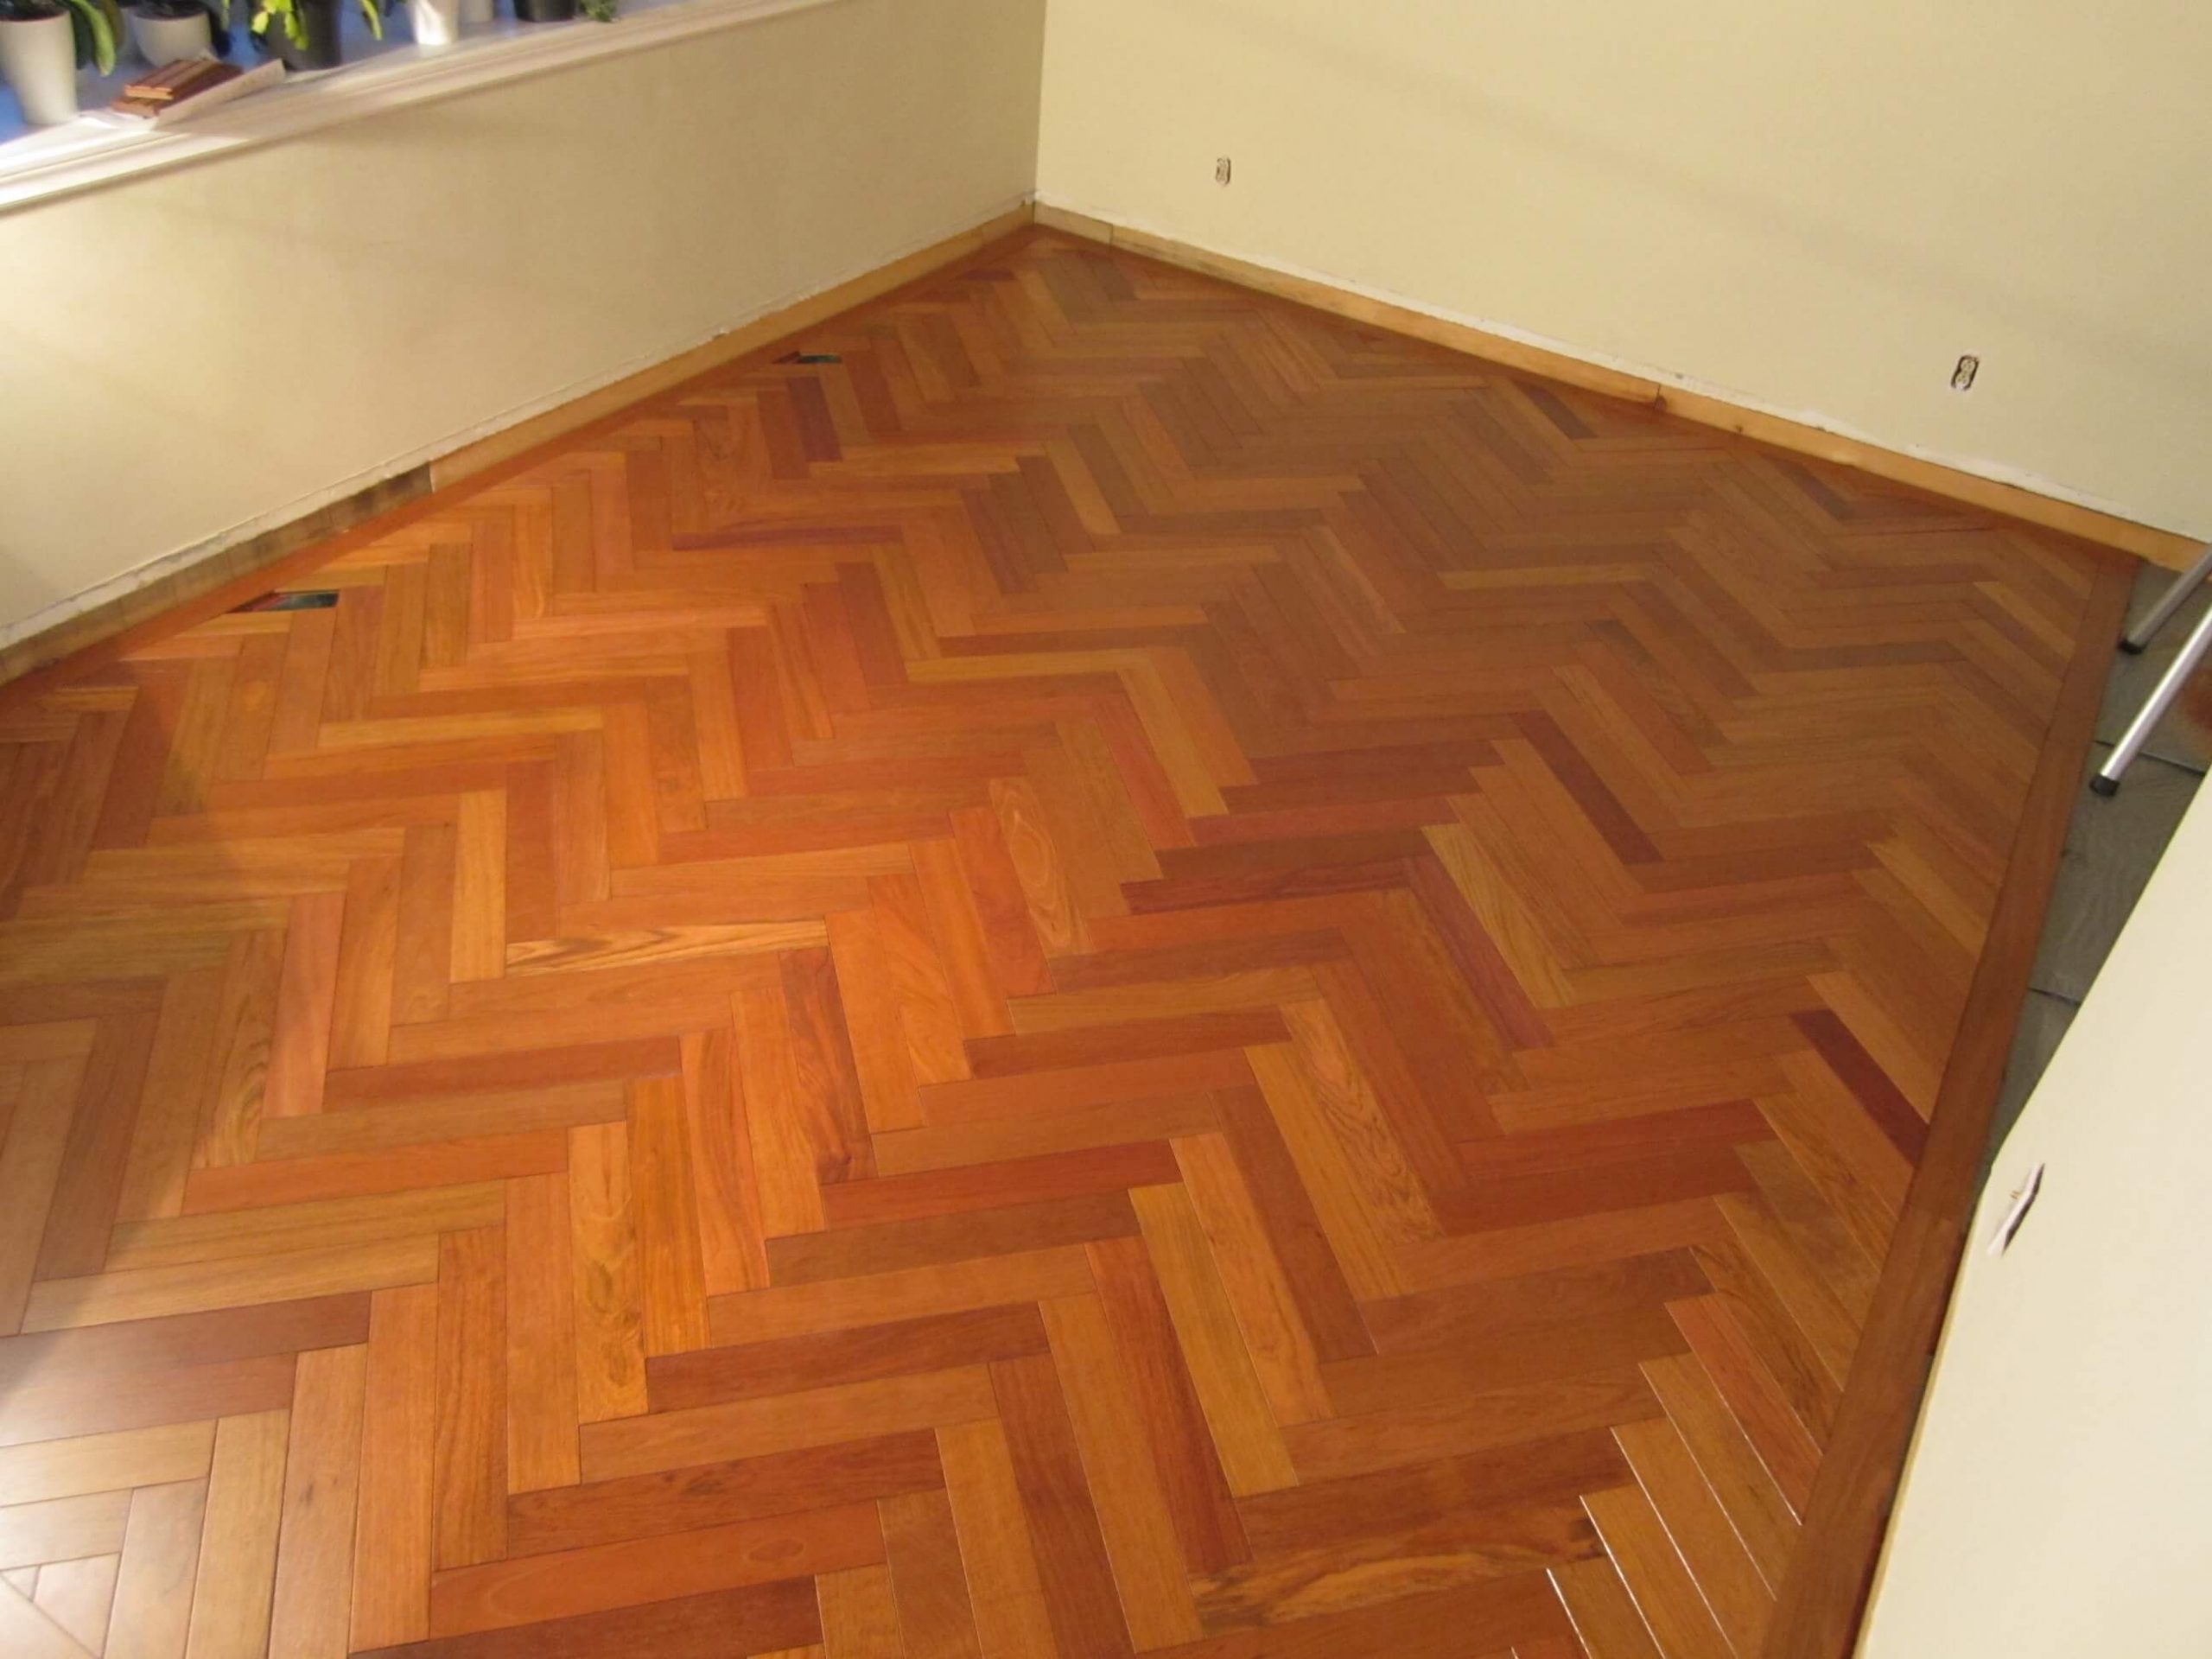
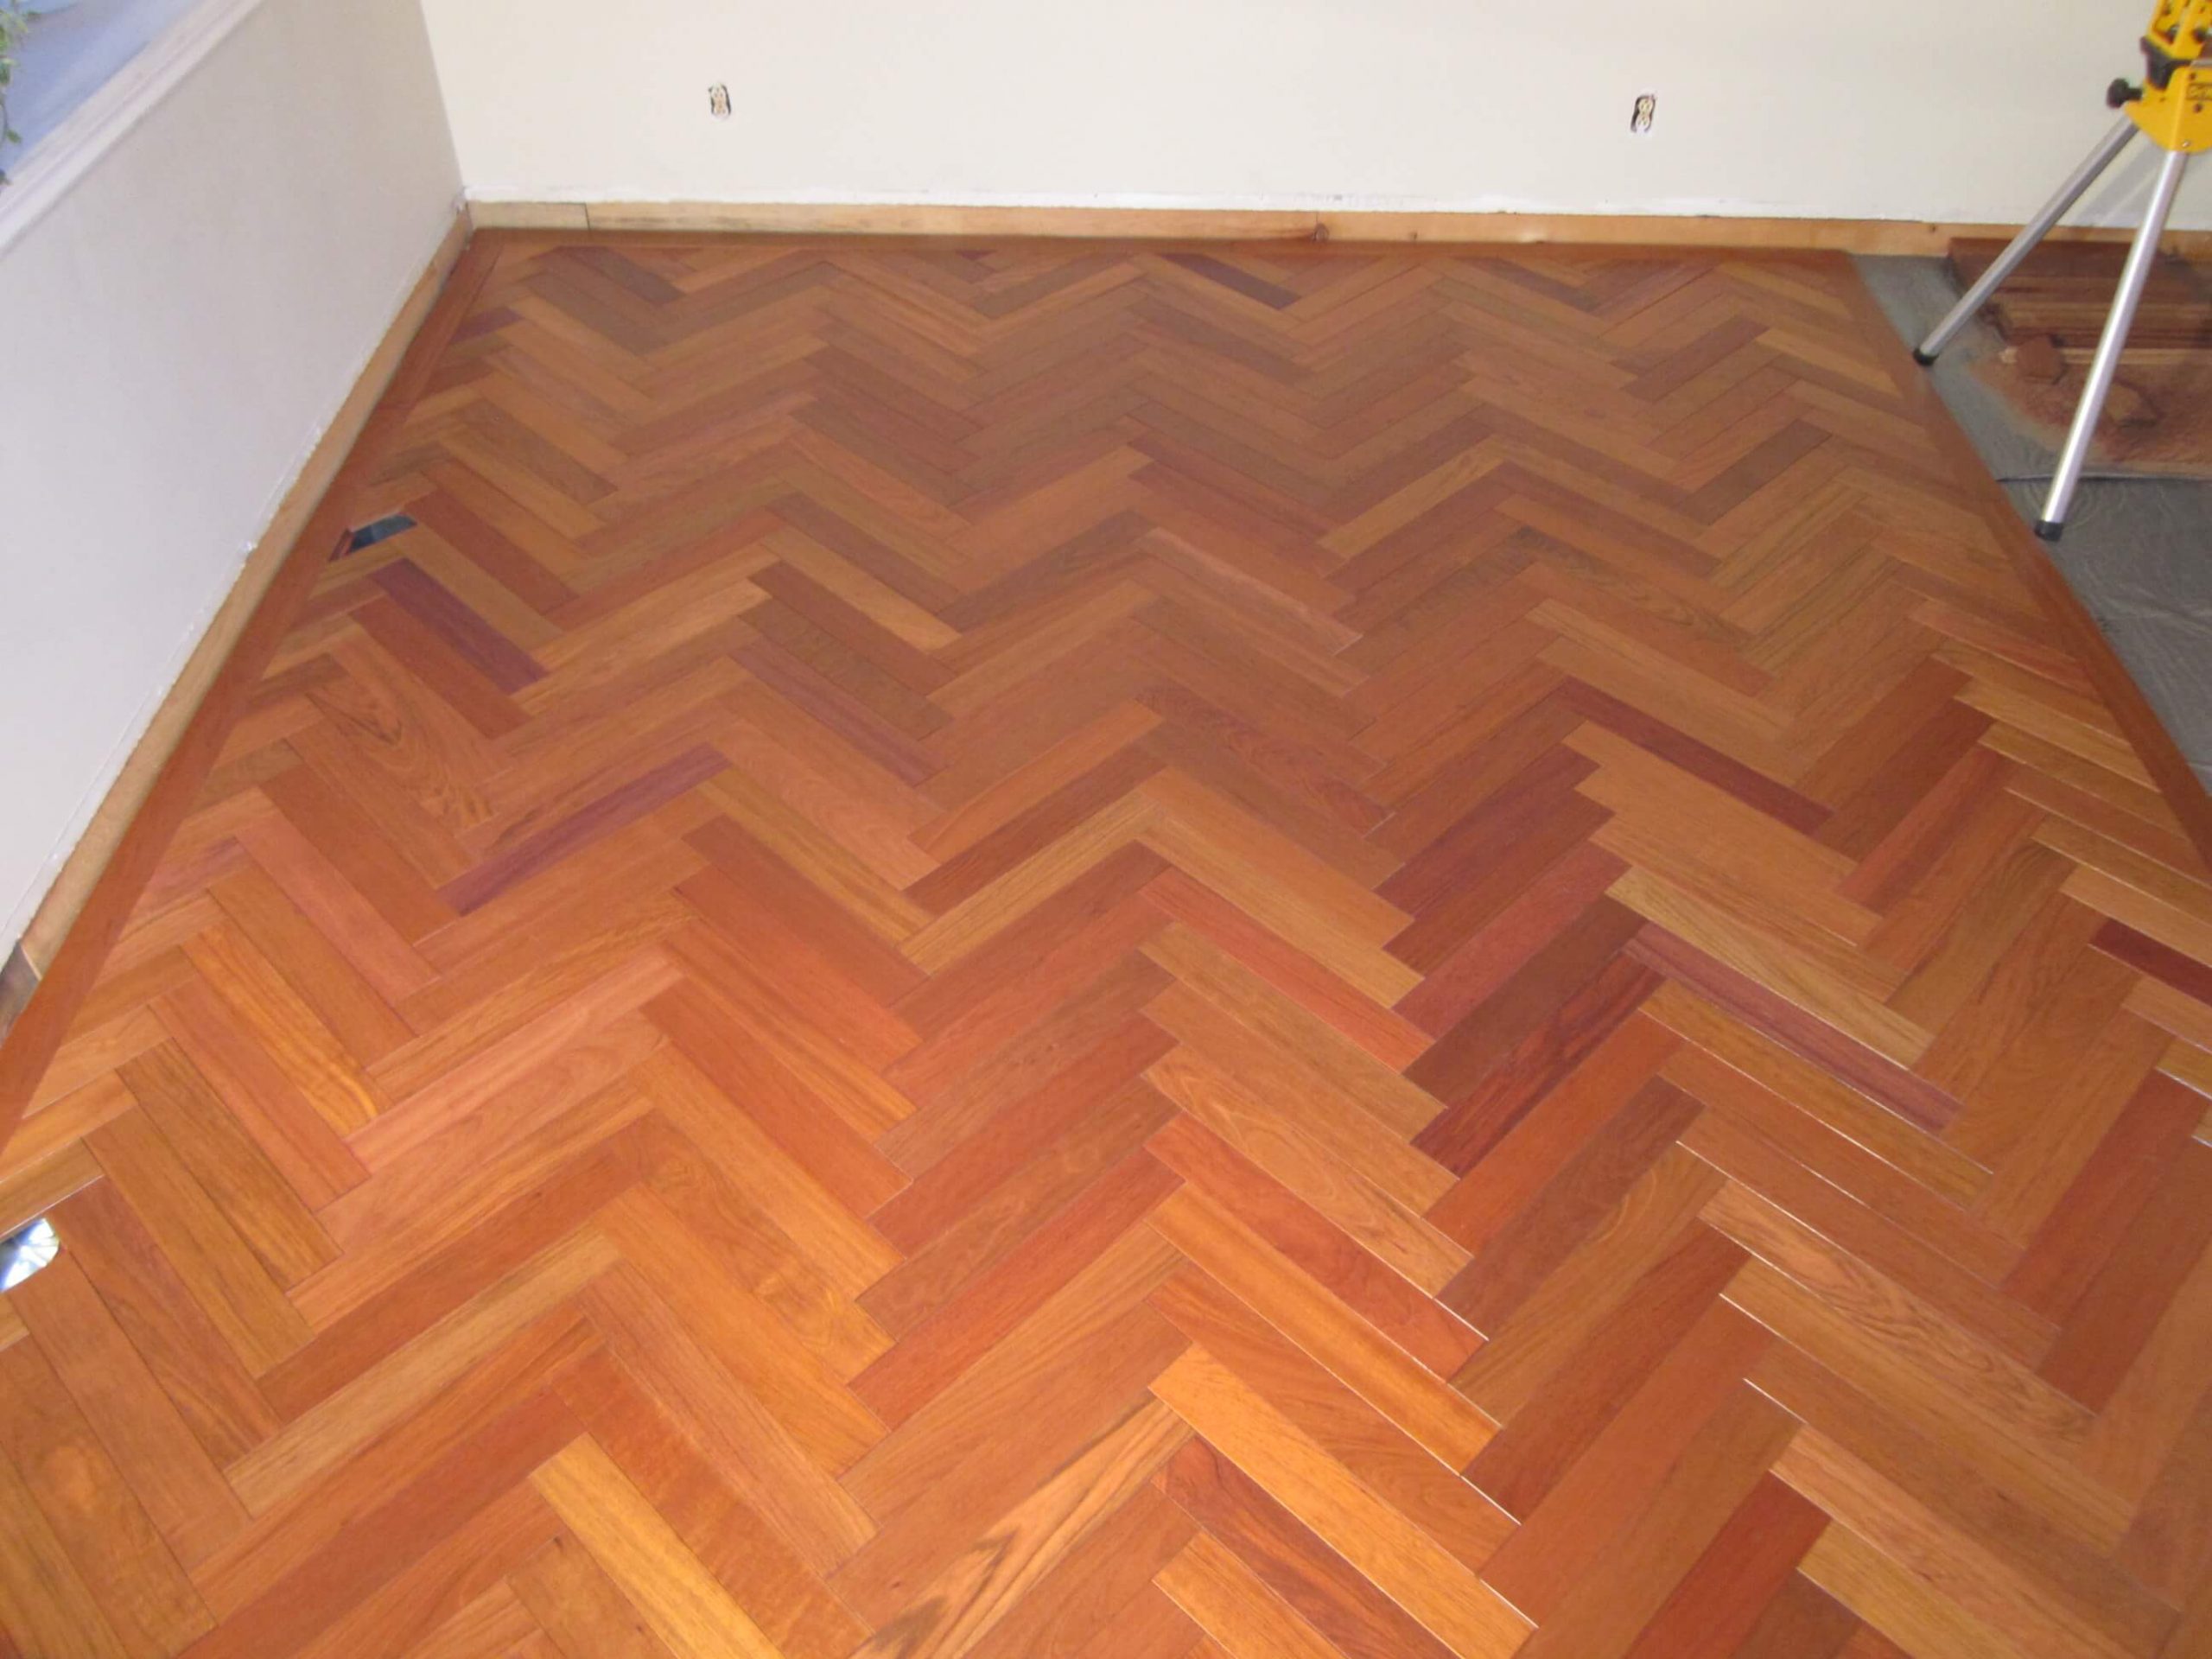
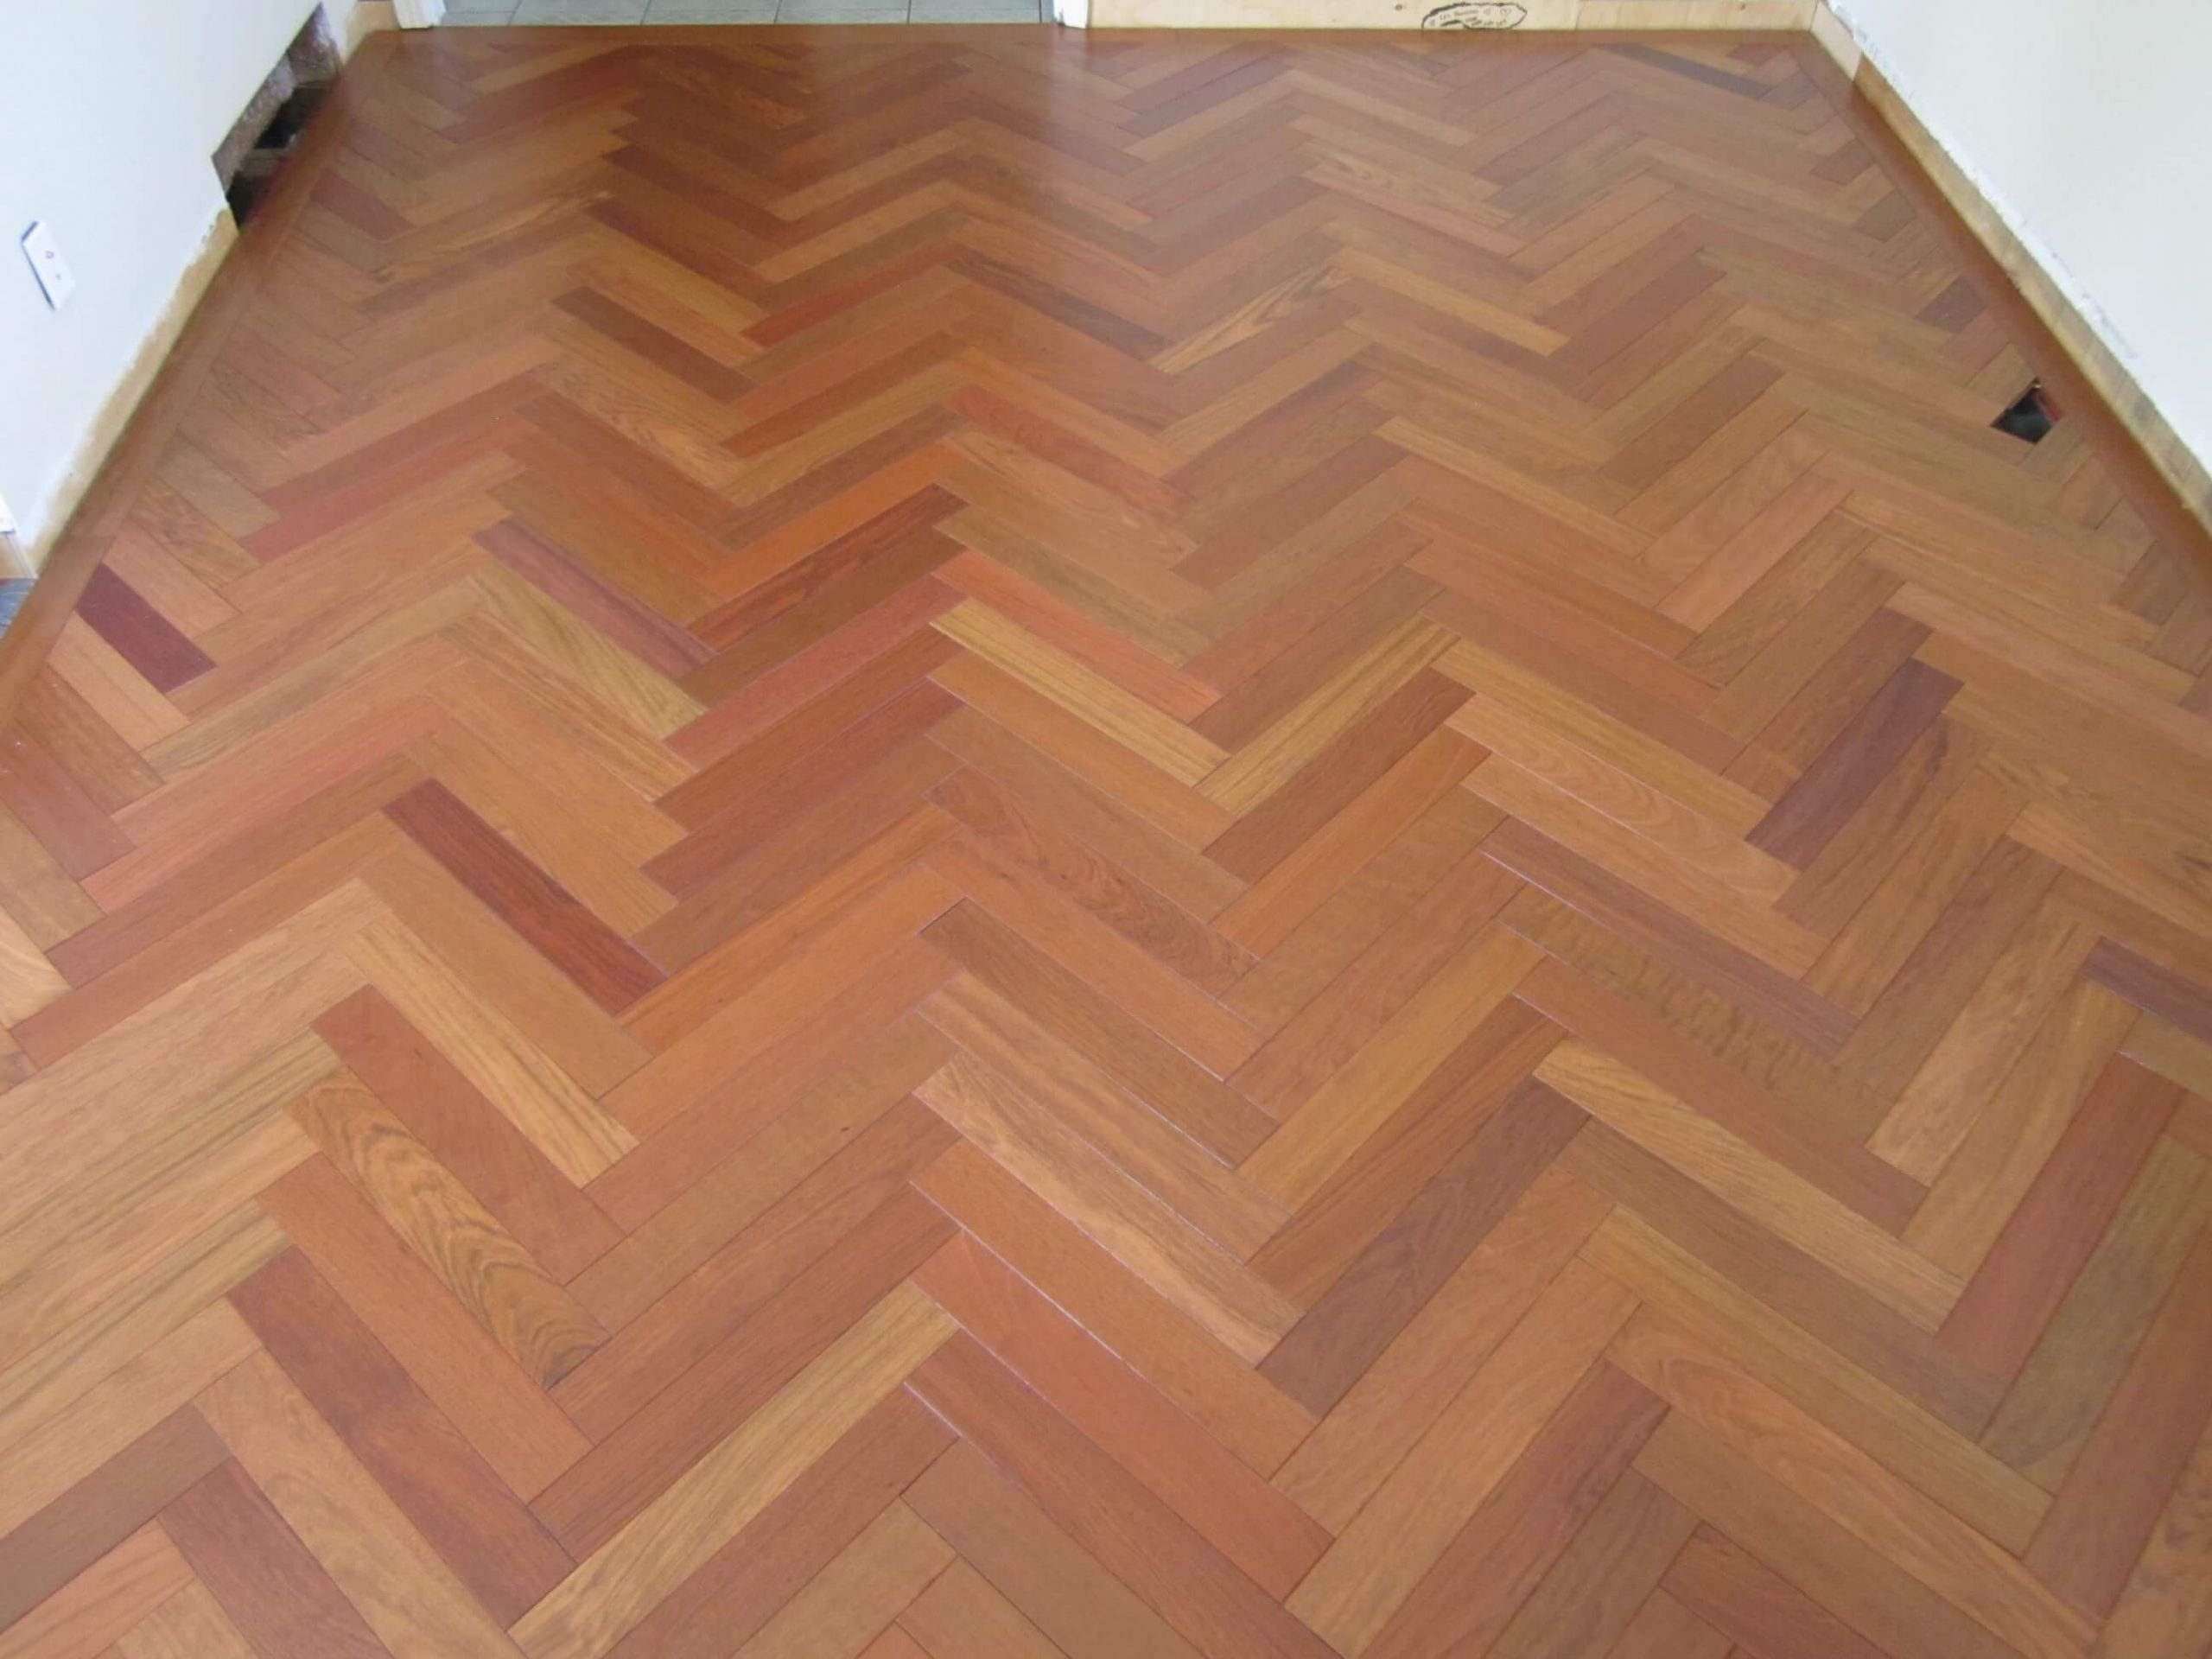
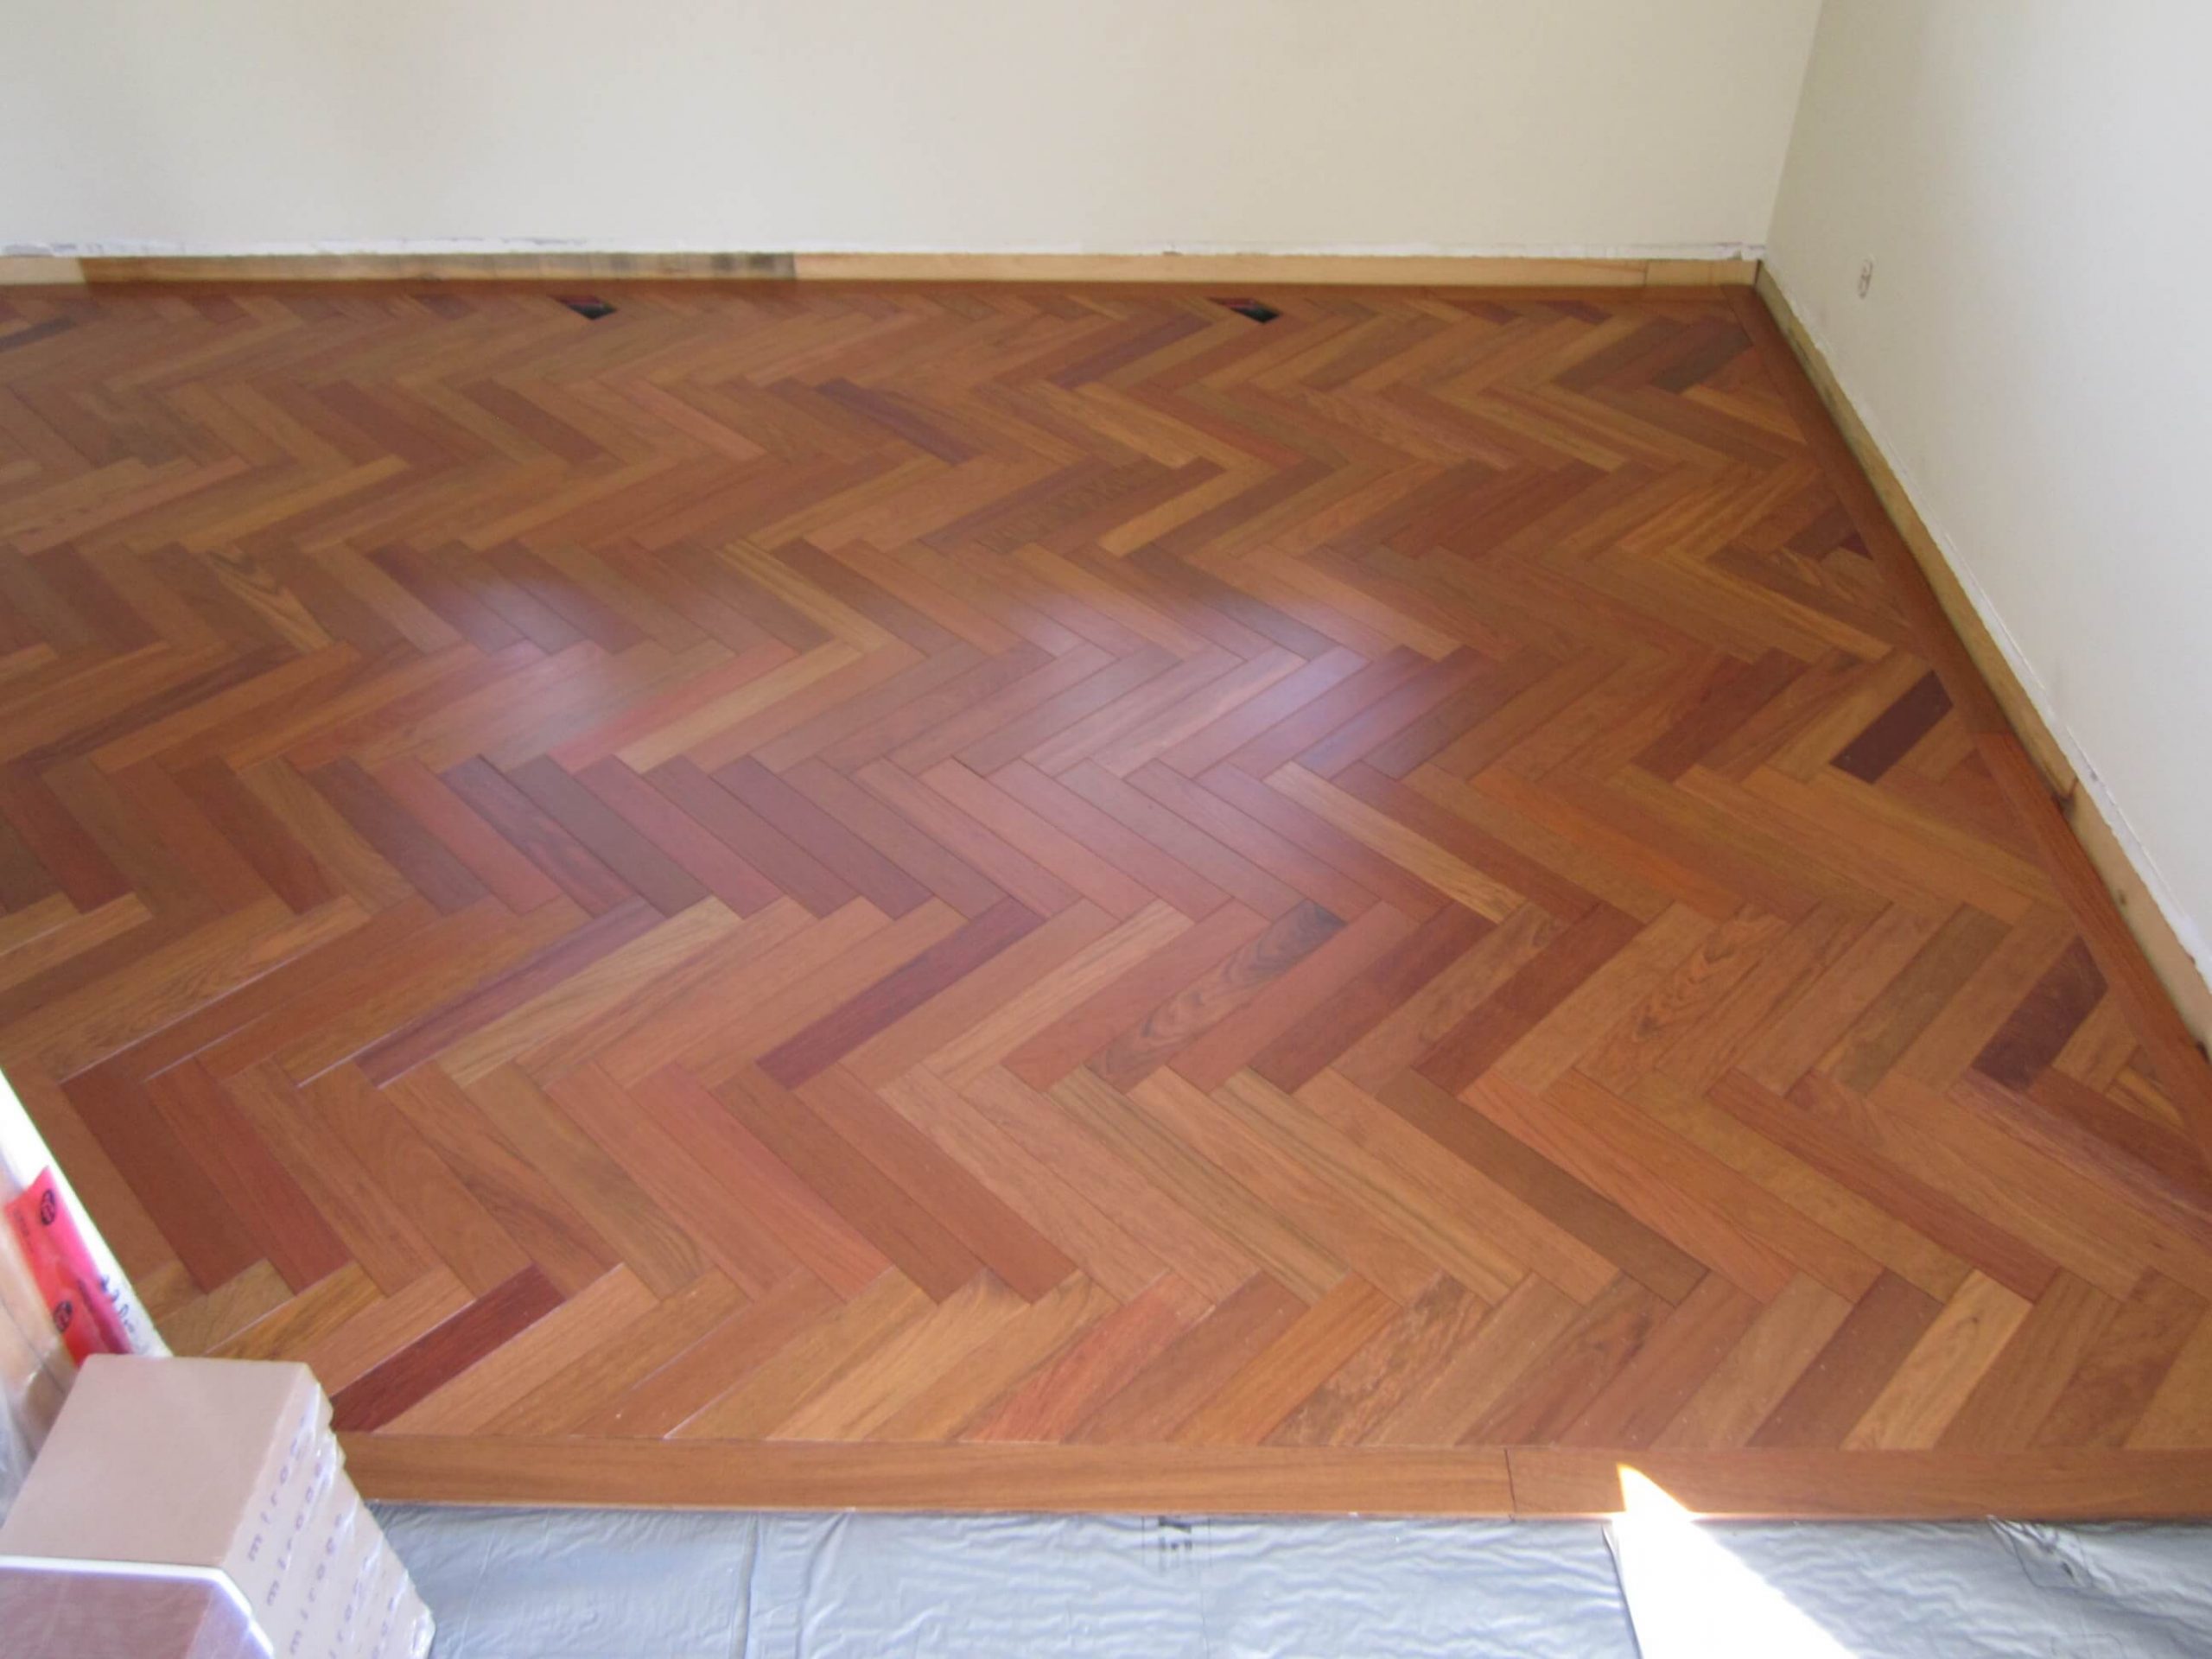
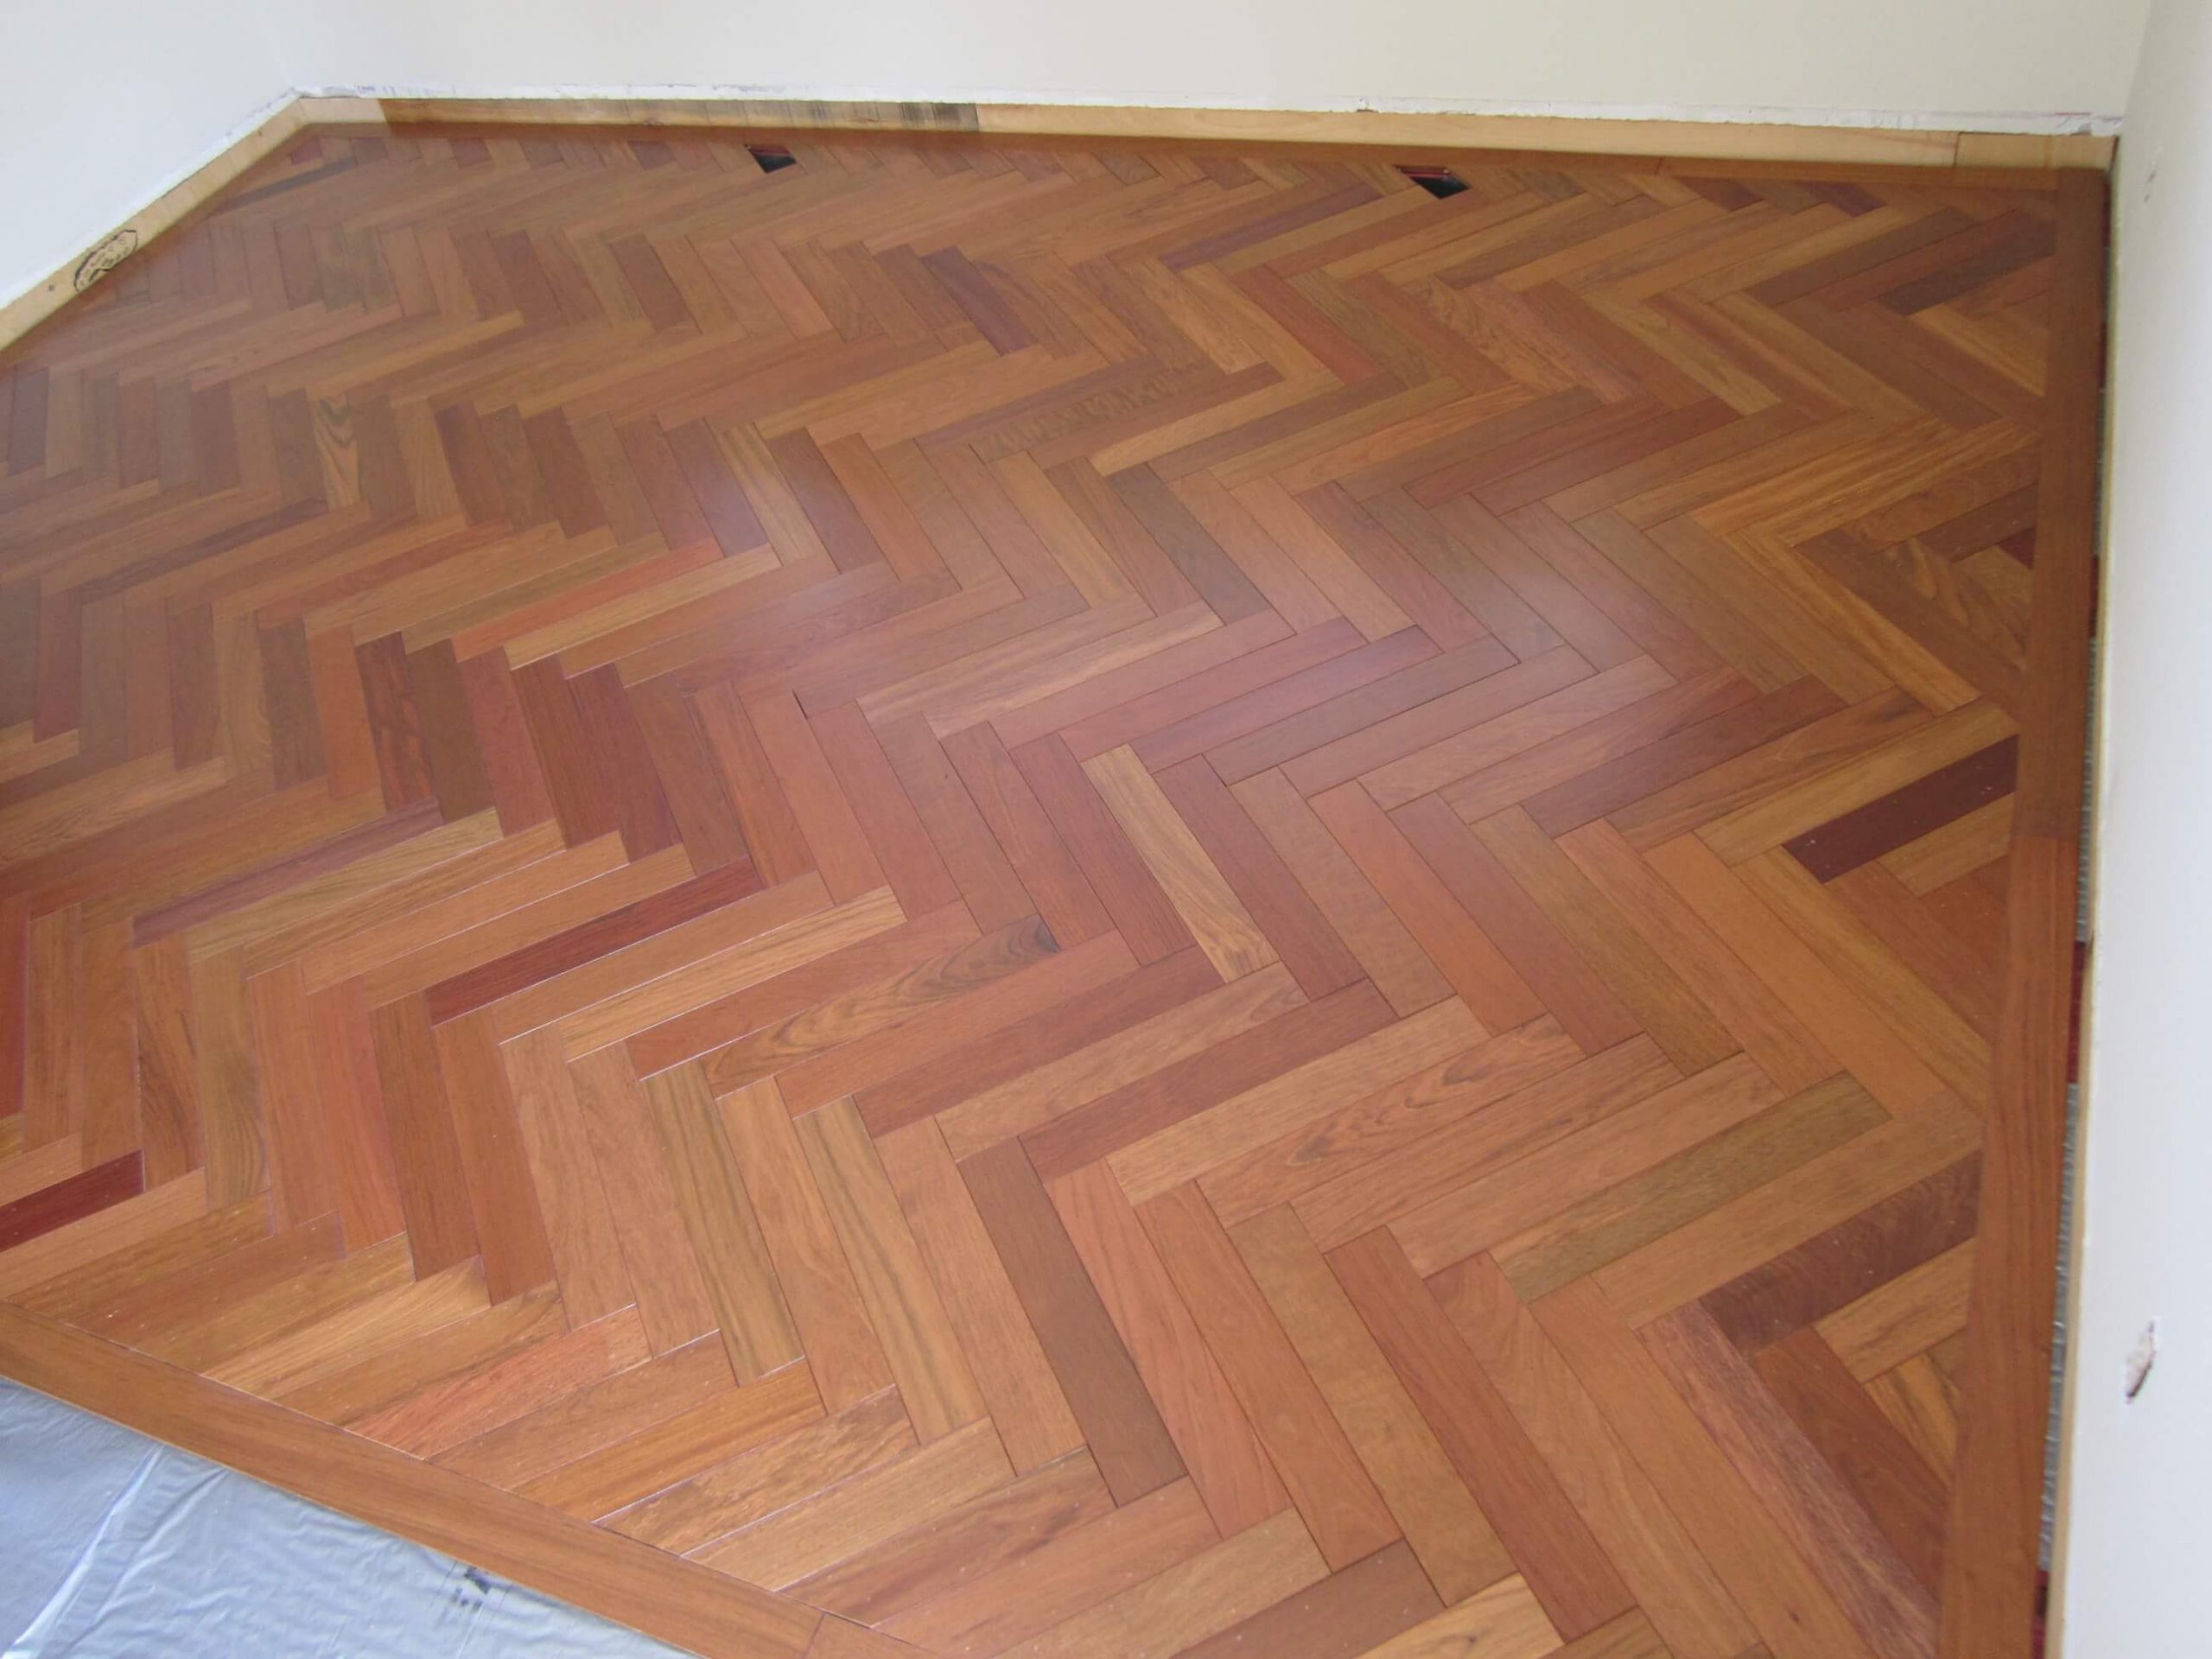
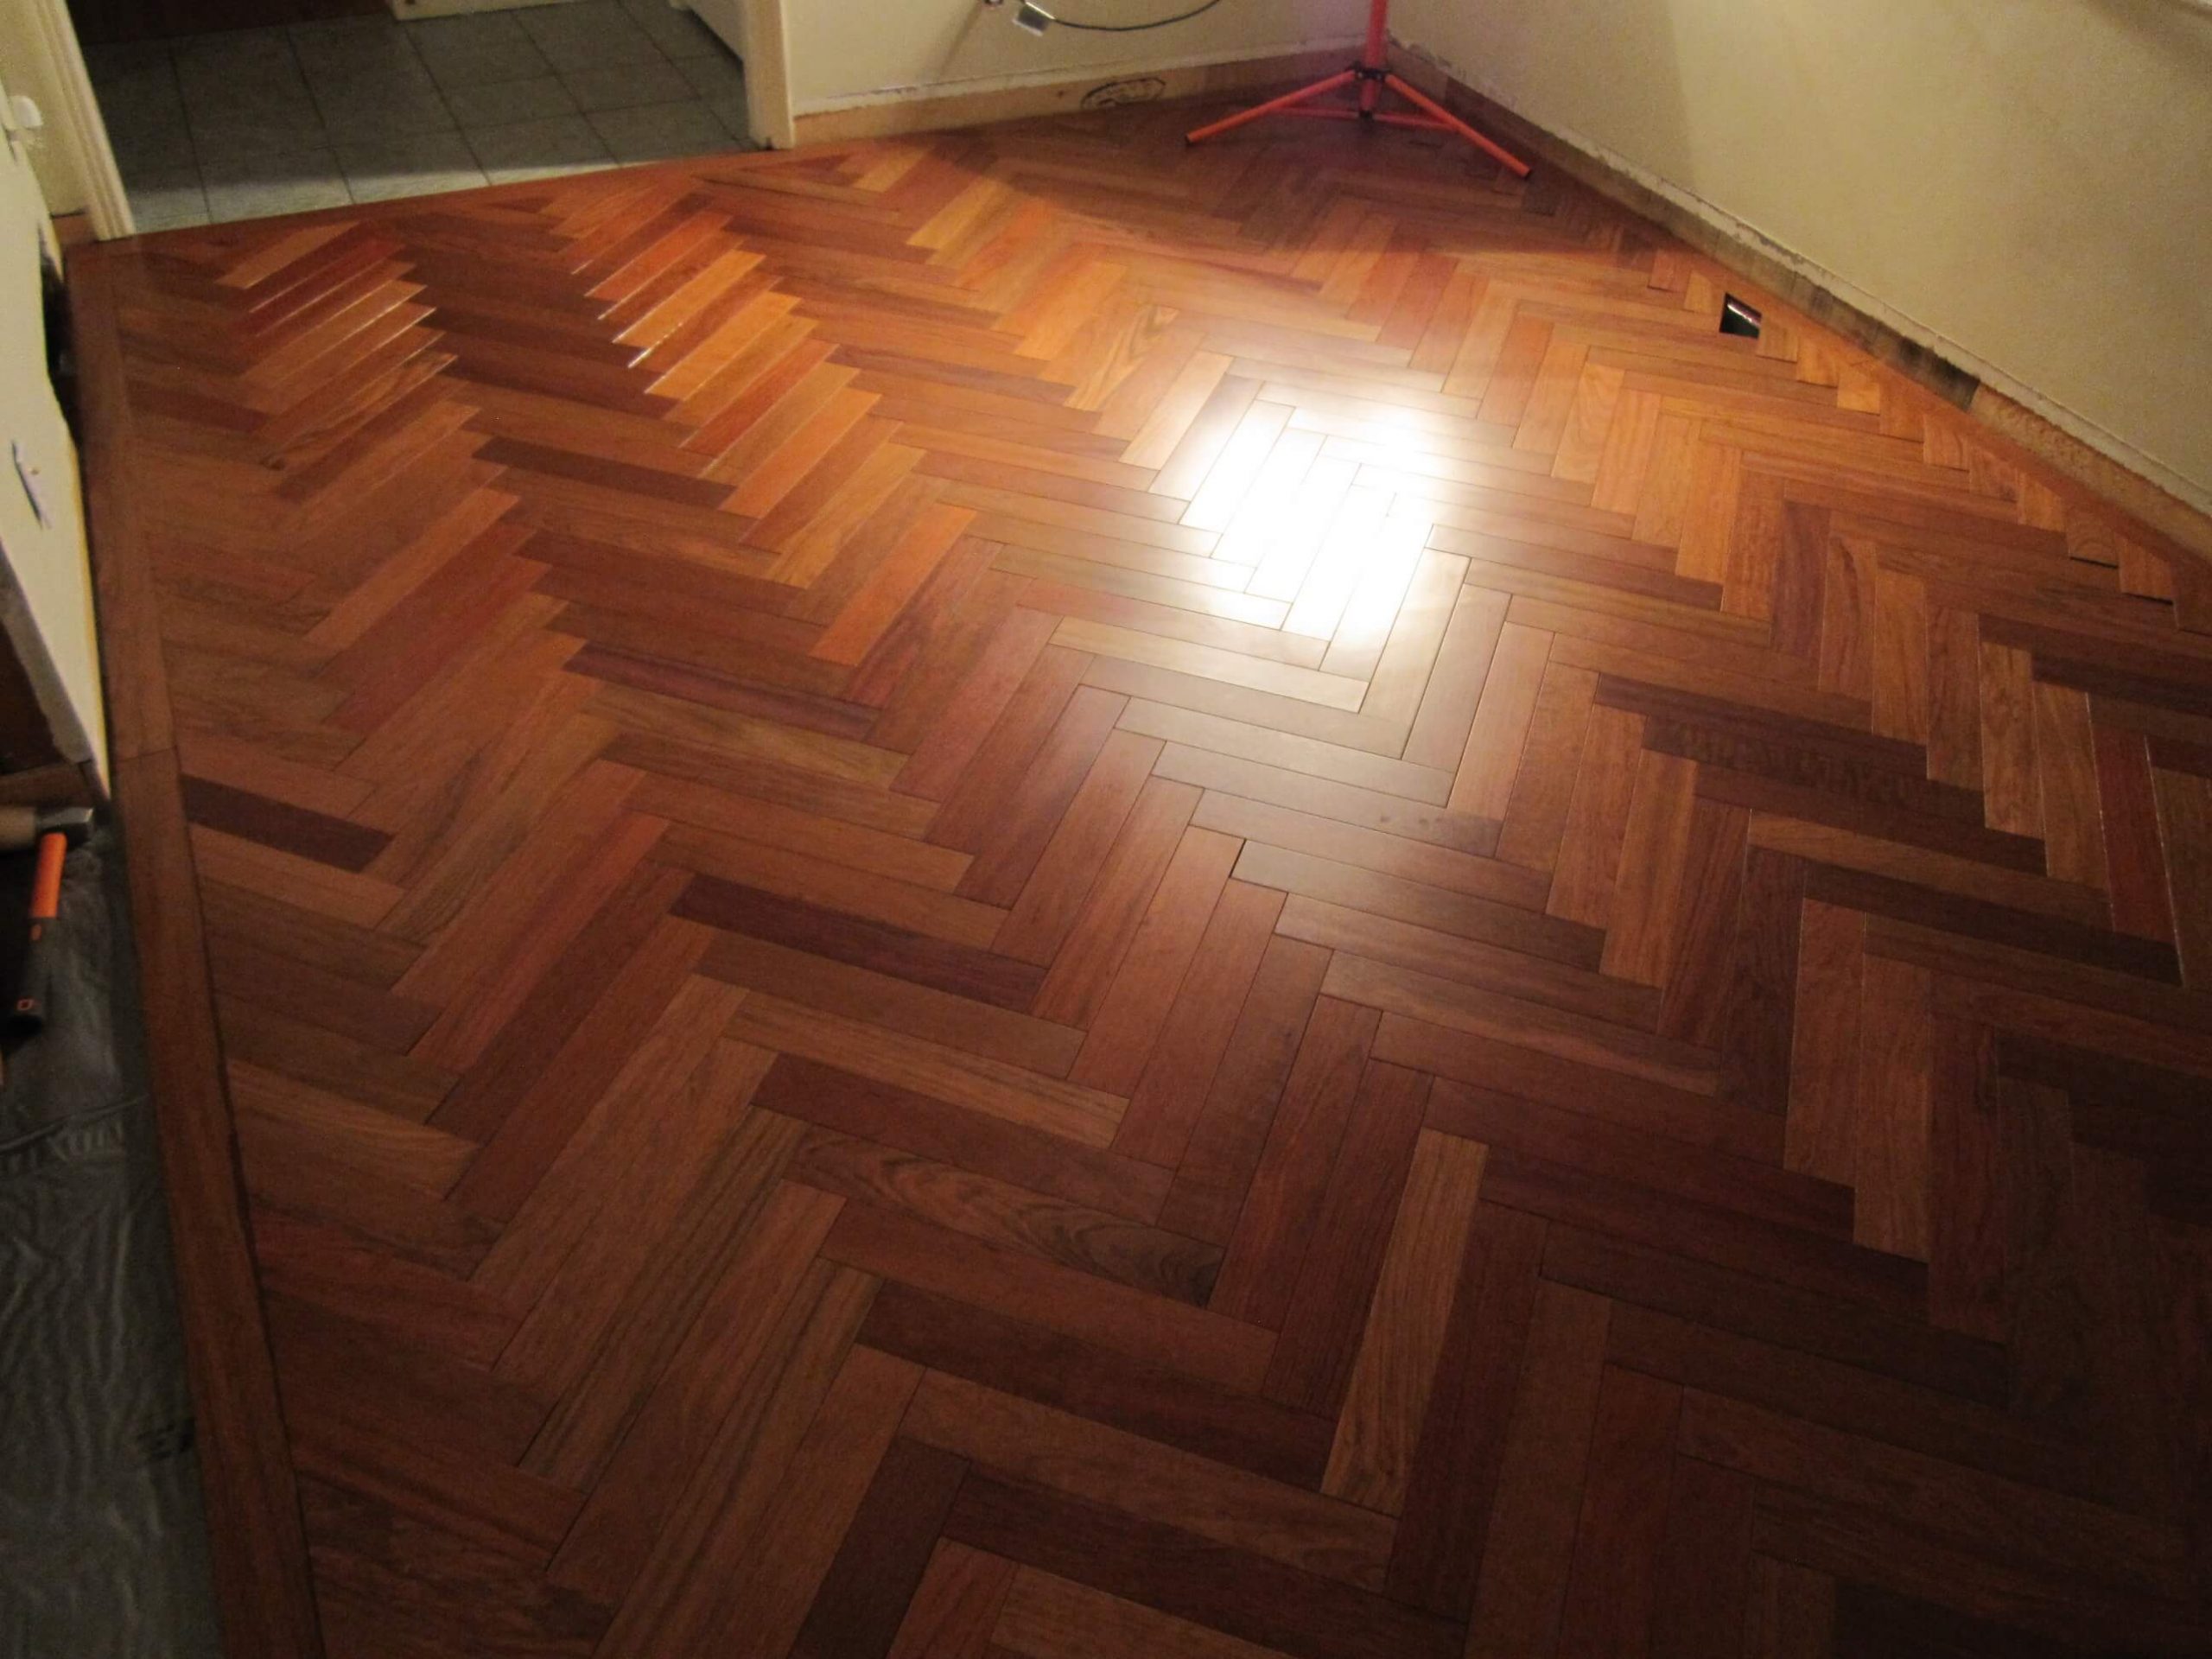
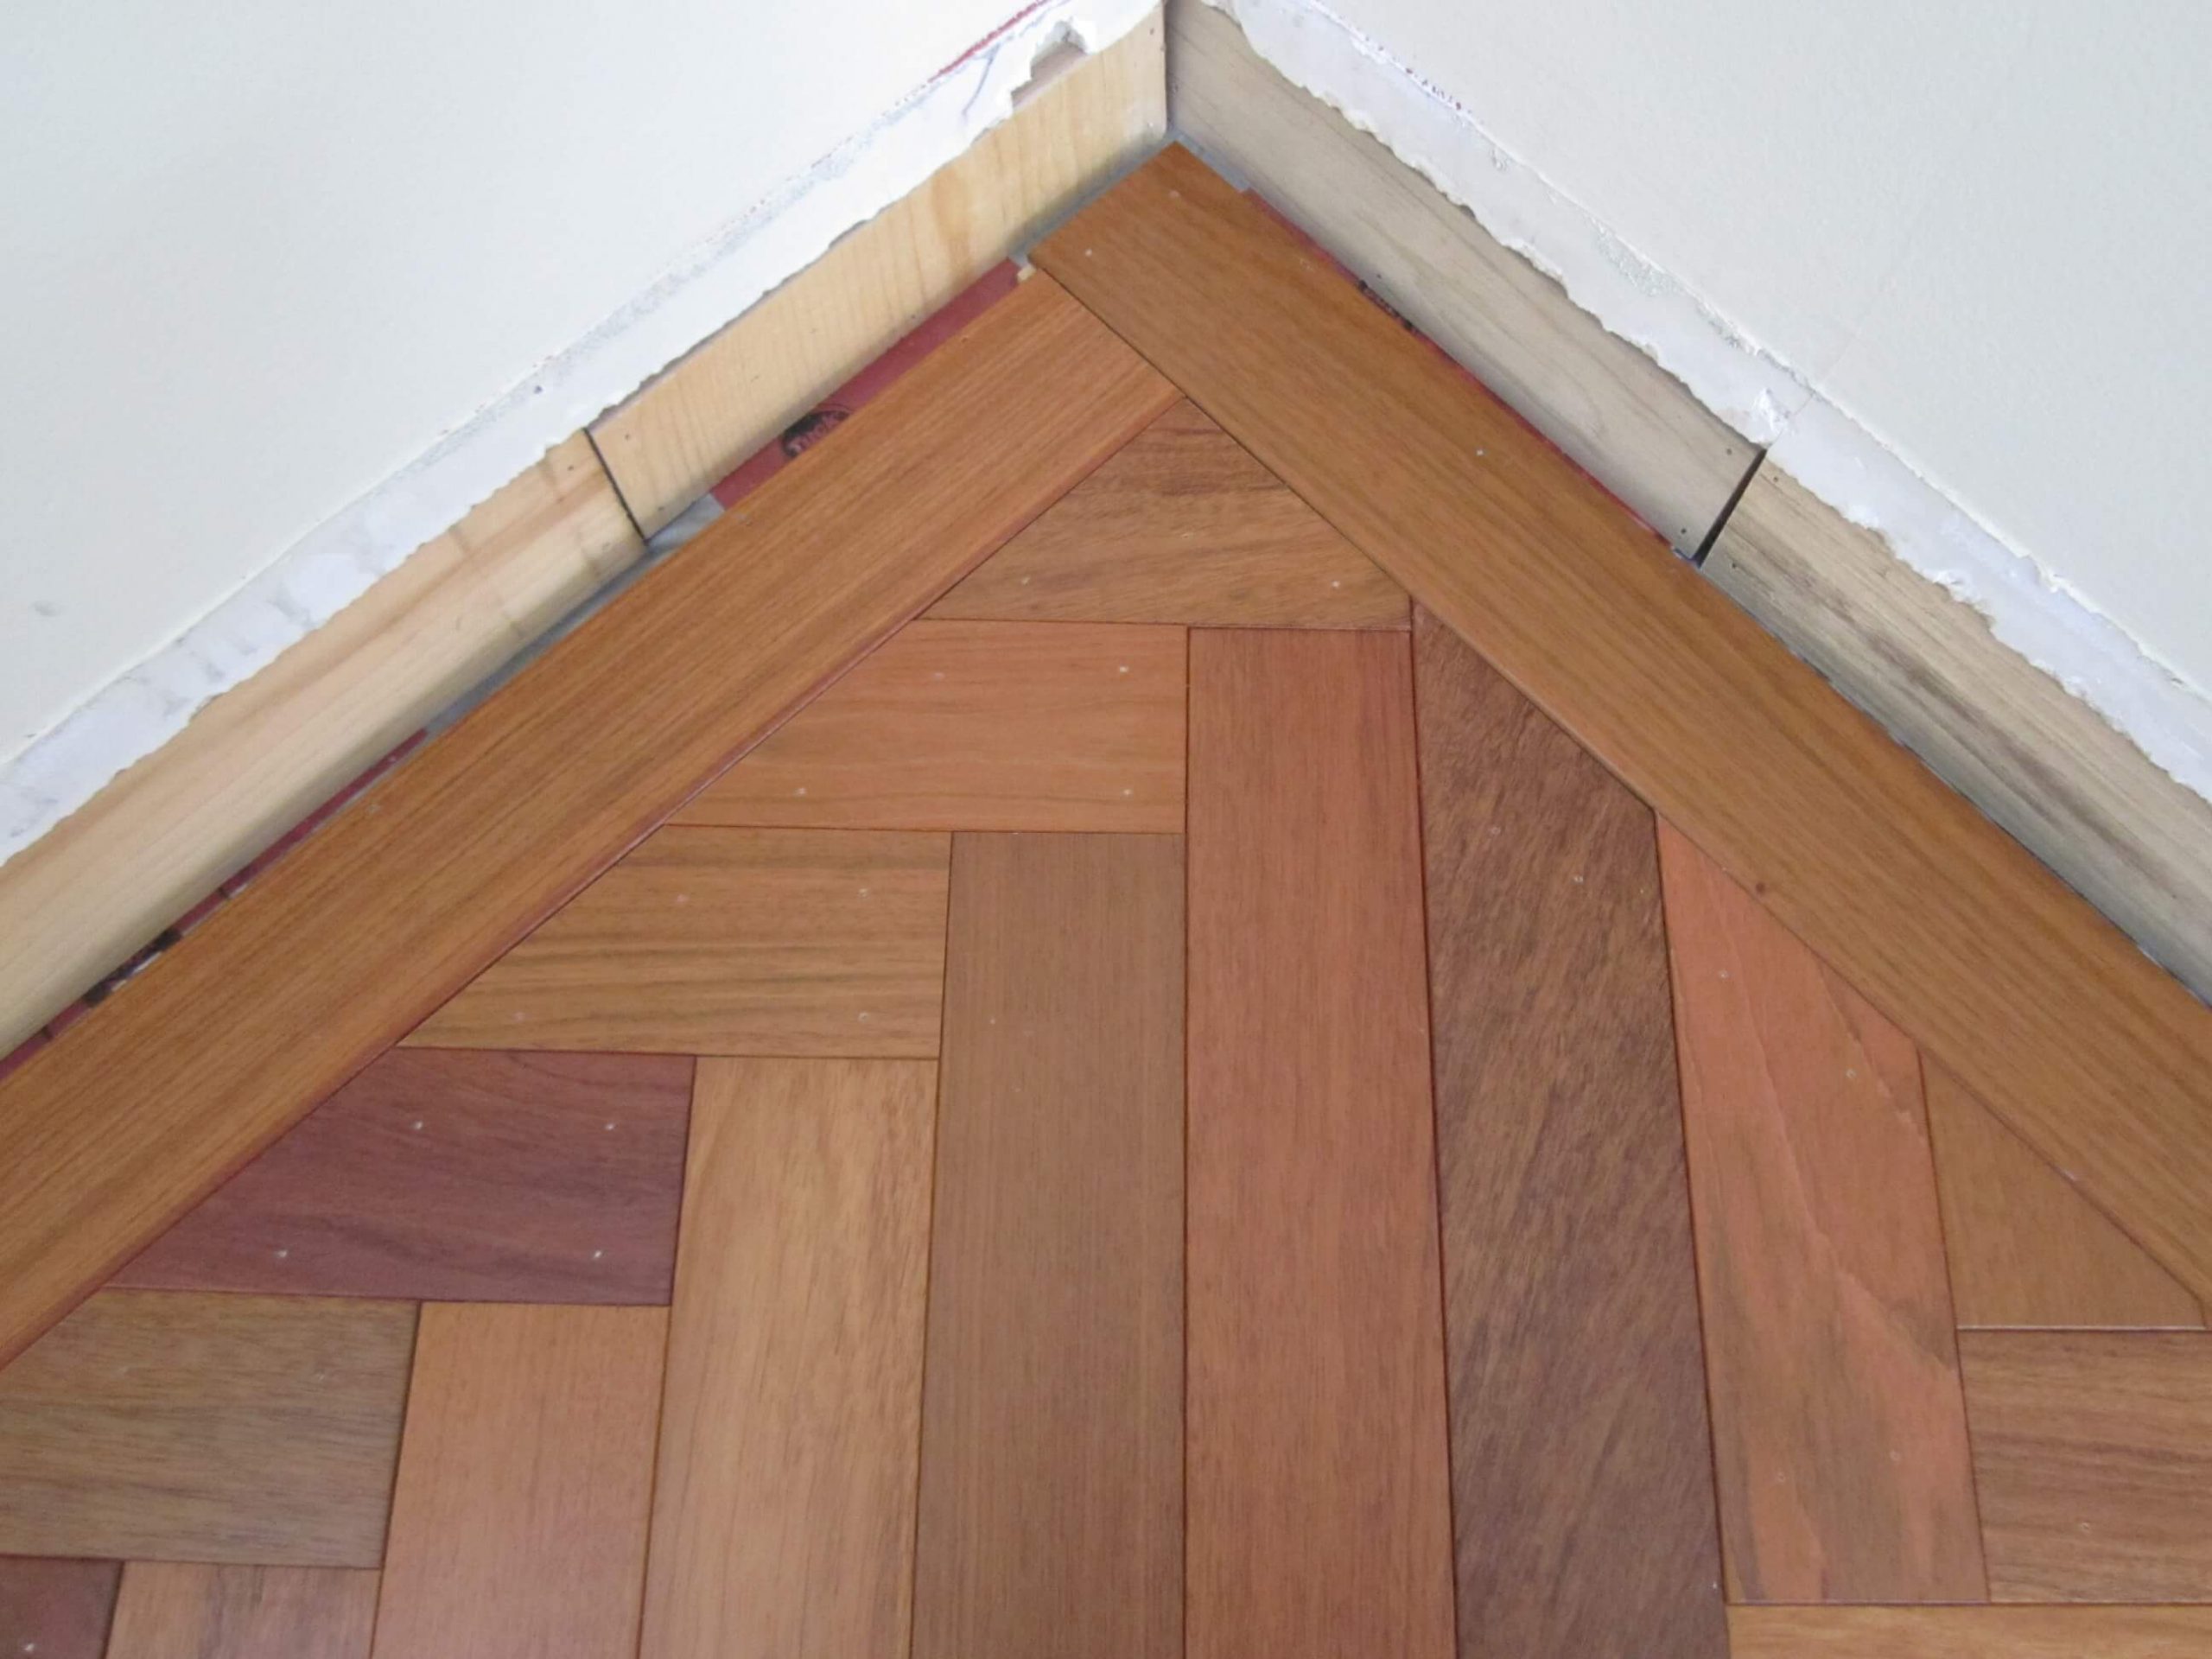
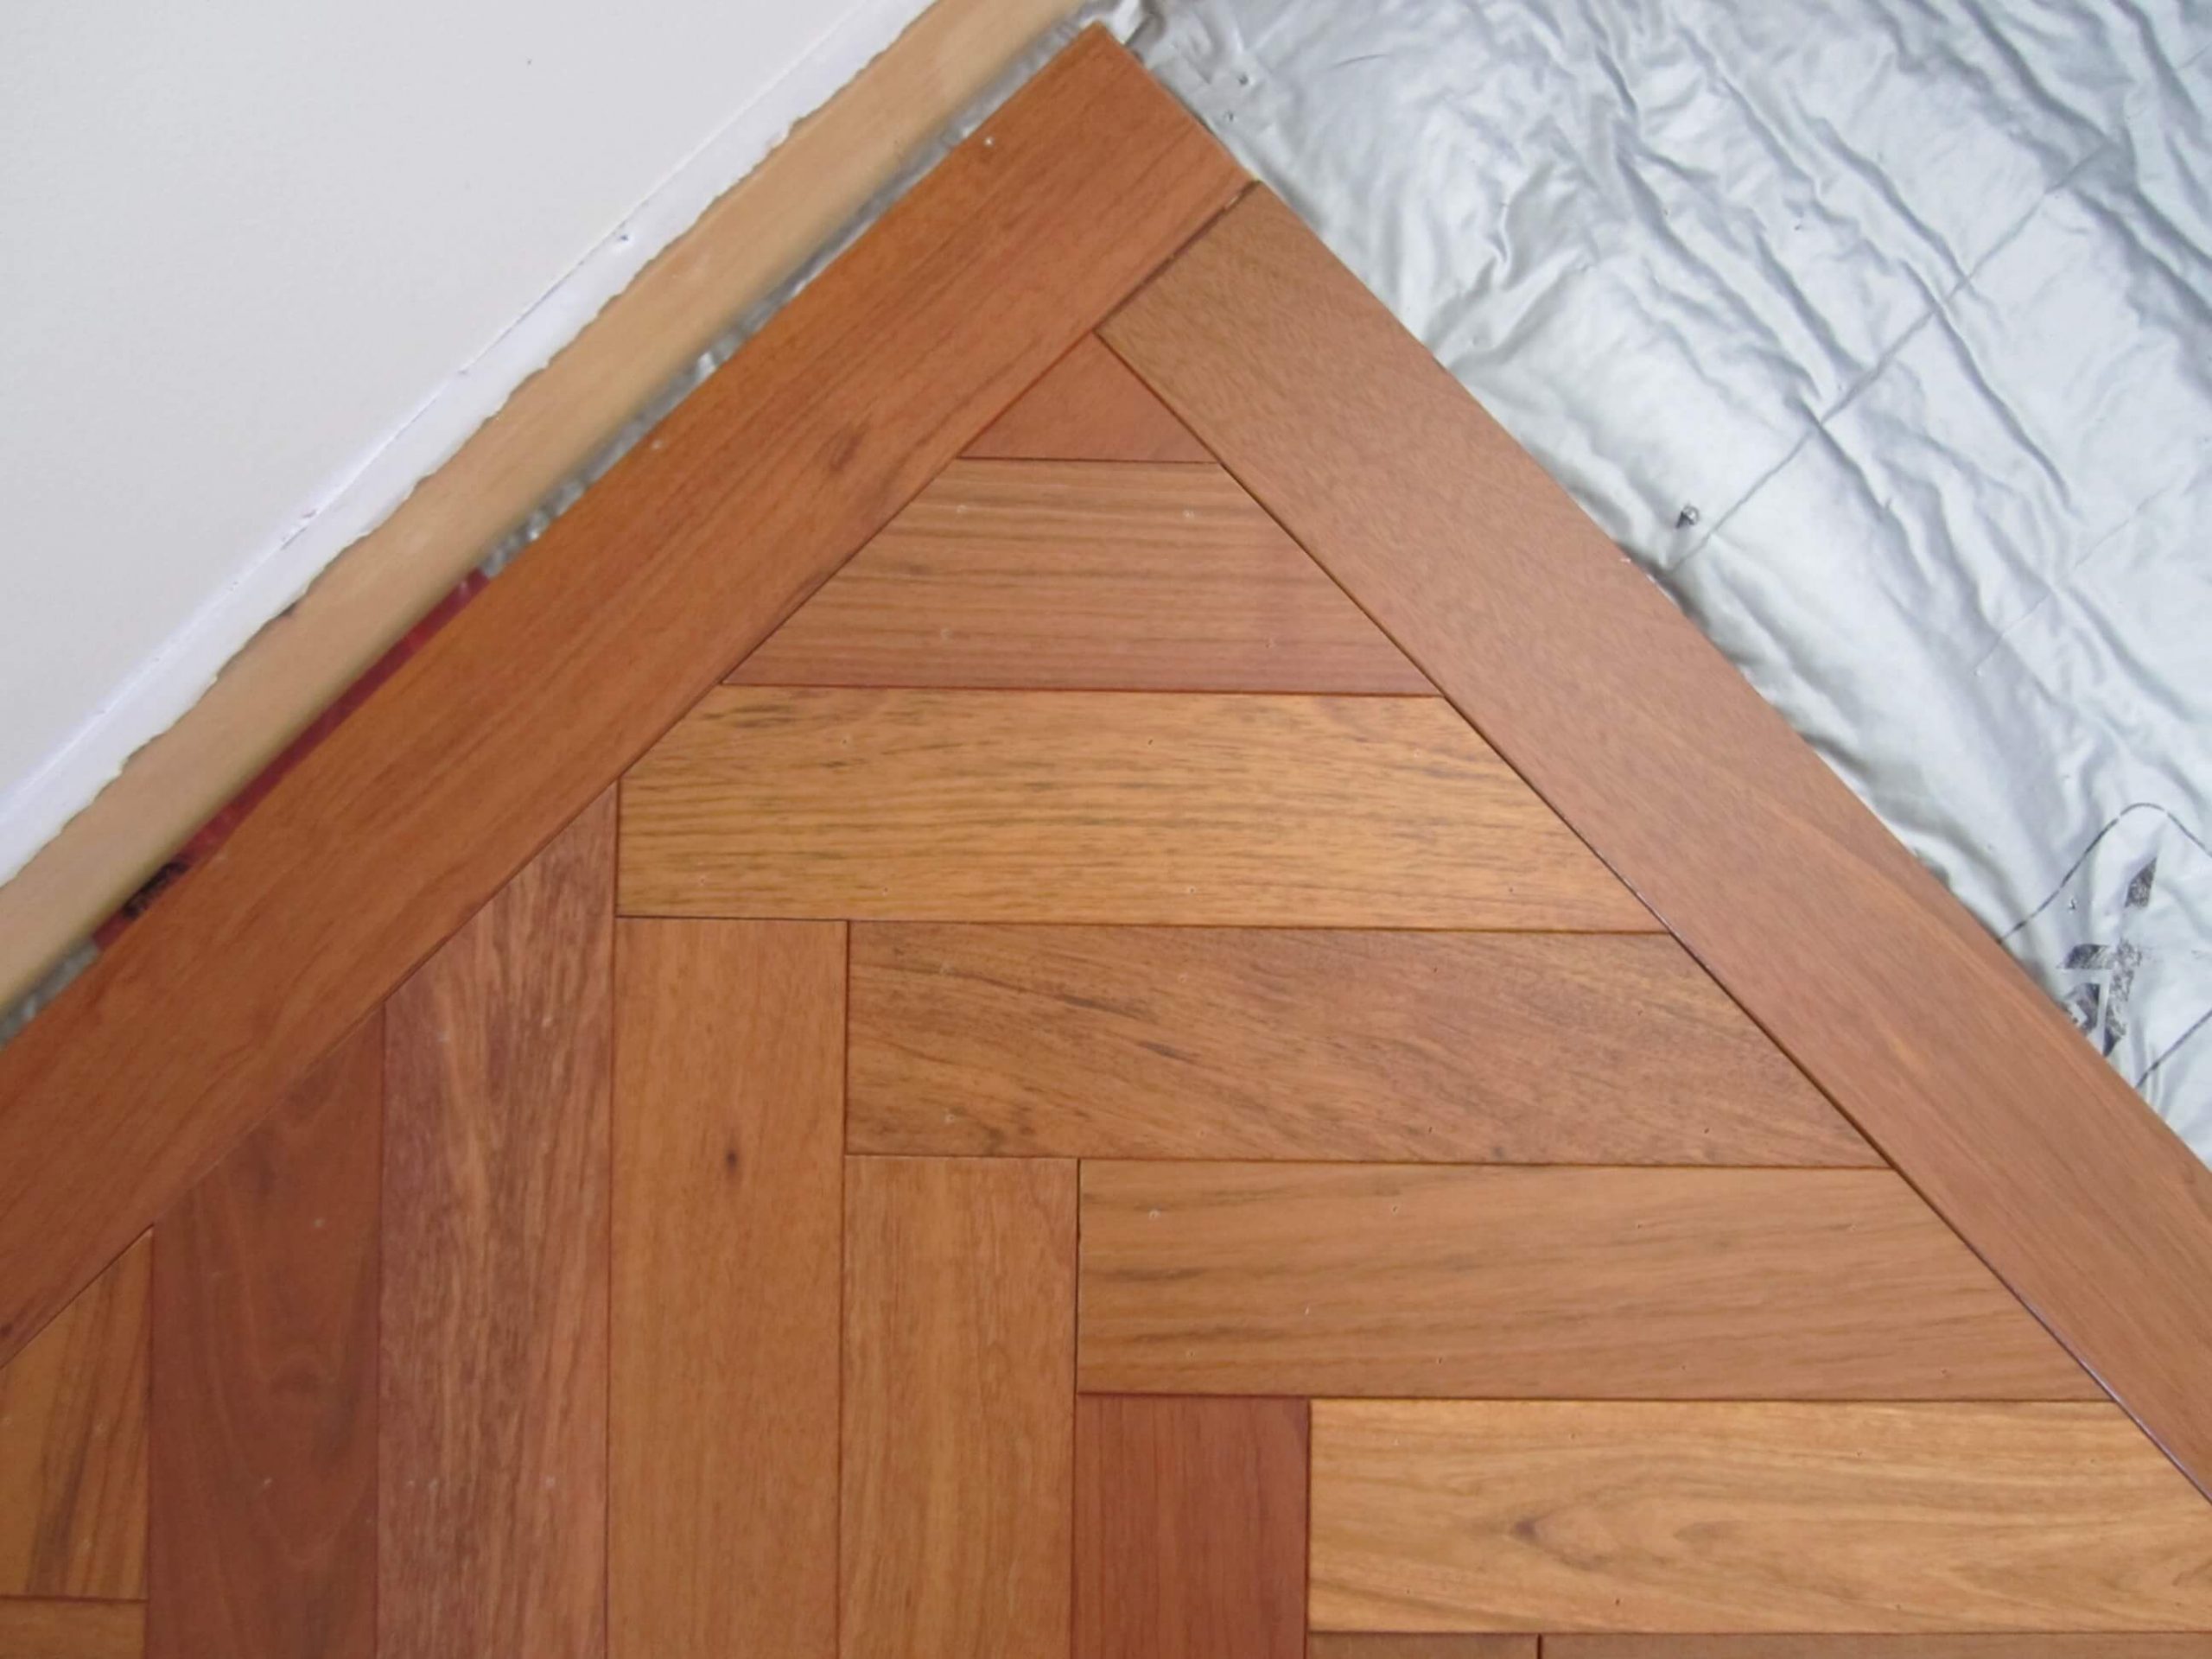
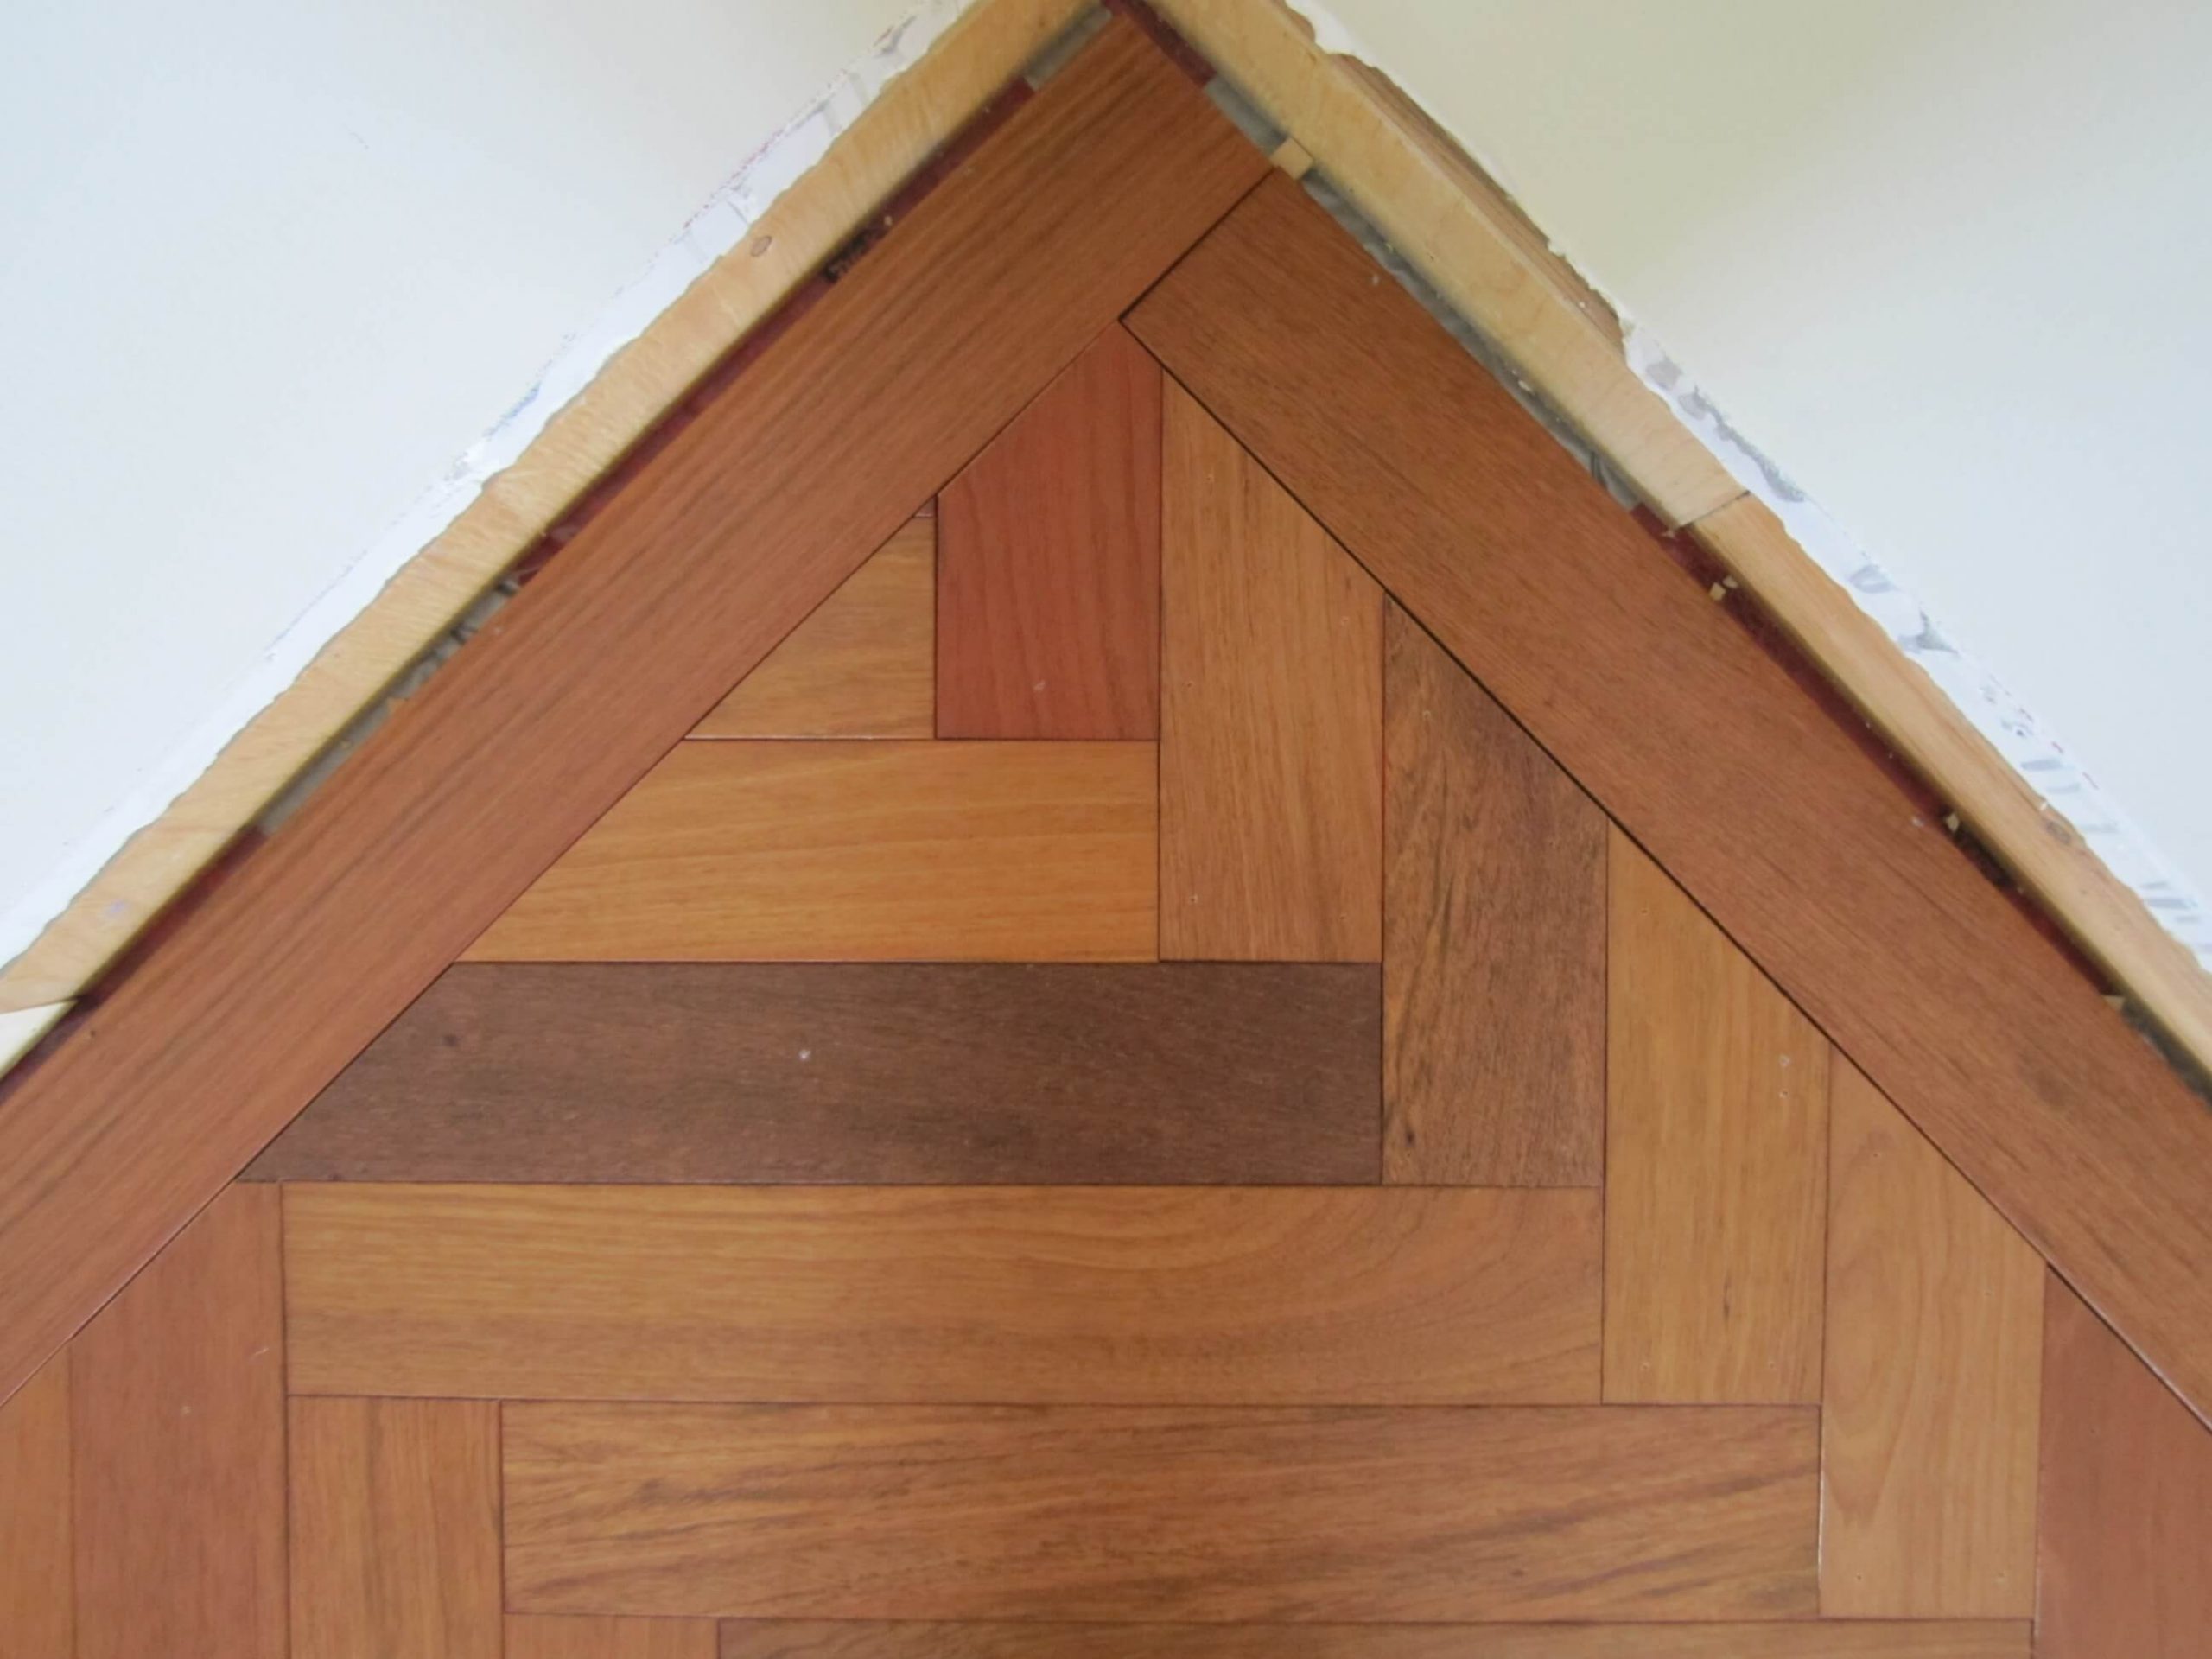
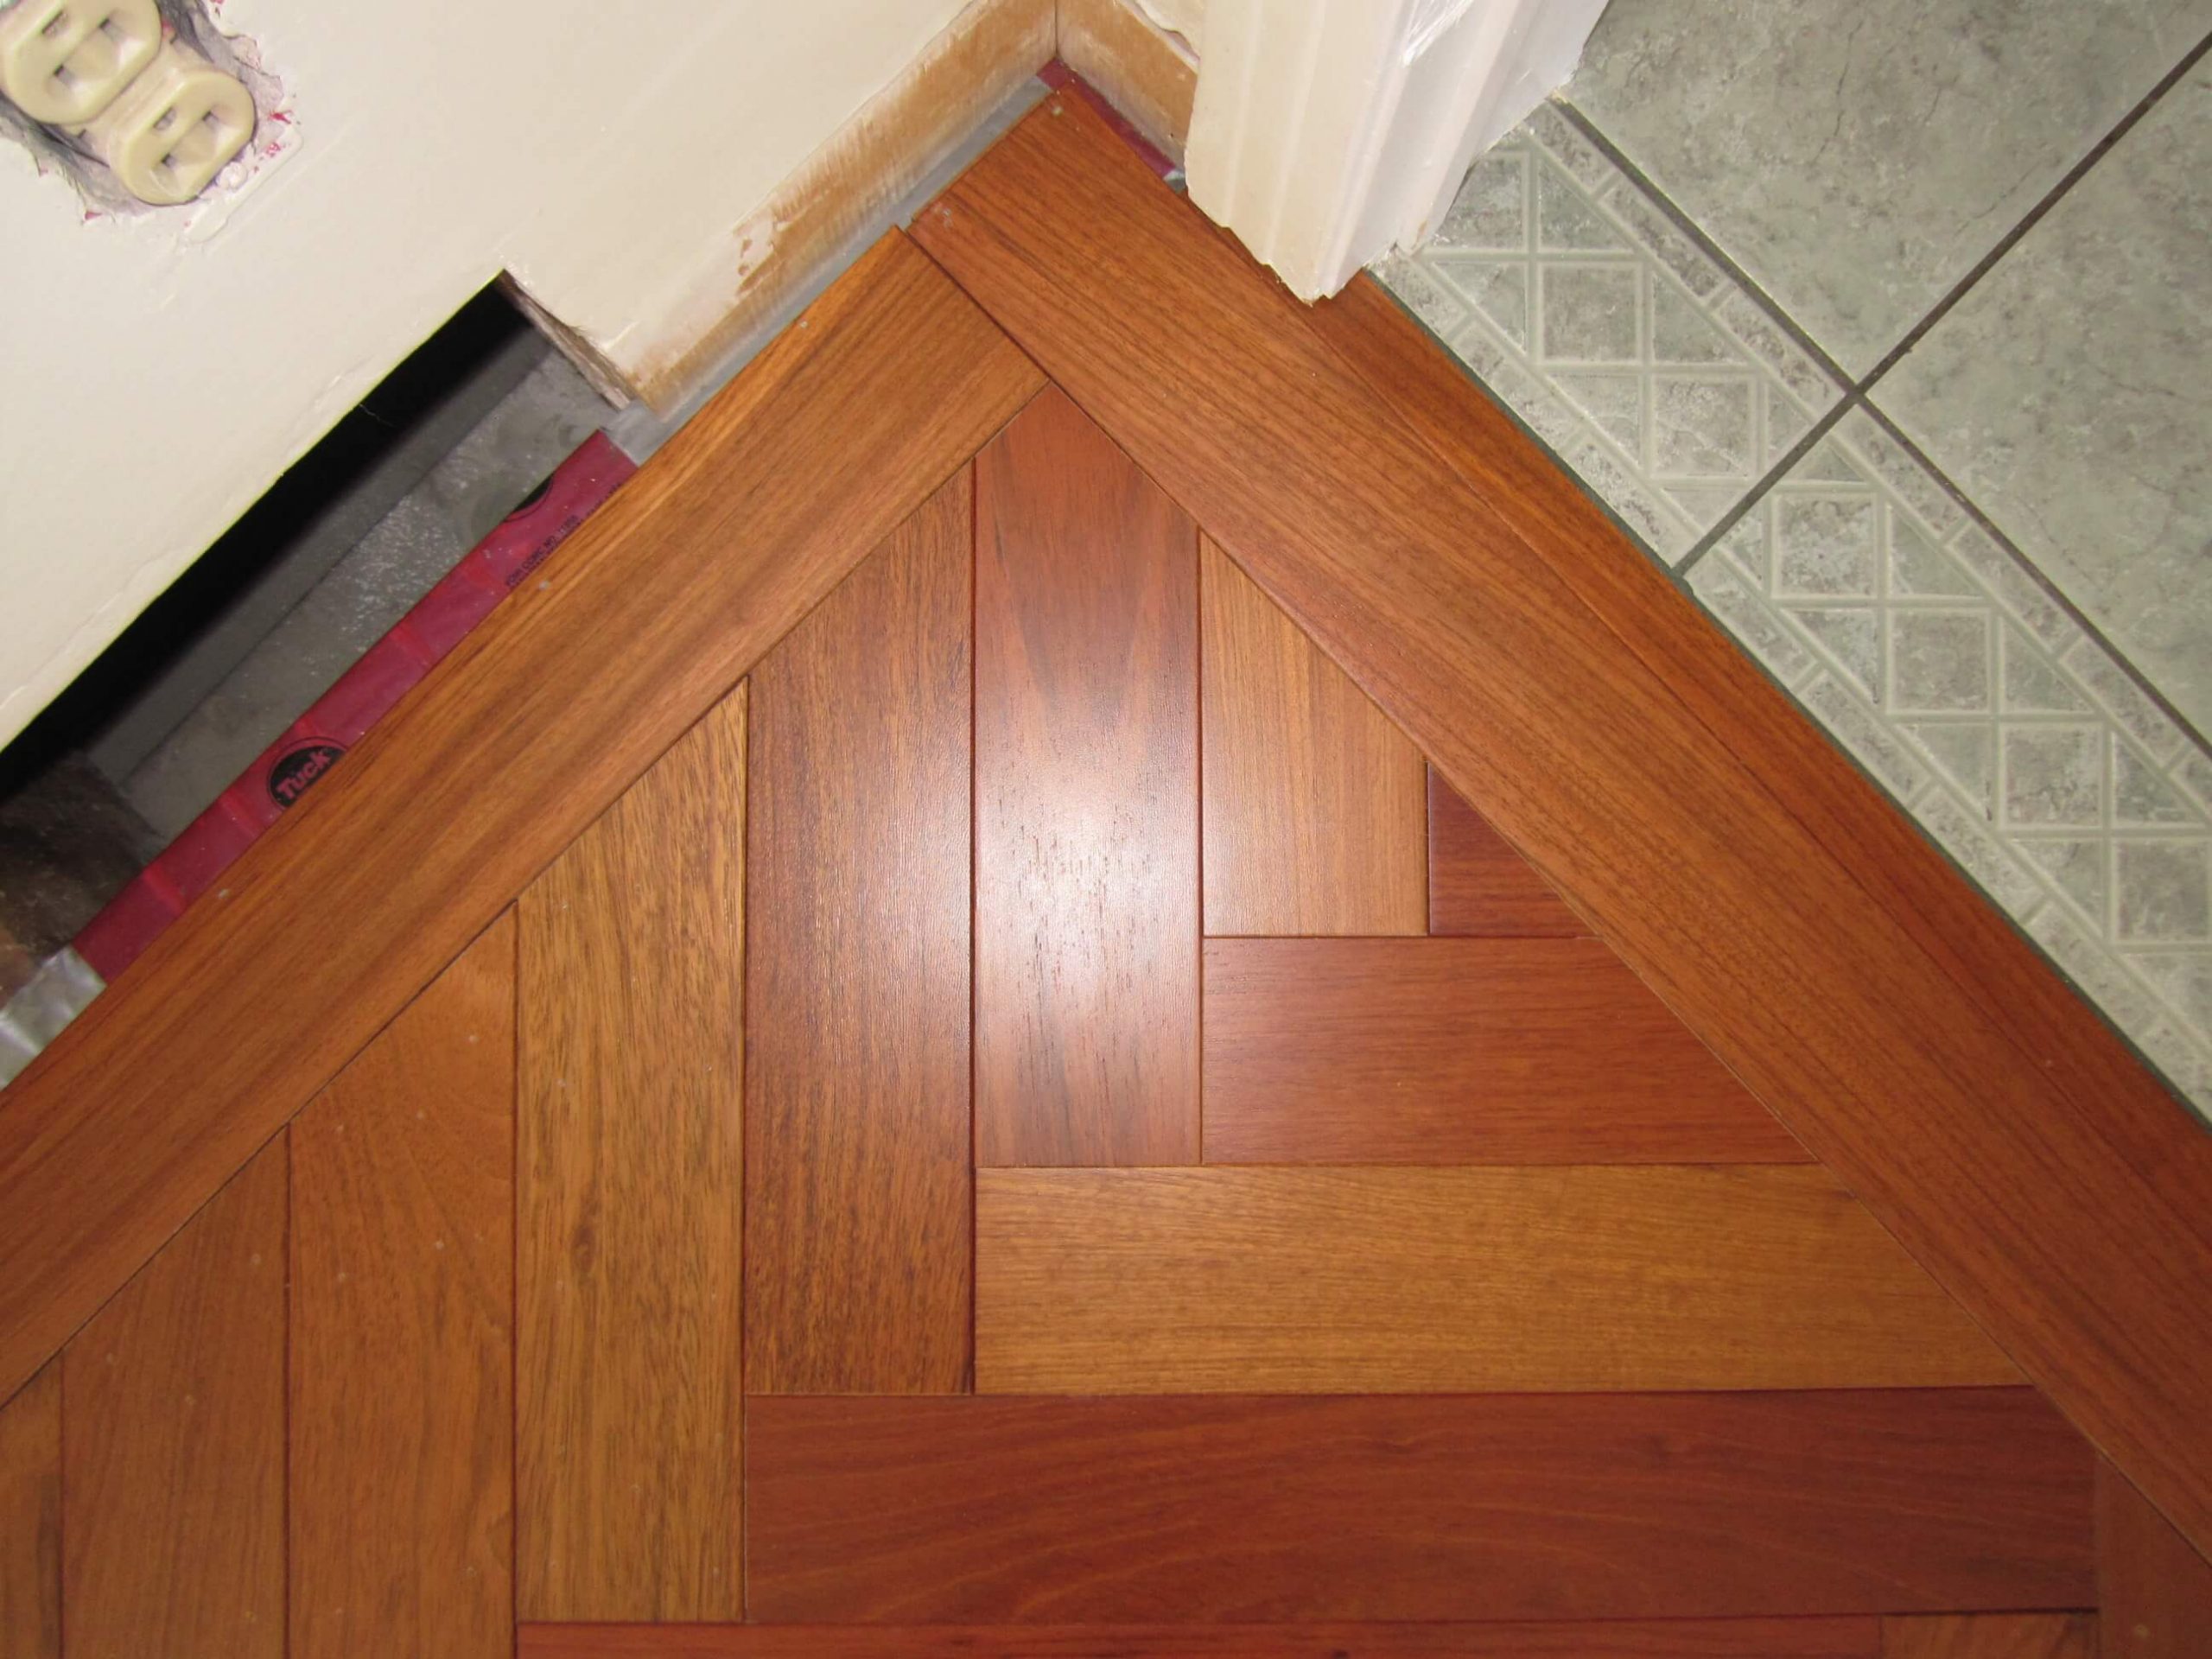
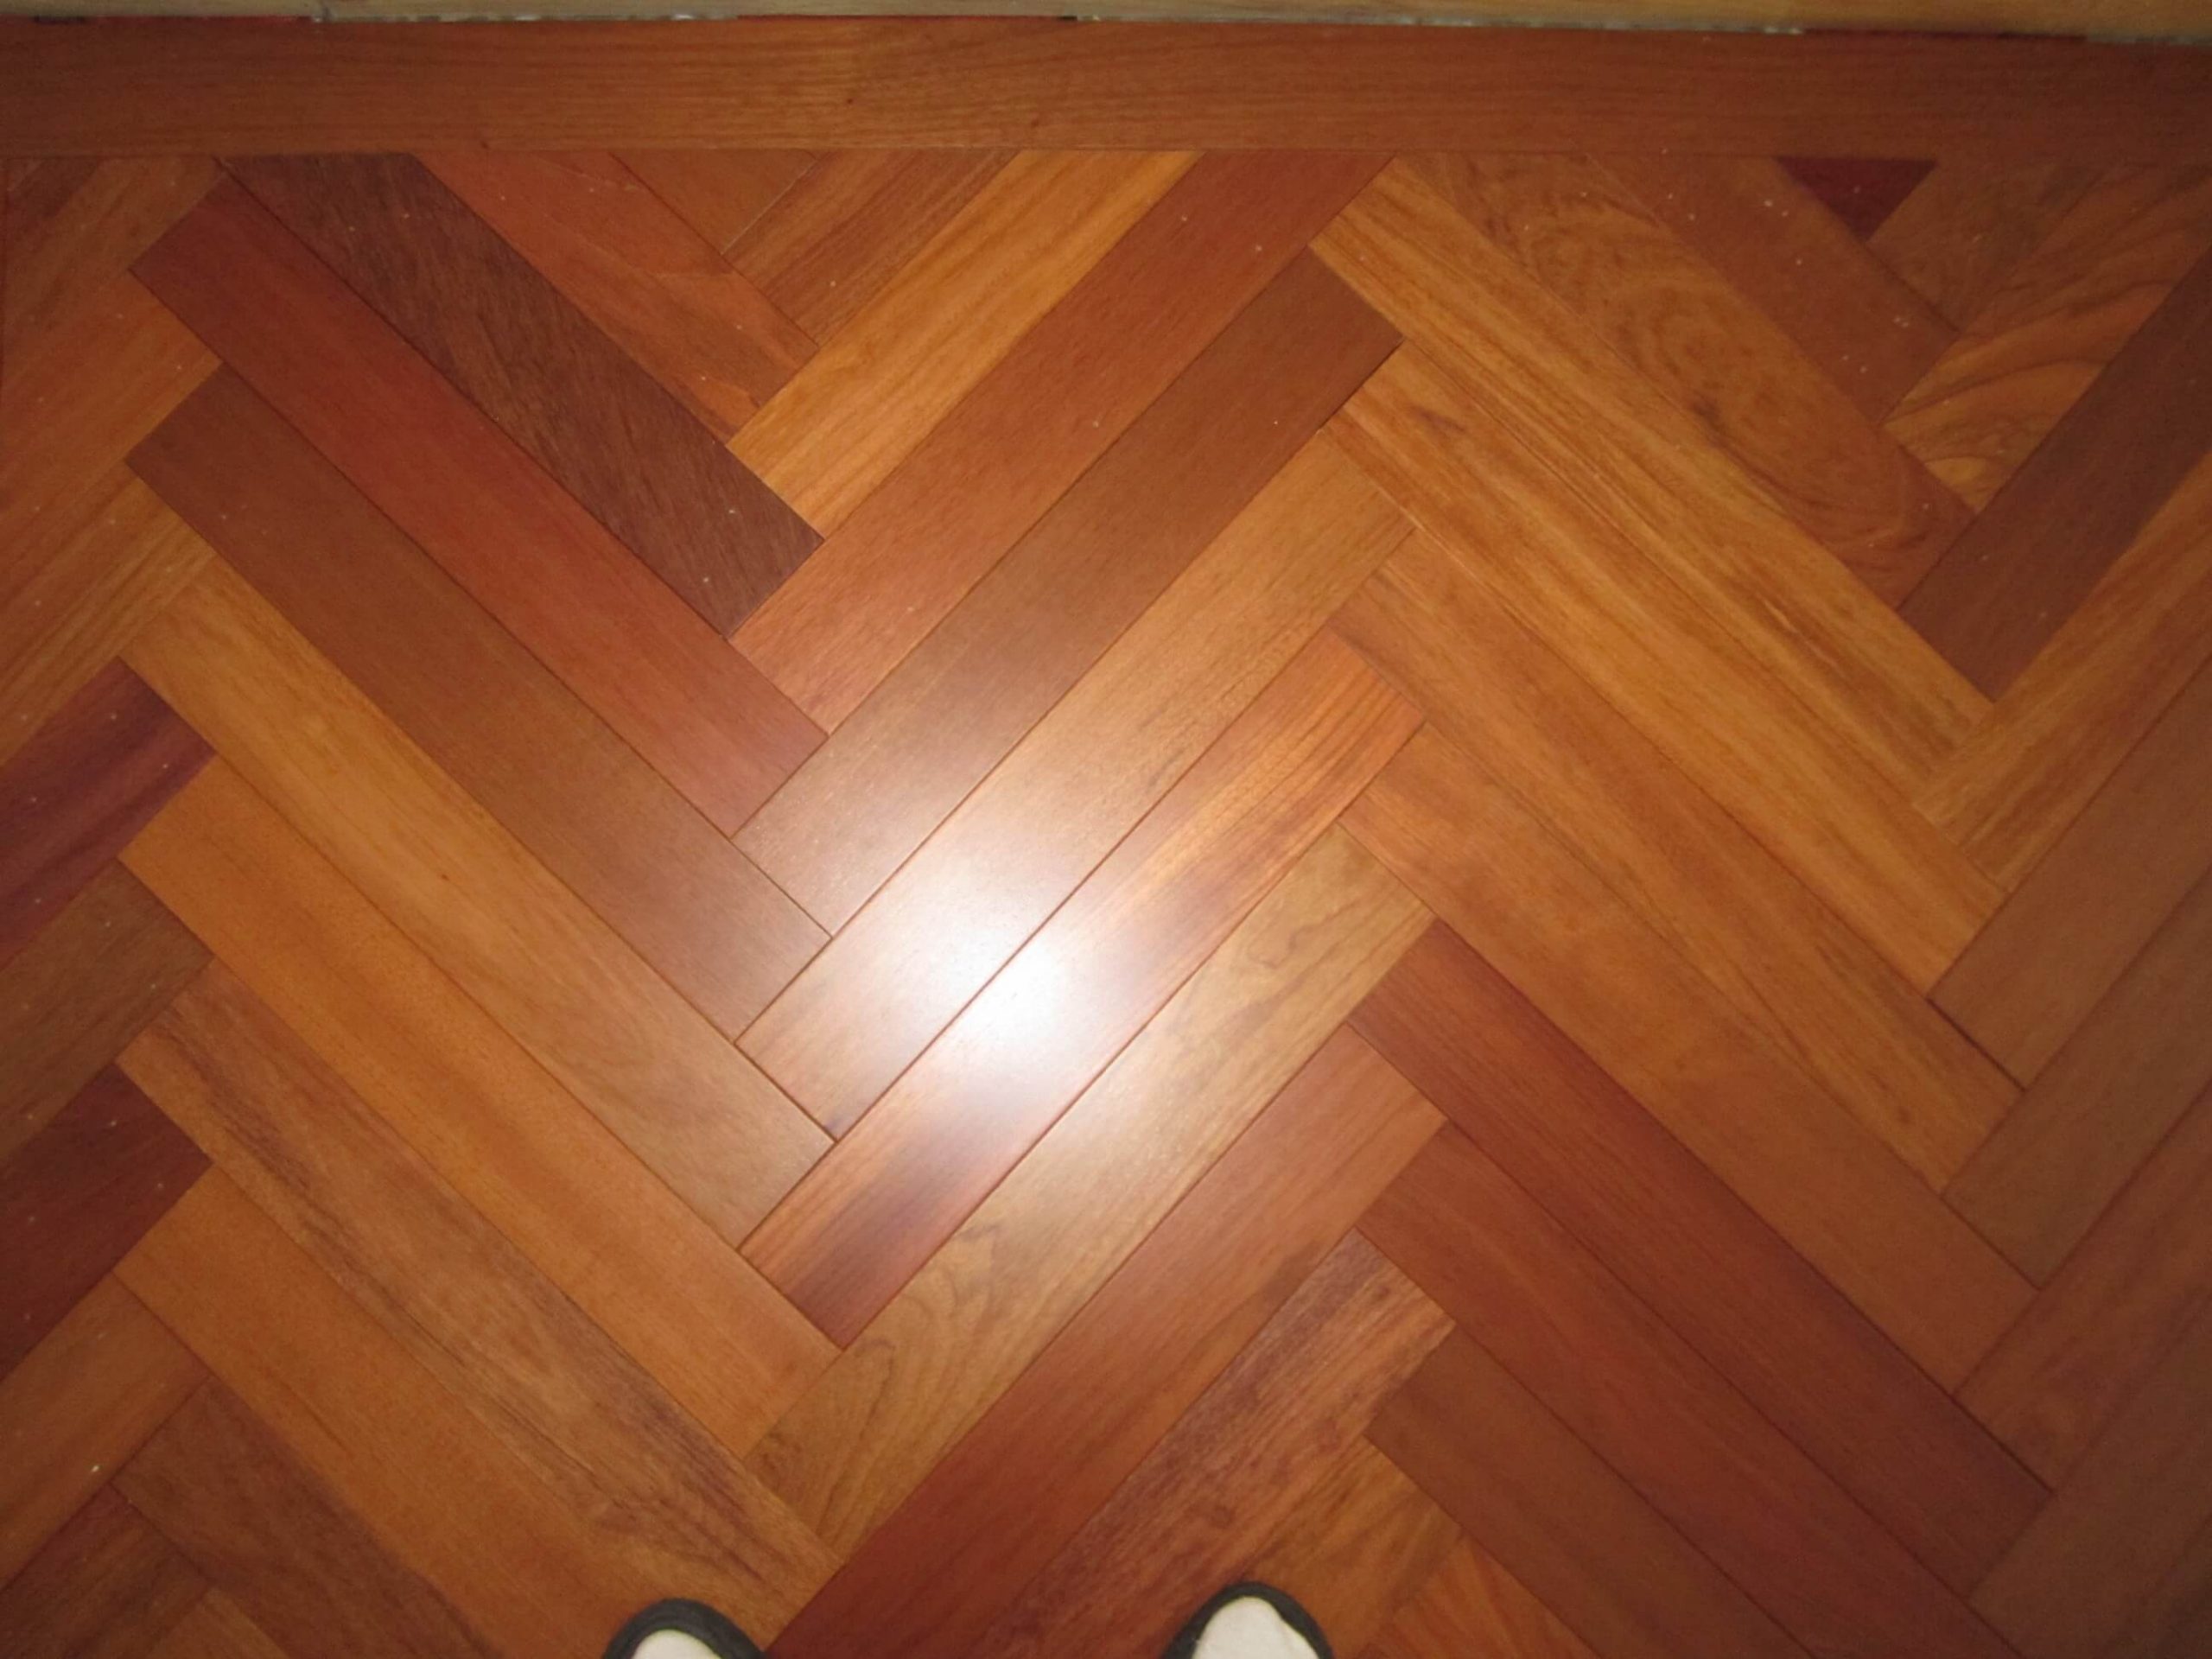
I finally choose the herringbone pattern of 19.5″ (about 49.5 cm) across the width of the room.
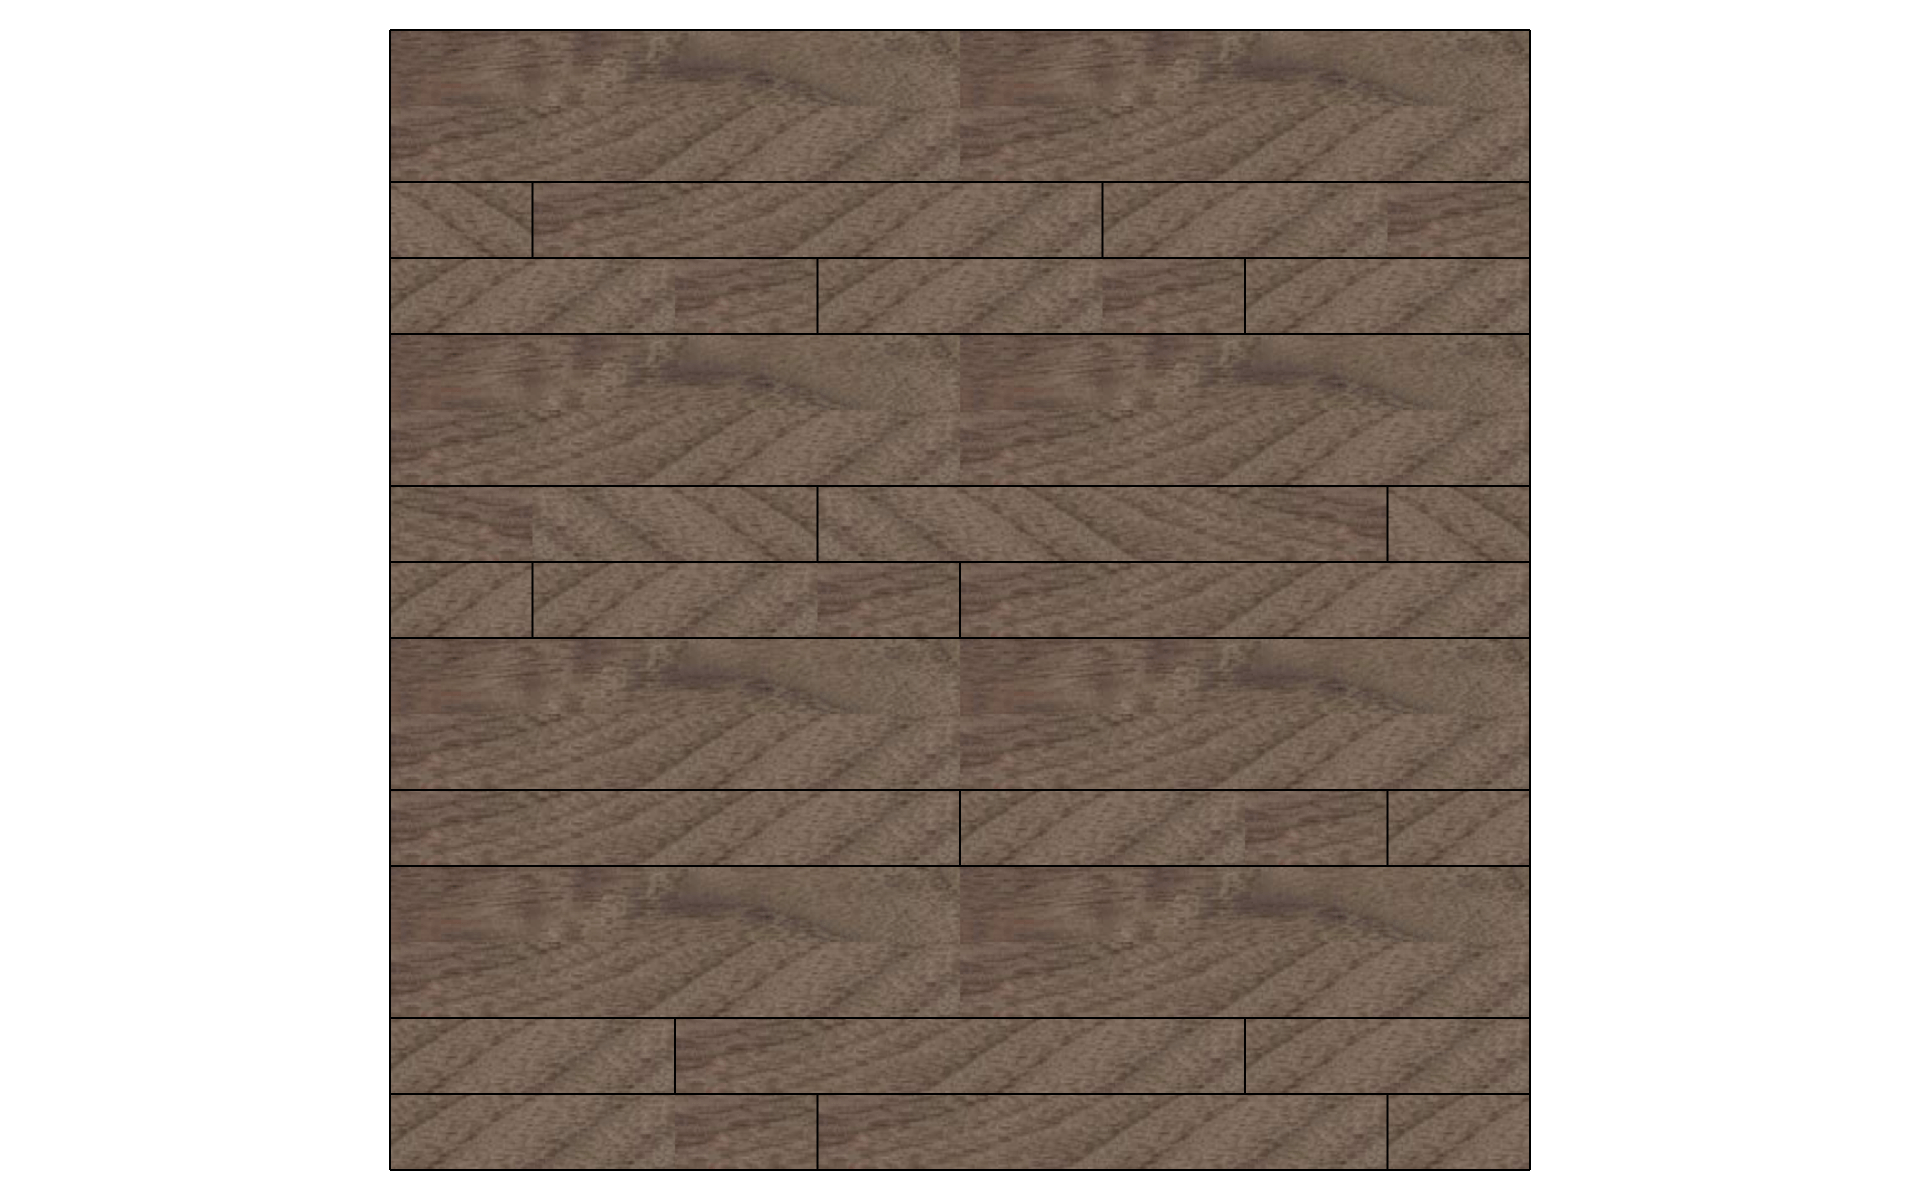
Next, I wanted to frame this one with a 1 foot (about 30.5 cm) wide brim. It will remain for me to determine the type of pattern that will constitute this frame. Here are the different types of poses I had considered.

3.3 Choice
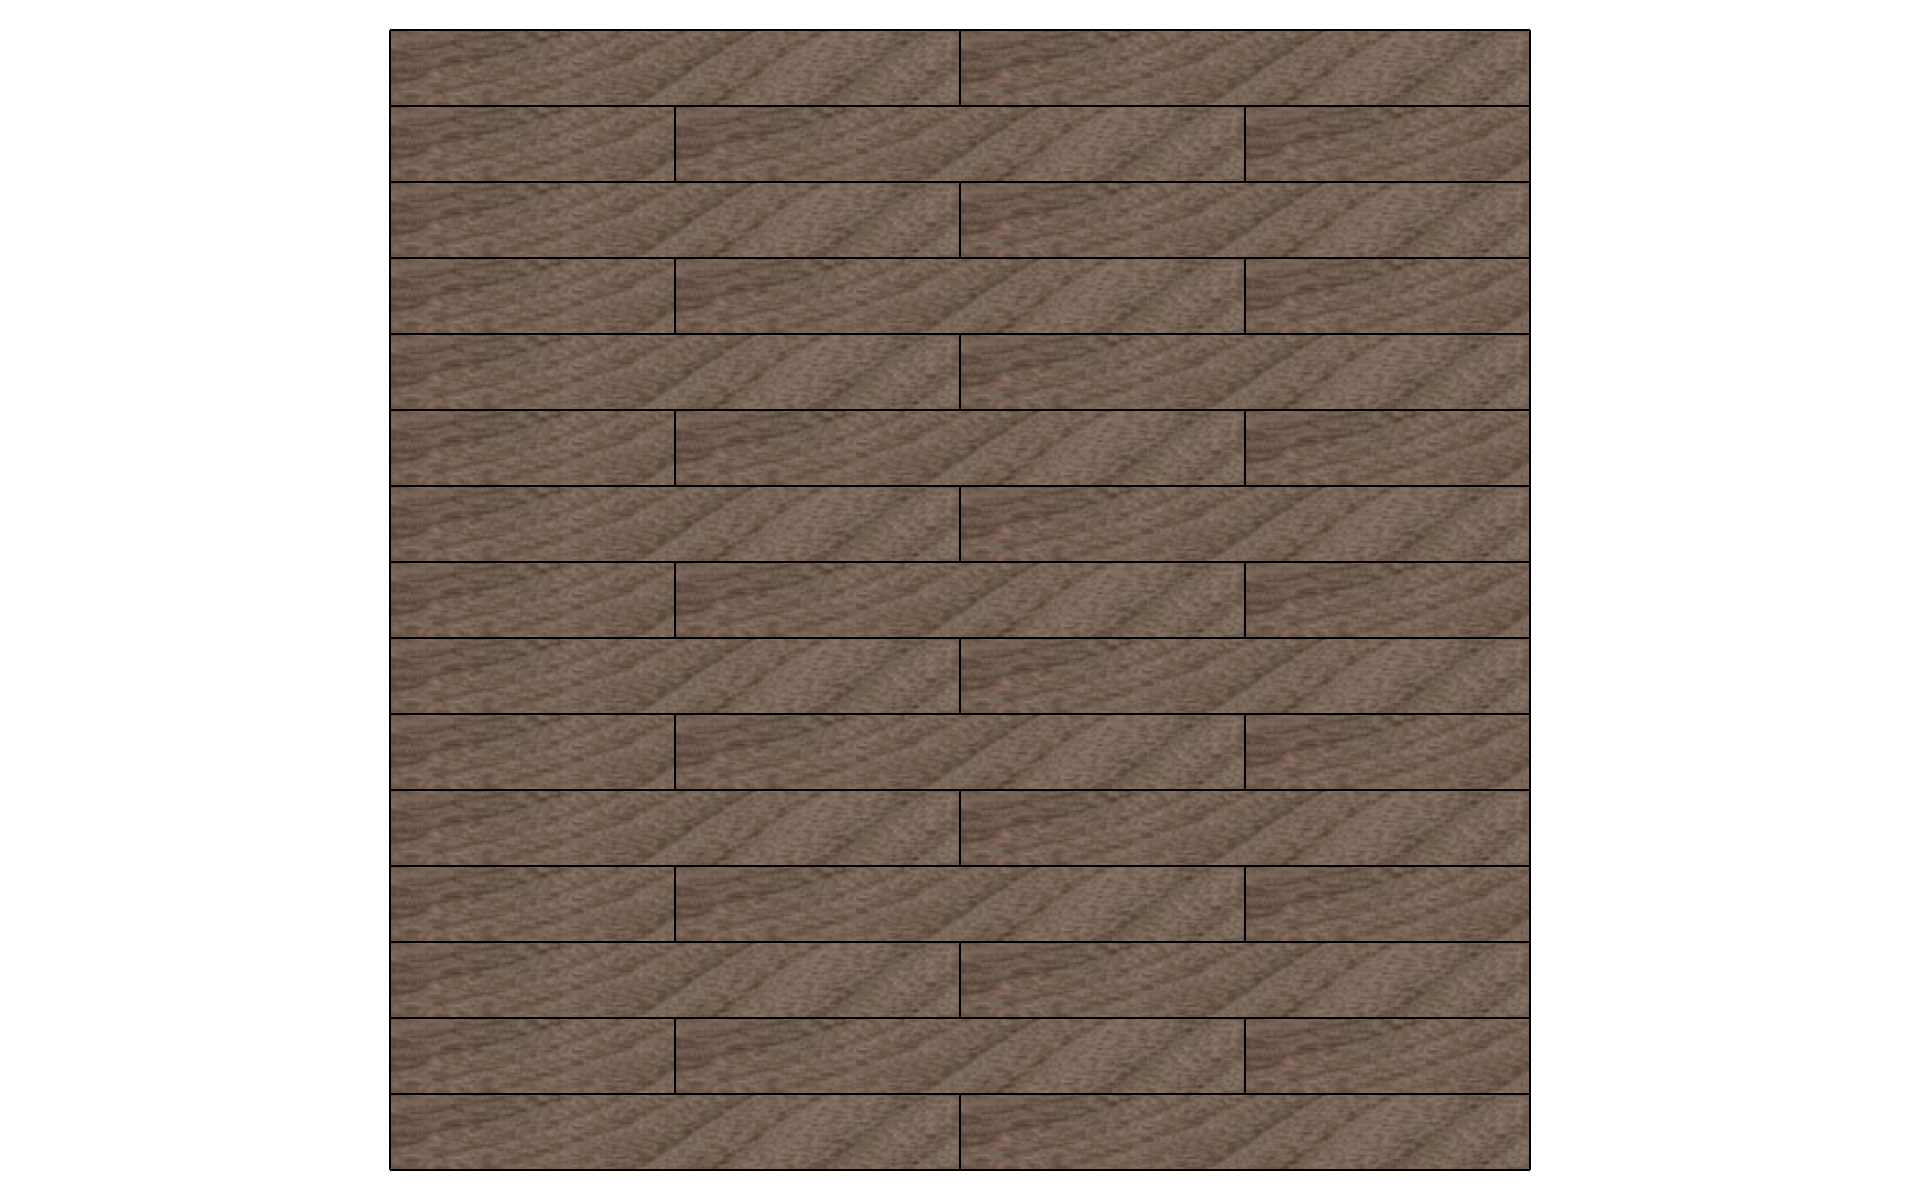
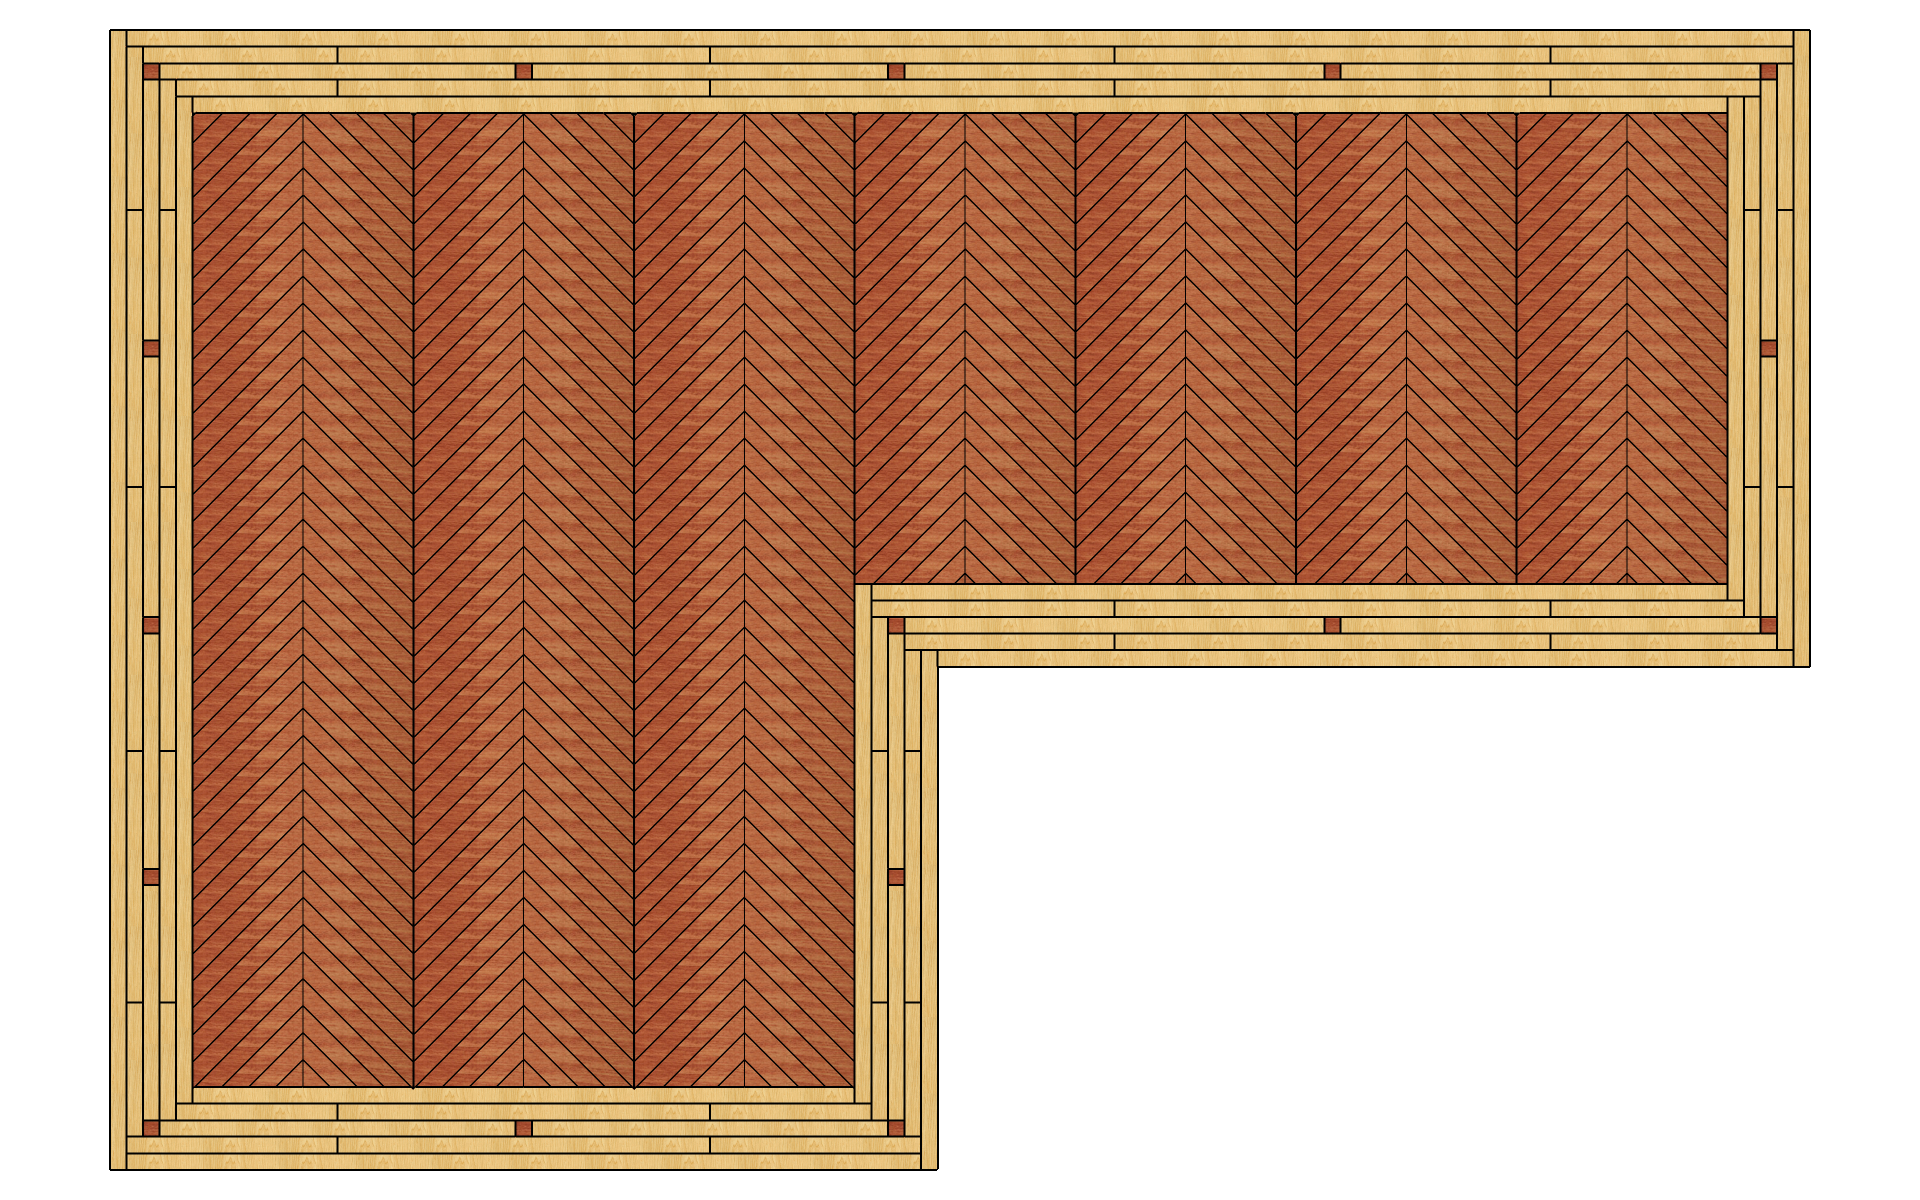
In conclusion, it will be… Drum rolling… None of these! In the meantime, I met my girlfriend and we decided to expand the kitchen later. To do this, we will need to take part of the dining room. The horizontal end of the “L” to be exact. Here is the new matrix obtained:
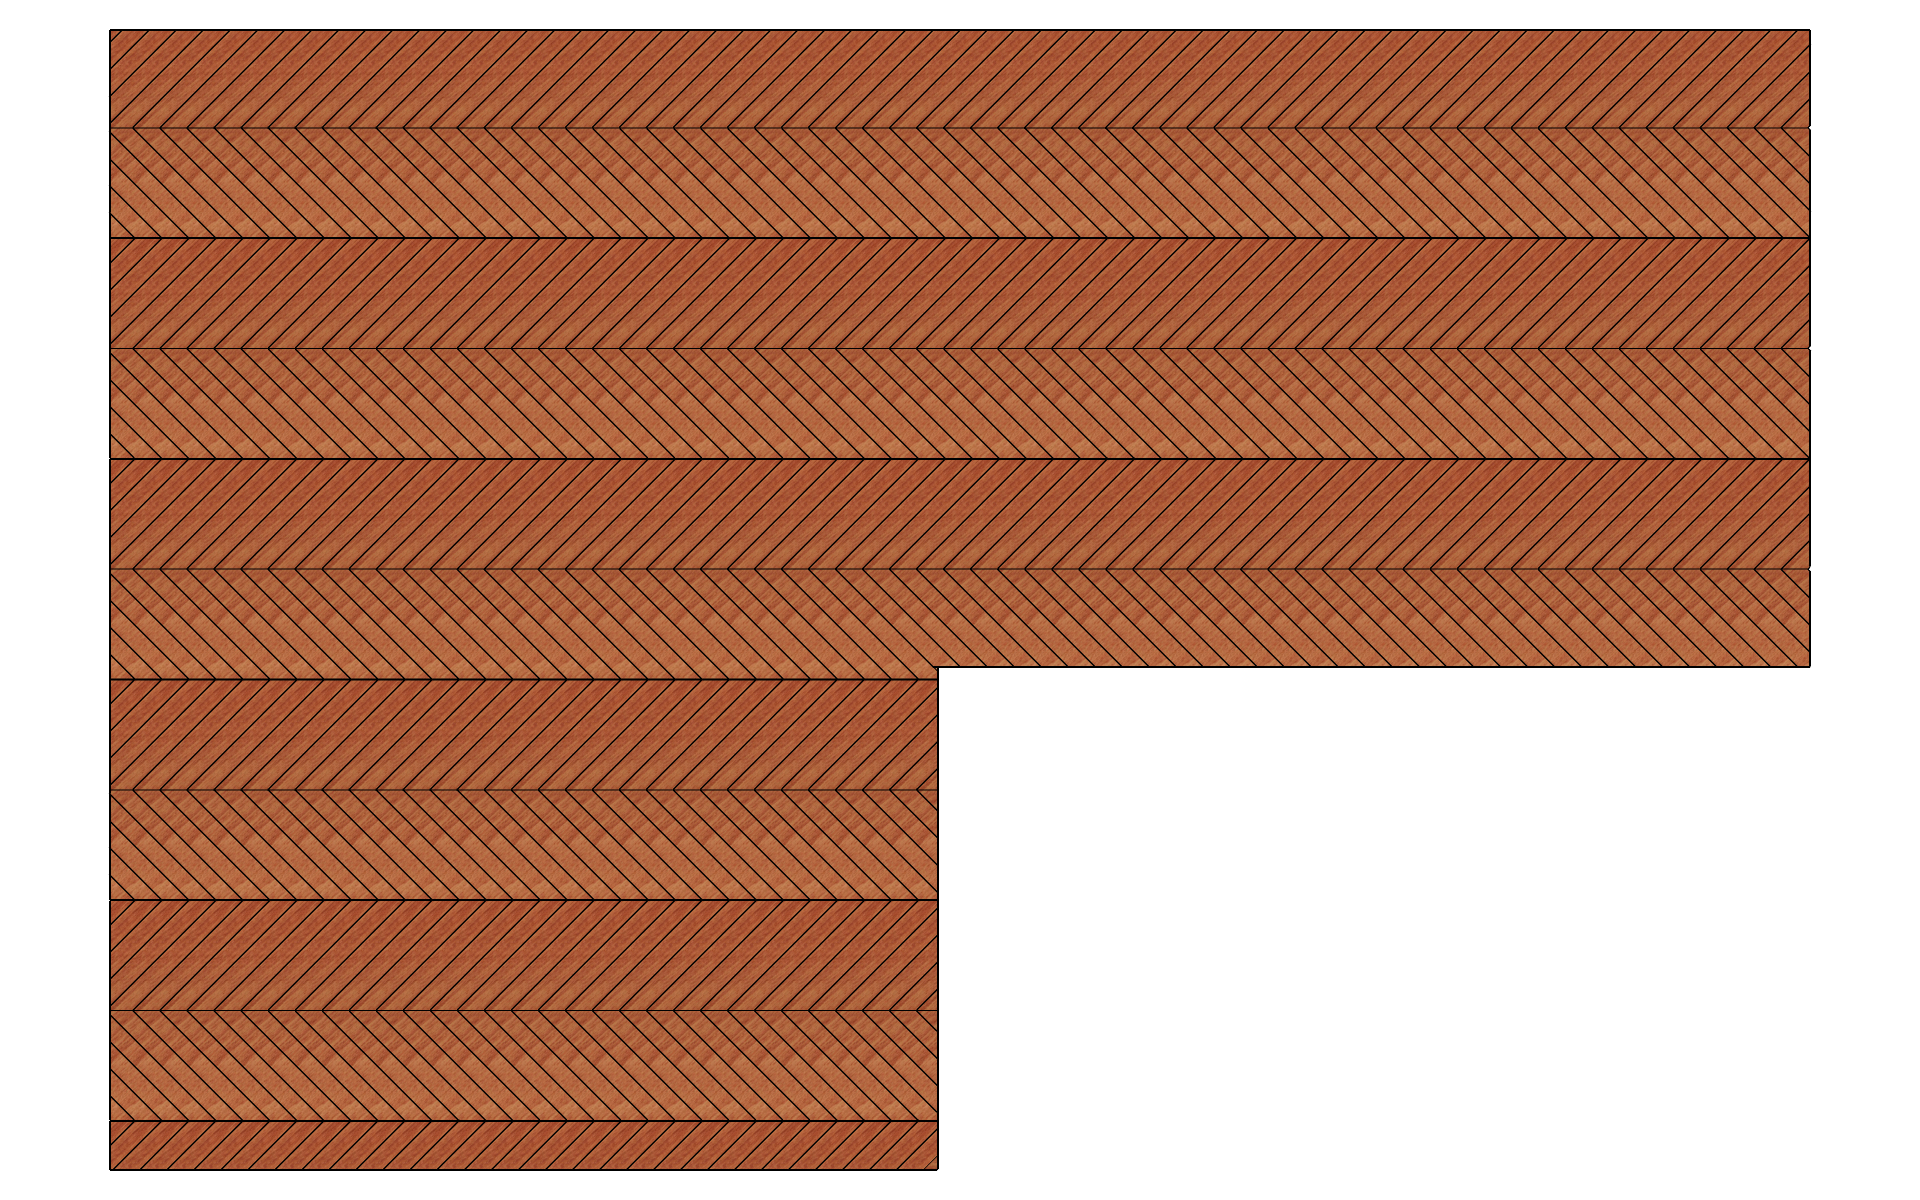
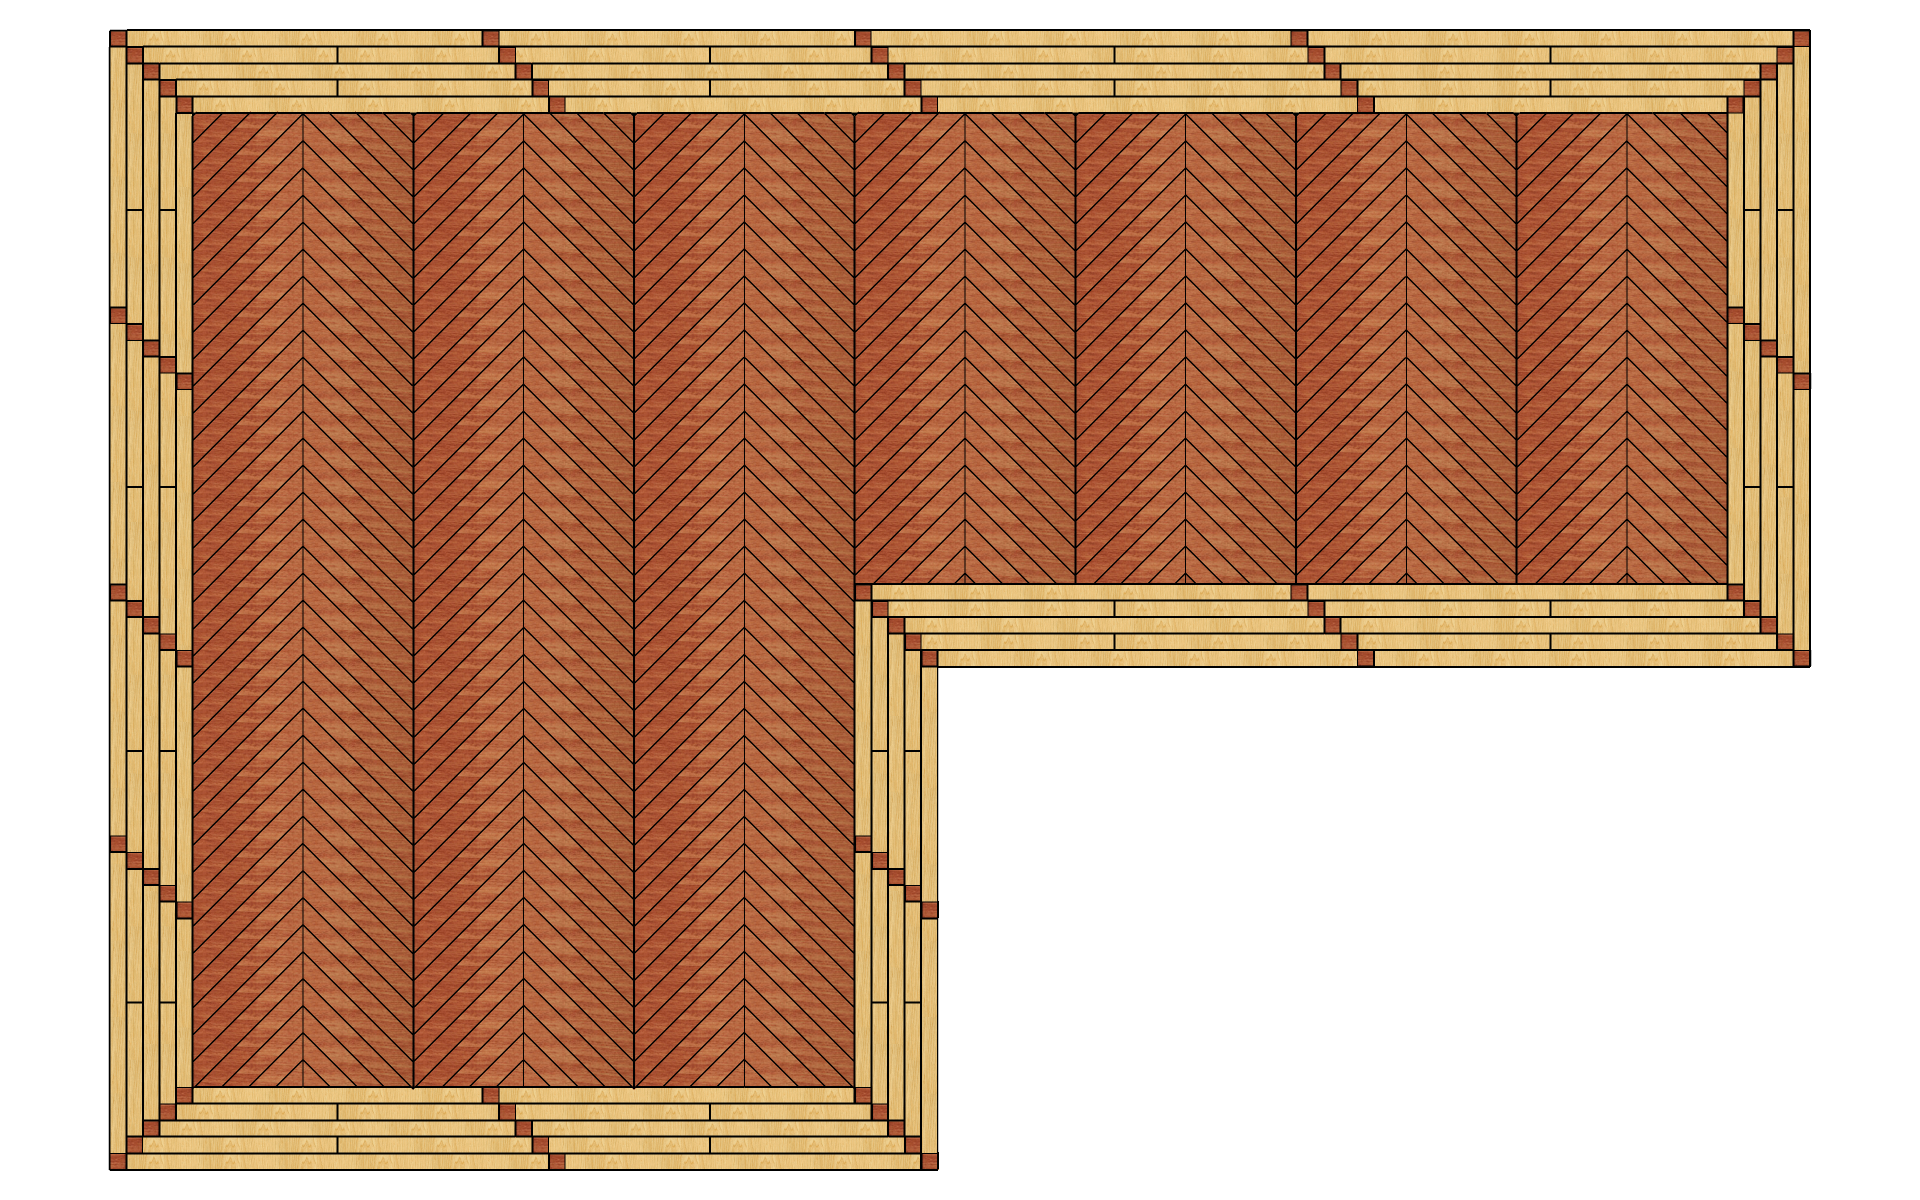
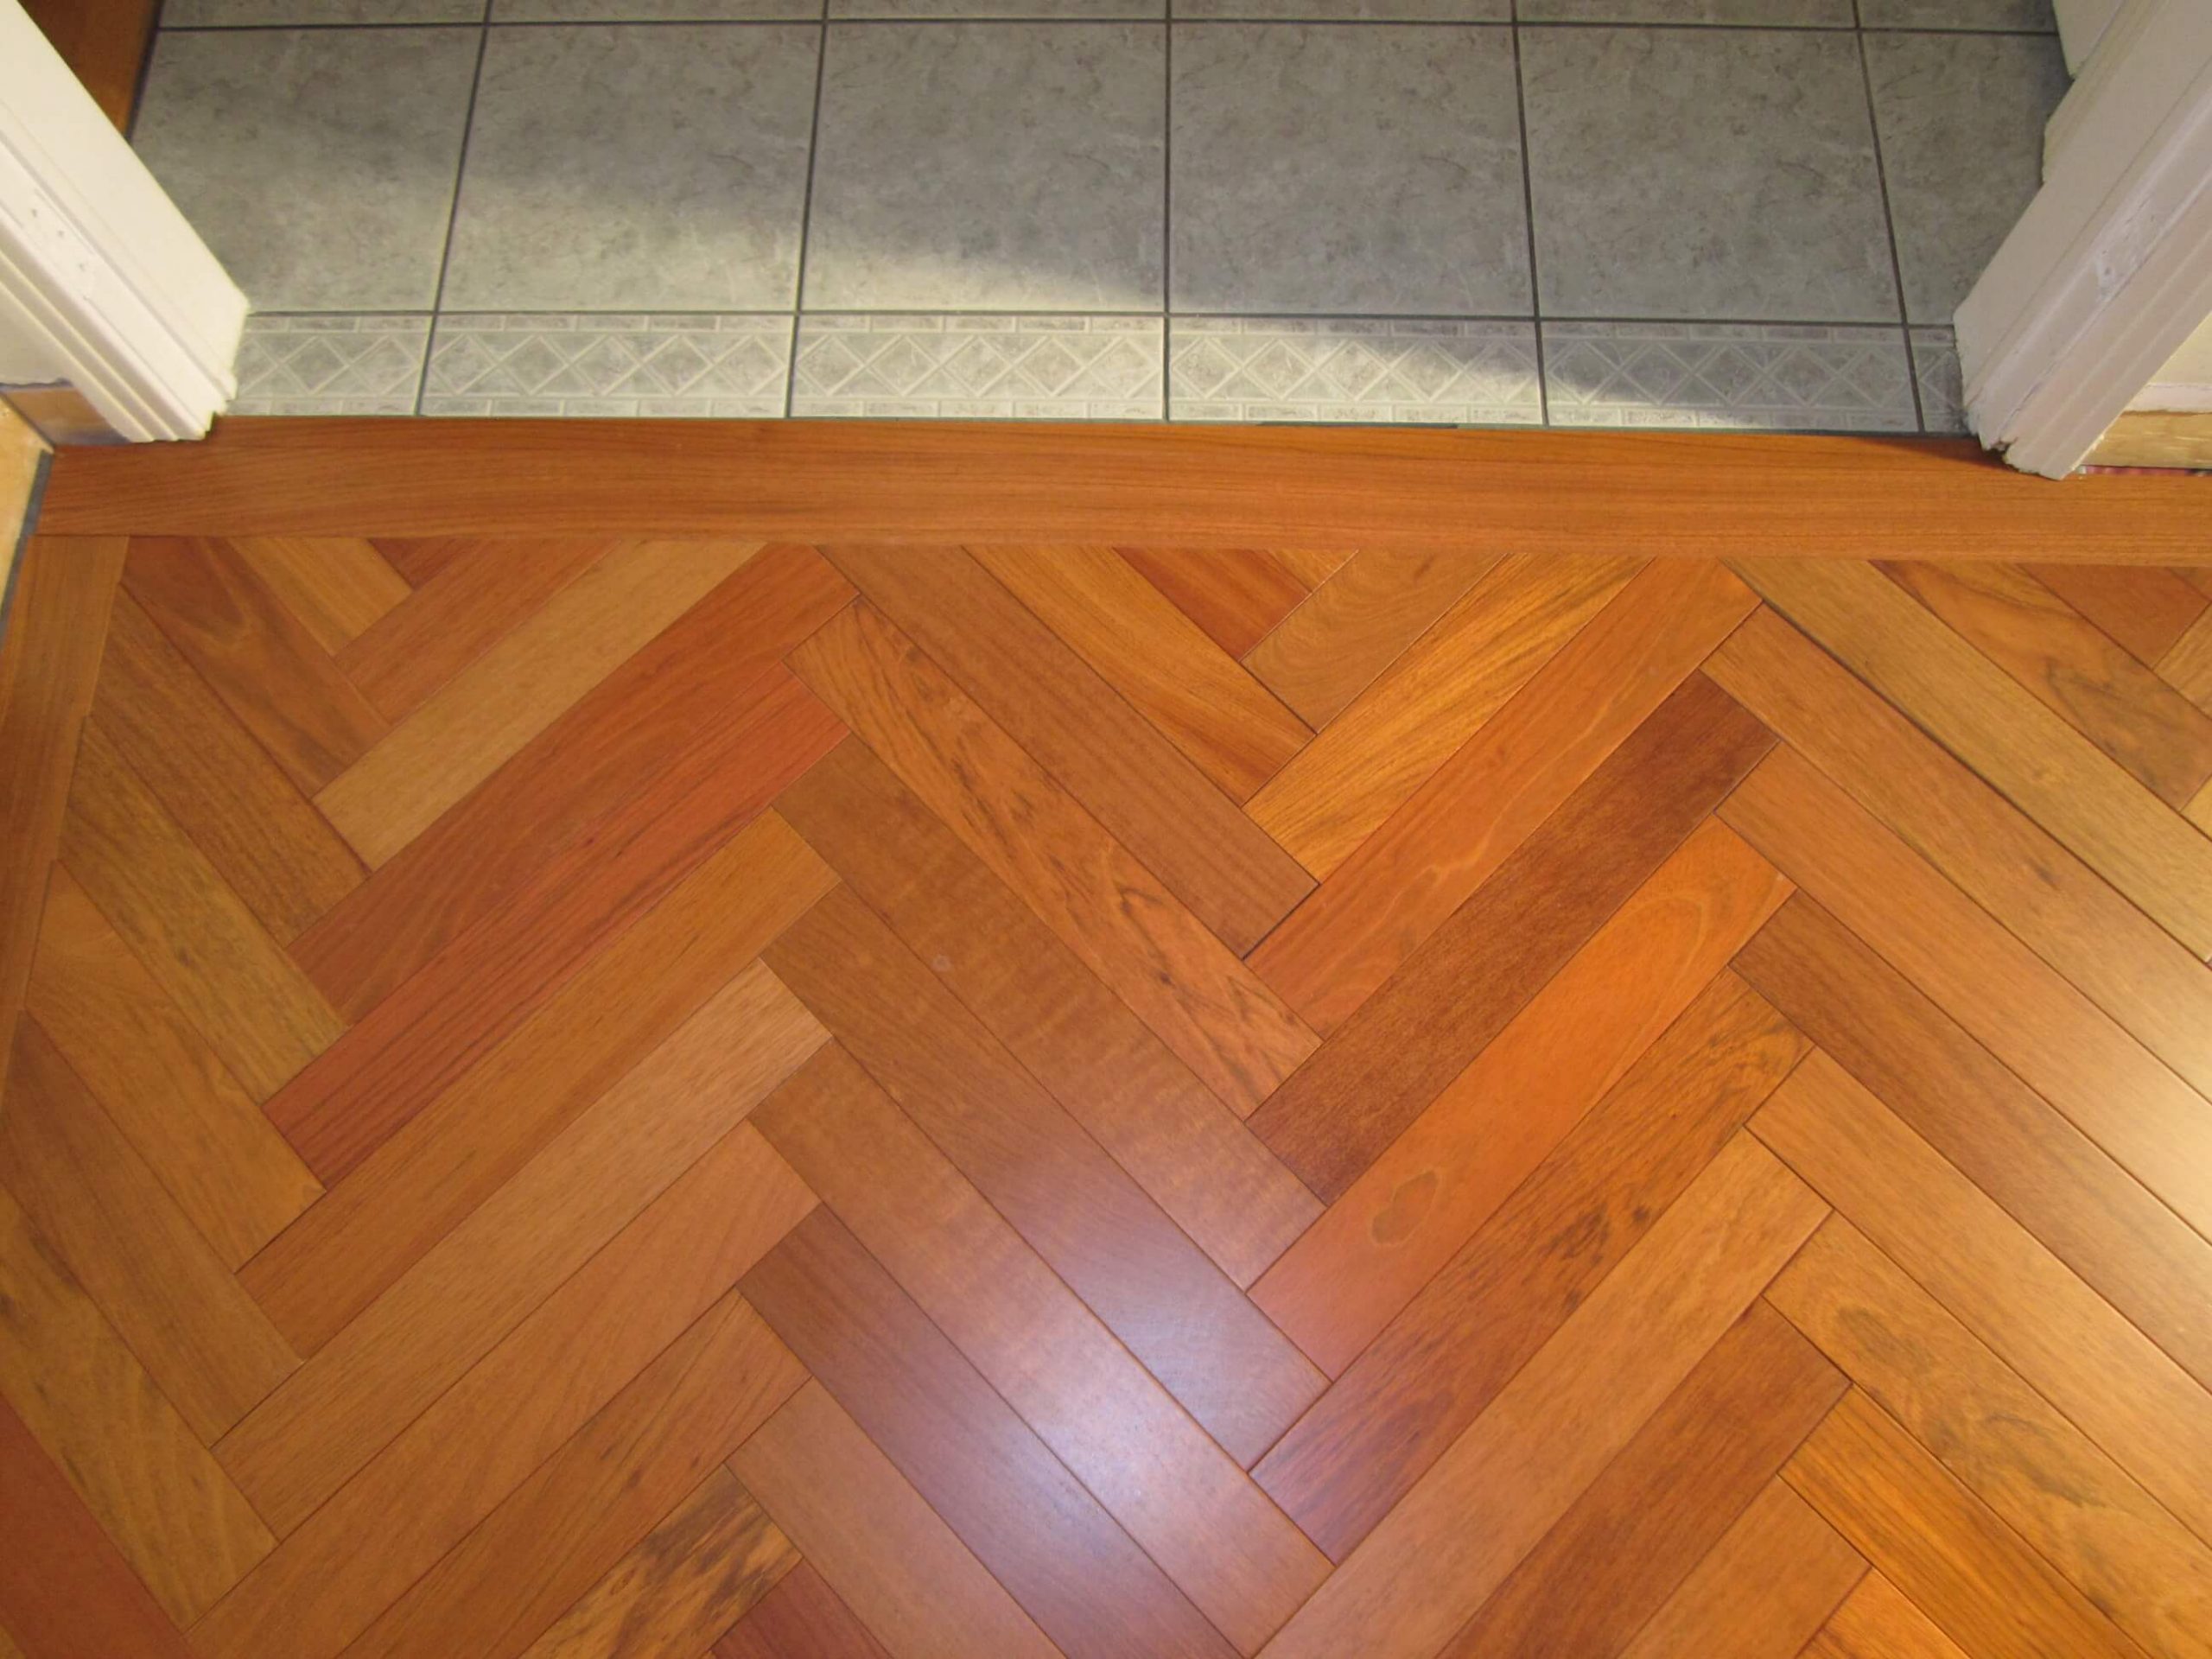
After a few blank tests, the edges crushed the part too much and the effect obtained was not pretty. I reluctantly had to give up the 1′ border and reduce it to a simple framing the width of a blade. It will therefore be a herringbone pose.
4. La realization
The pattern floor is chosen, the materials are purchased and the tools are ready, we can tackle the realization.
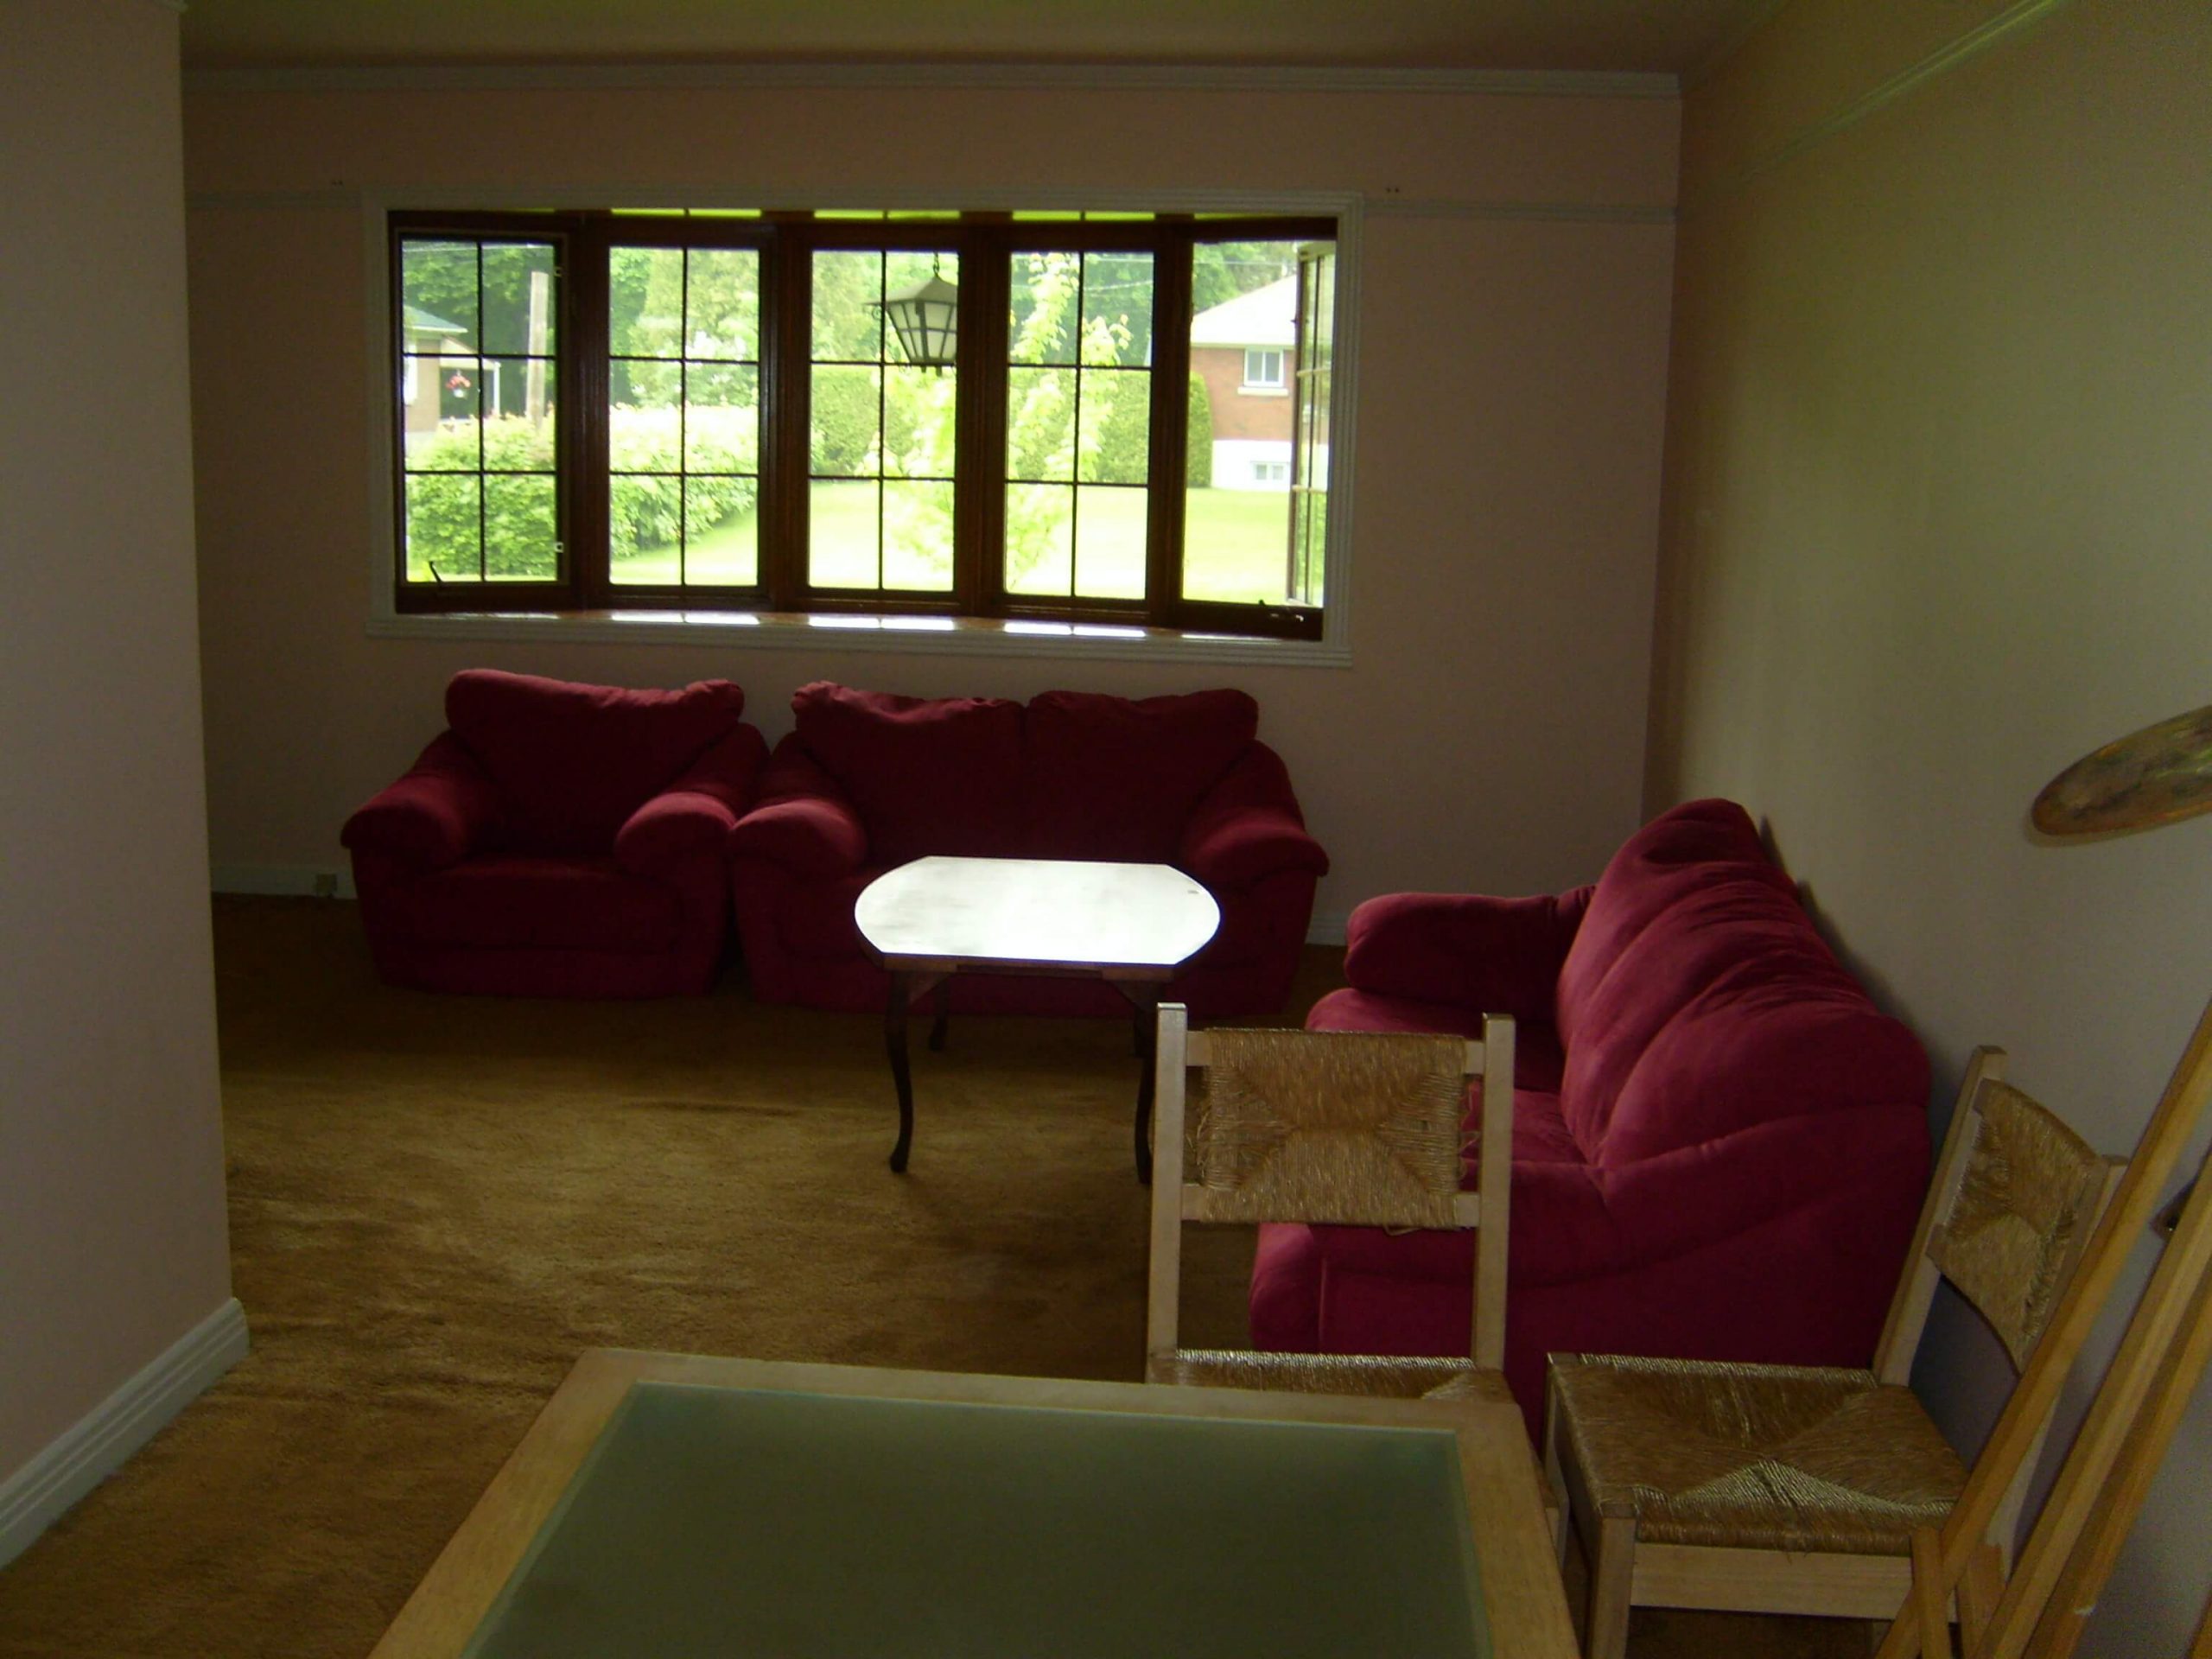
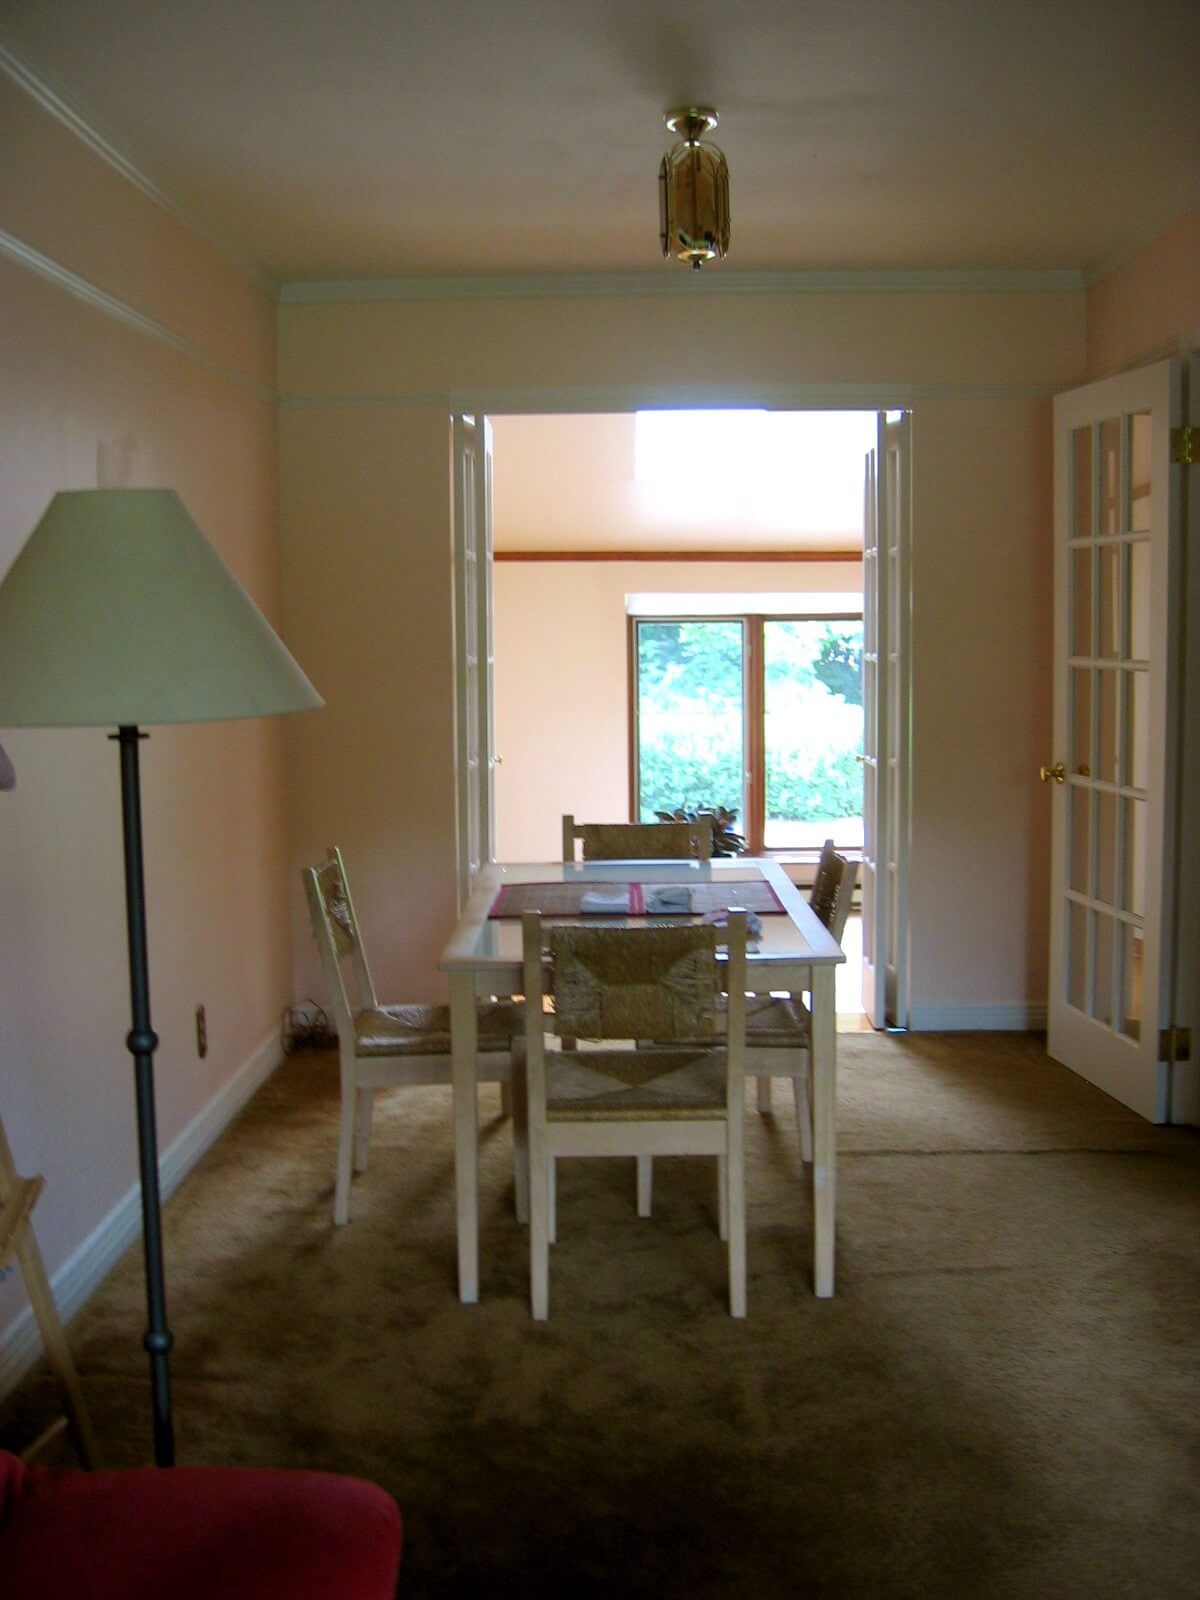
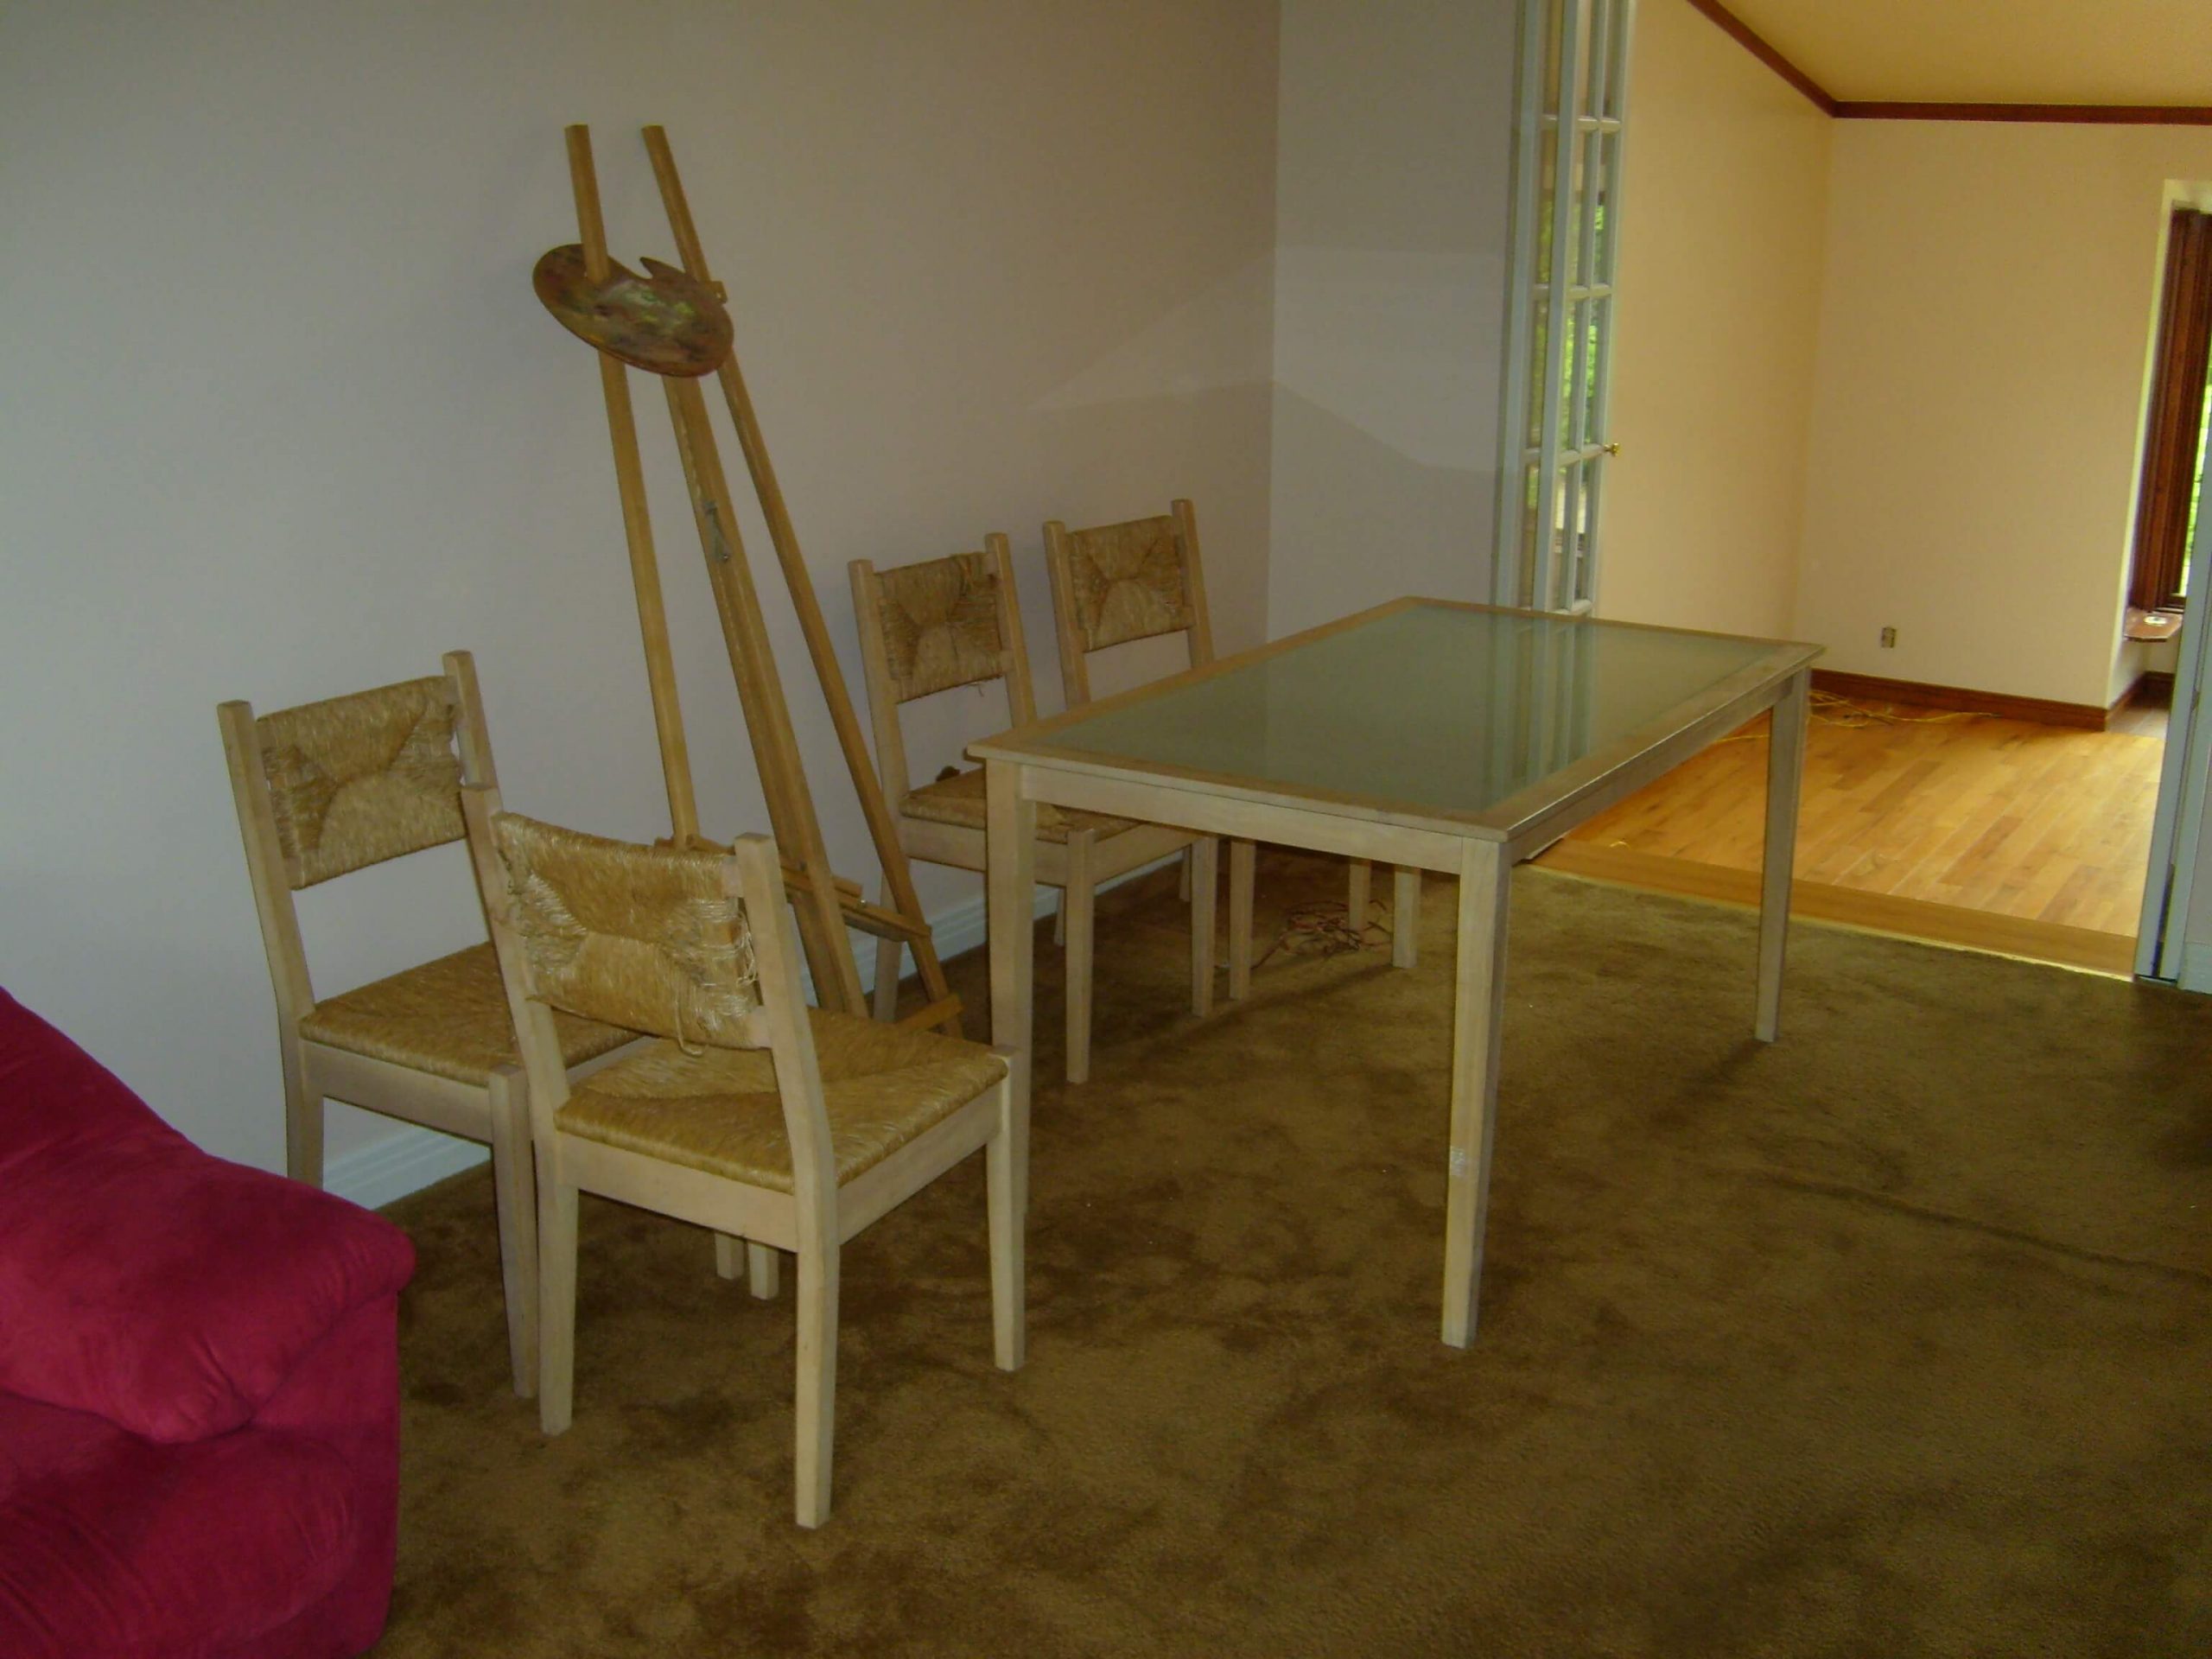
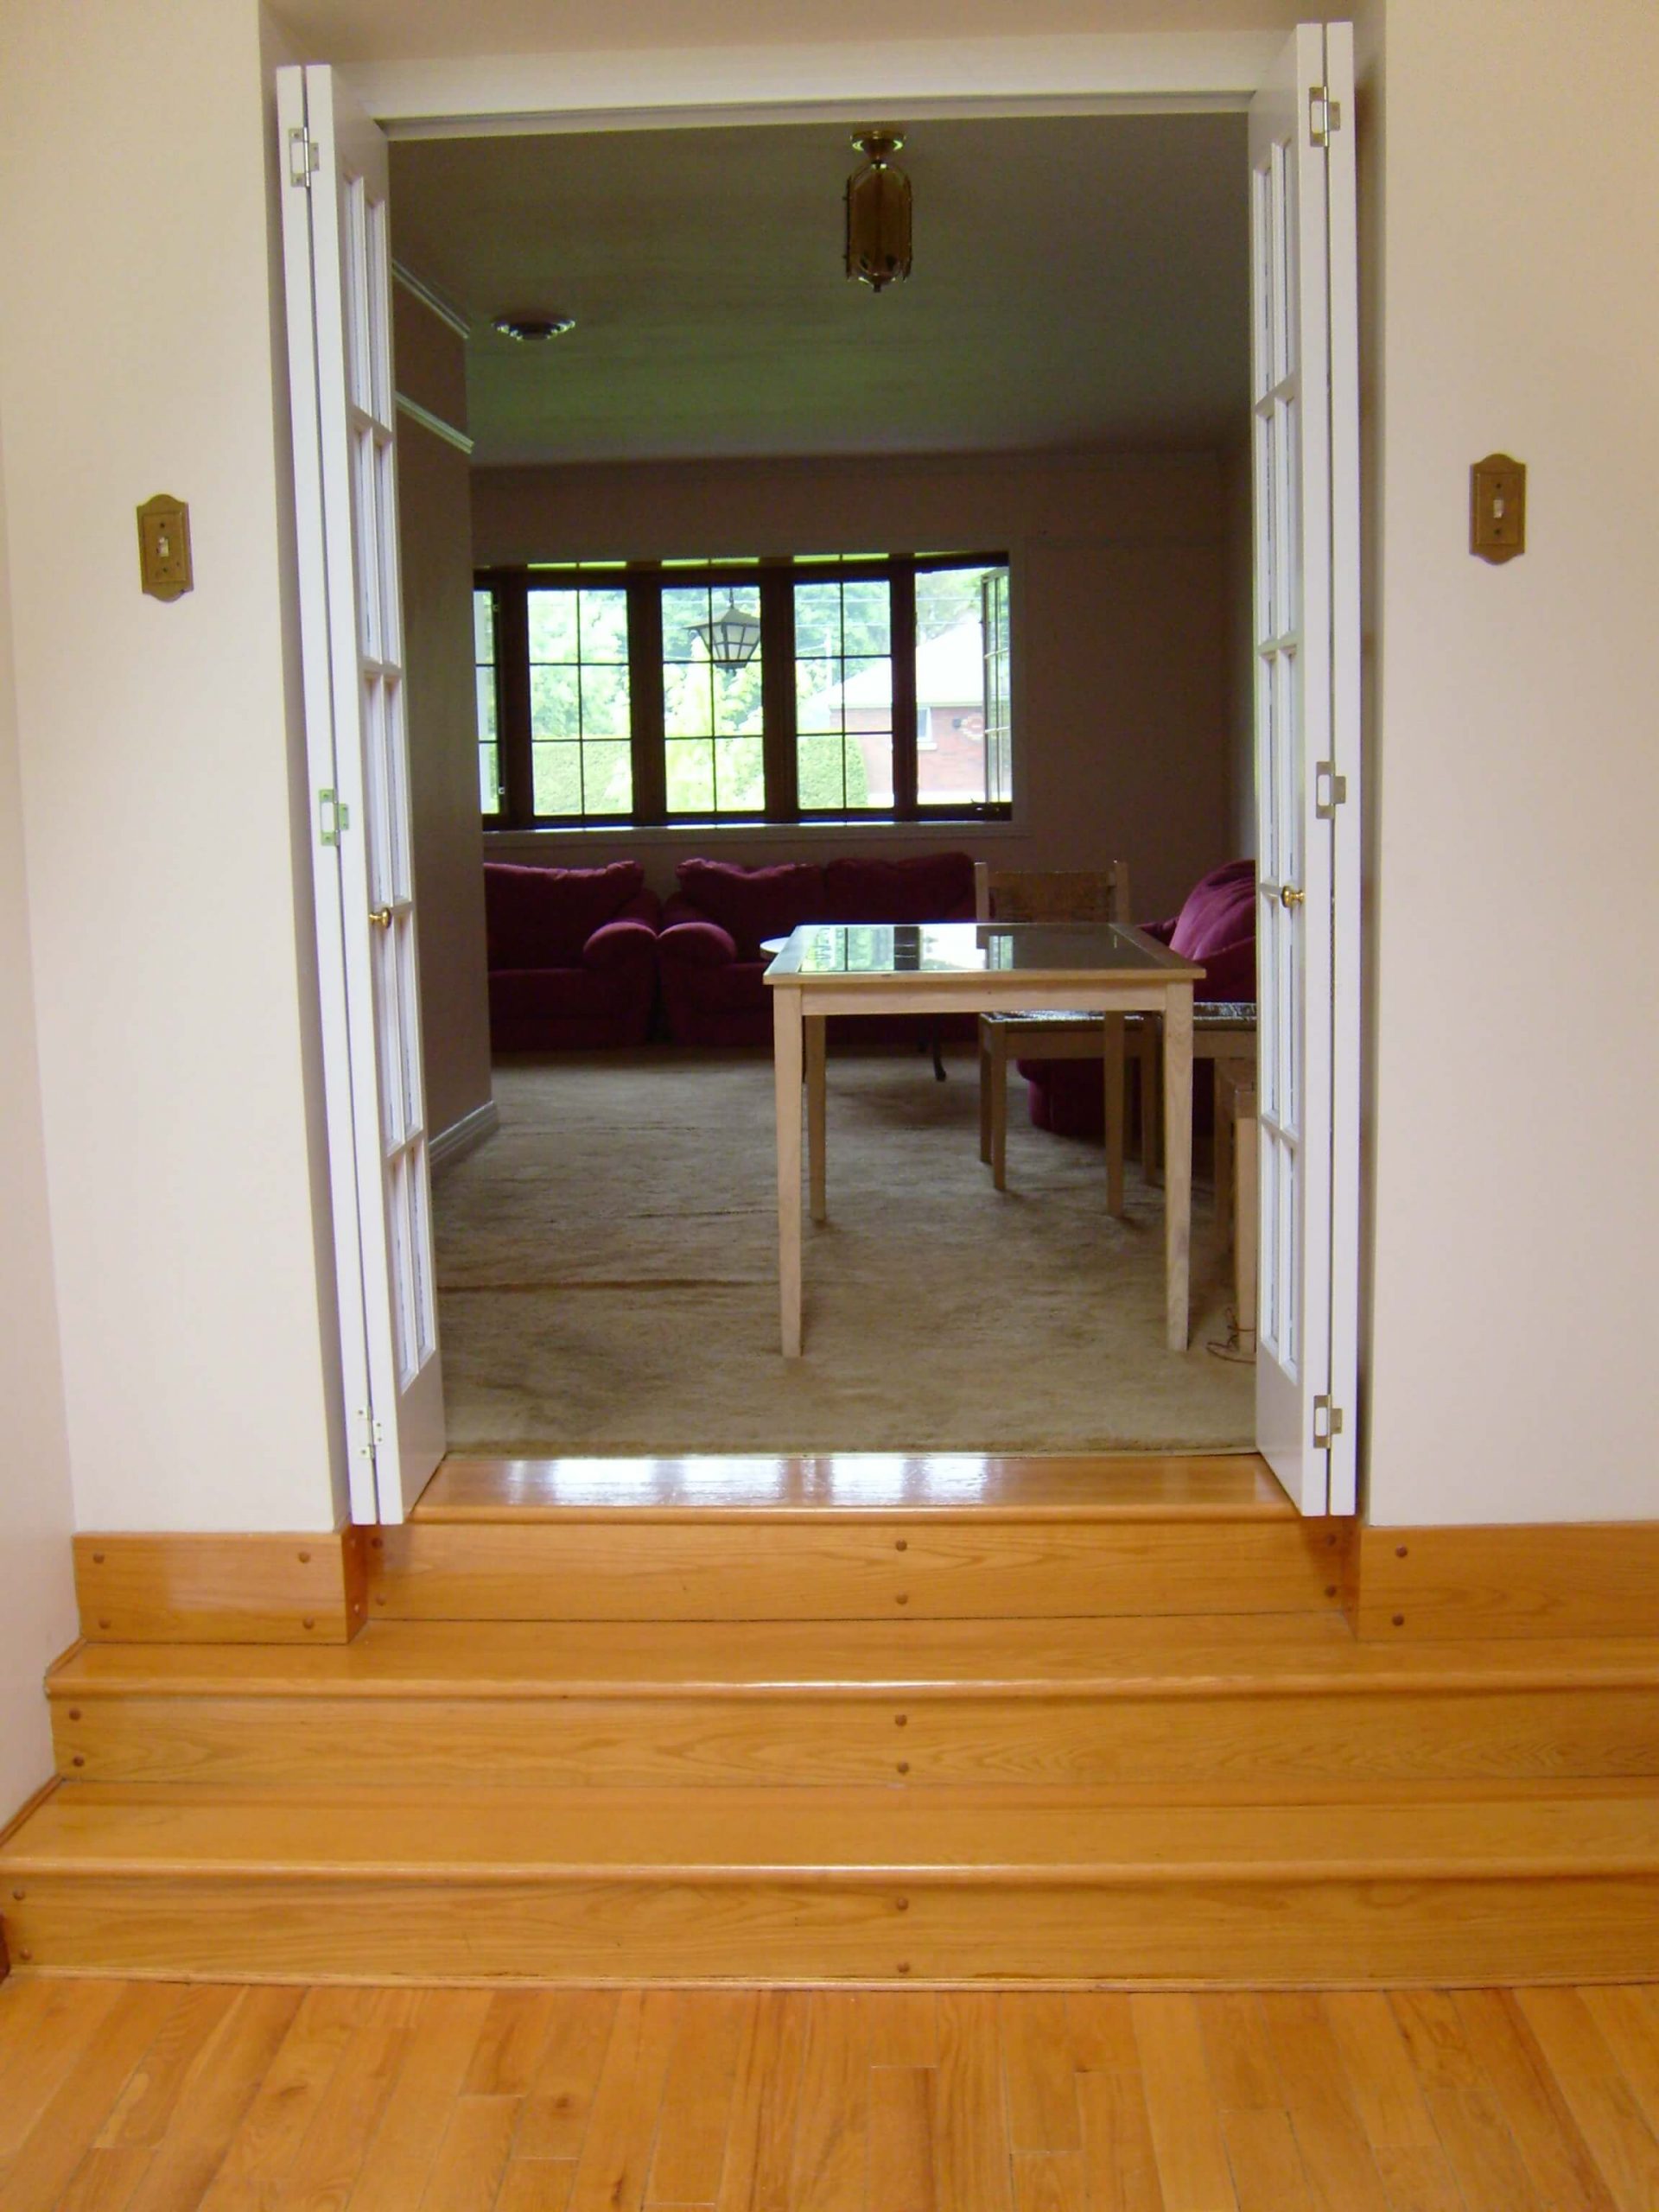
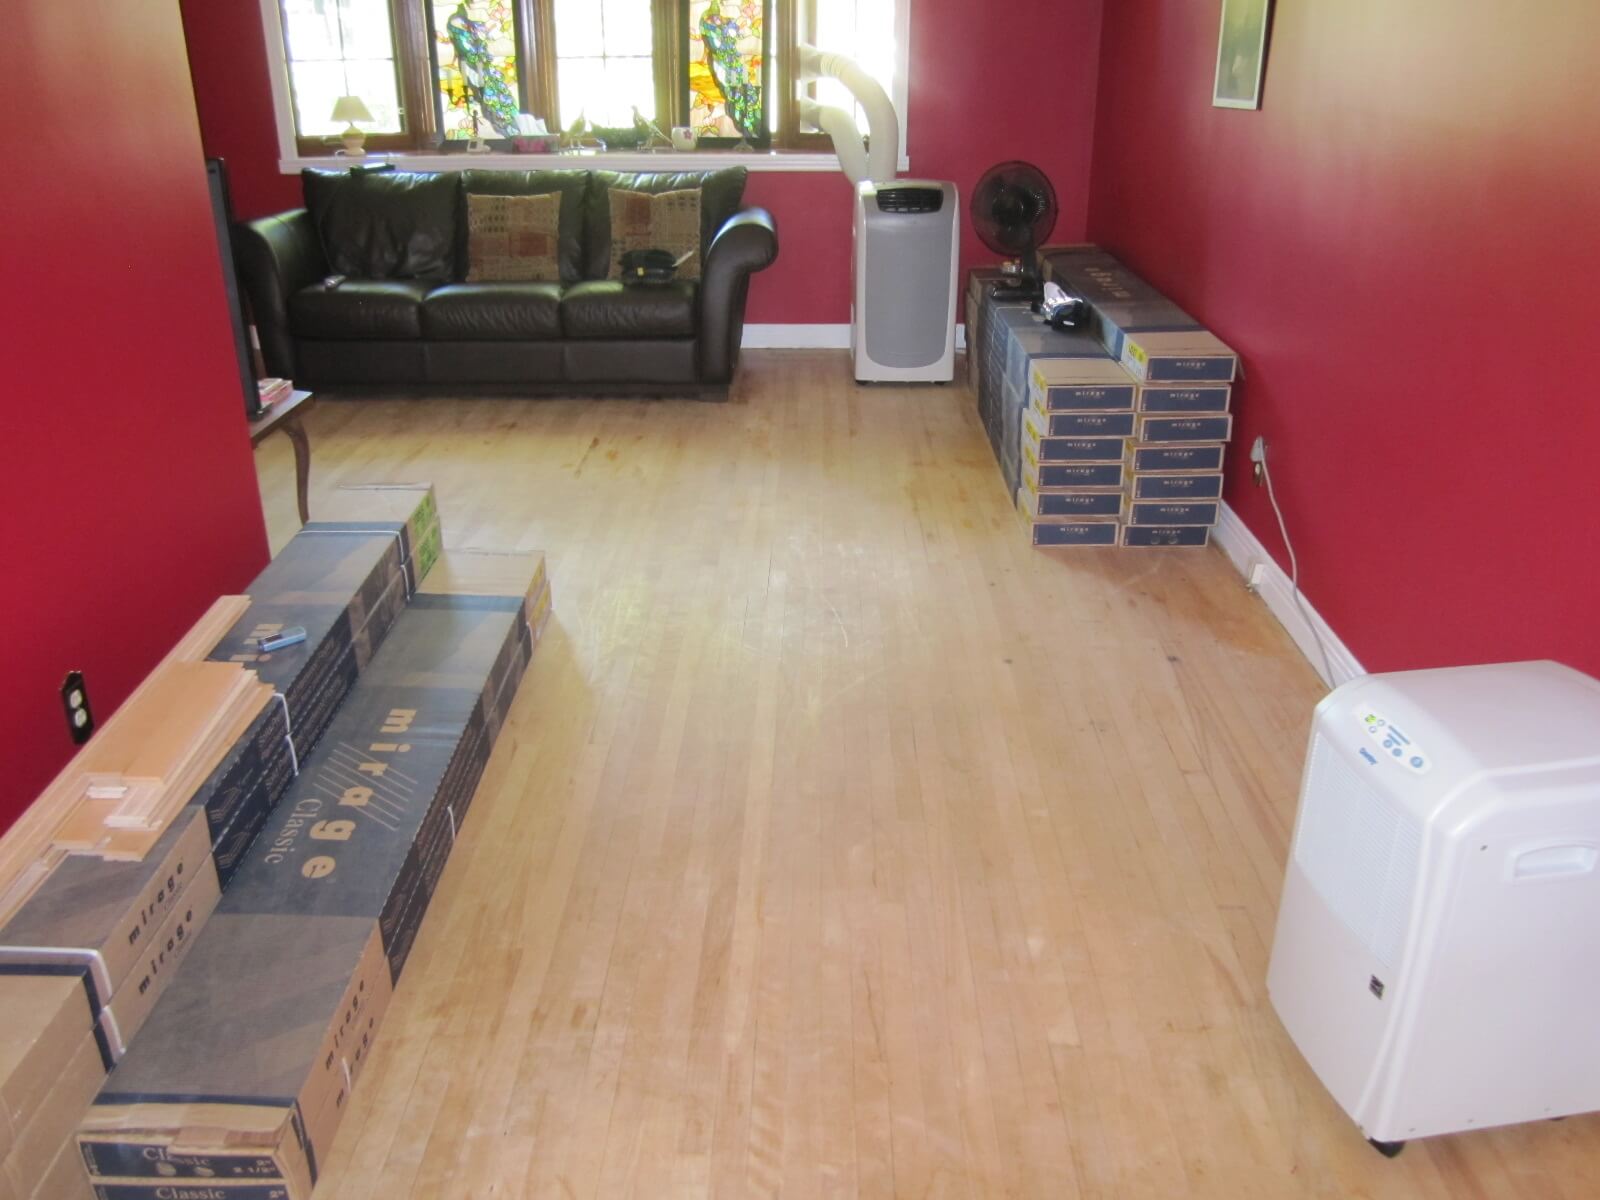
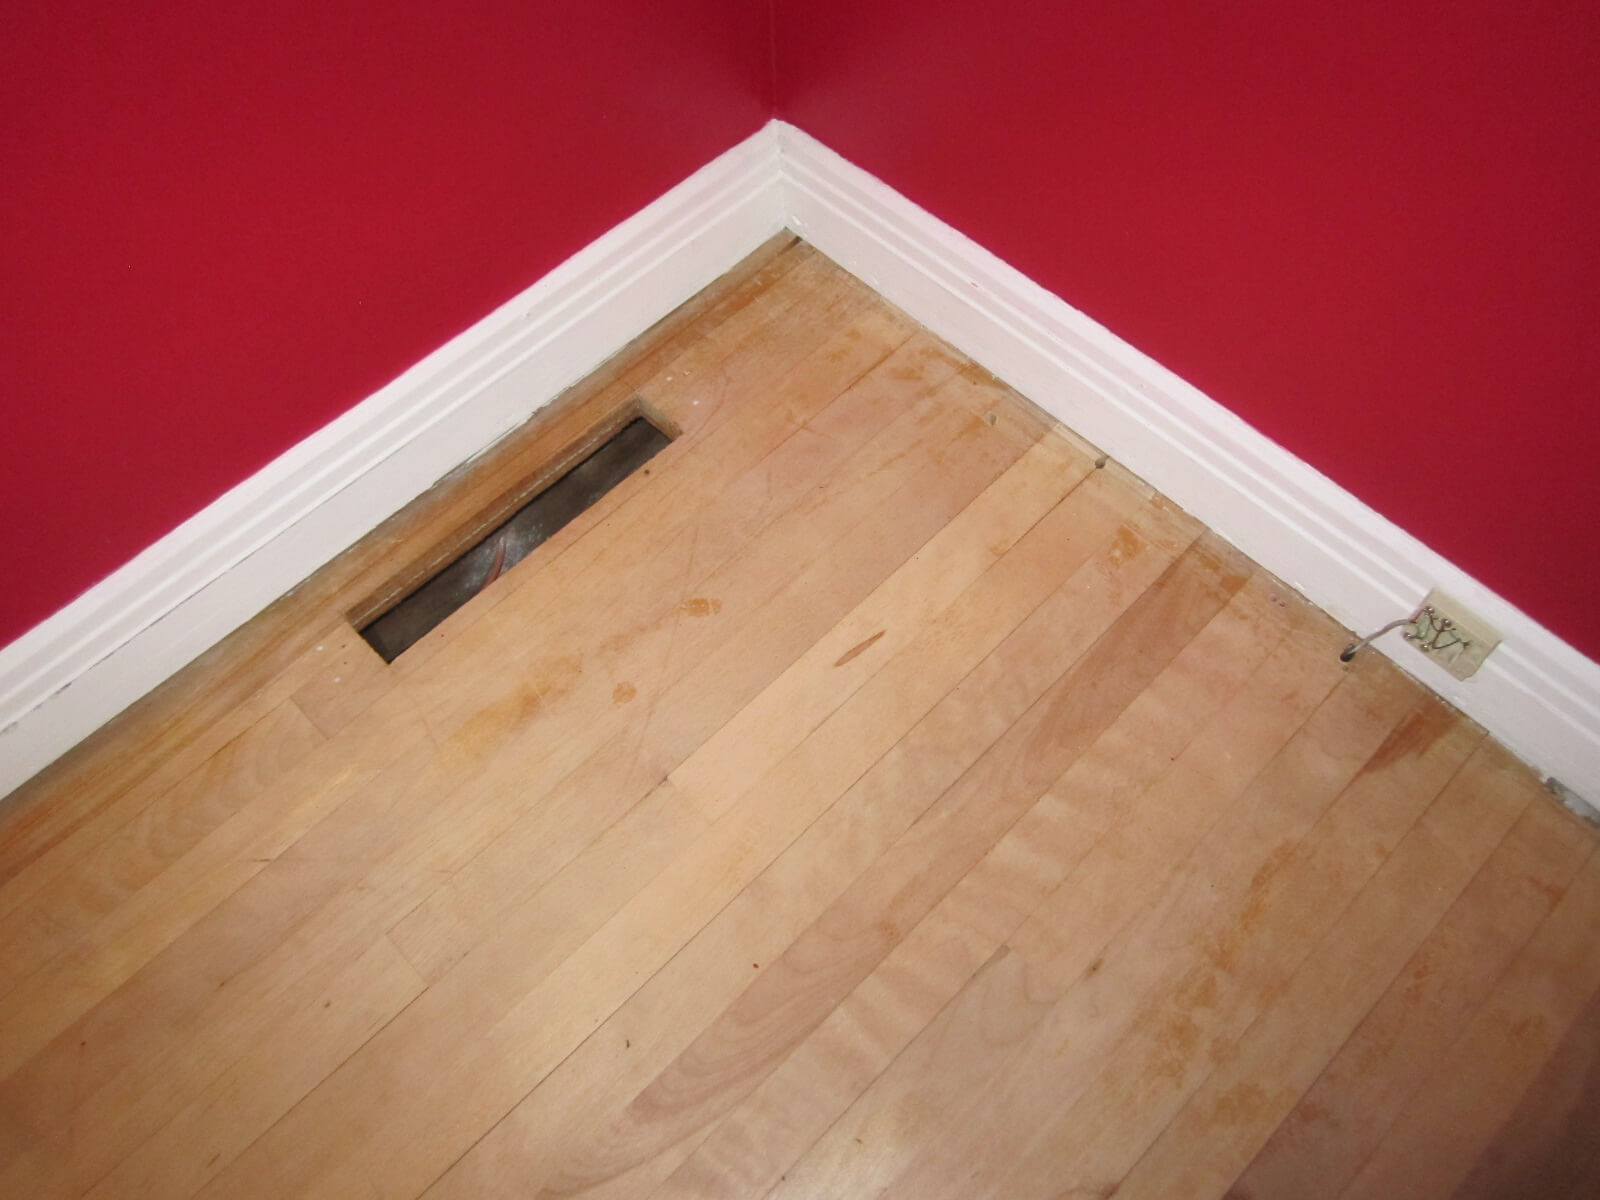
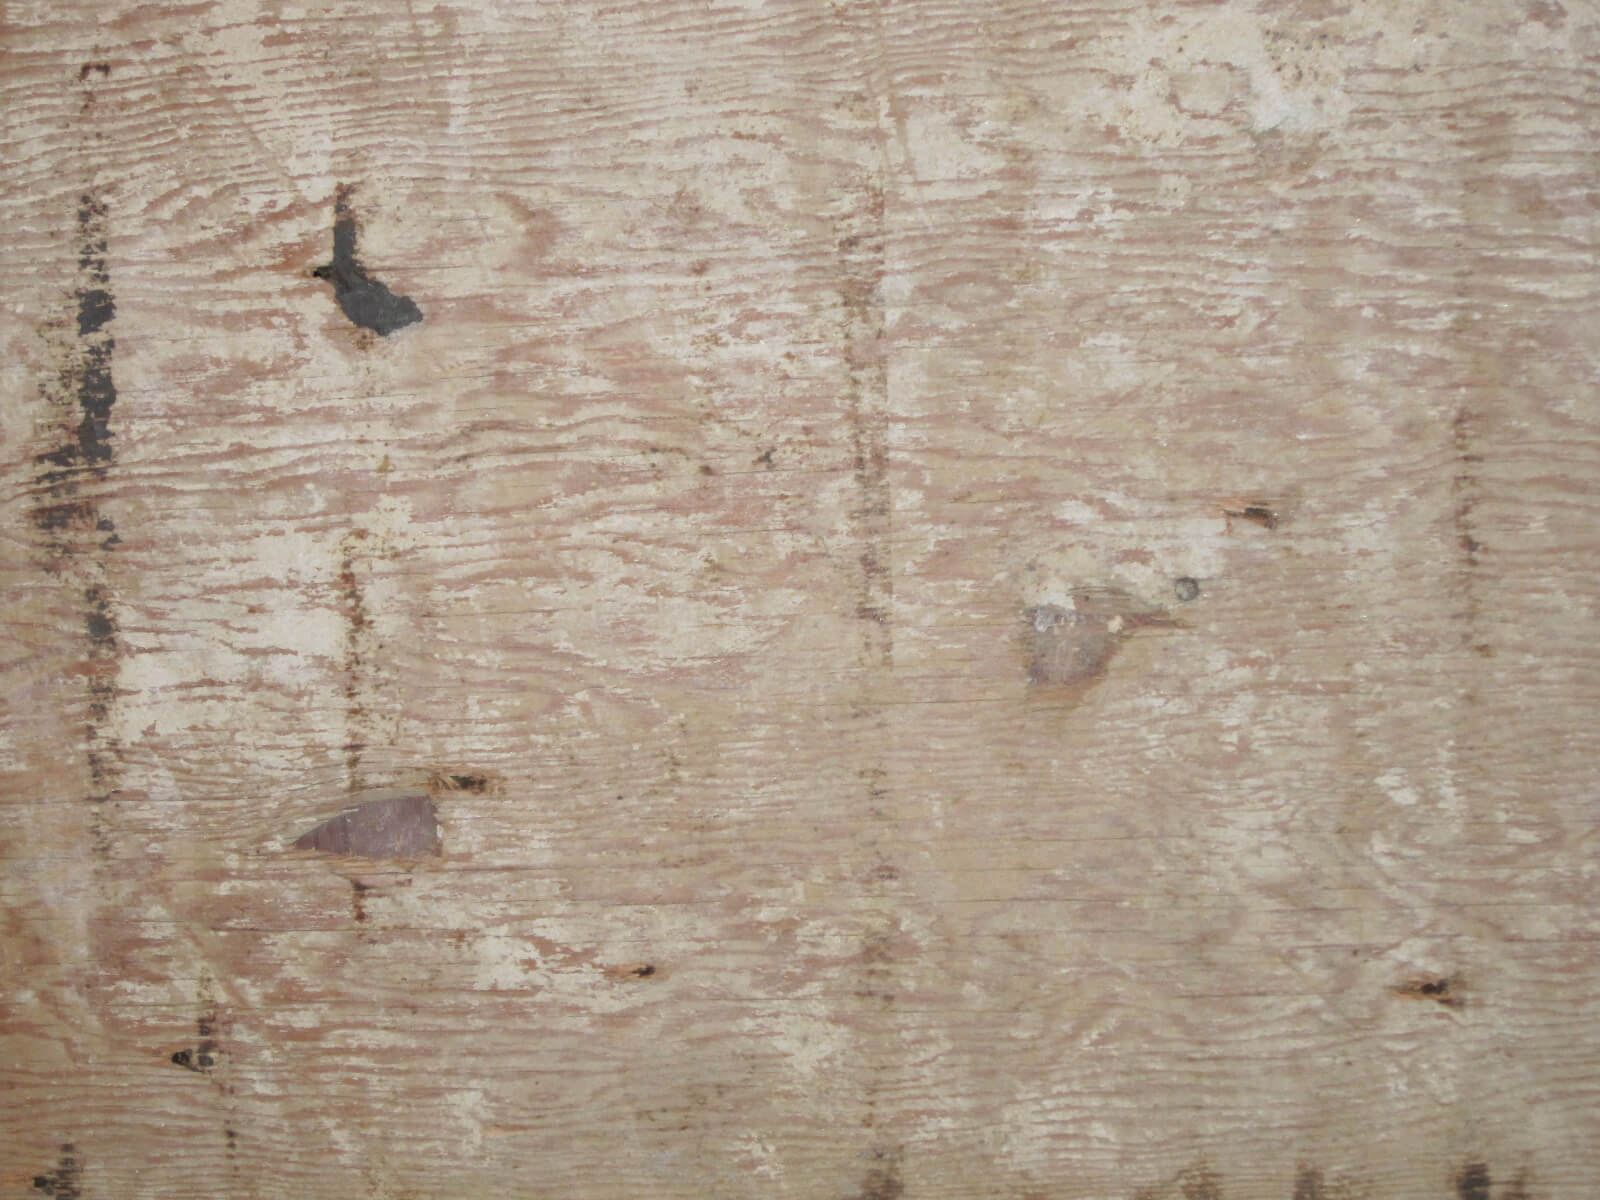
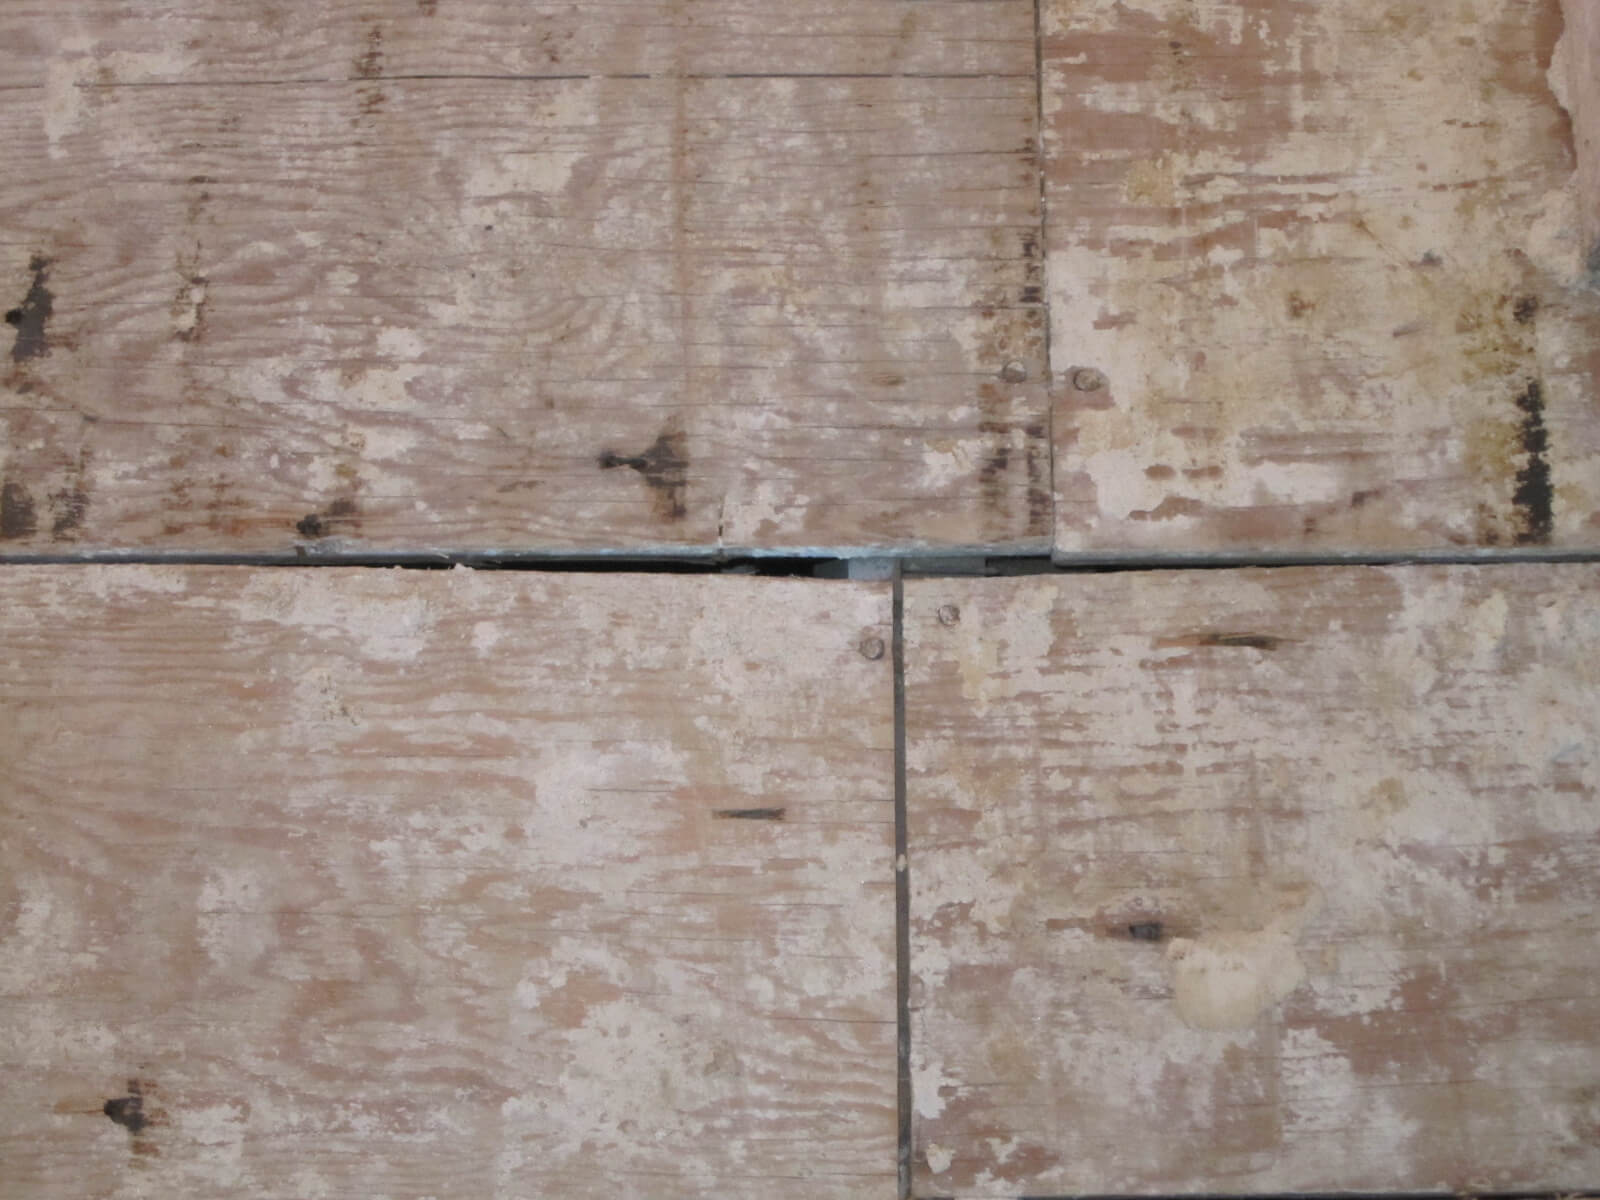
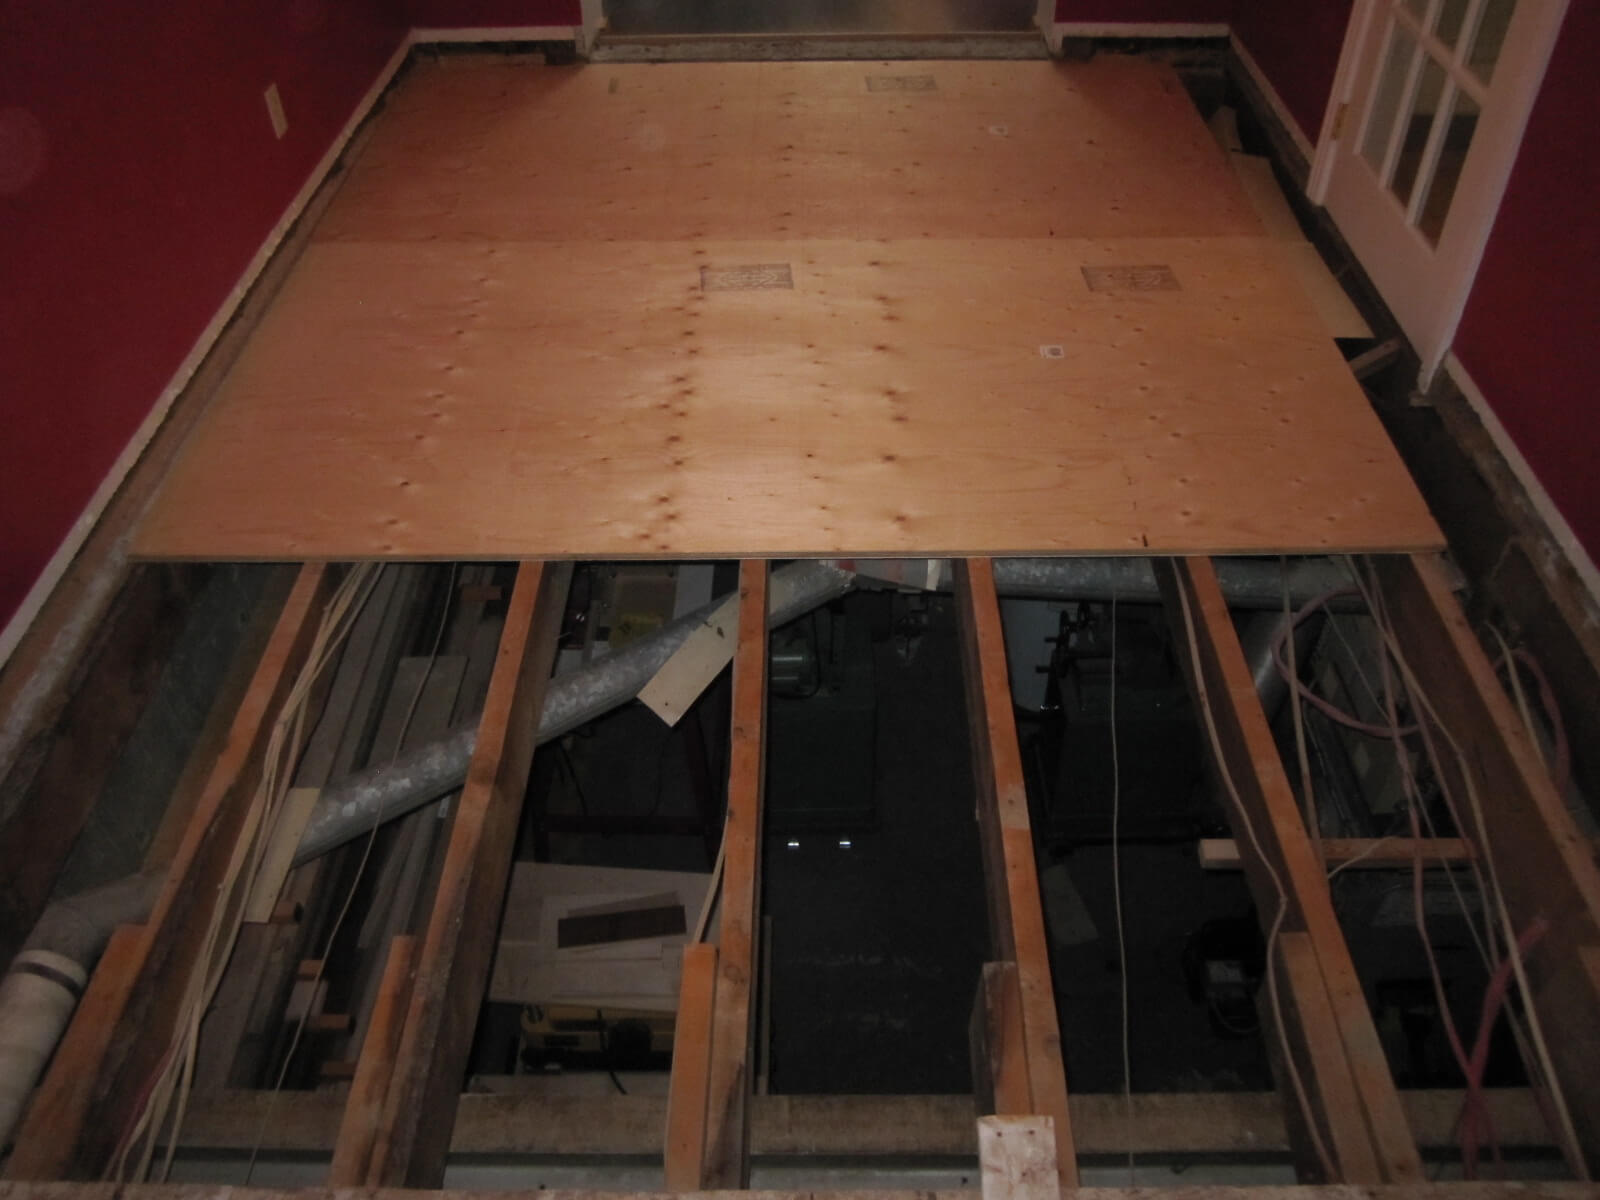
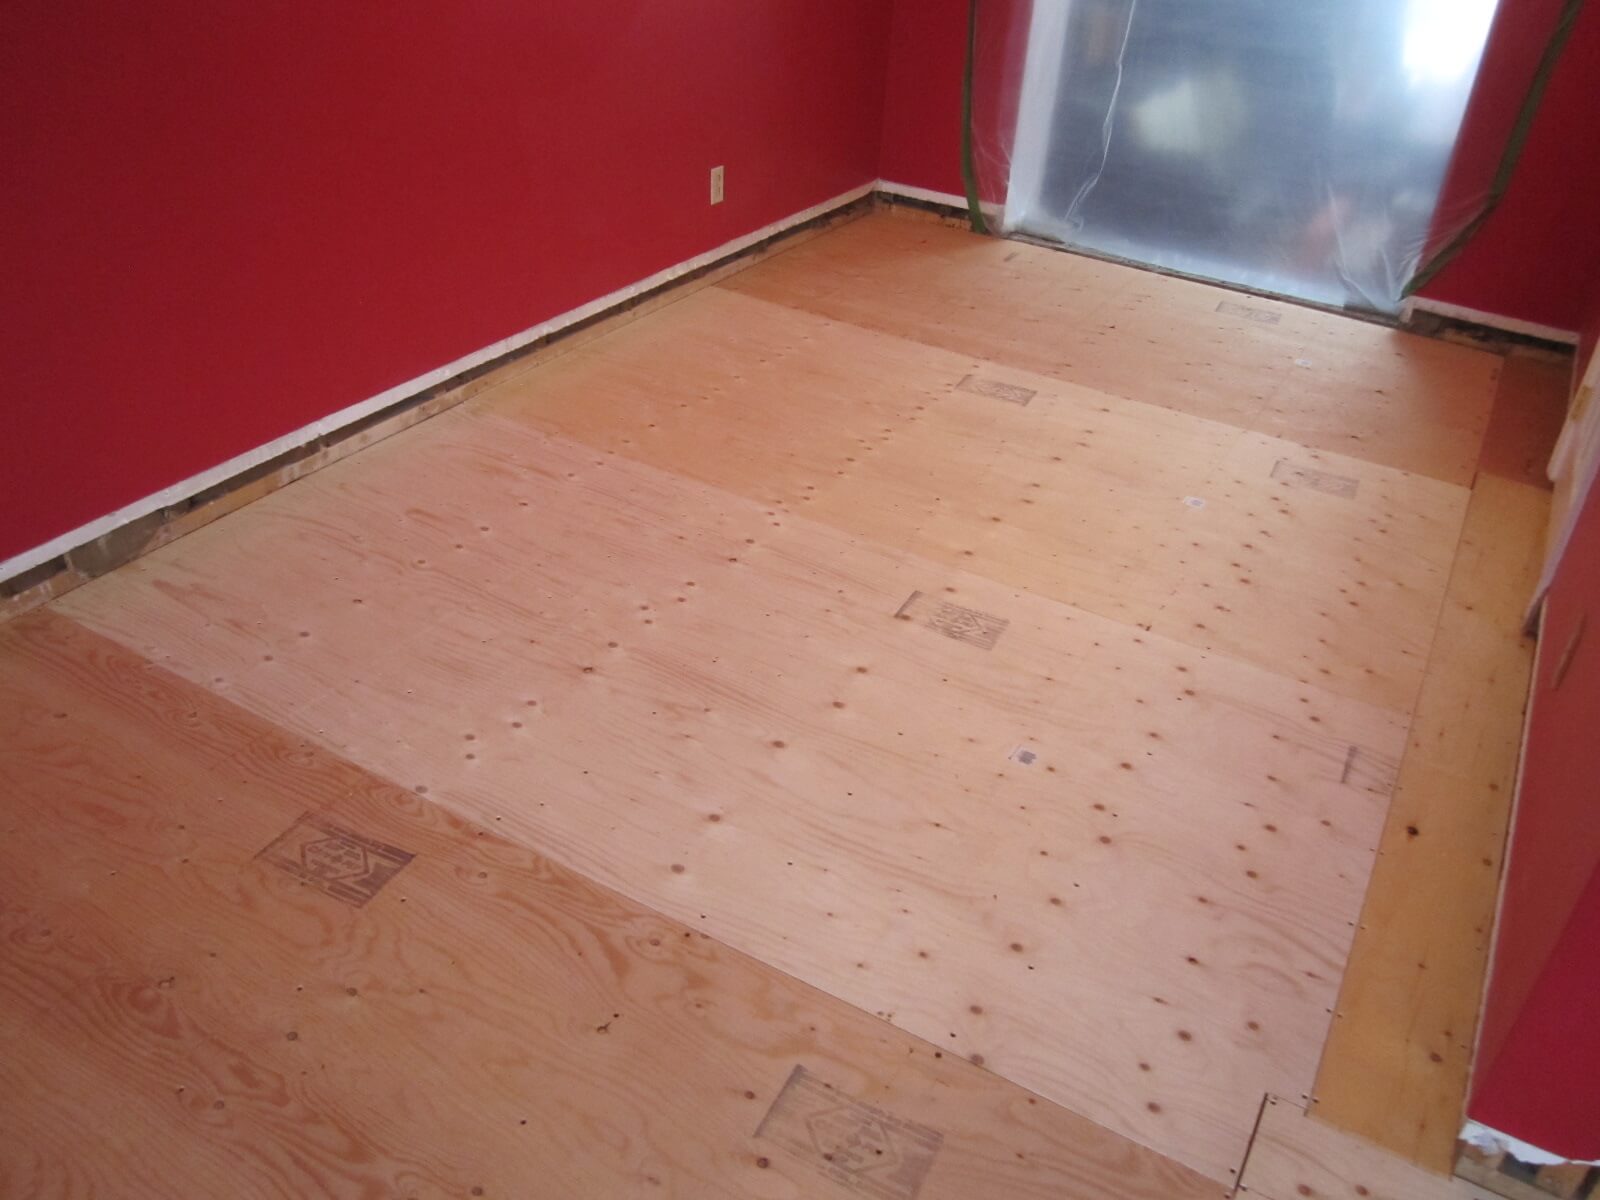
Warning, sensitive souls abstain yourself, here are some photos of the starting point:
4.1 Planning
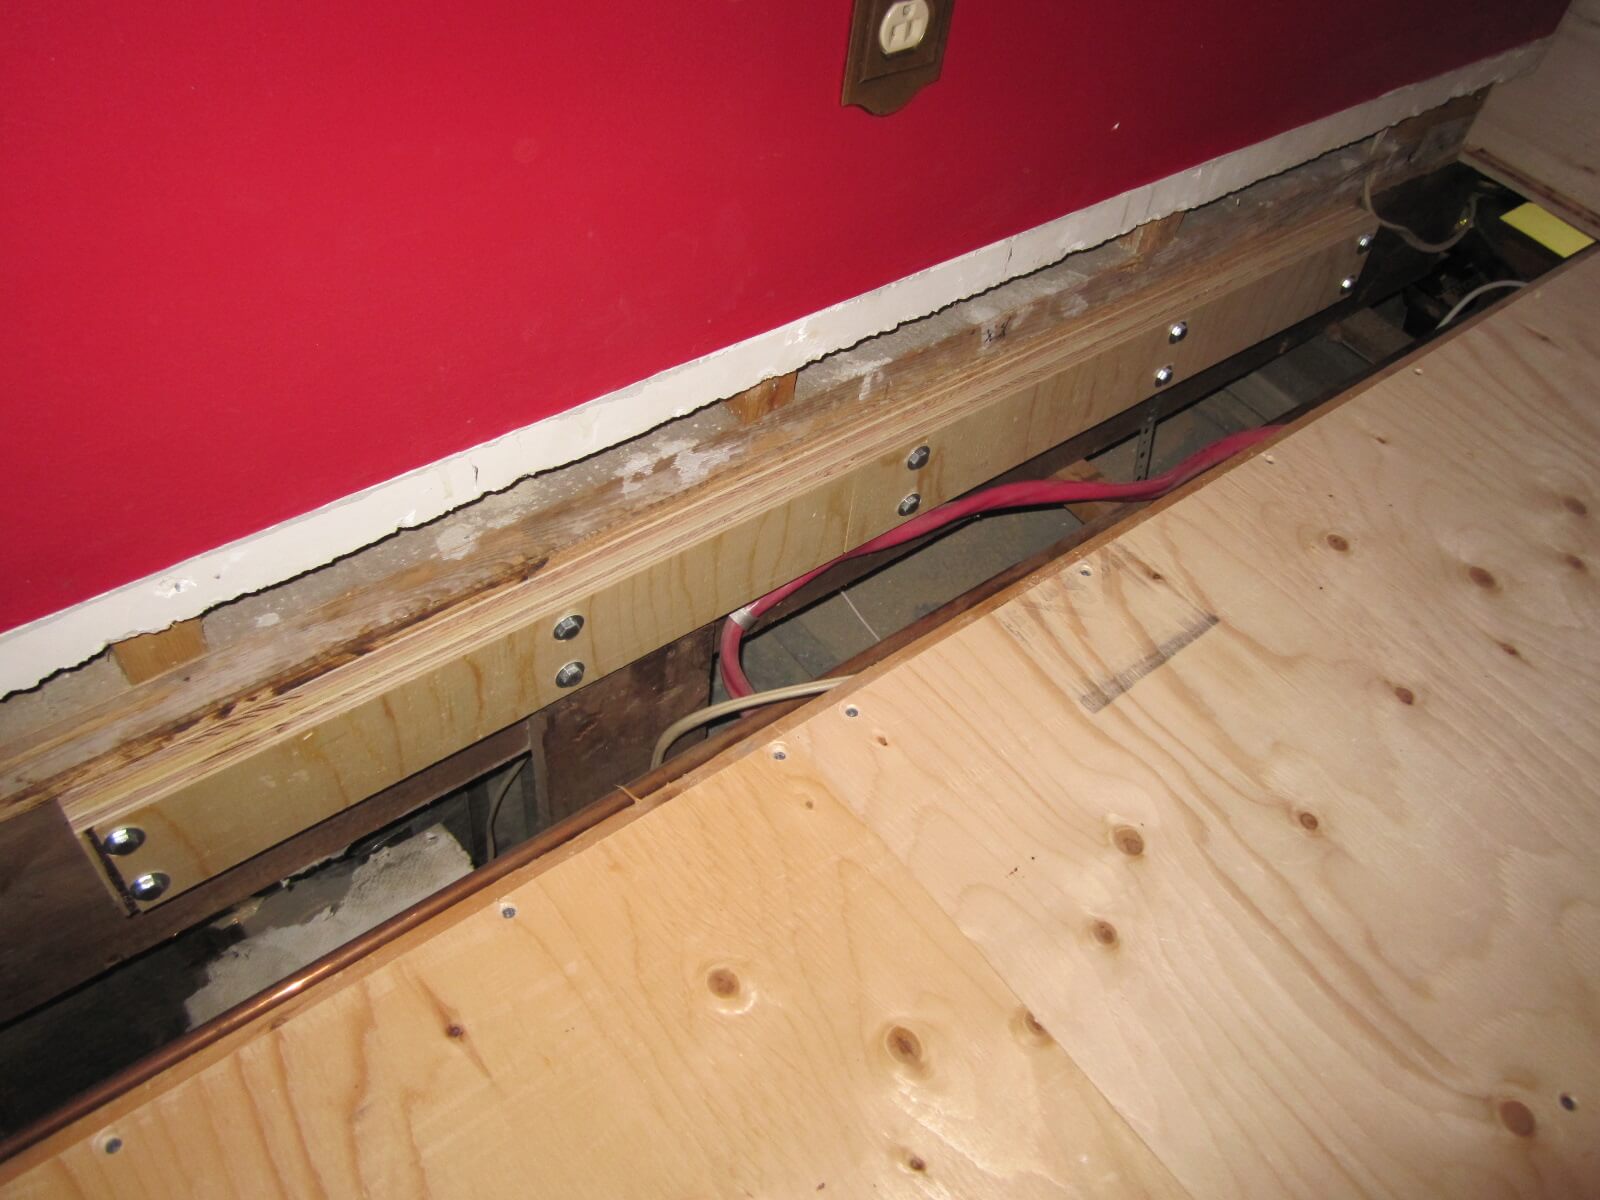
1st step: remove moldings and carpet.
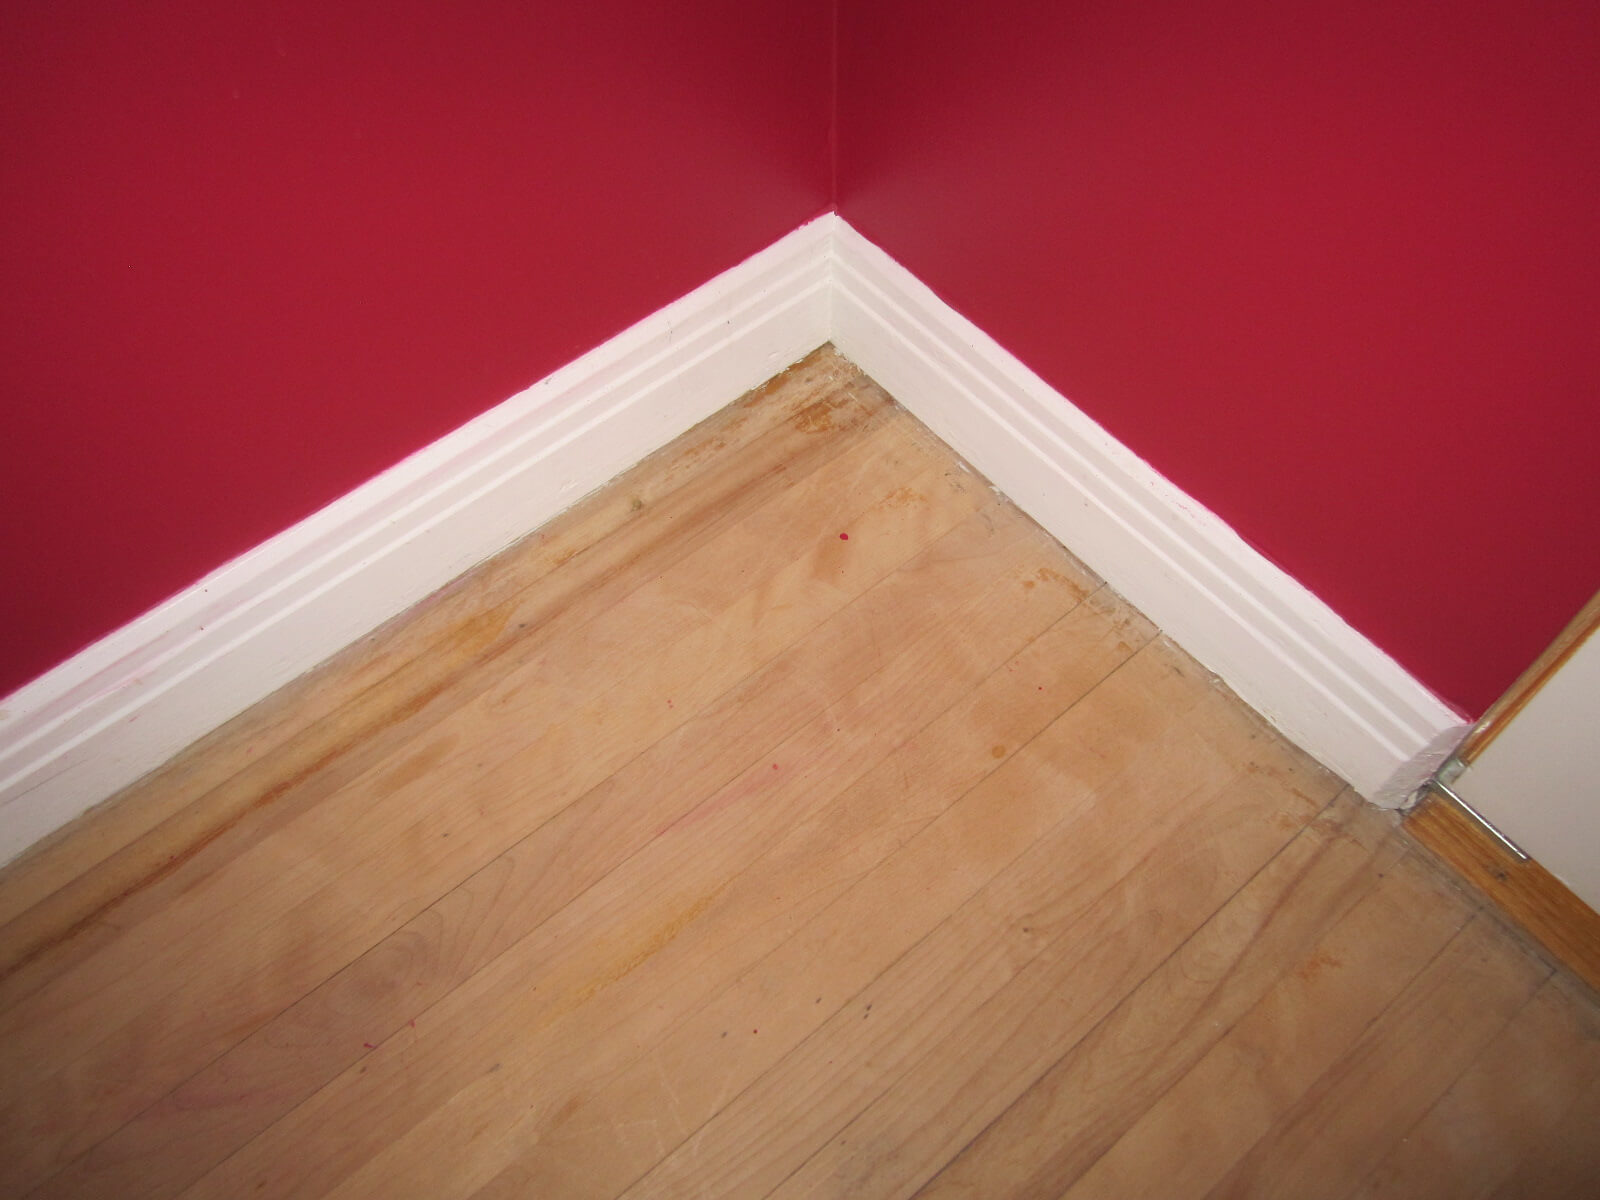
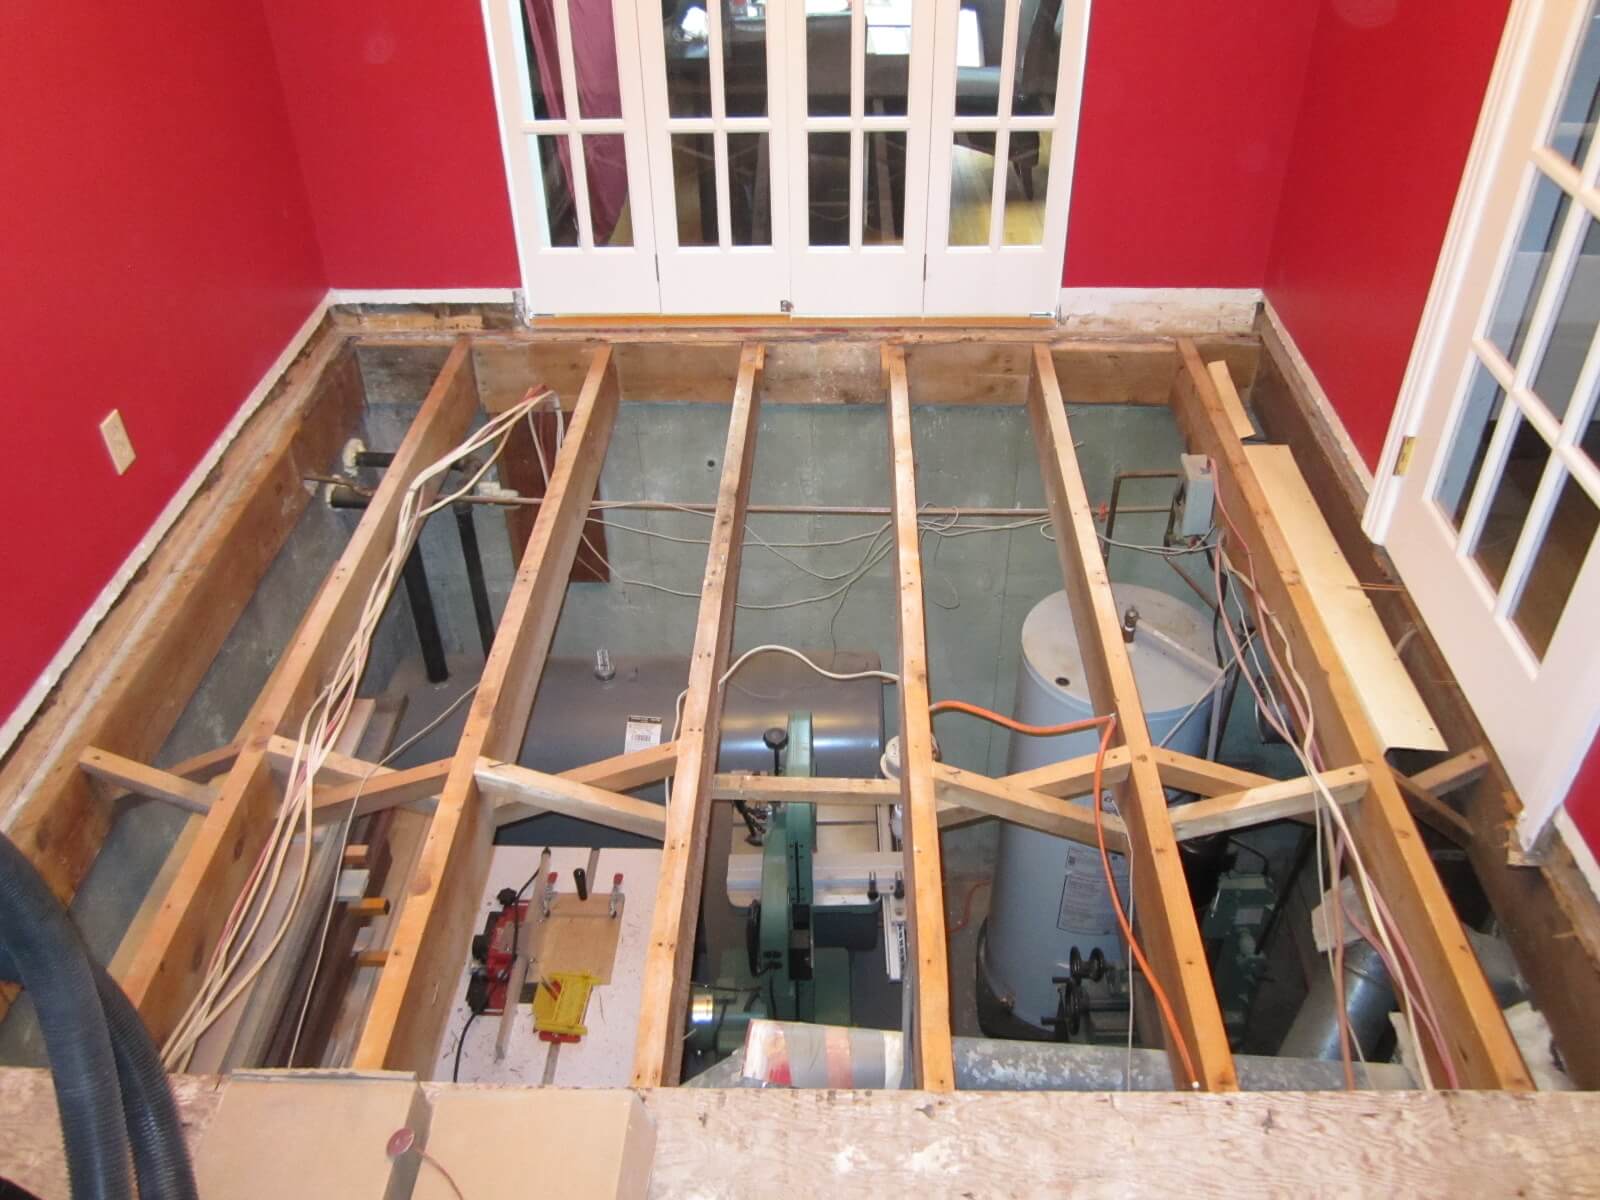
I must admit that I had a twinge in my heart when removing this magnificent brown carpet. Just kidding… In any renovation project, there are always surprises! I discovered the original floor, in cherry wood, under the thick carpet. It had to be removed.
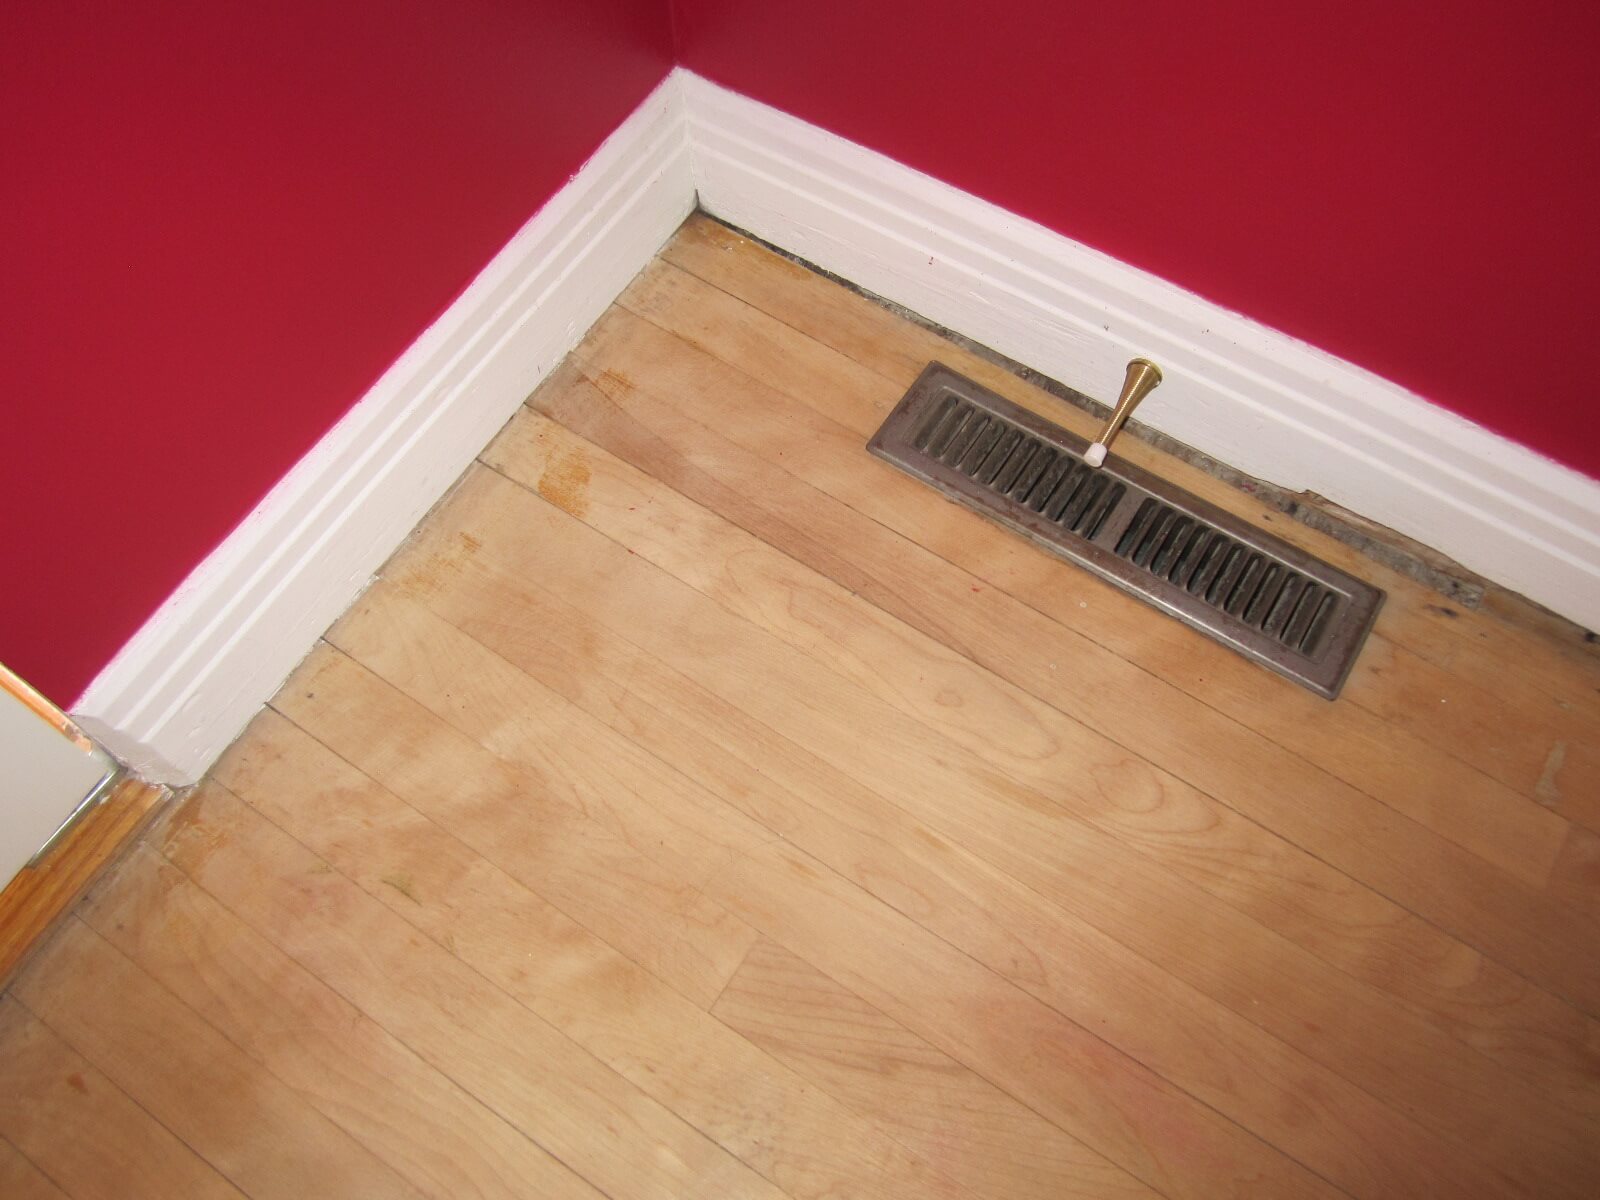
Run a utility knife along your moldings so they come off cleanly. This will prevent the paint from tearing outwards which would require you to correct later.
This concerns only me but I always remove the nails from the moldings. I’m thinking of the people who will handle them when I get rid of them and I wouldn’t want them to get hurt. Also, nails recycle very well.
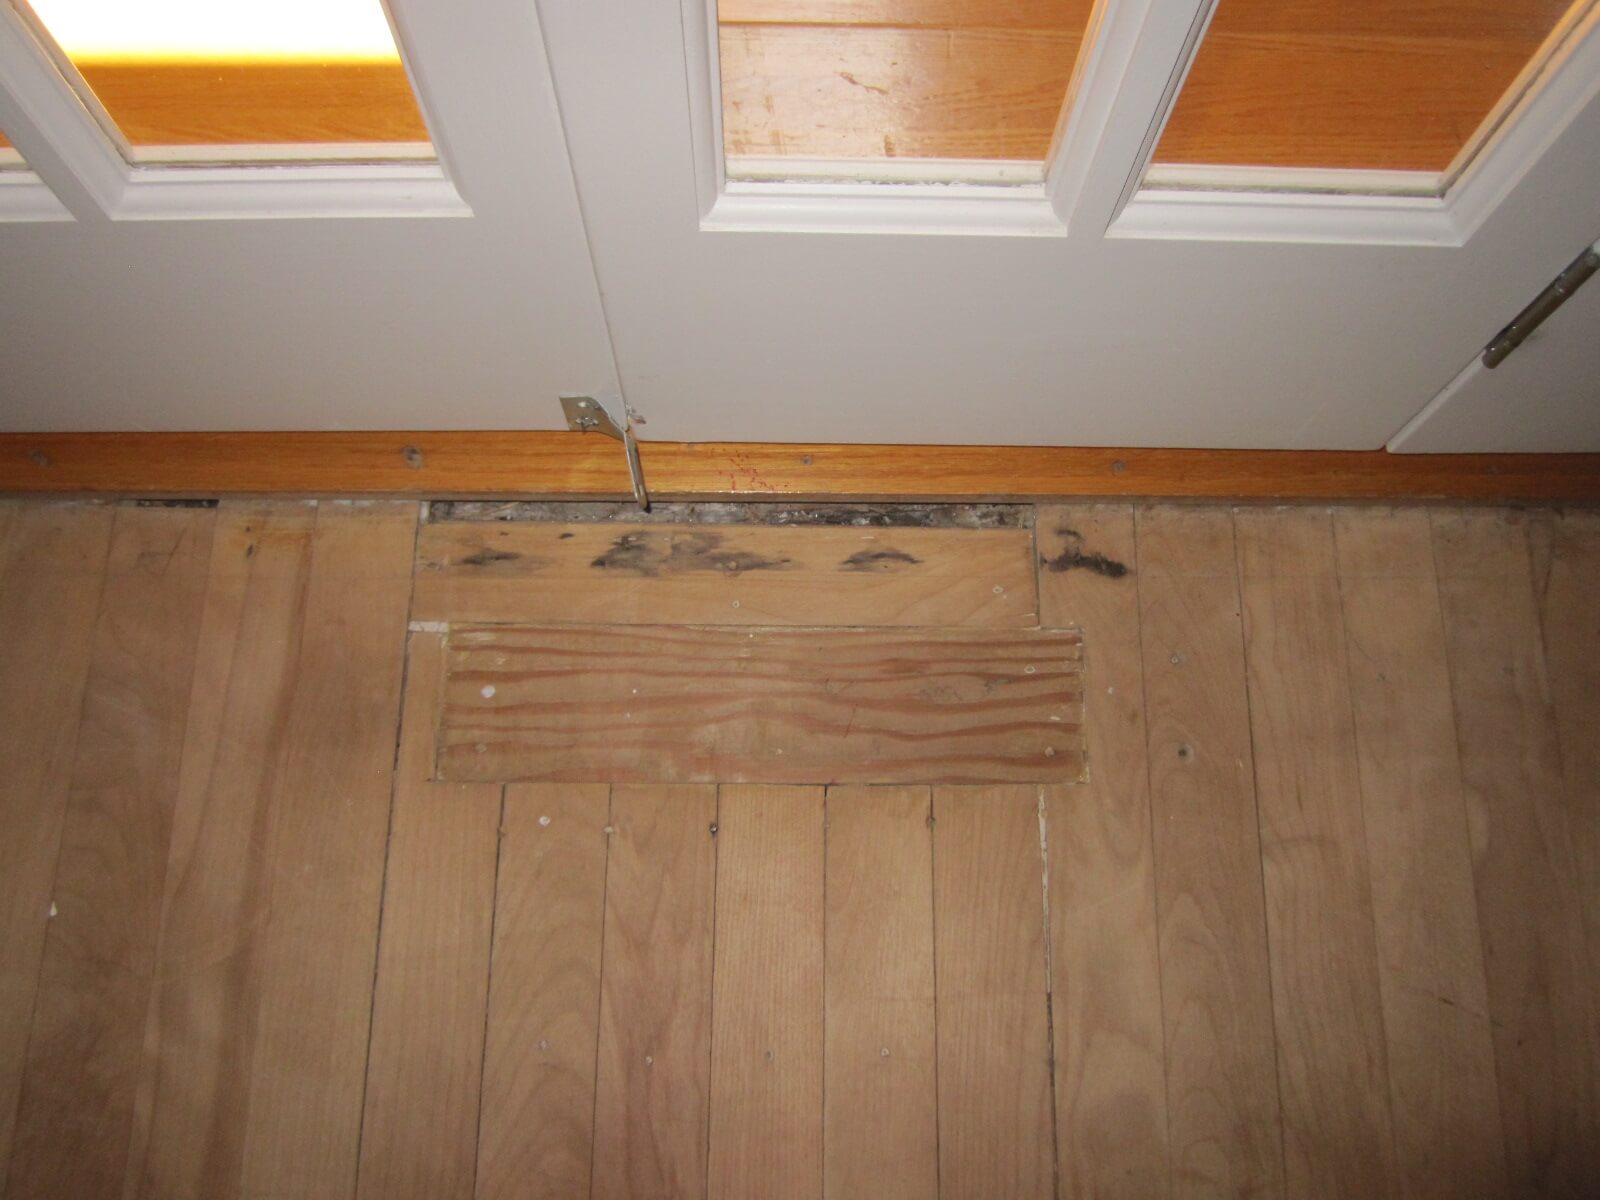
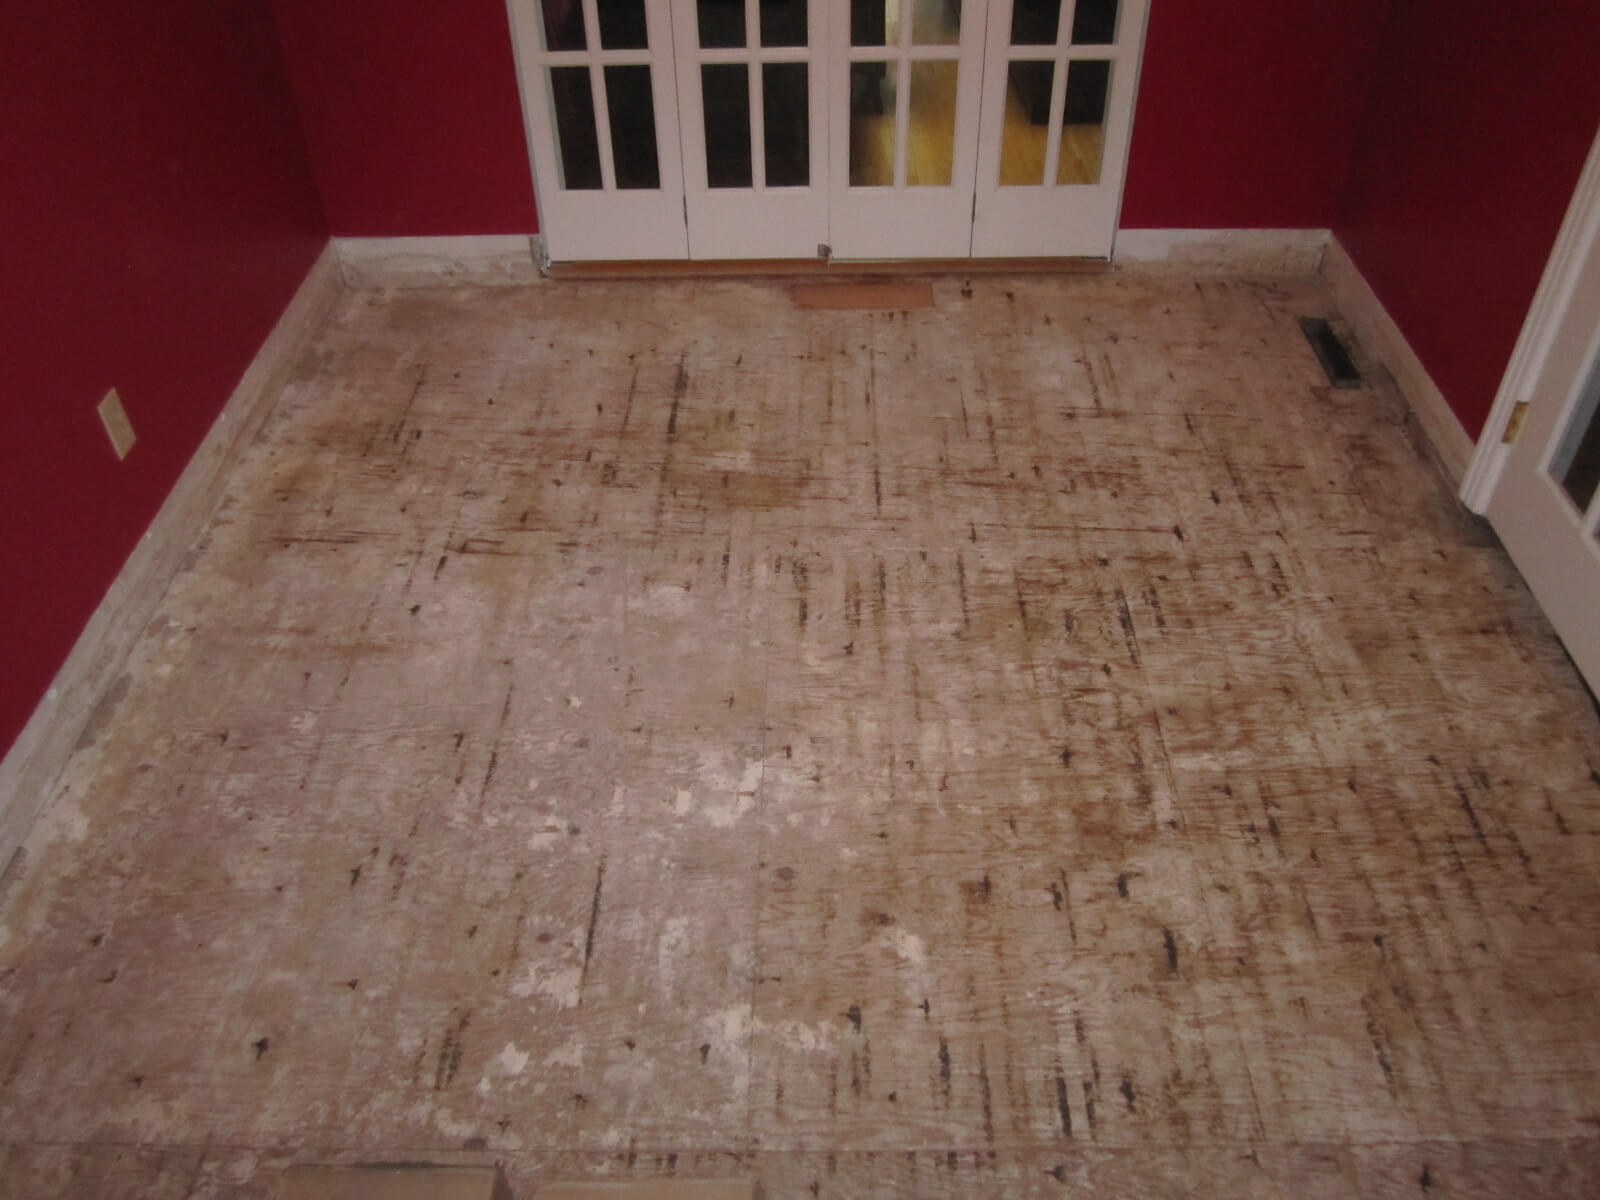
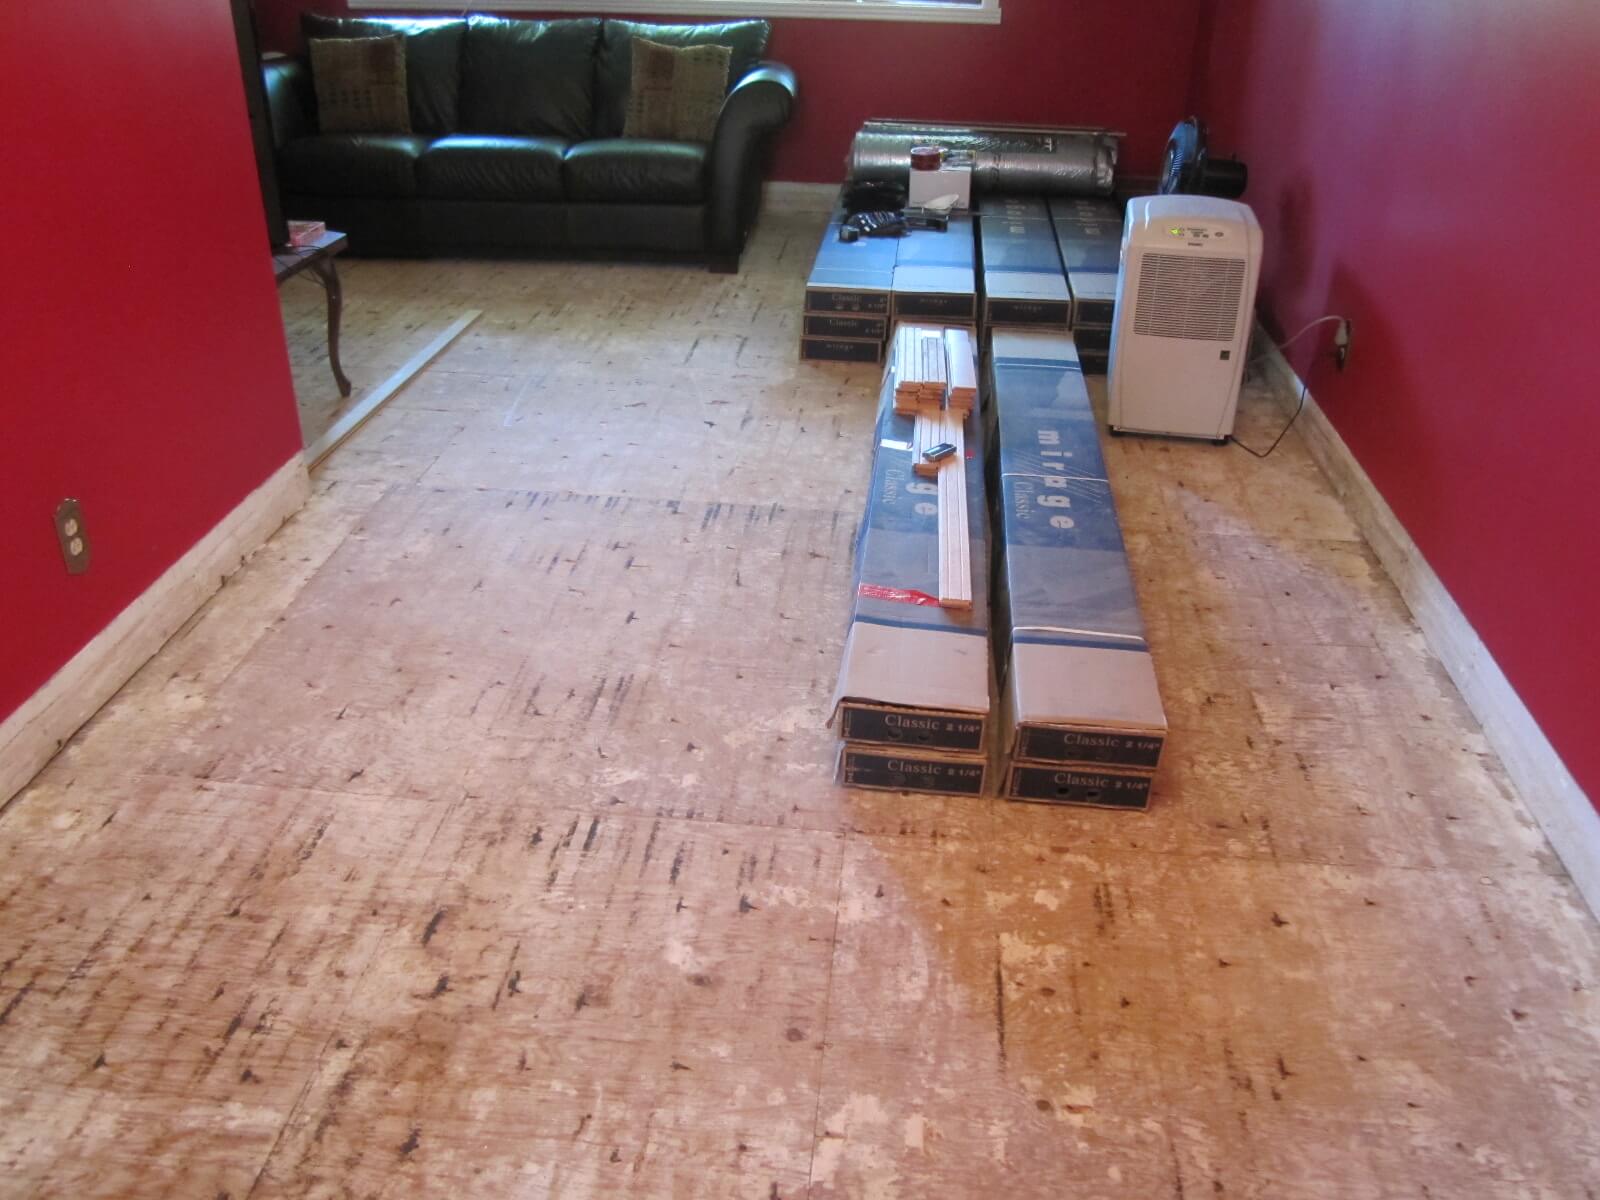
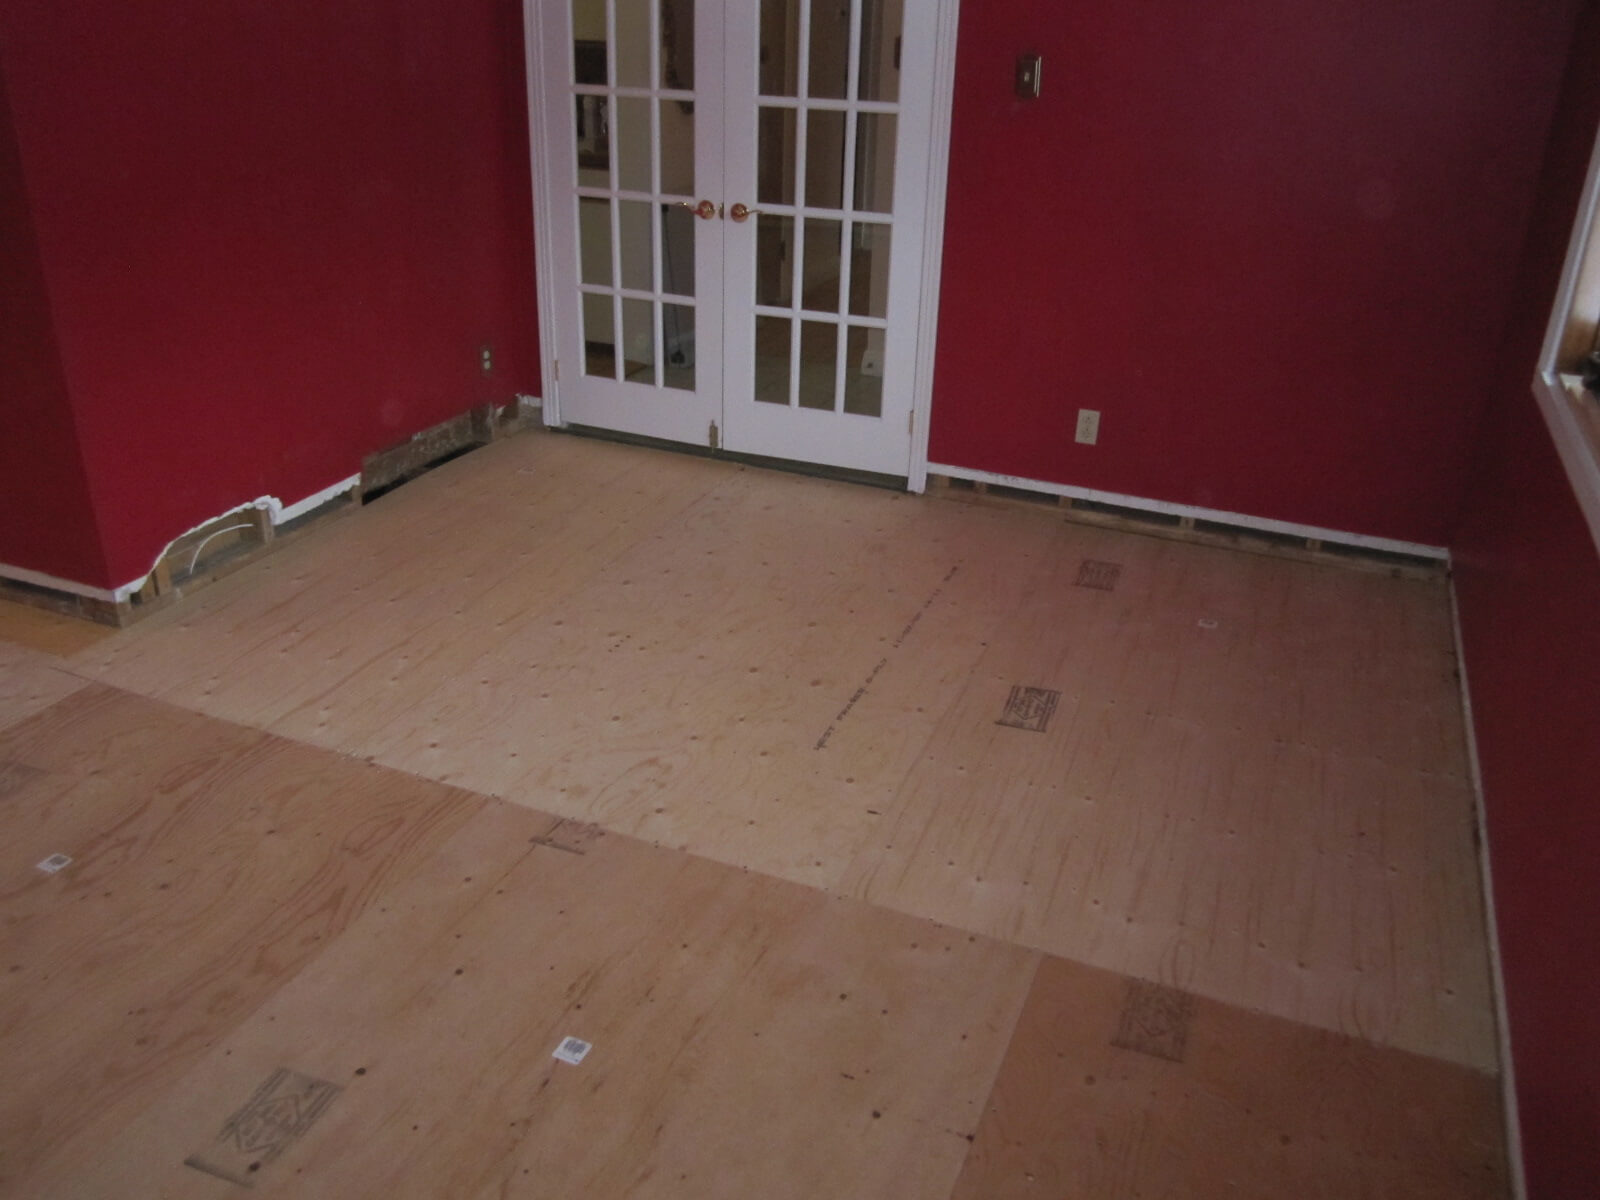
2nd step: replace the subfloor
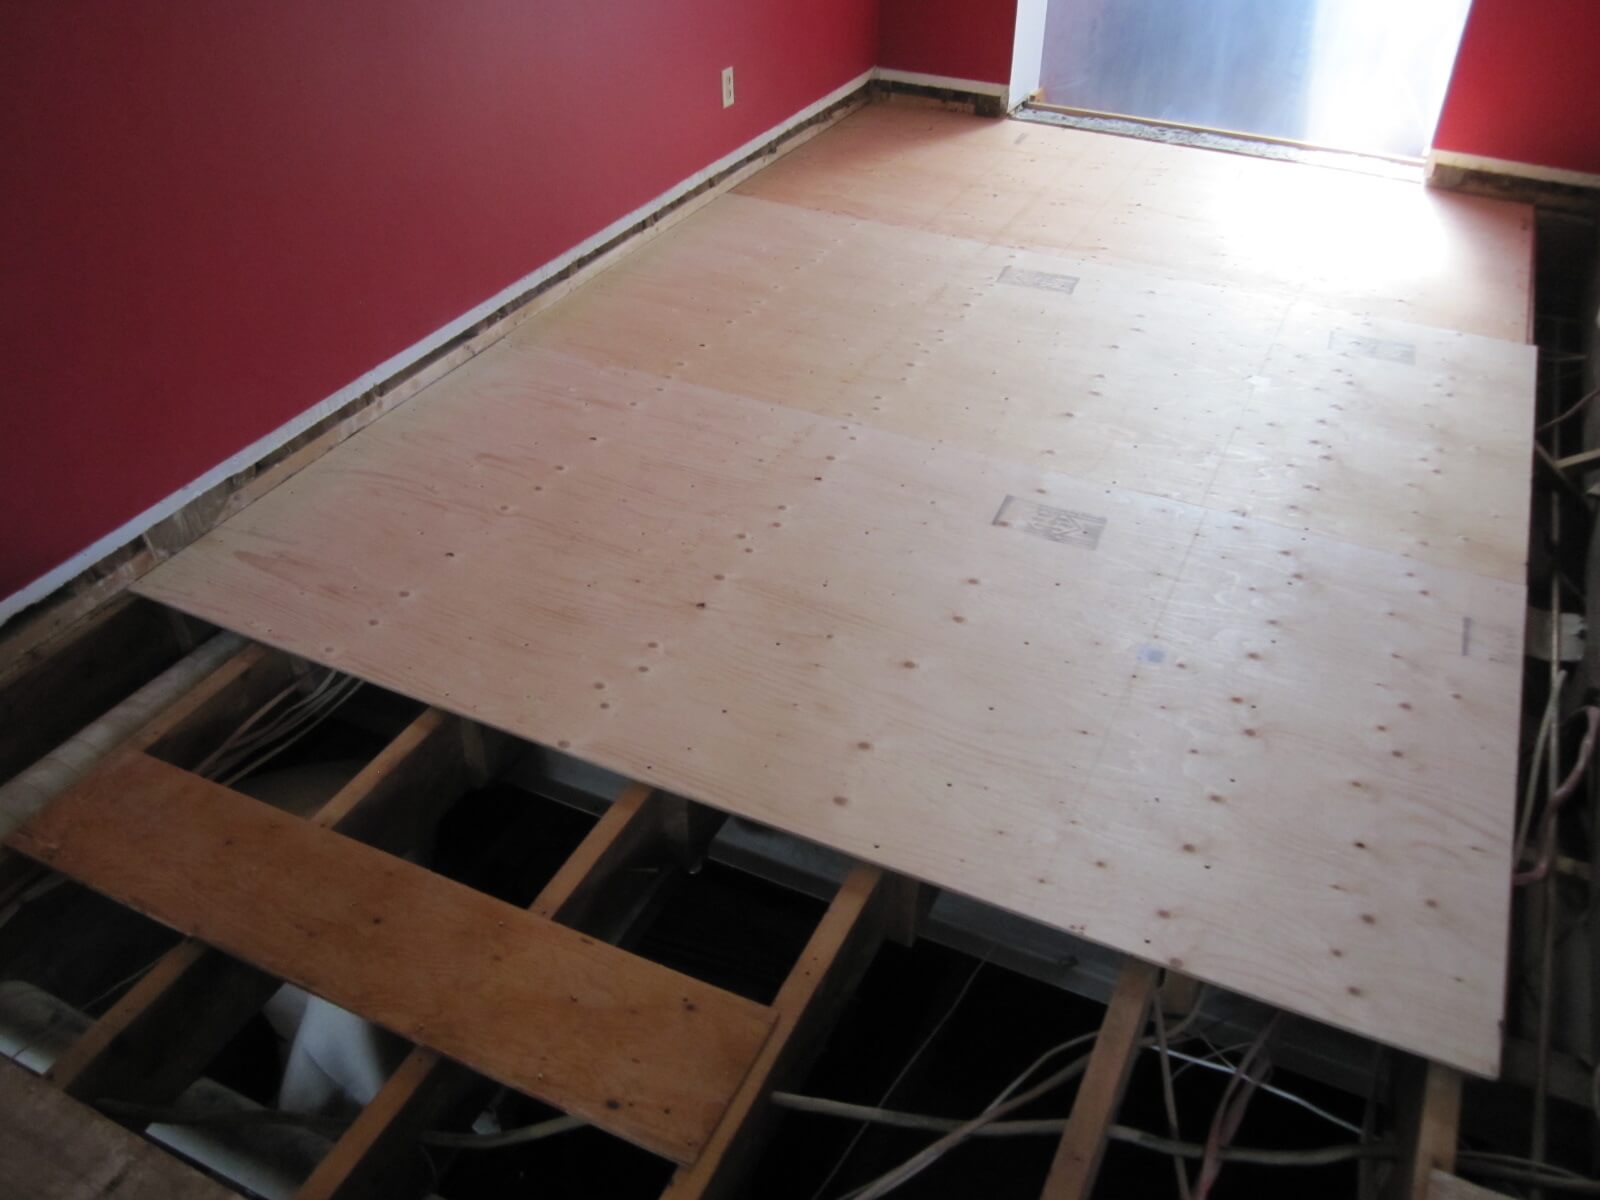
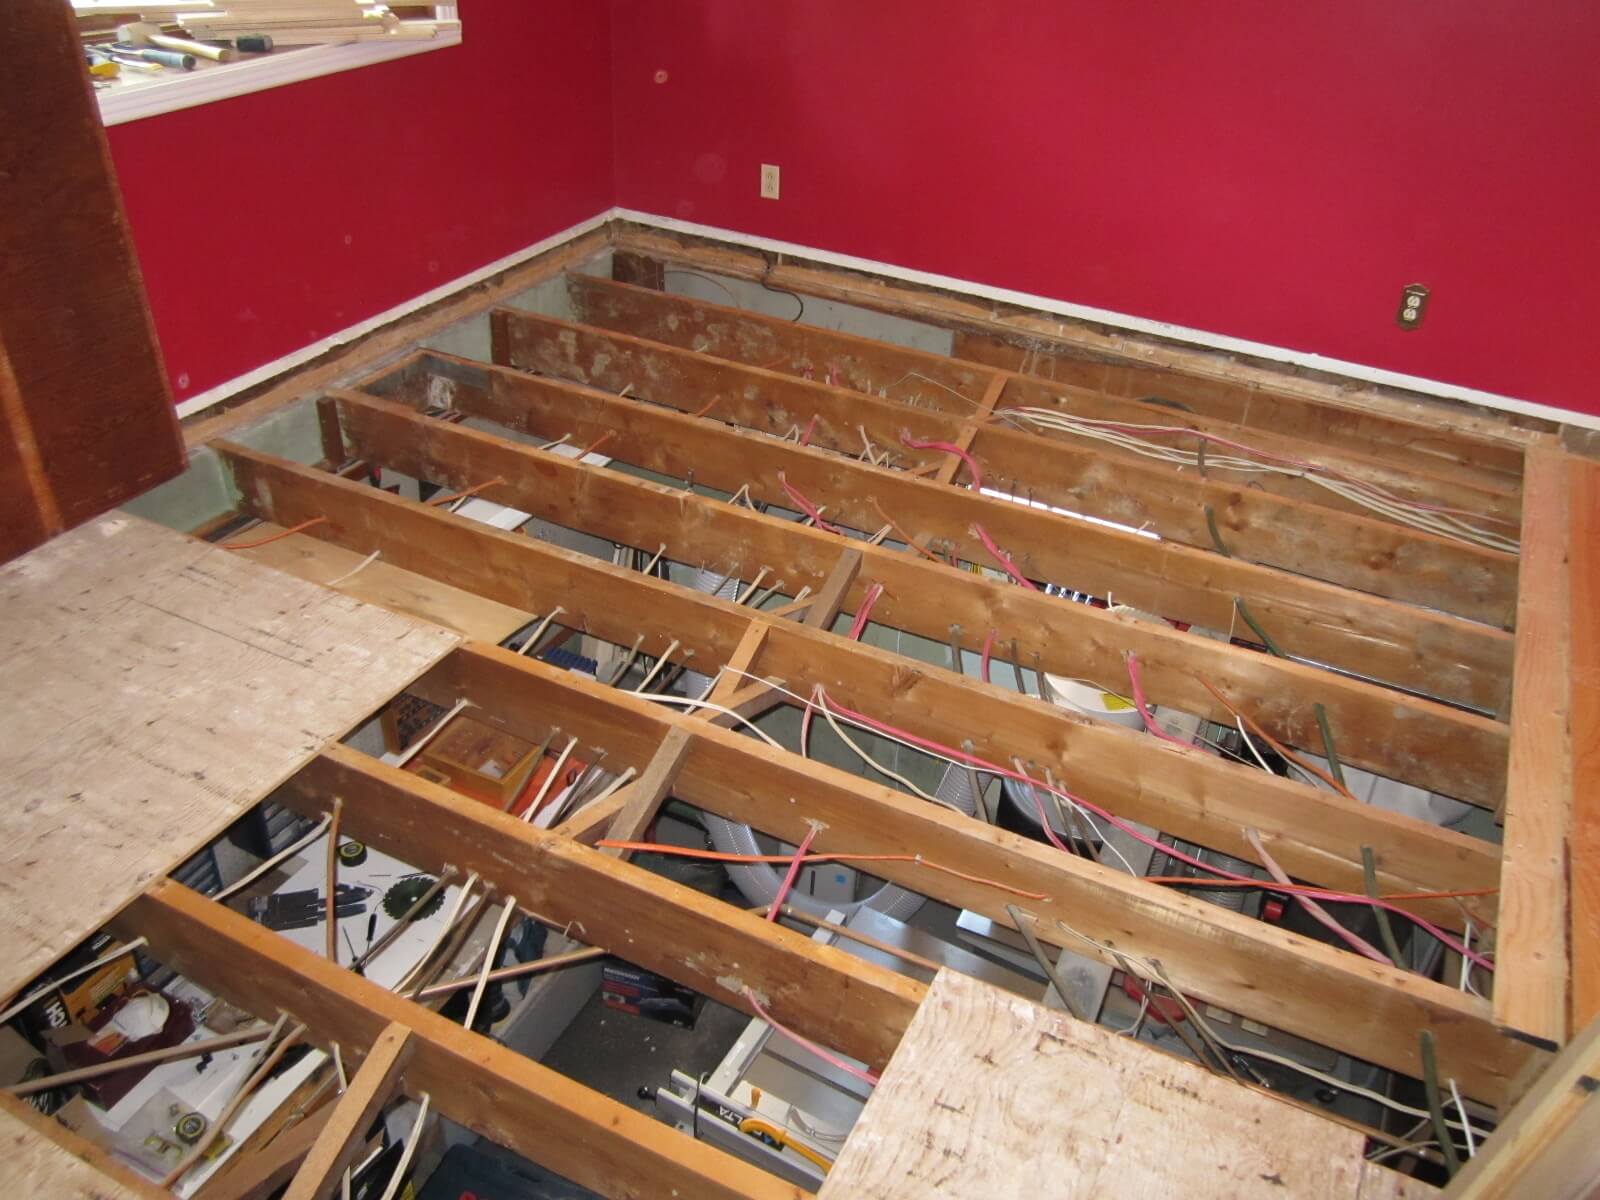
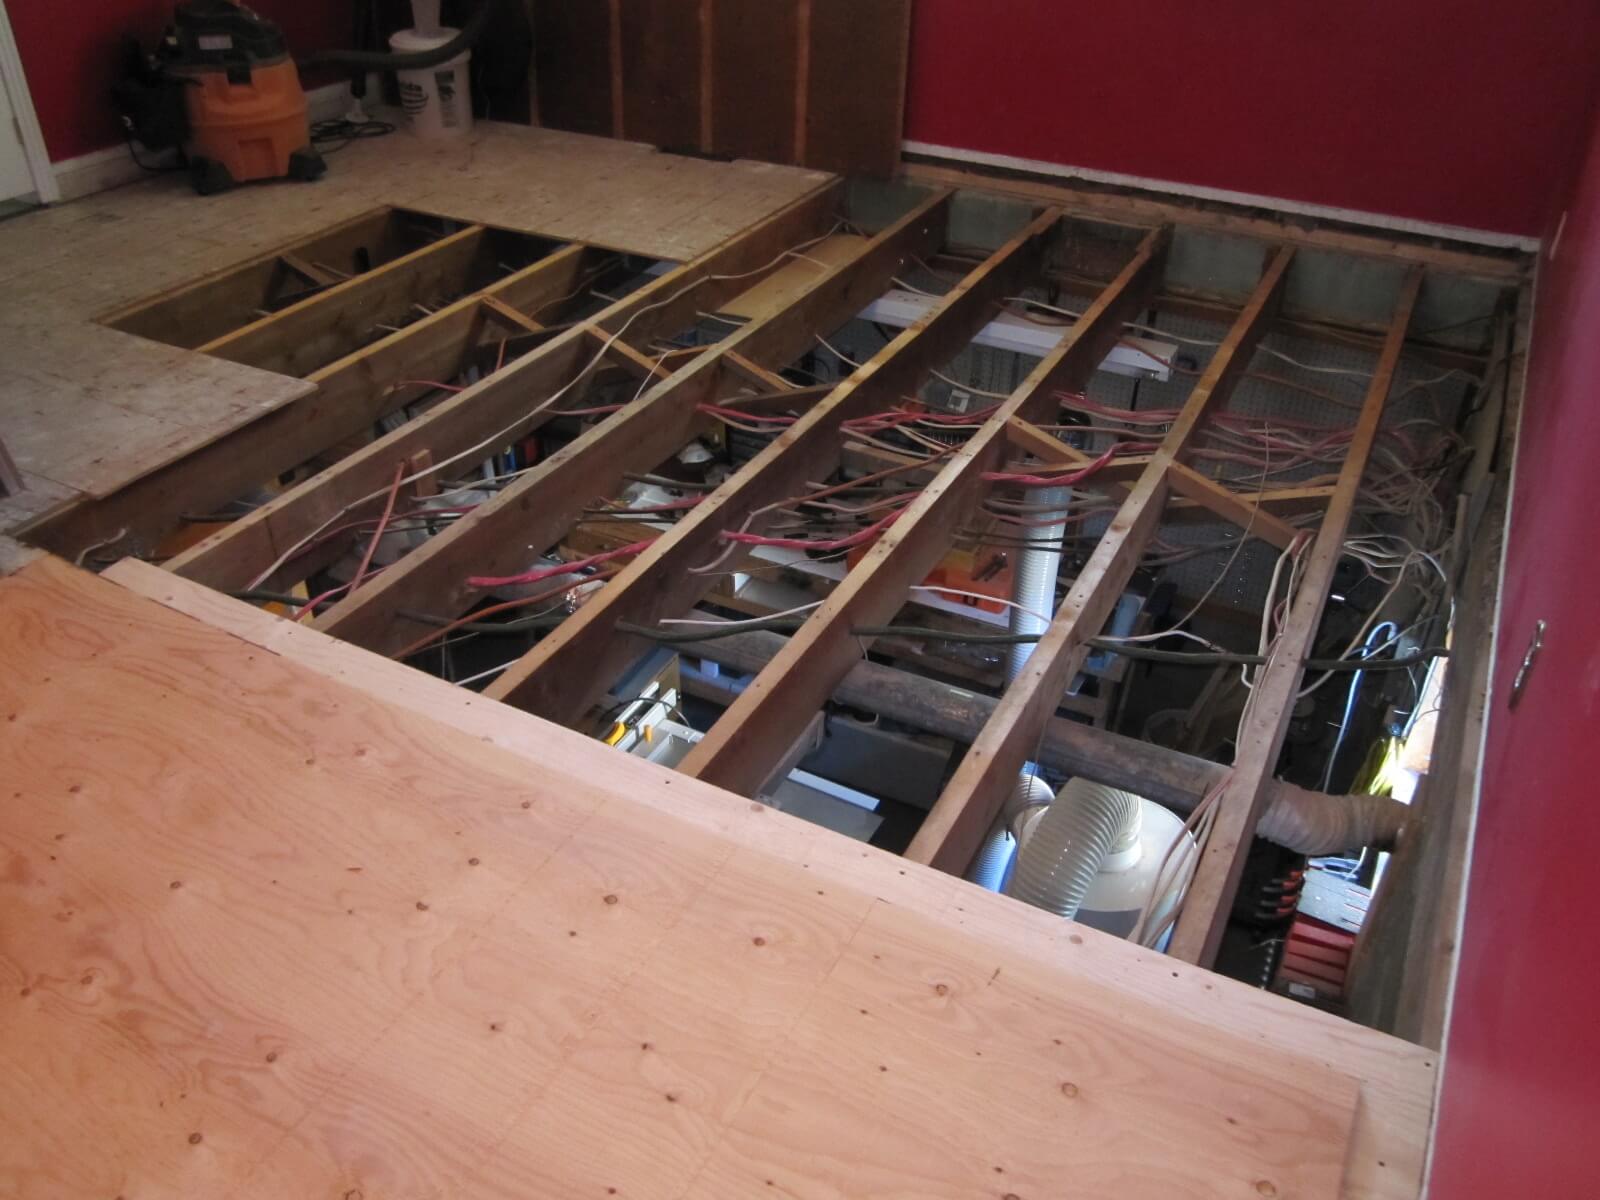
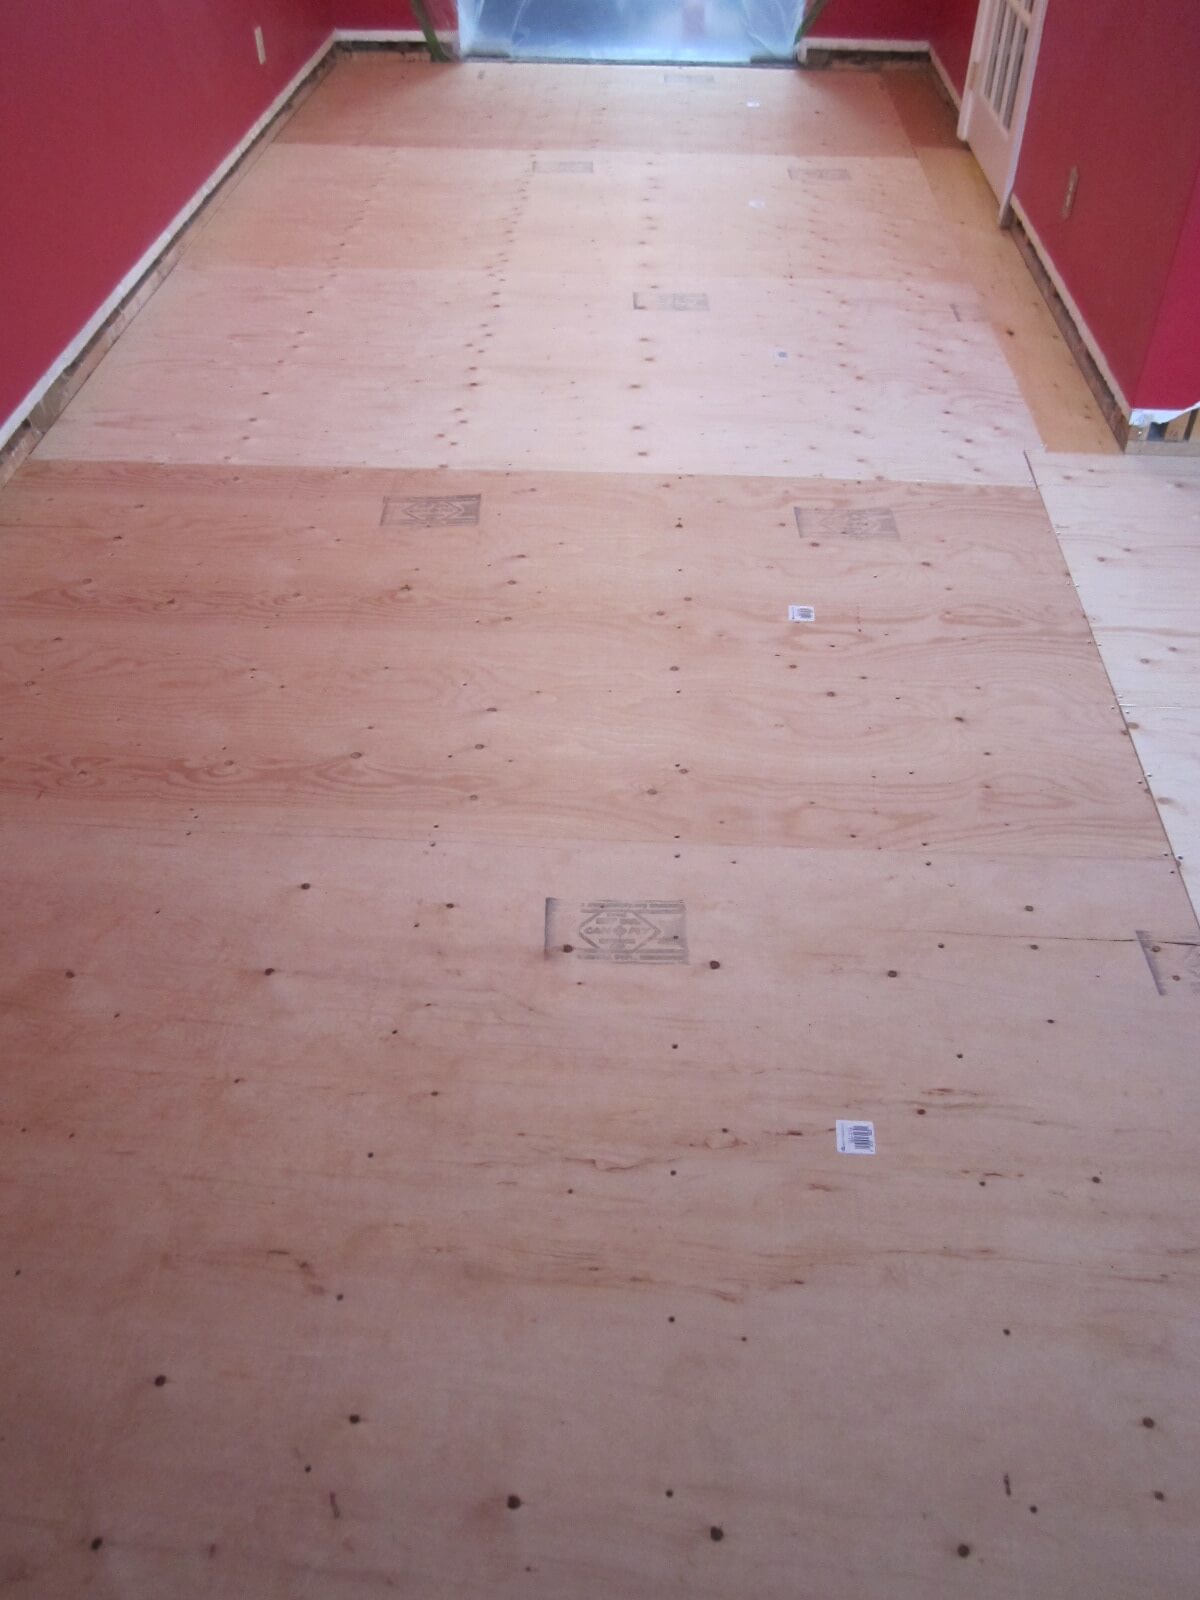
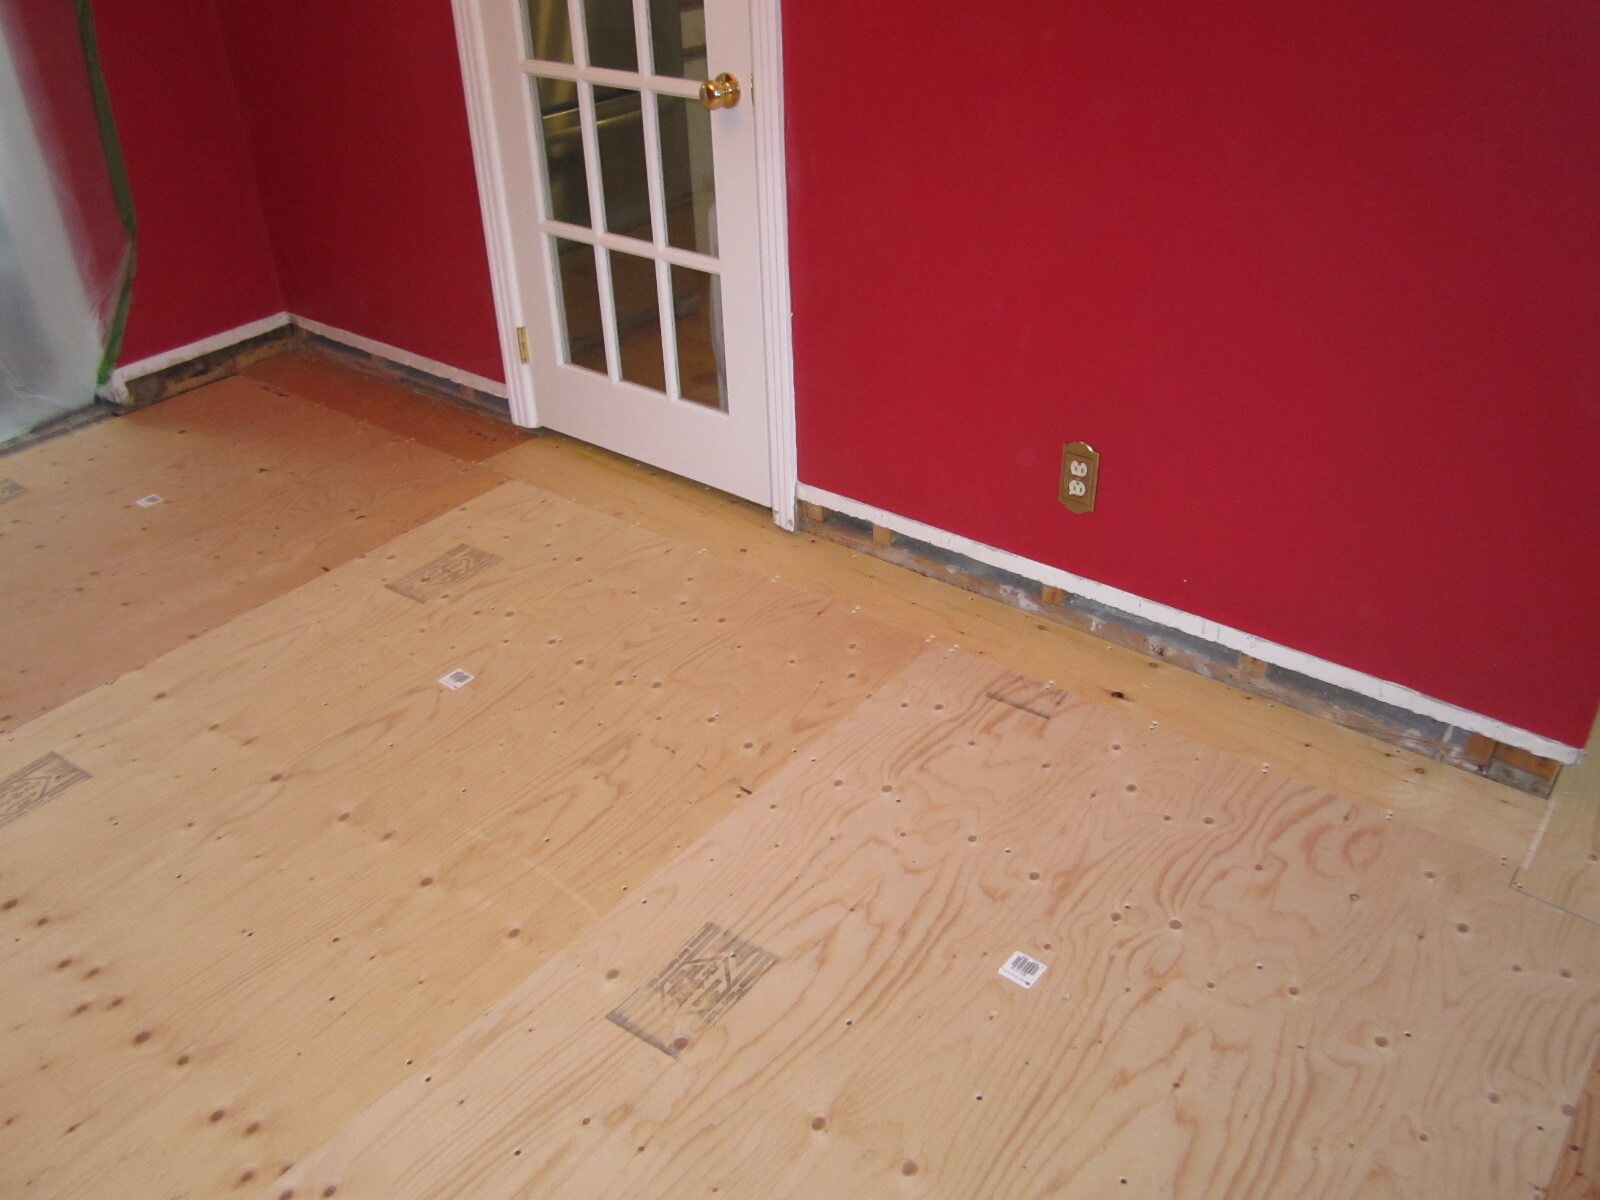
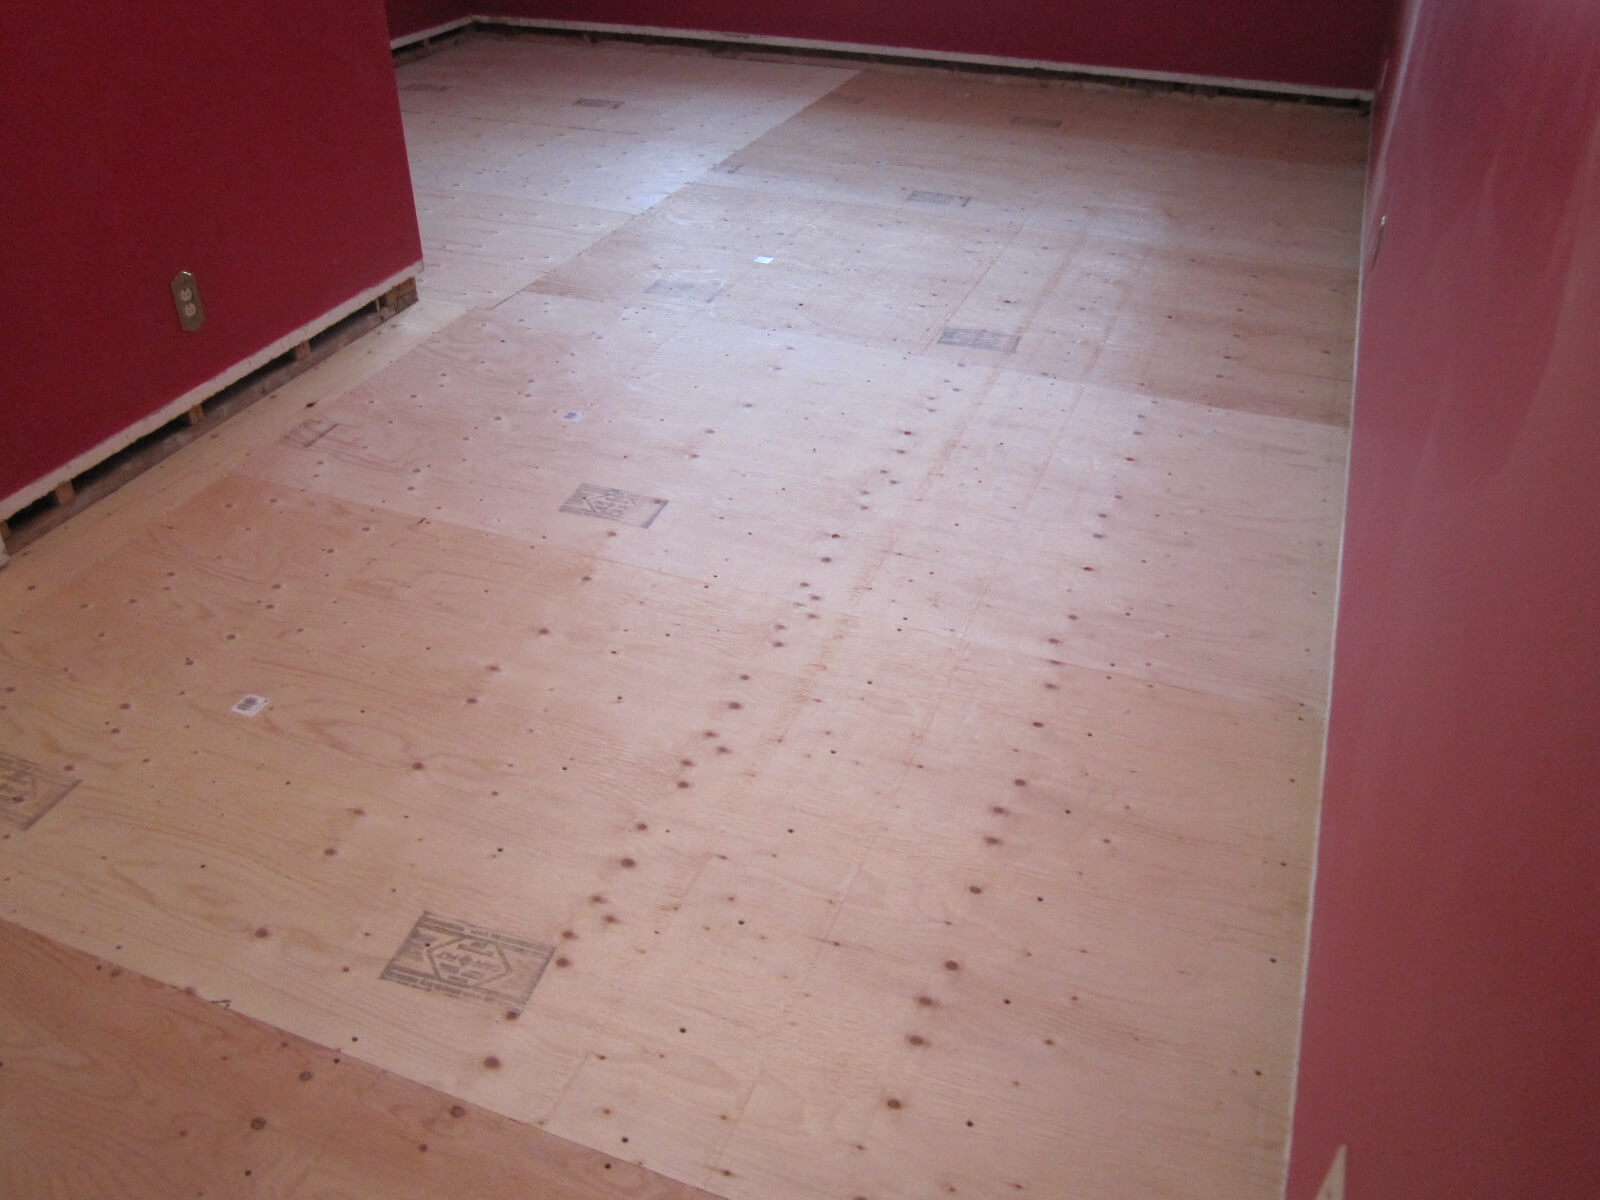
The subfloor was, unfortunately, not in good enough condition so I had to replace it.
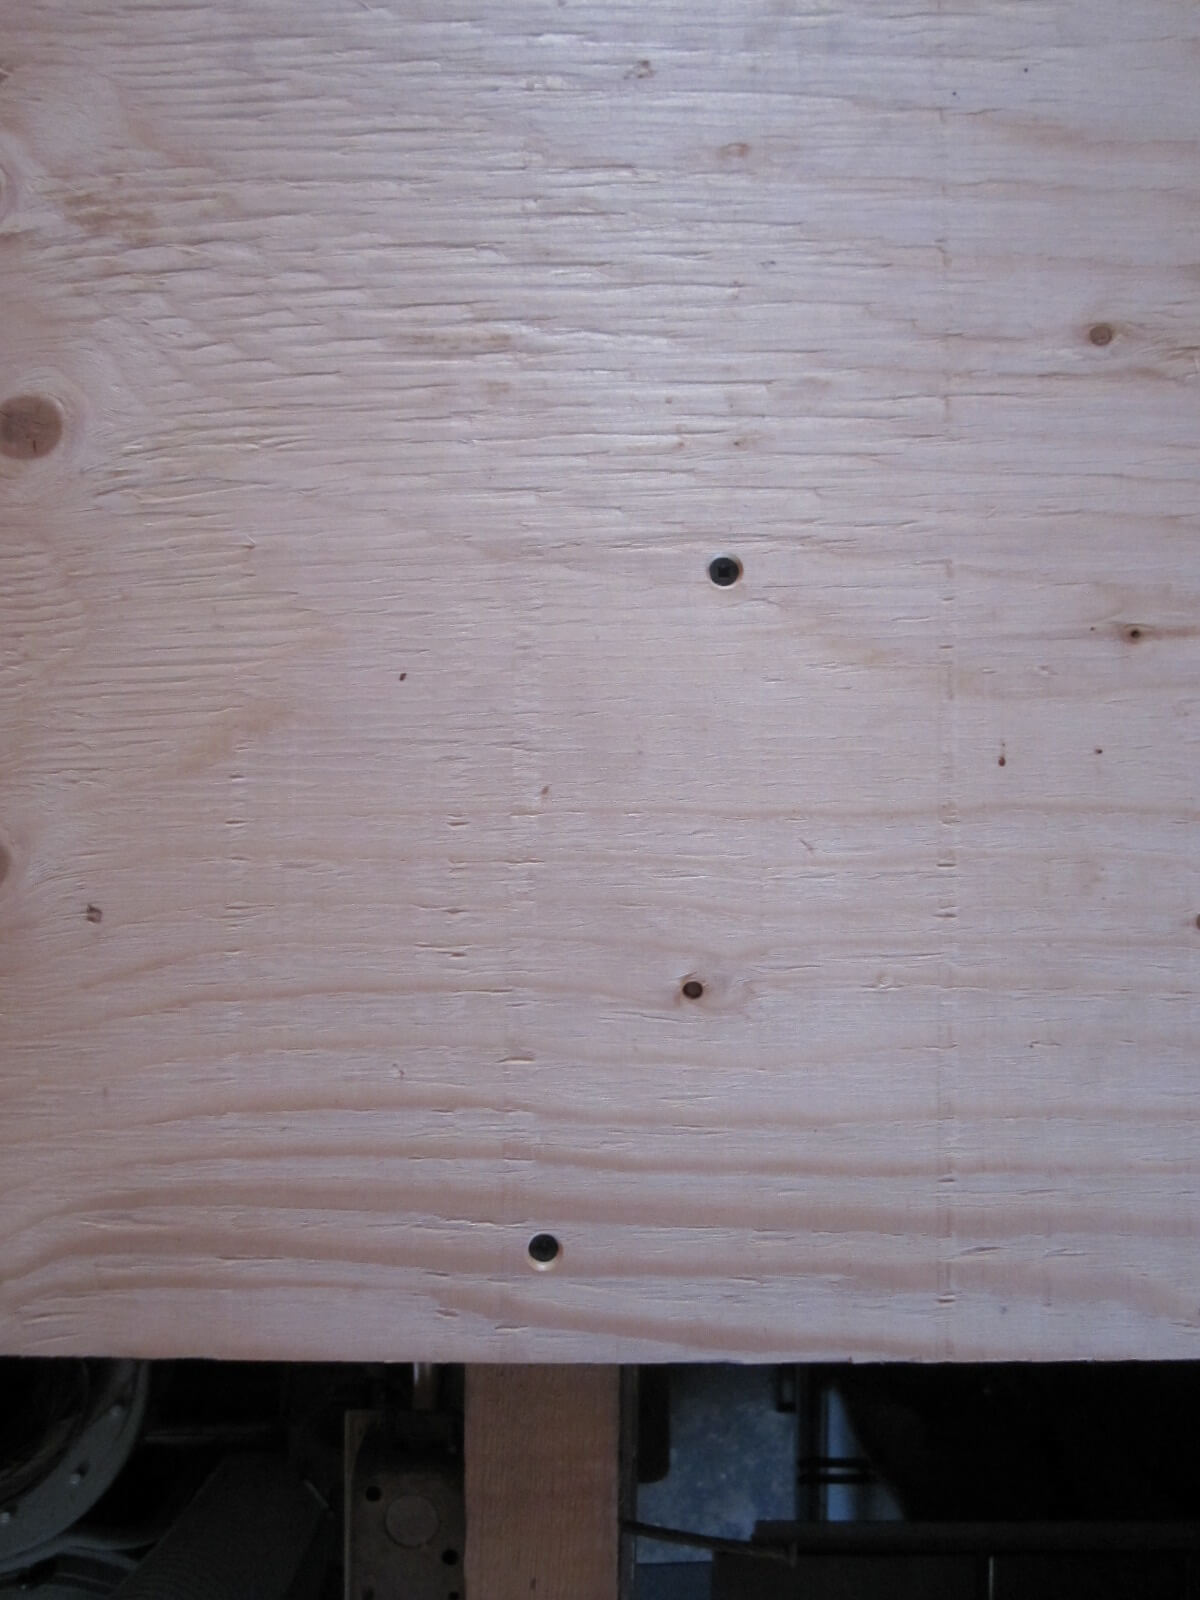
To do this, I bought 3/4″ x 4′ x 8′ (about 1.9 cm x 122 cm x 244 cm) spruce plywood sheets on which I made, with a router, rabbets of 1/2″ (about 13 mm) on all sides so that they can fit together during installation. Then I unnailed all the old plywood sheets, cut them out along the walls, then leveled, glued and 8″ screwed the new ones.
Here is the realization in pictures:
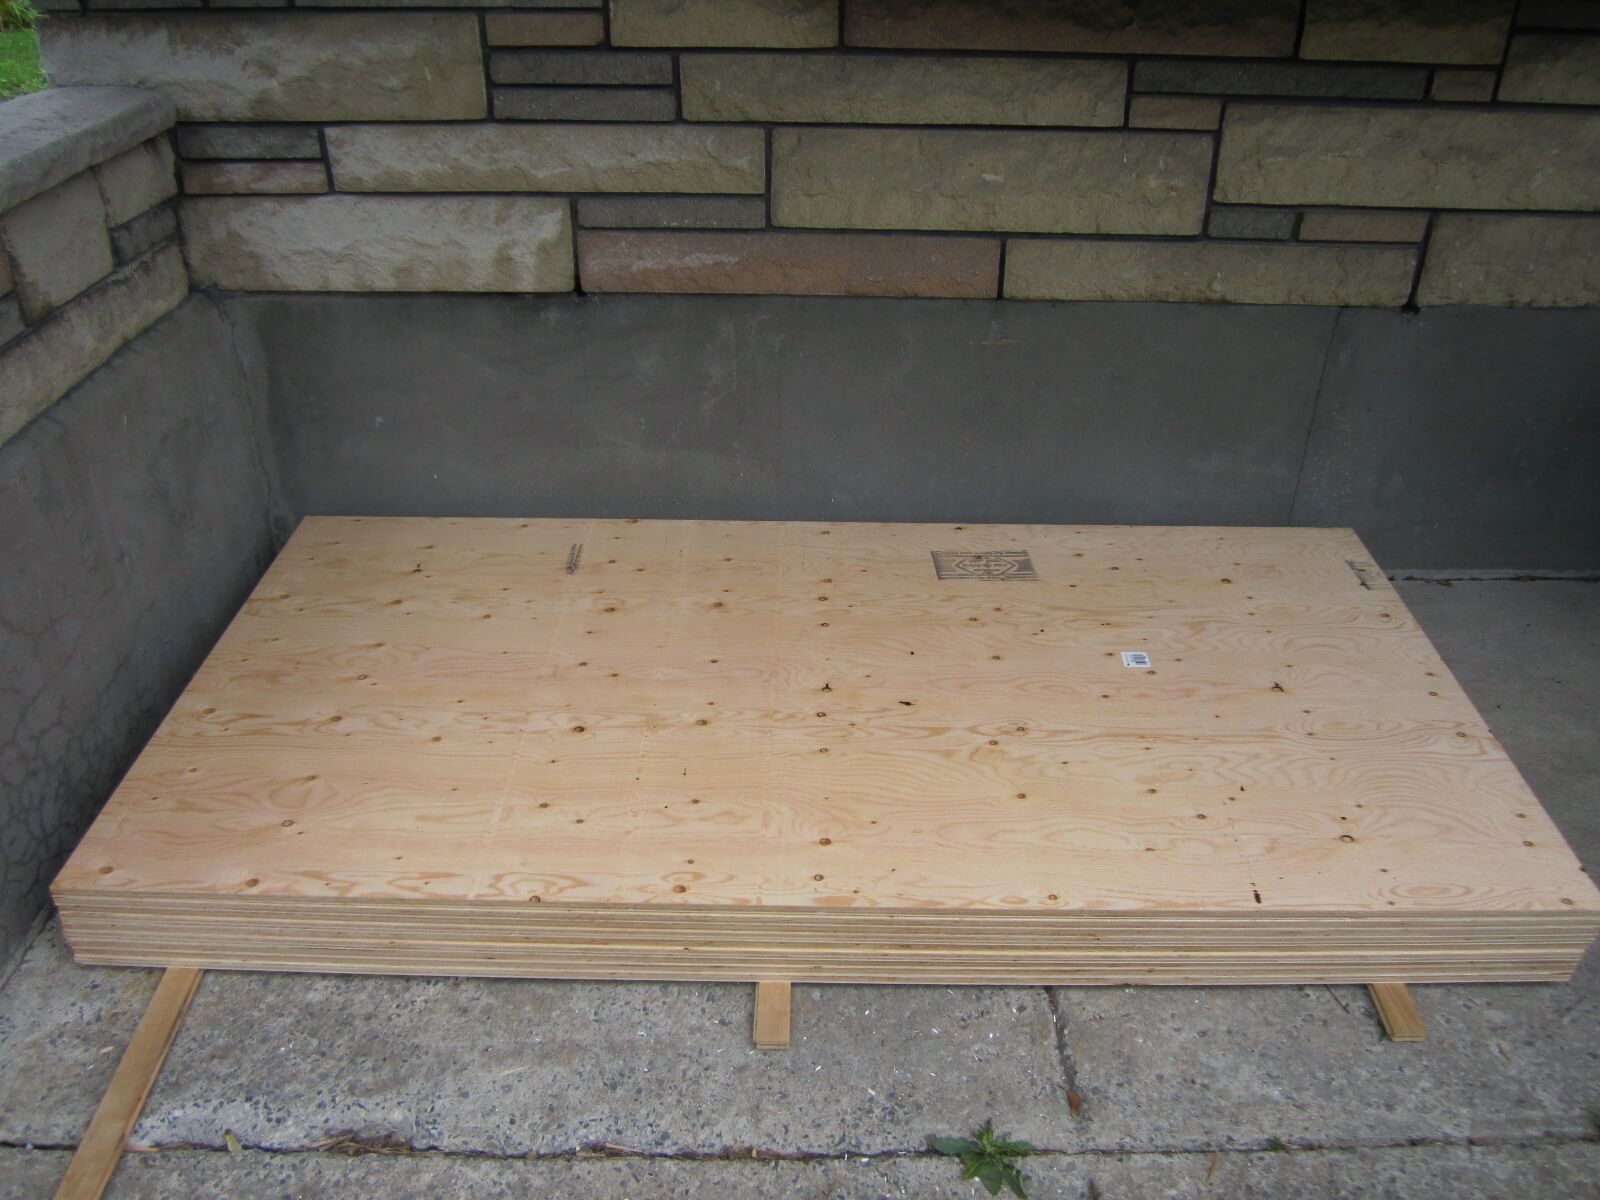
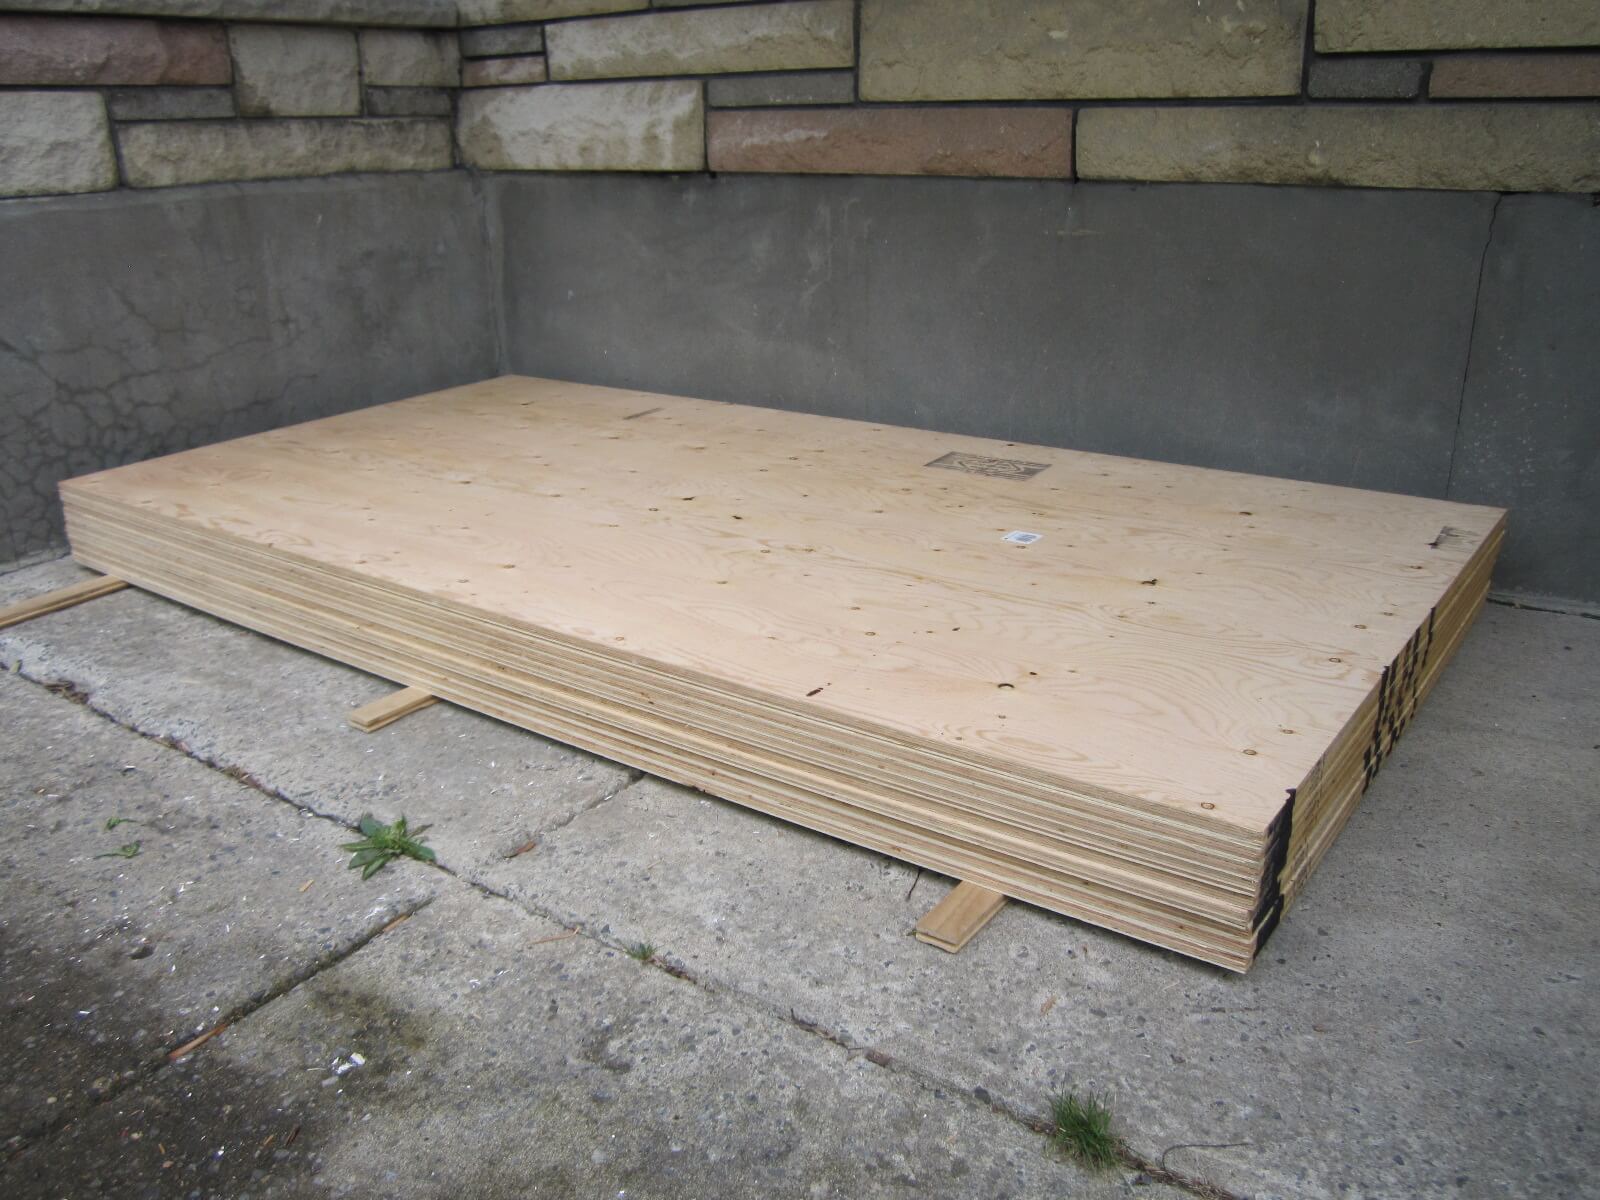

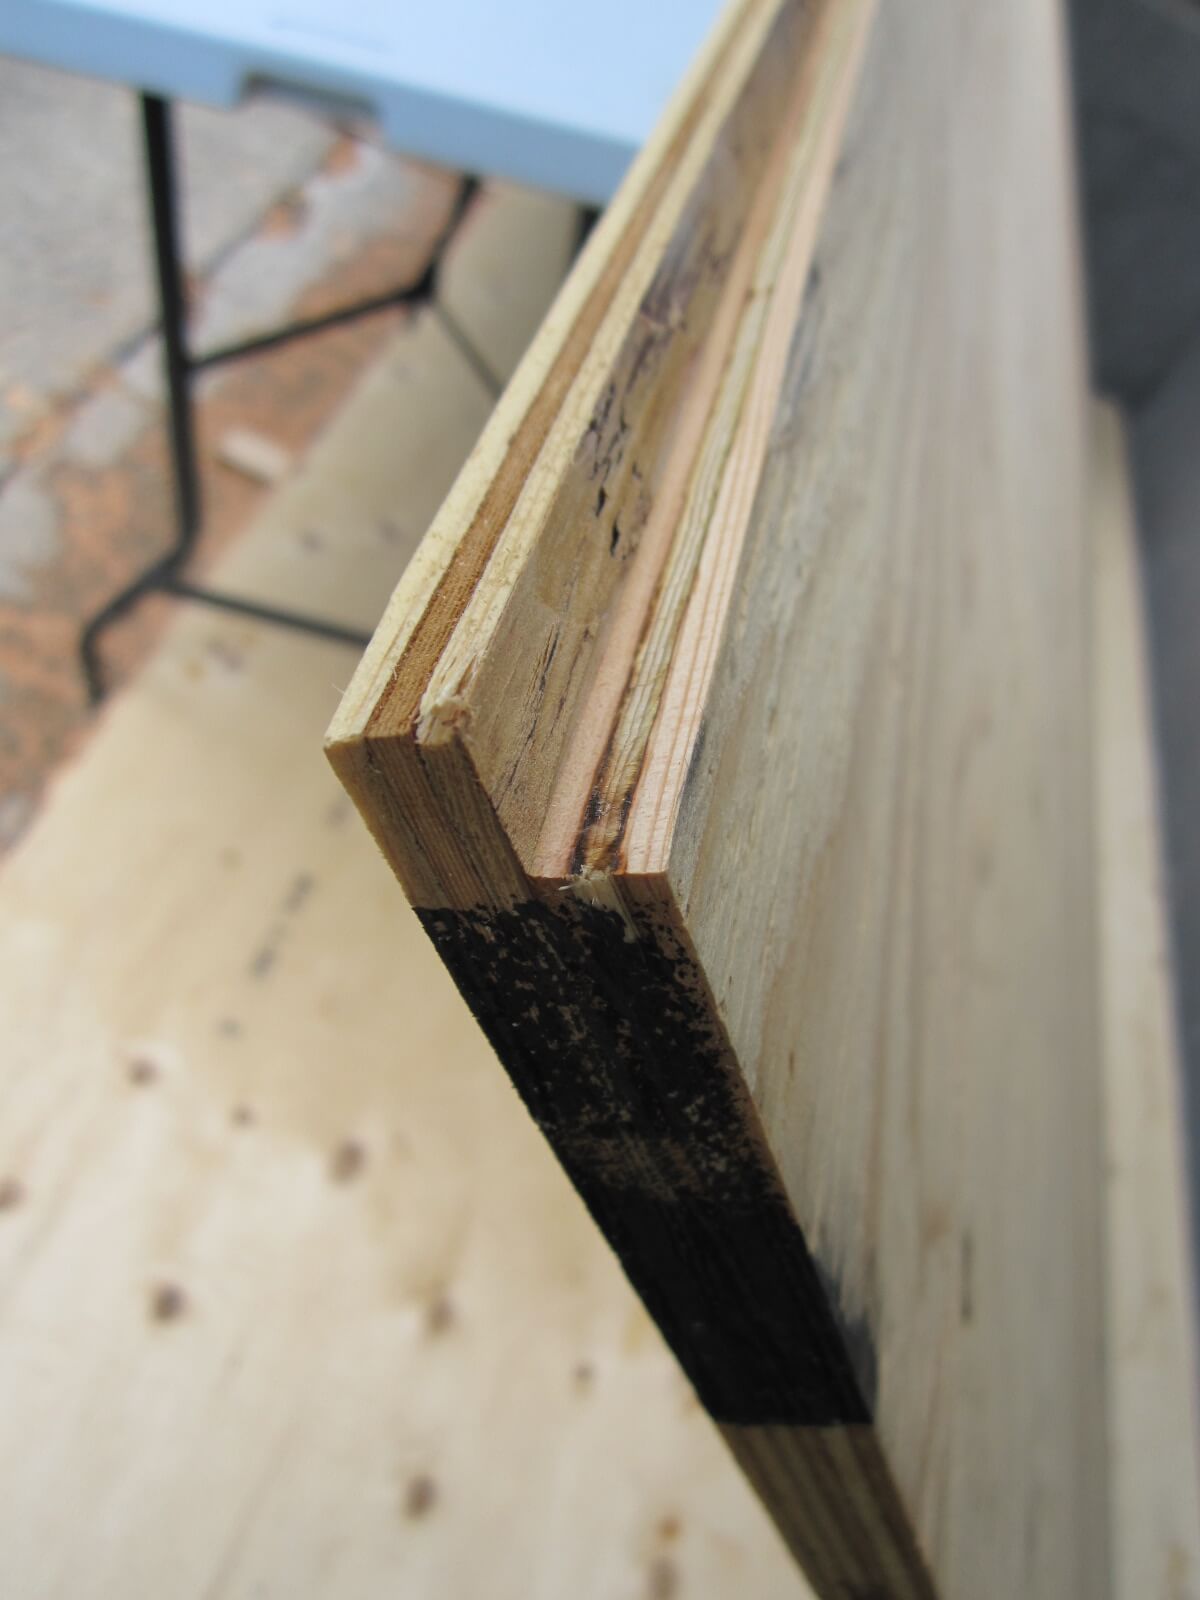
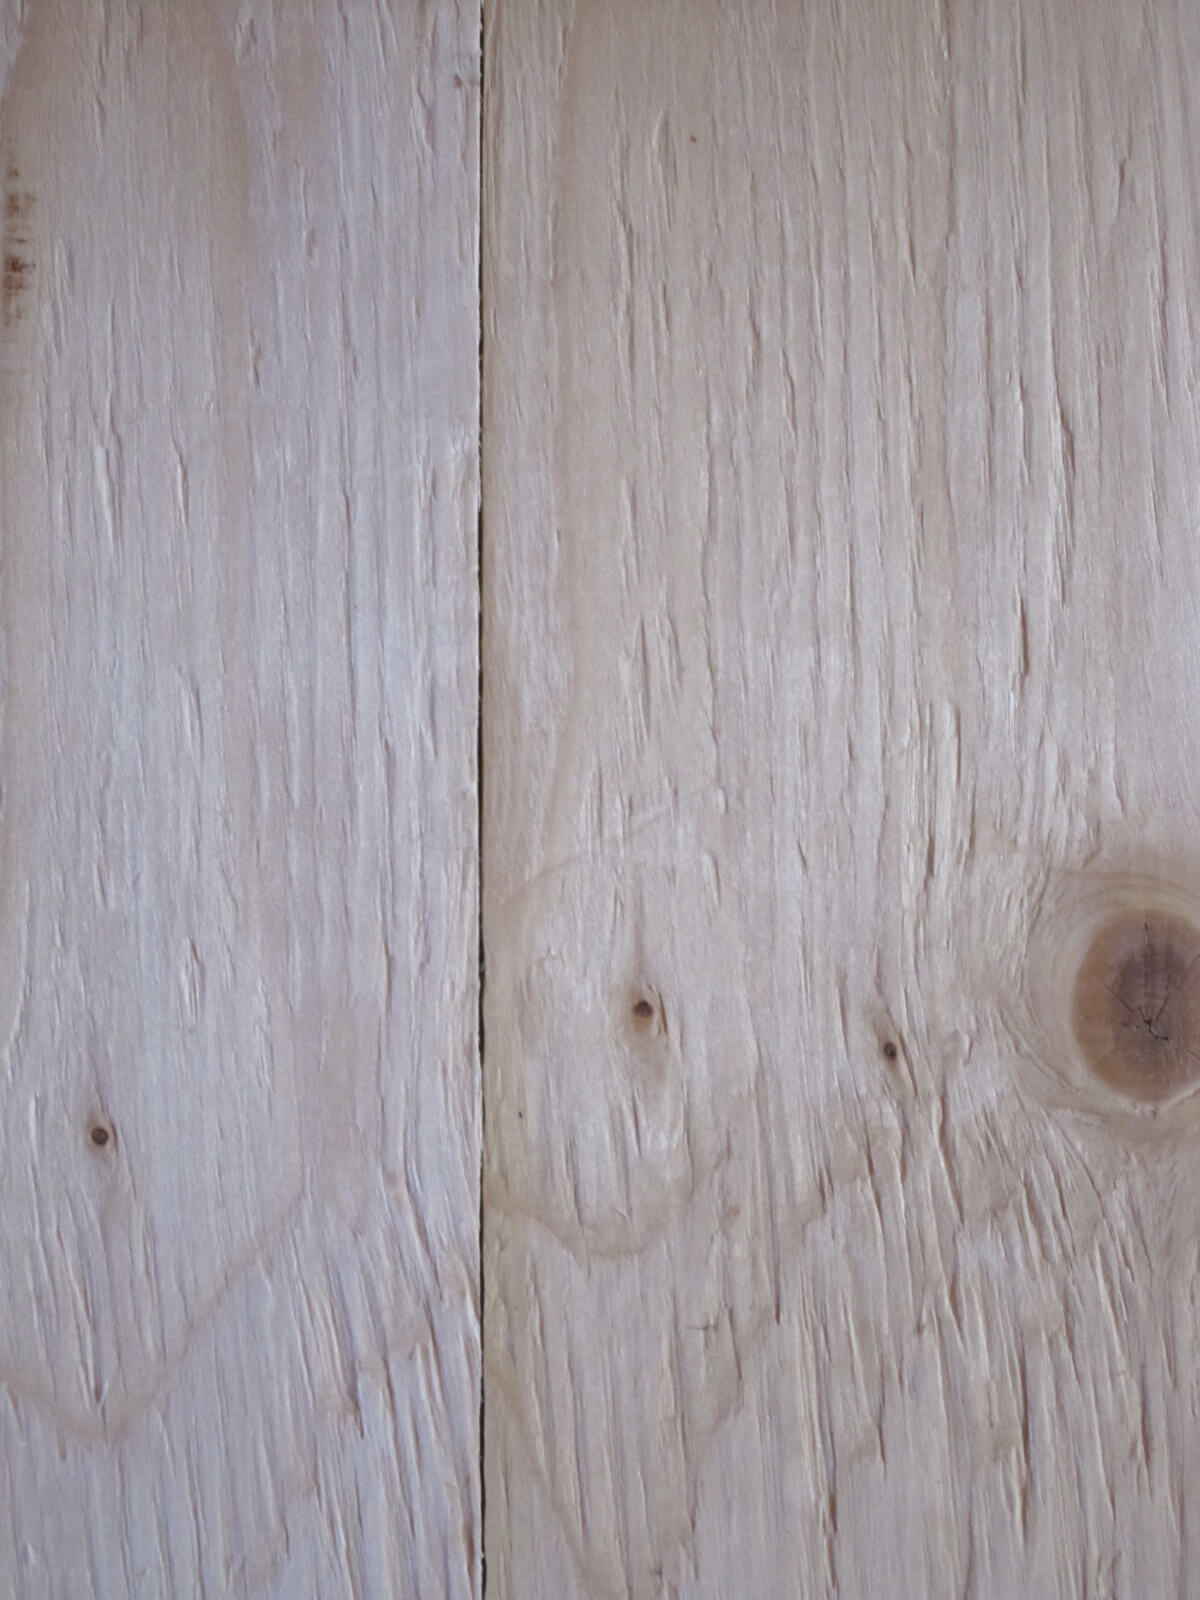
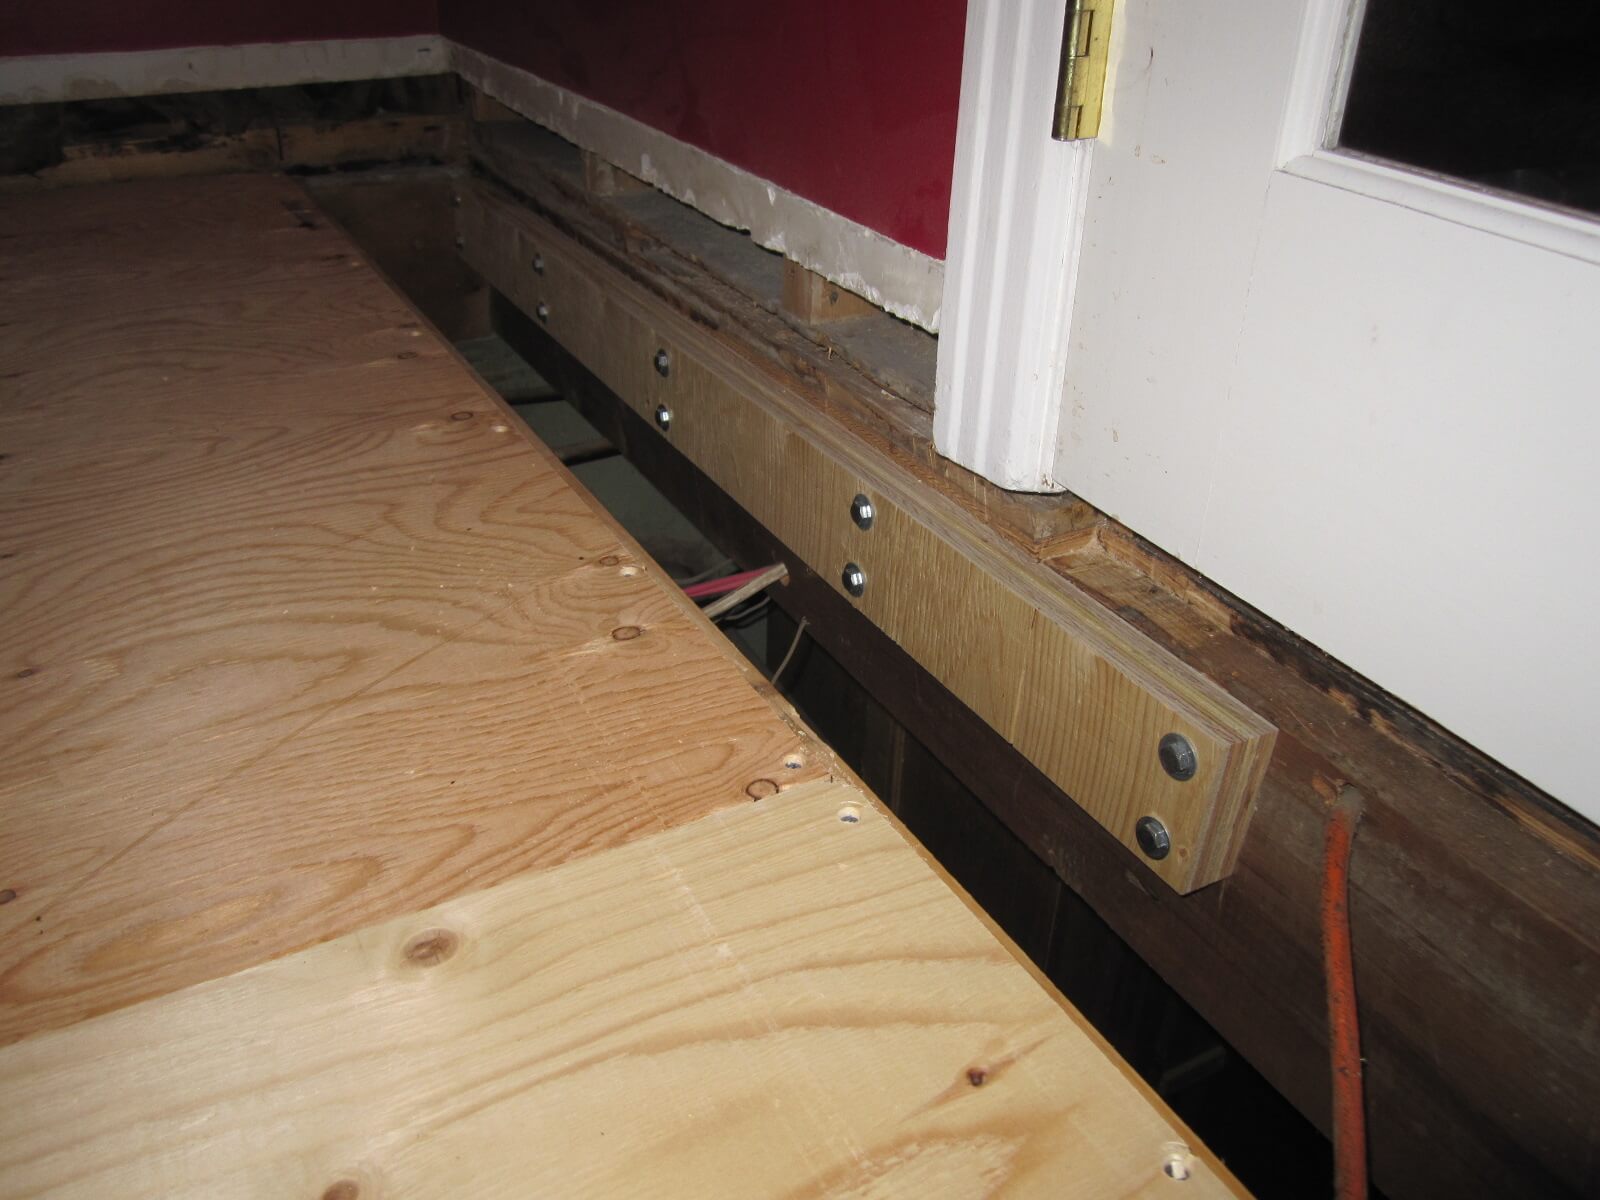
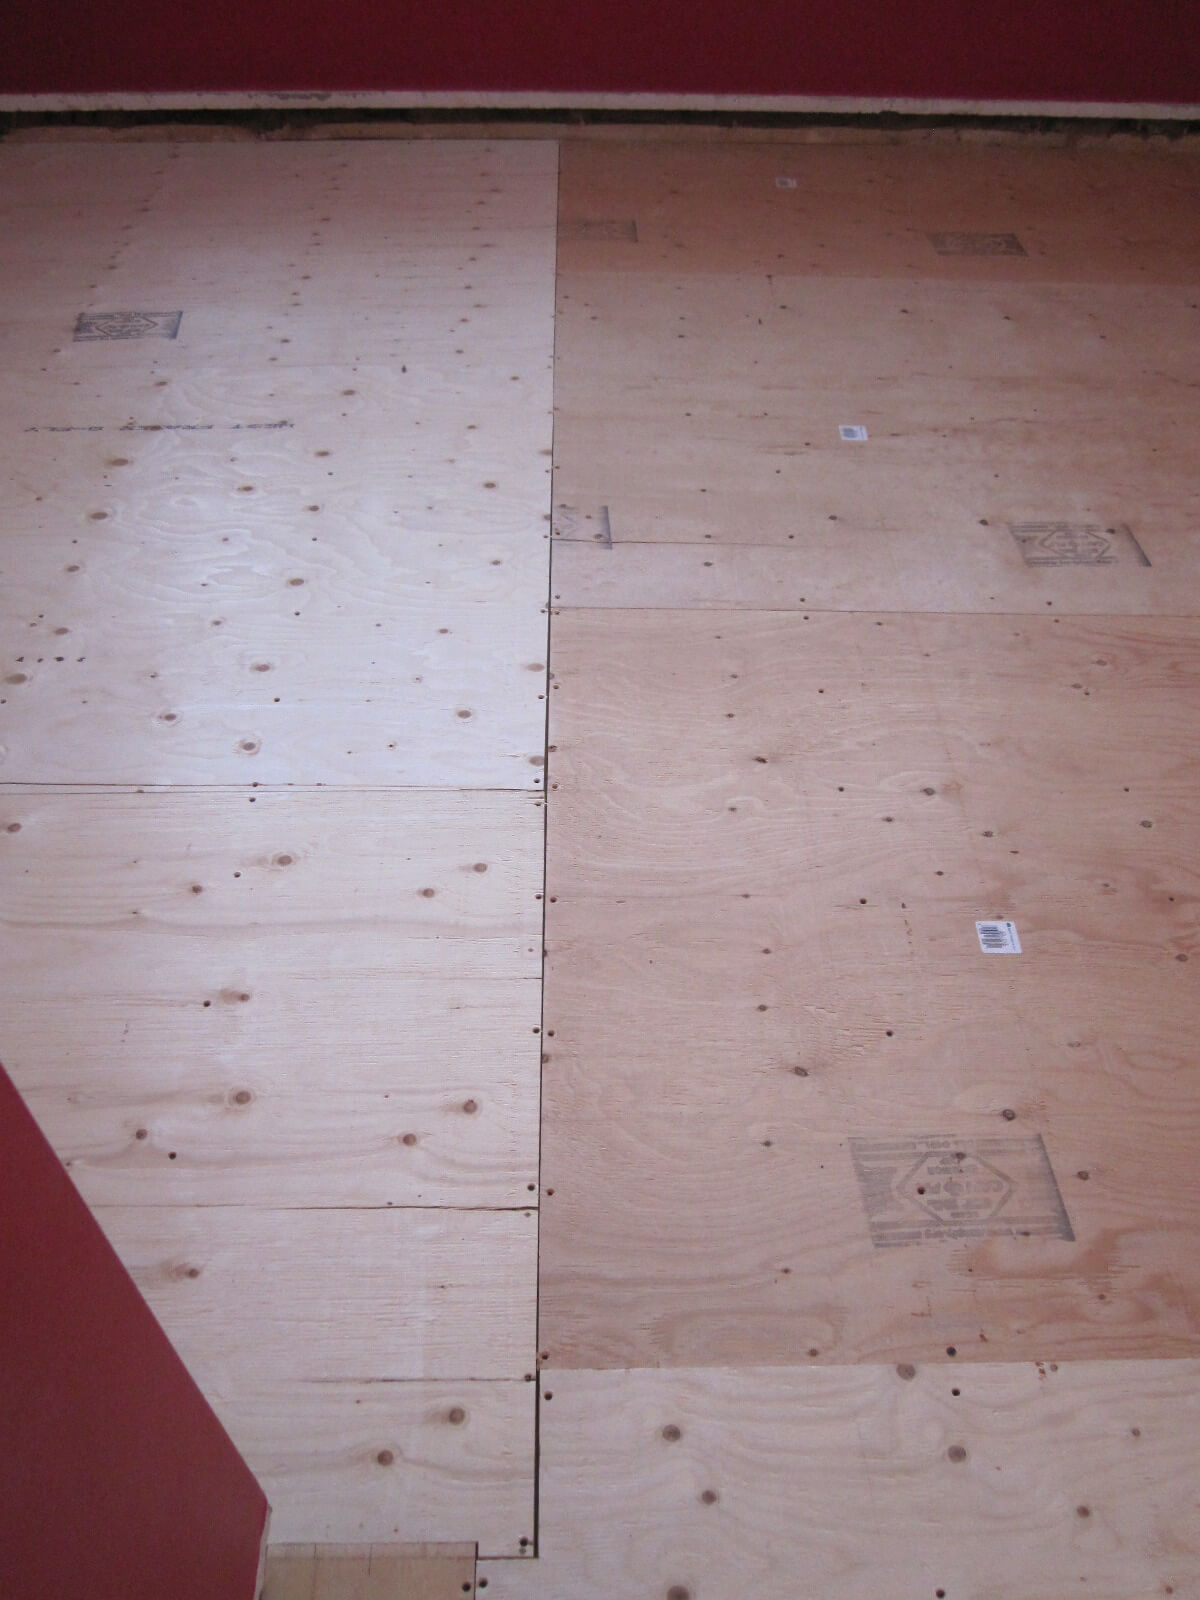

Here is a rabbet and two tongue-and-groove sheets:
I would have preferred sheets of Douglas fir plywood (Douglas Fir) but the budget had to be respected. Spruce will do just fine.
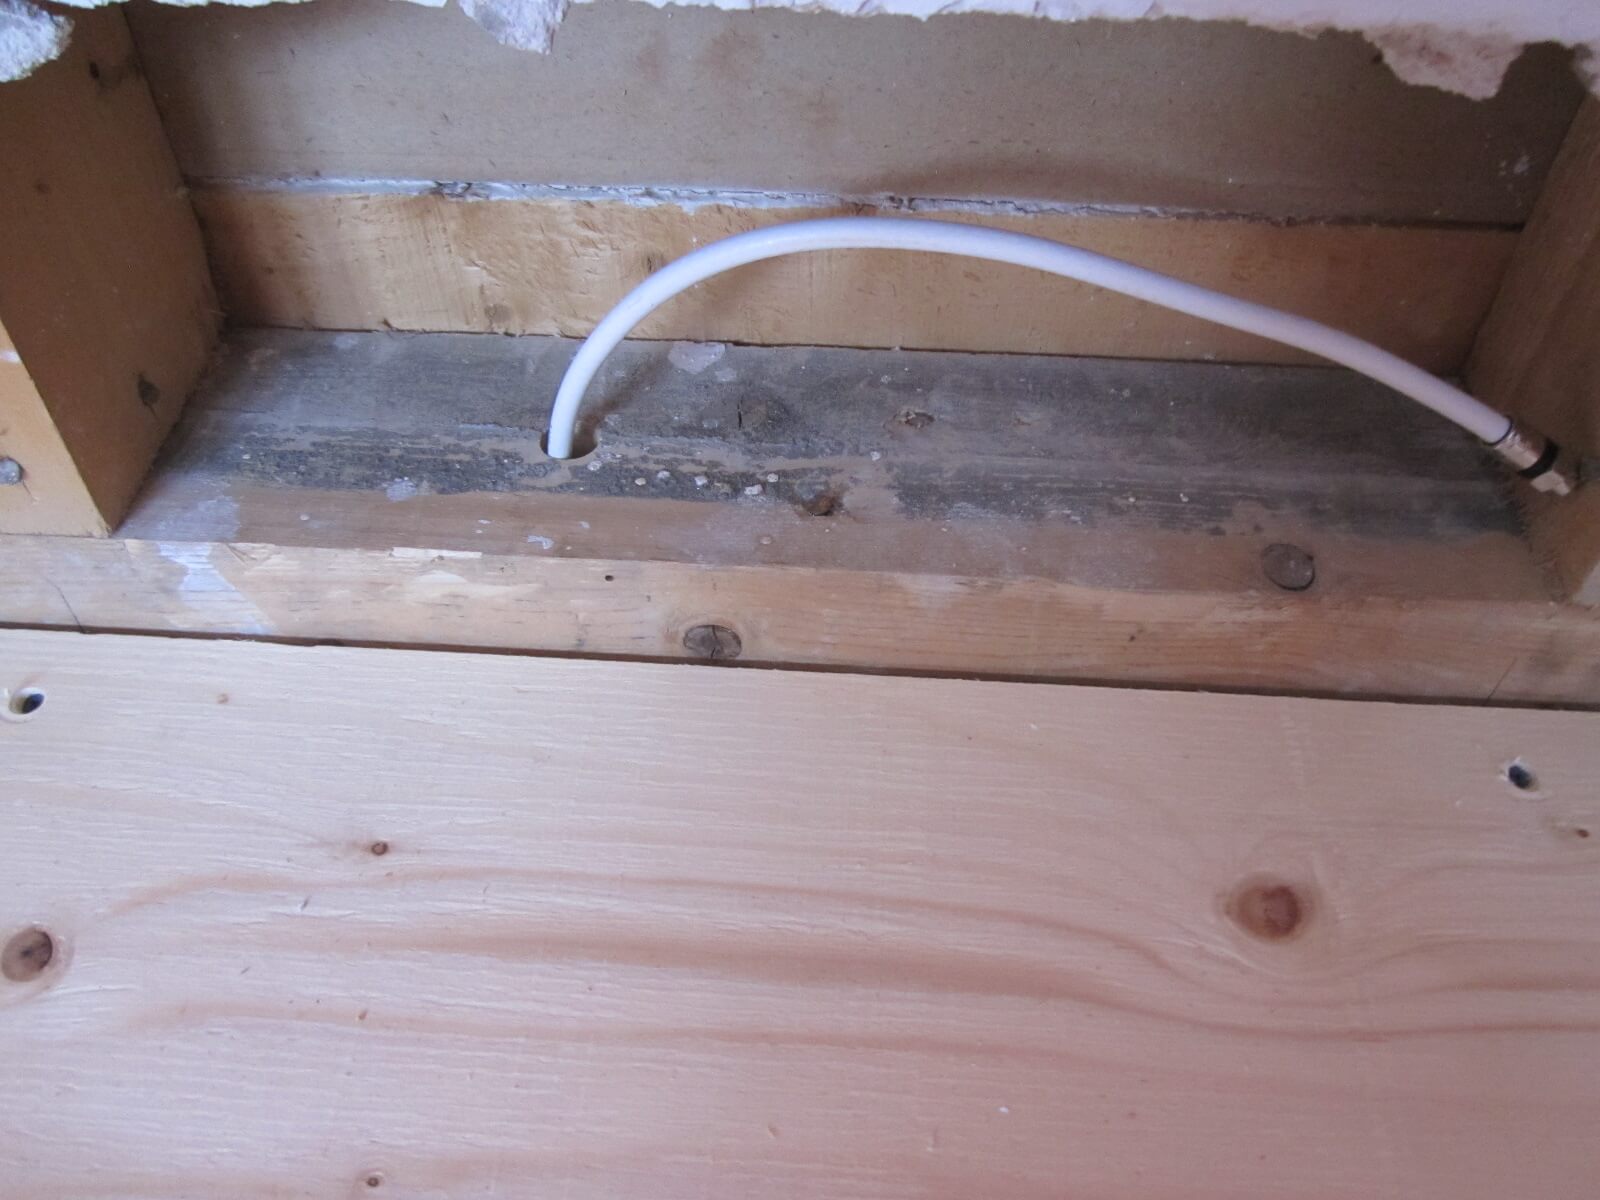
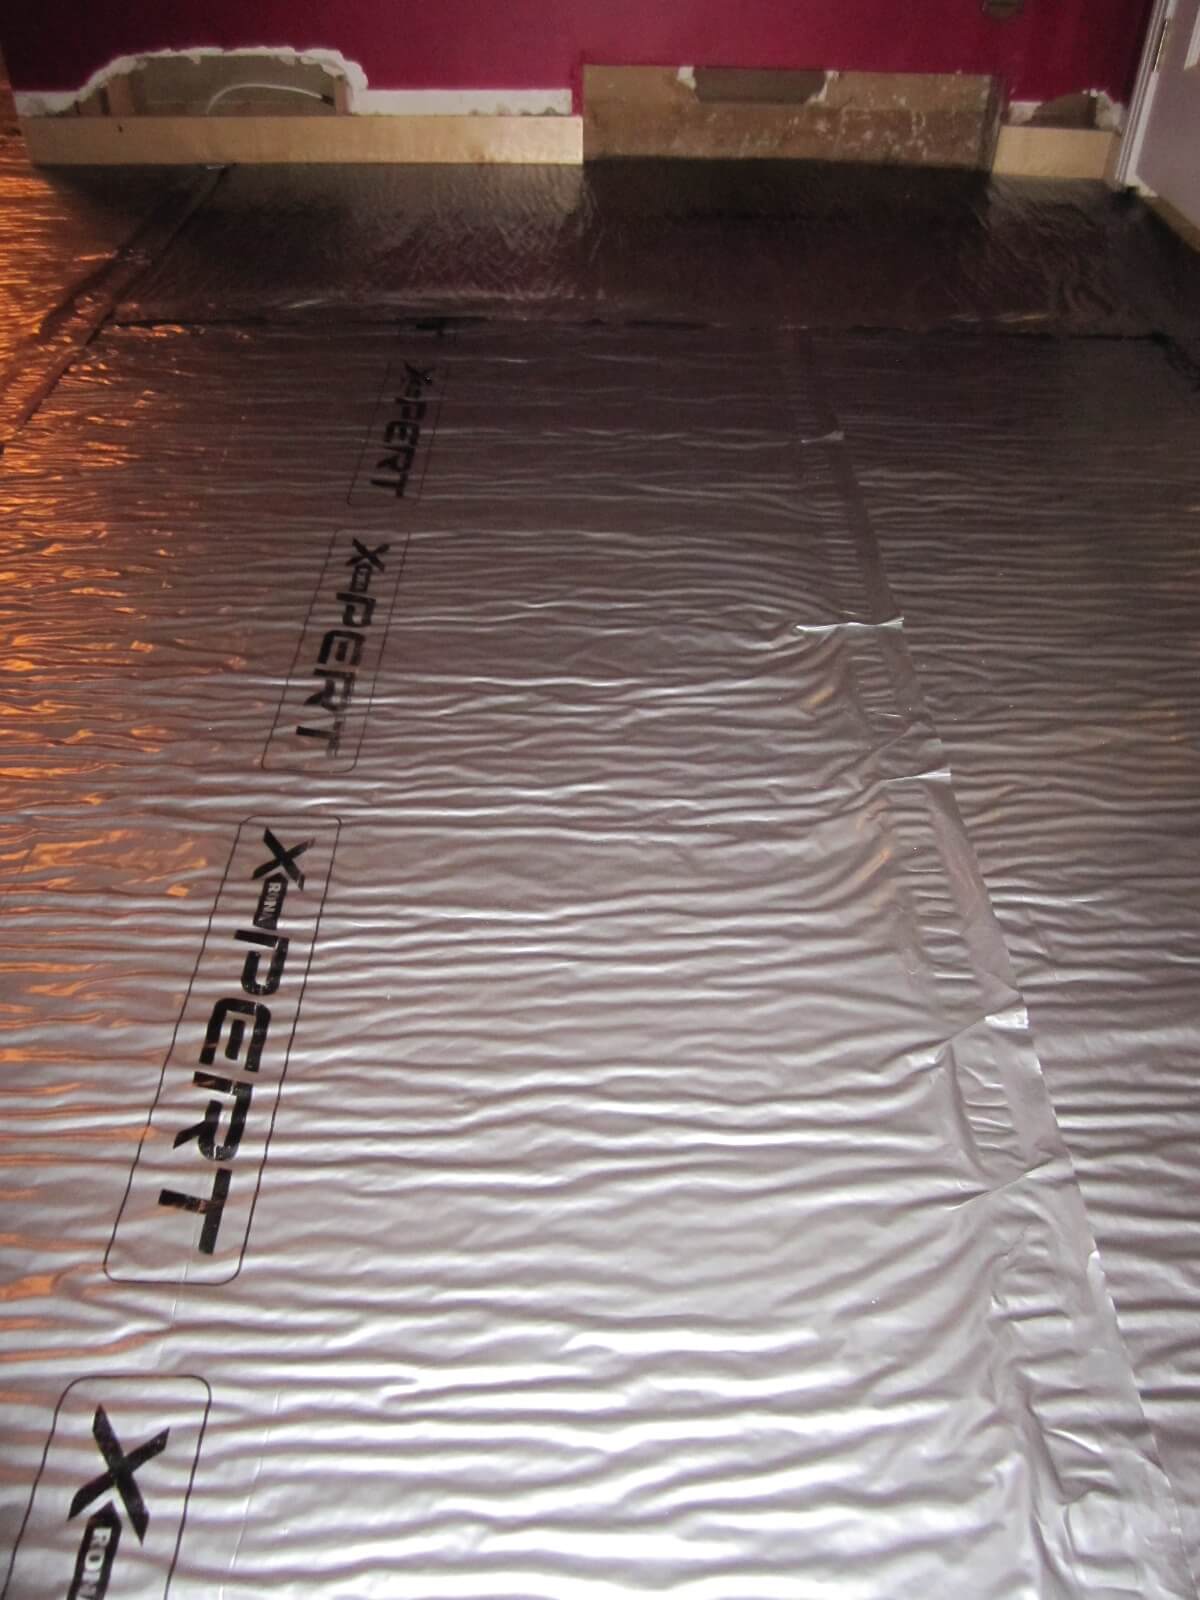
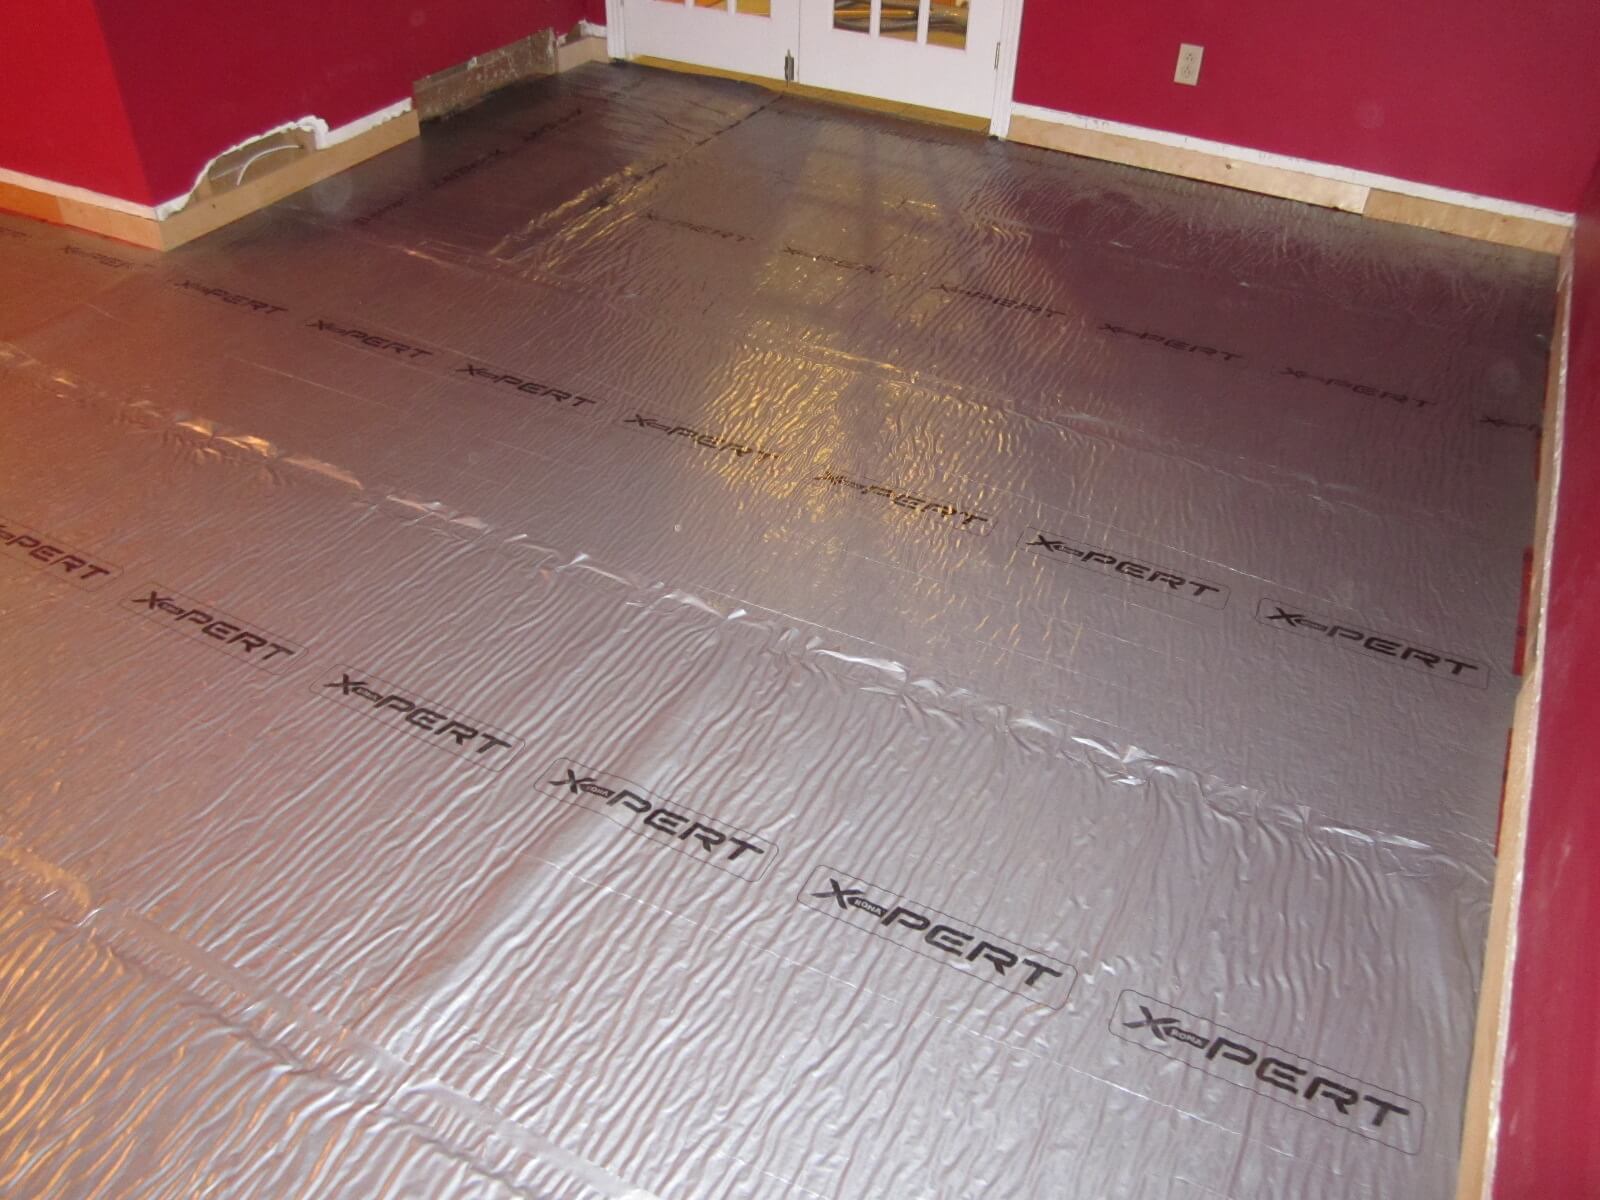
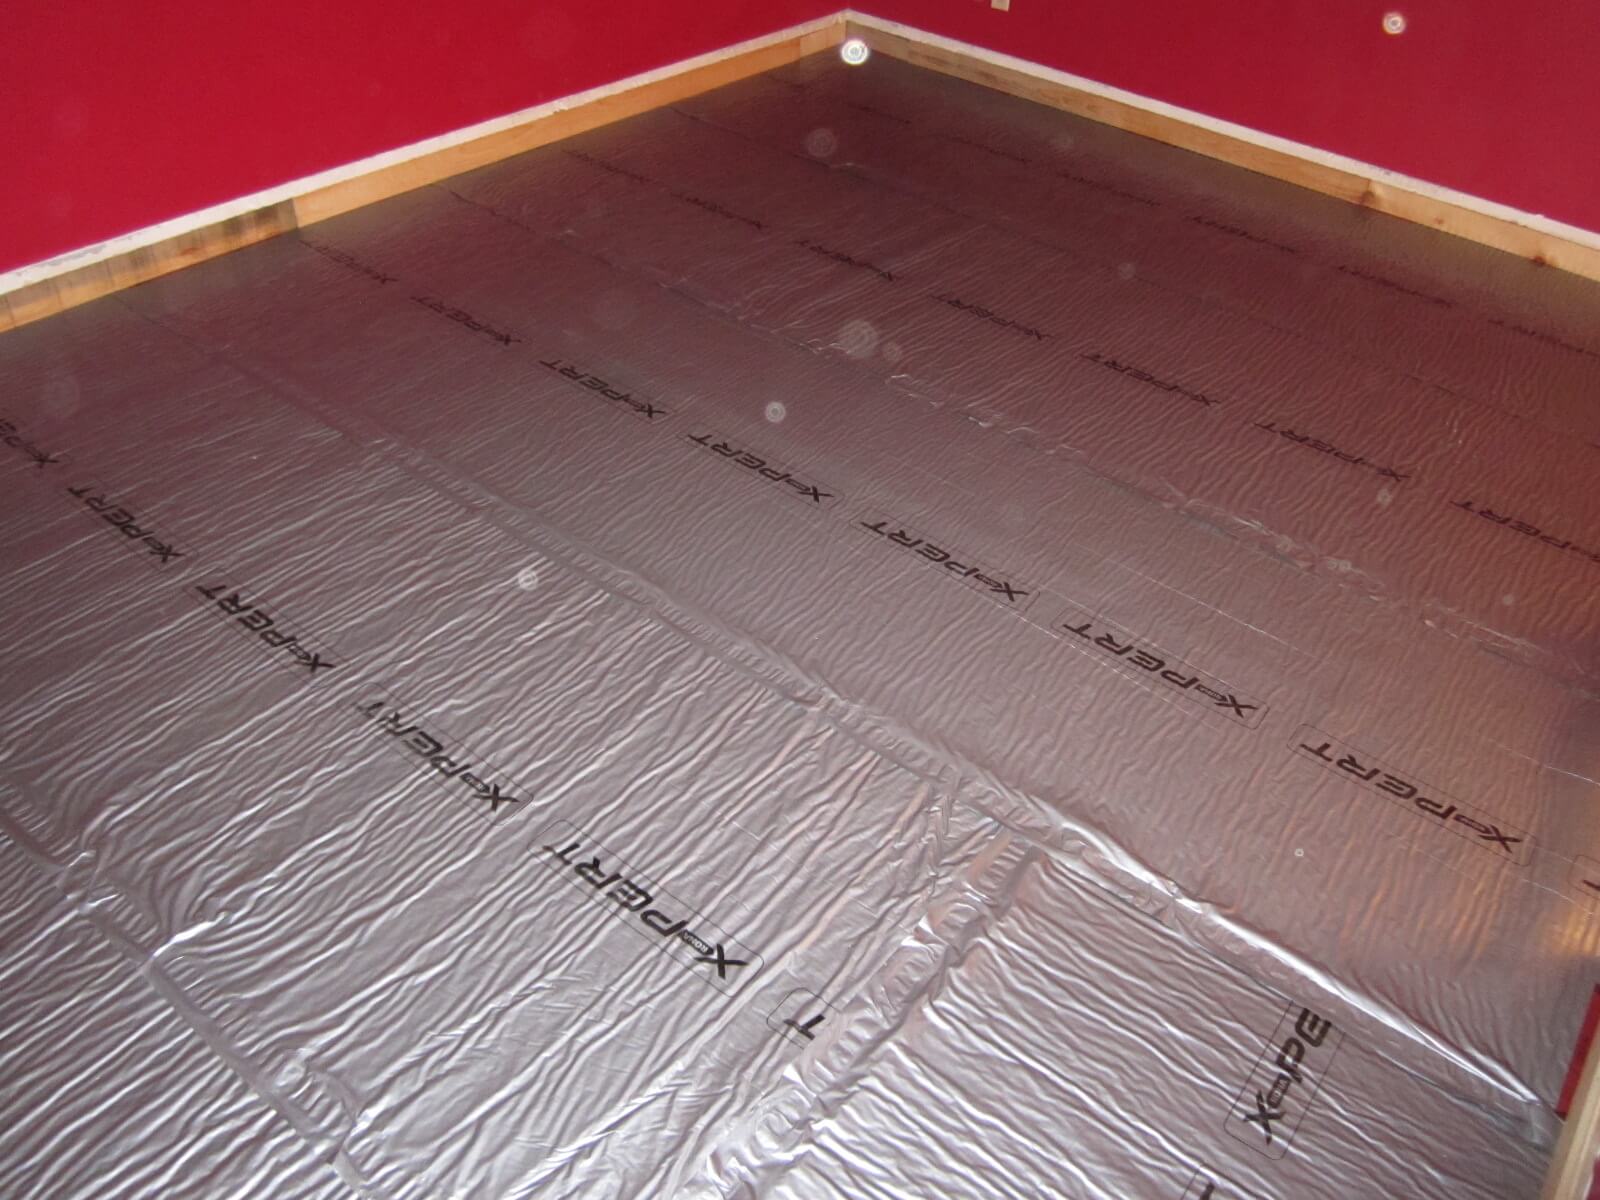
- Vapor barrier;
- Acoustic insulation;
- Thermal insulator;
- Corrects minor floor imperfections;
The installation is very simple, I glued it to the ground with double-sided tape. I did not use a staple so as not to create a thermal bridge.
4th step: ventilation
After calculating the number of CFM* and checking the capacity of my furnace, I went to buy the materials needed to install the new ventilation. I replaced the 4″ pipes with 6″ and the floor registers had their openings changed from 3″ x 14″ to 4″ x 10″.
This has significantly reduced fan noise and increased fan efficiency. The room is heated or cooled much faster which makes it more comfortable.
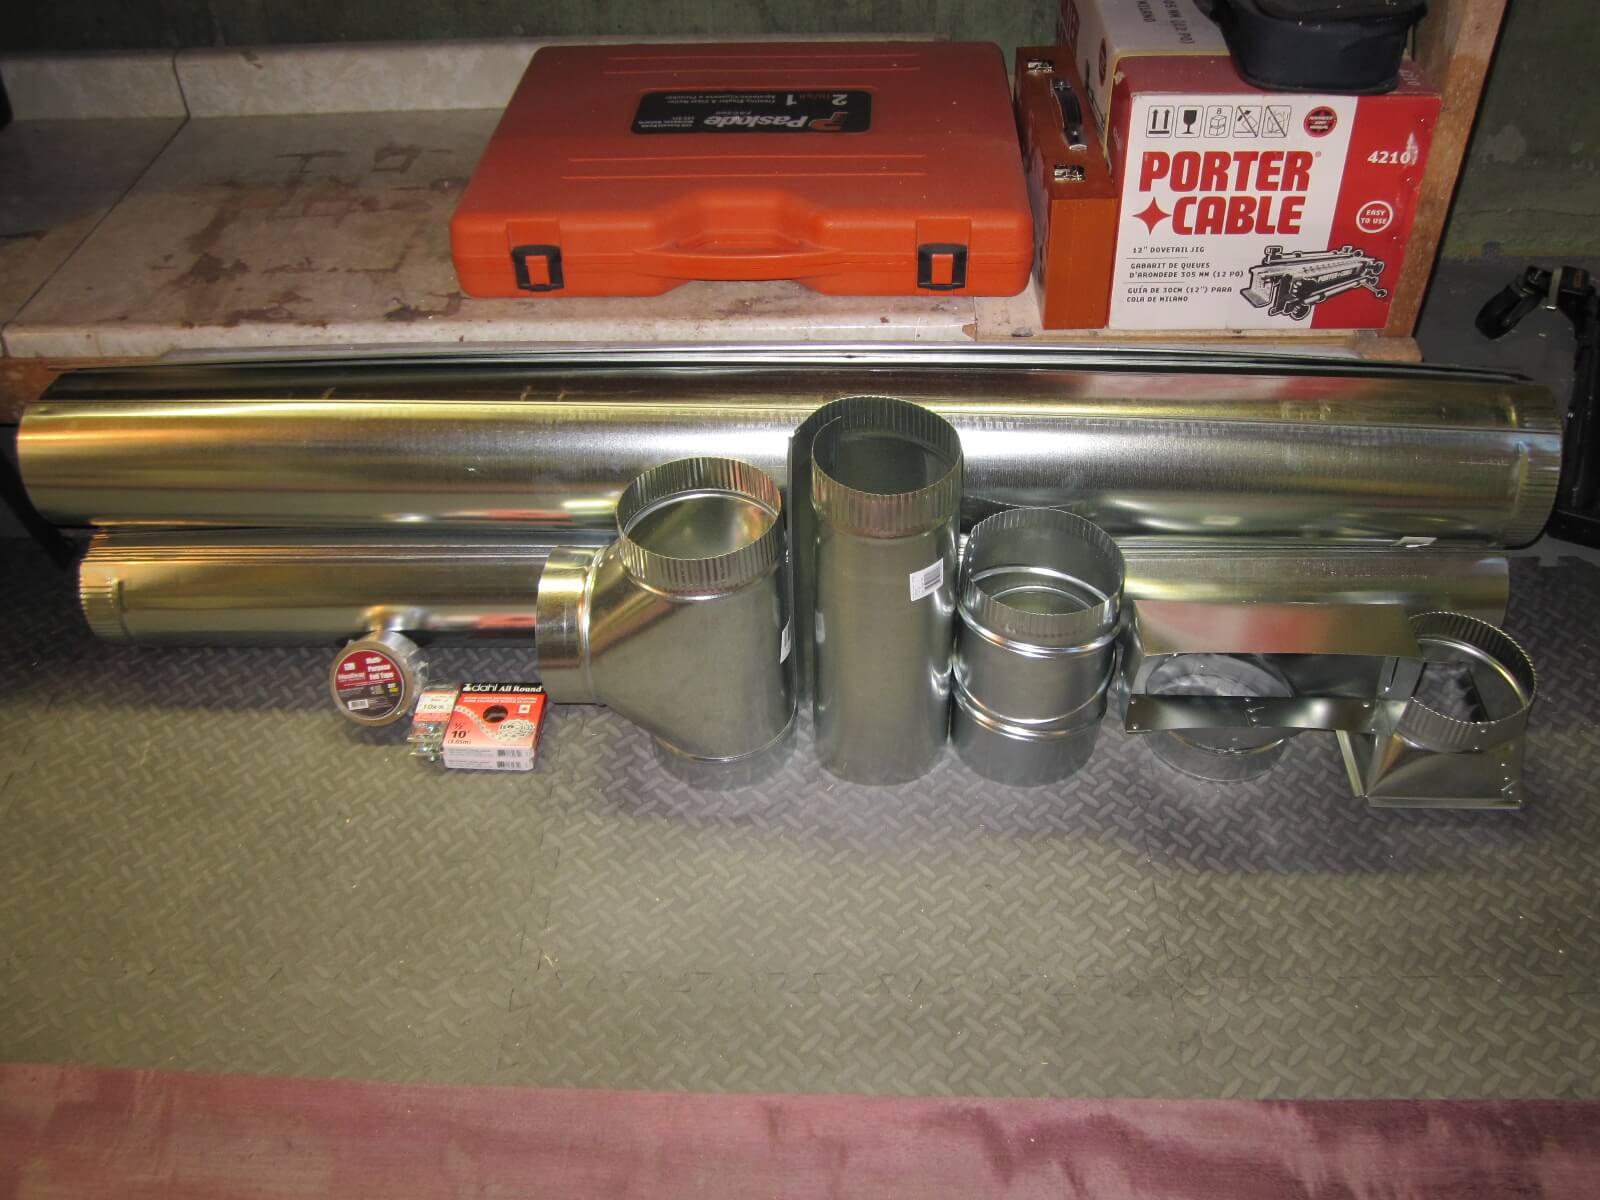
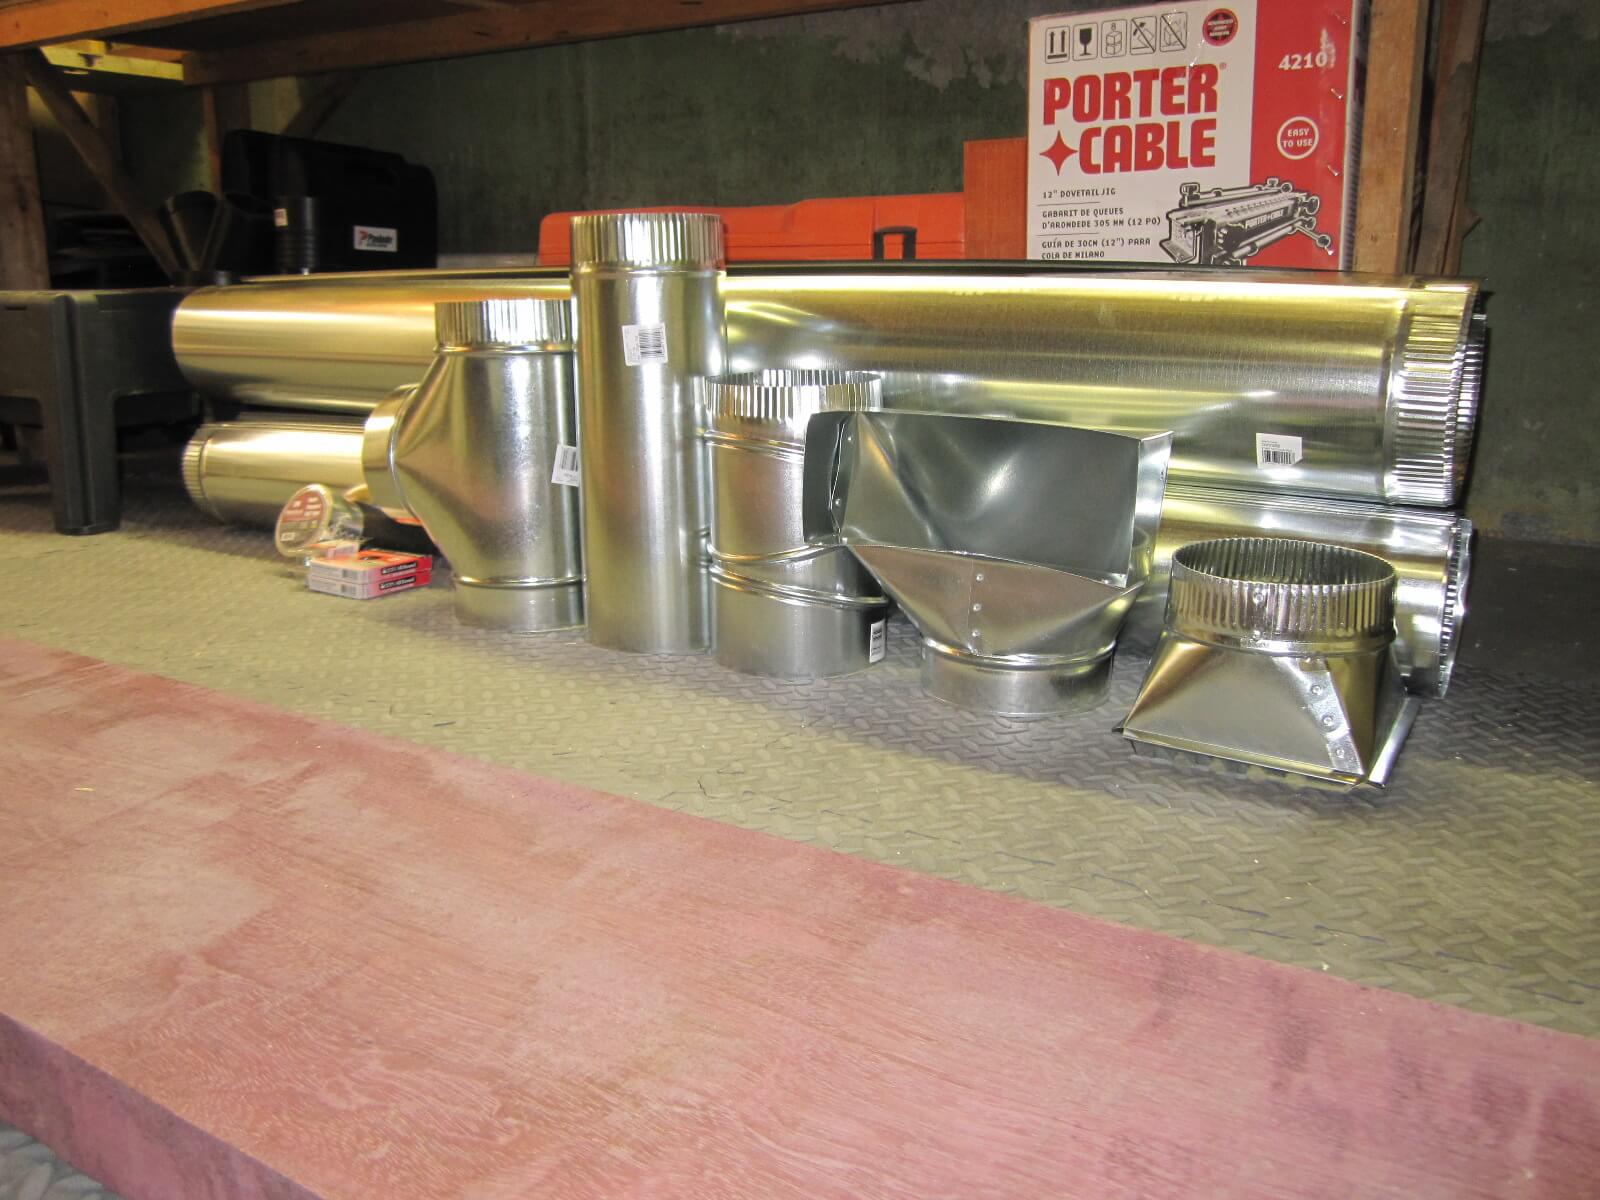
*CFM: Cubic Feet per Minute. This is a North American unit for calculating the flow of a volume. It can be a gas like air or a liquid like water.
4.2 Laying The Floor
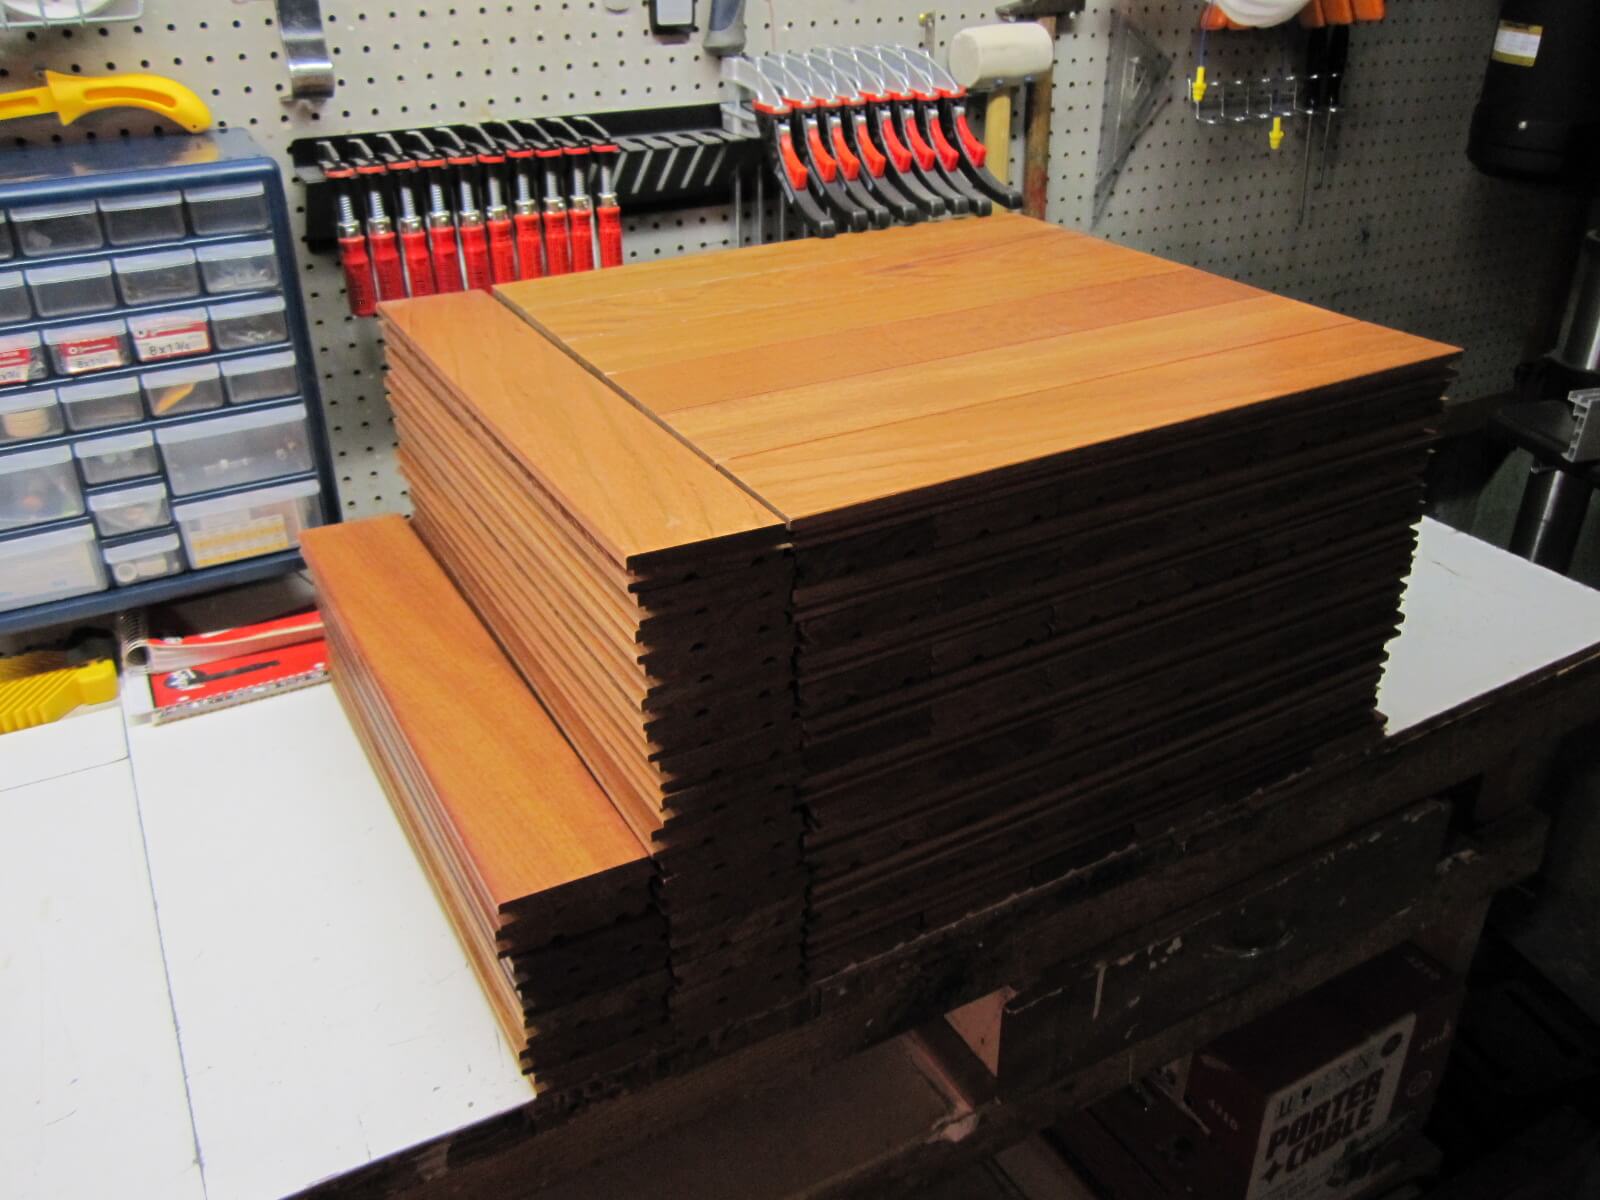
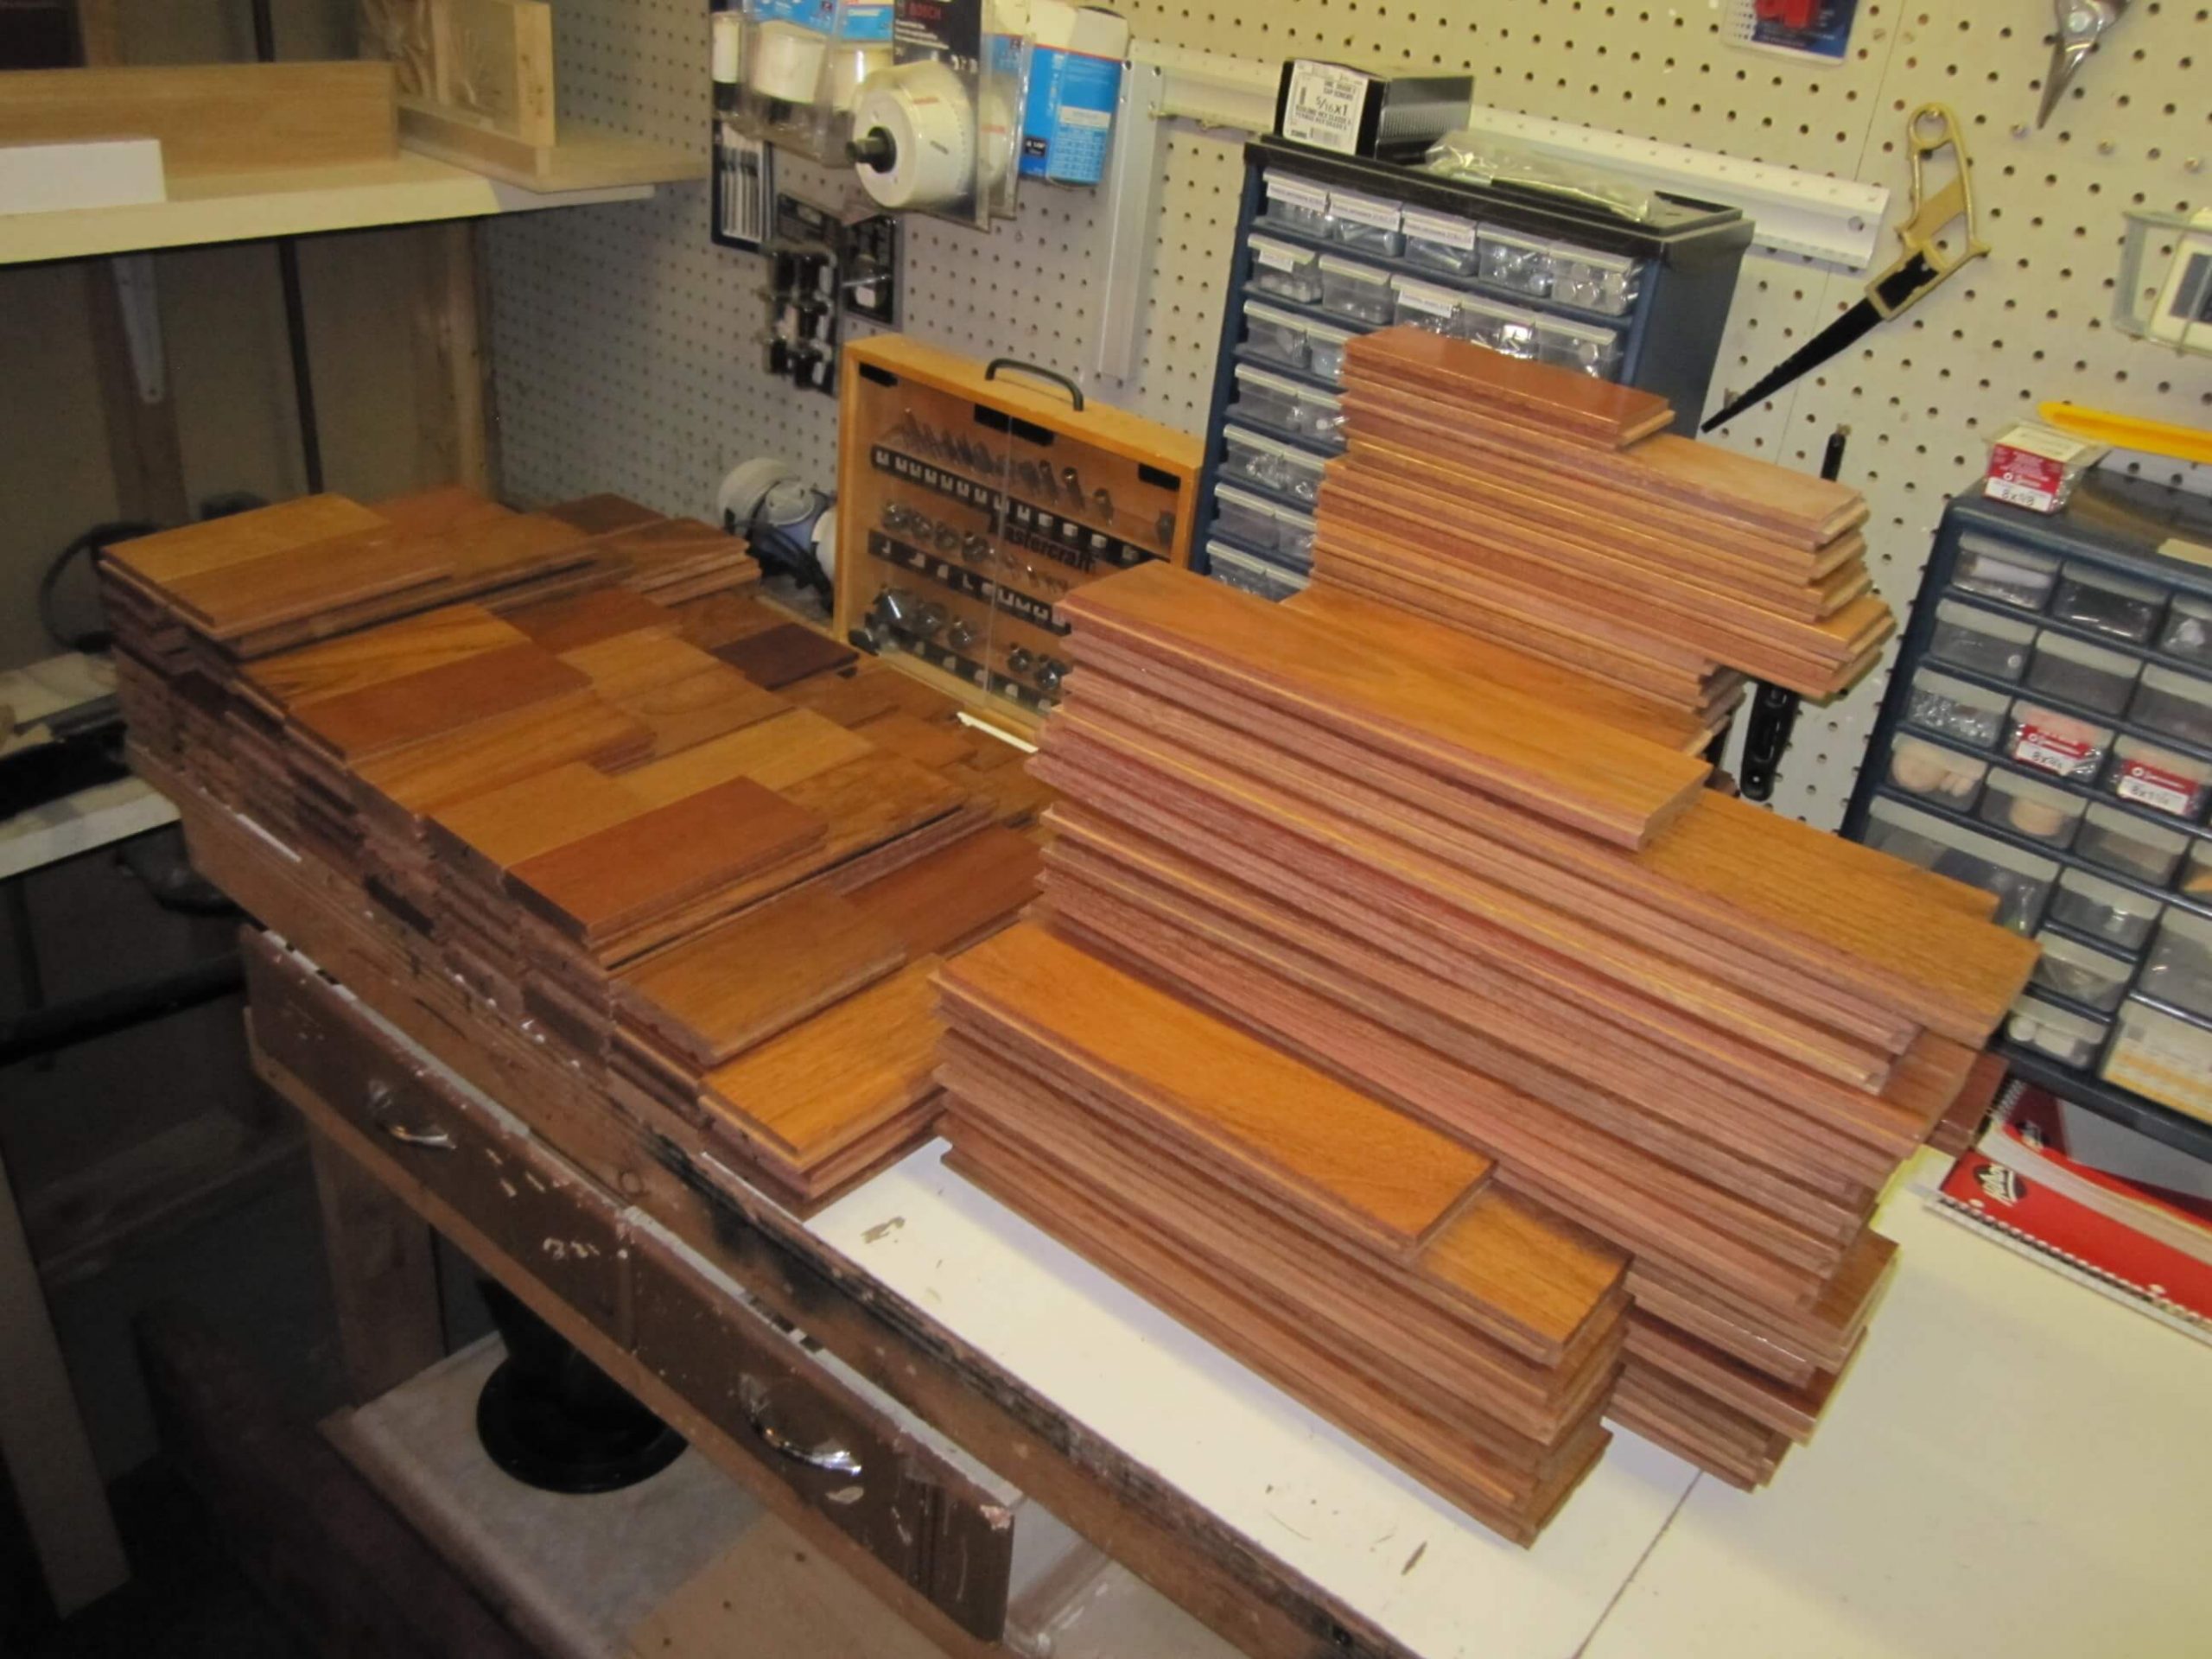
1st step: making the boards
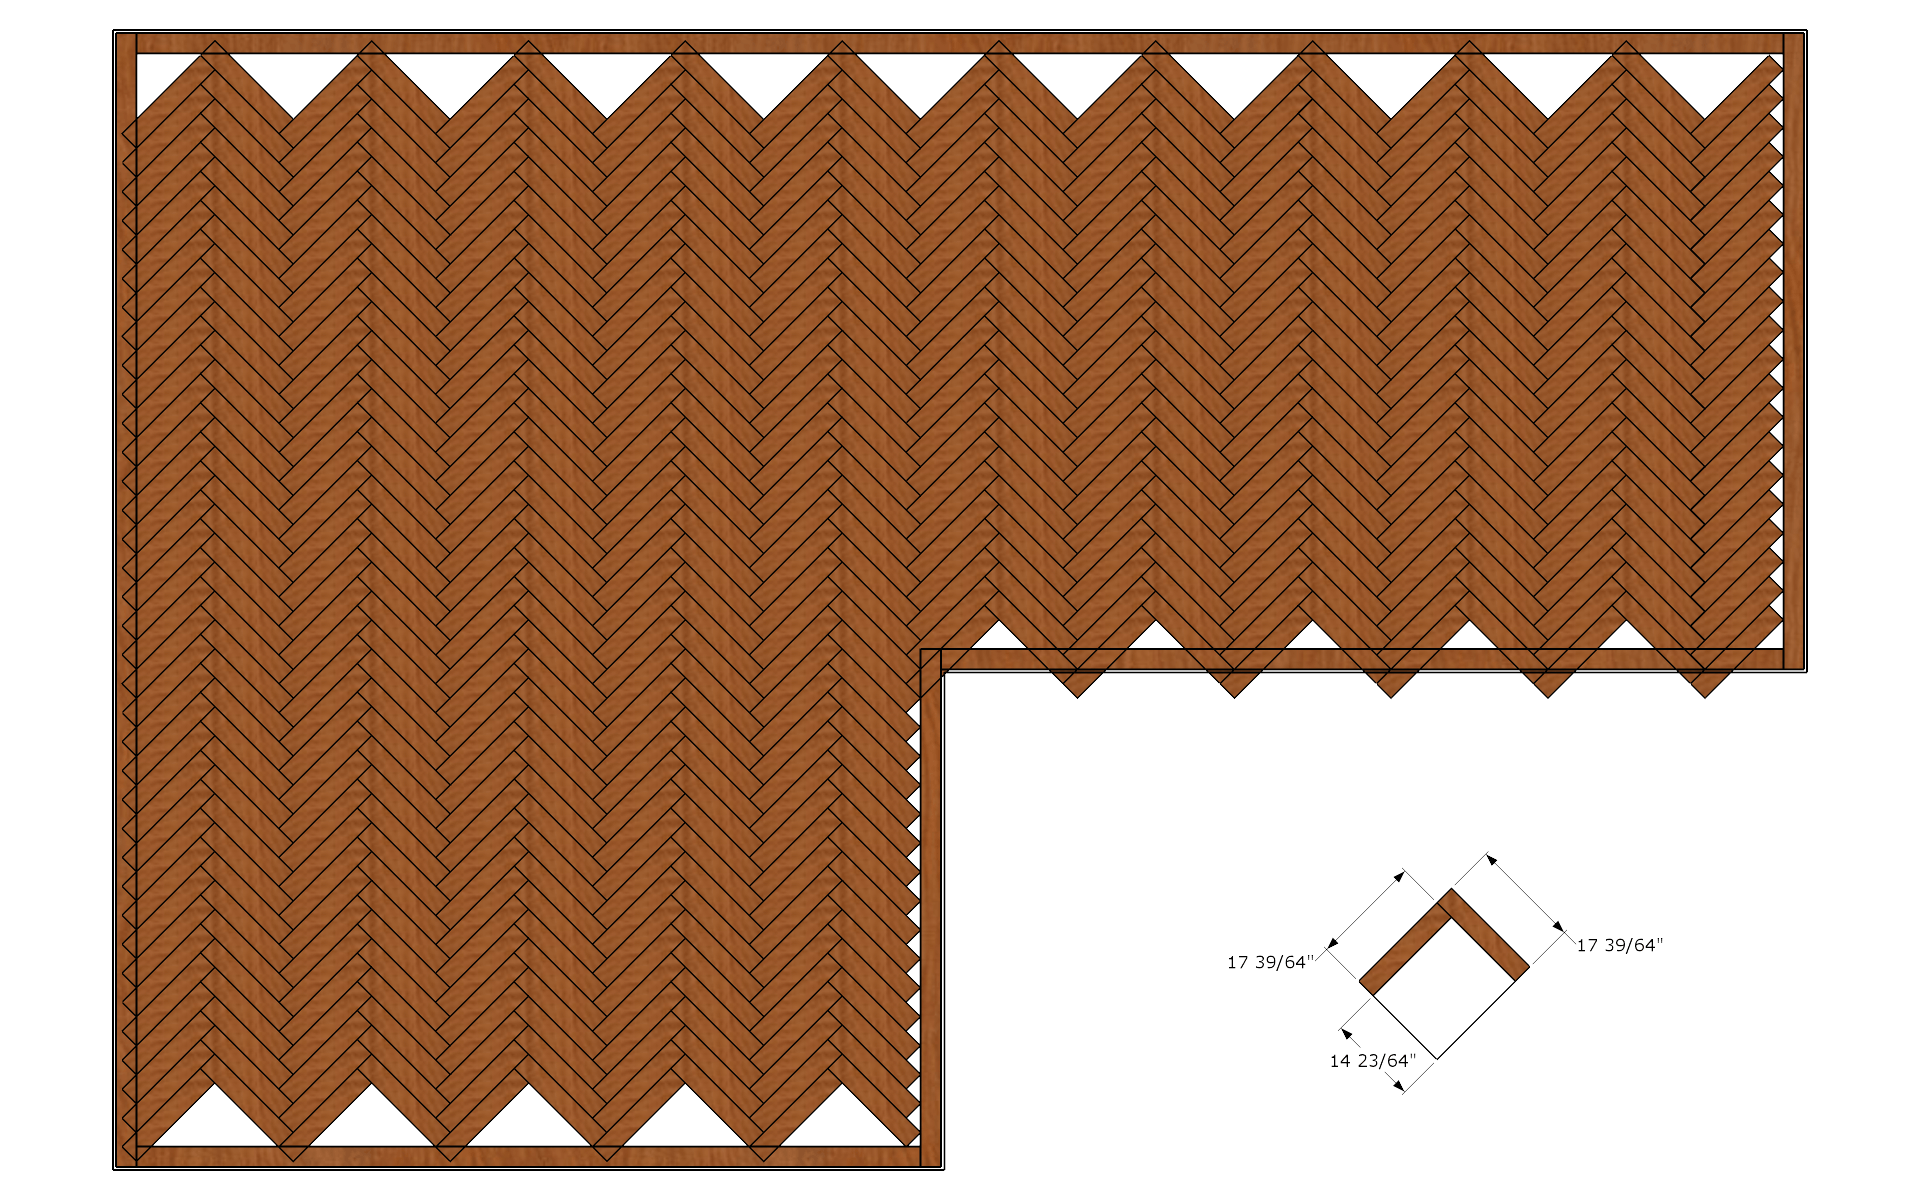
I chose a ratio of 6 times the width of the boards (6 x 3.25) so the rafter boards have a dimension of 3 1/4″ x 19 1/2″.
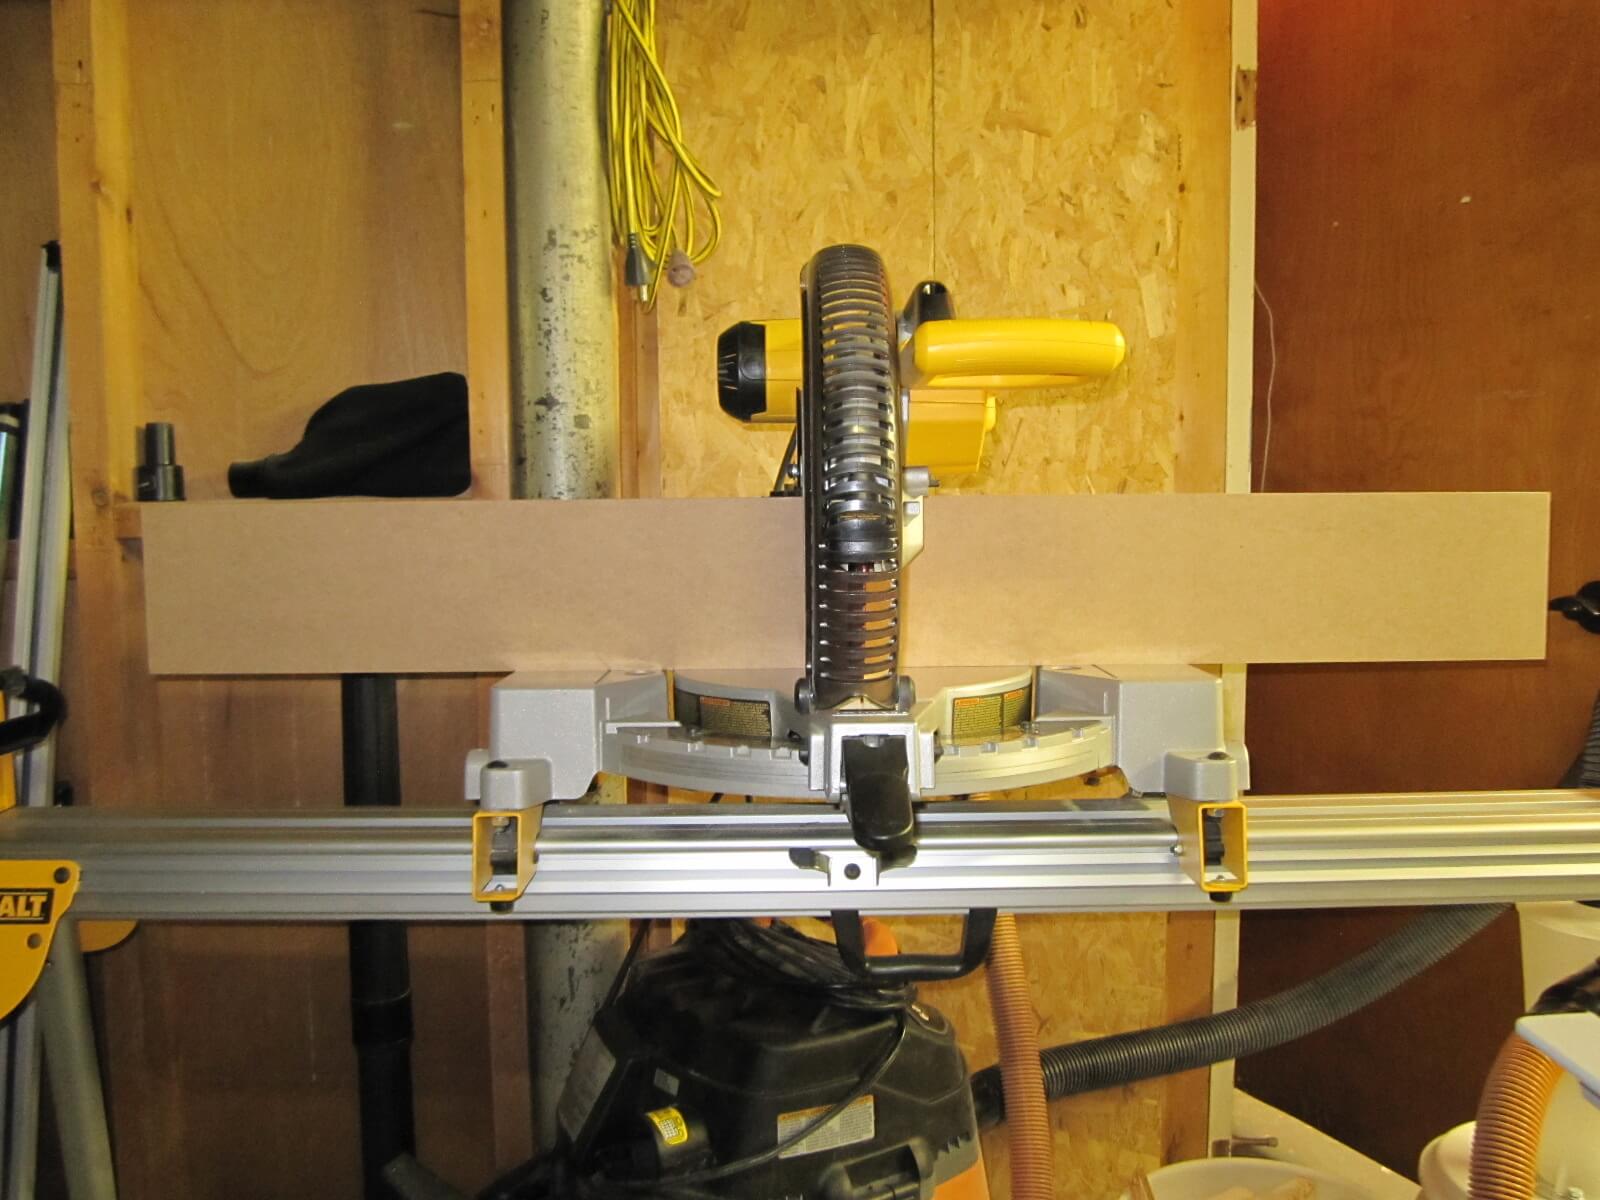
Making a jig for the miter saw
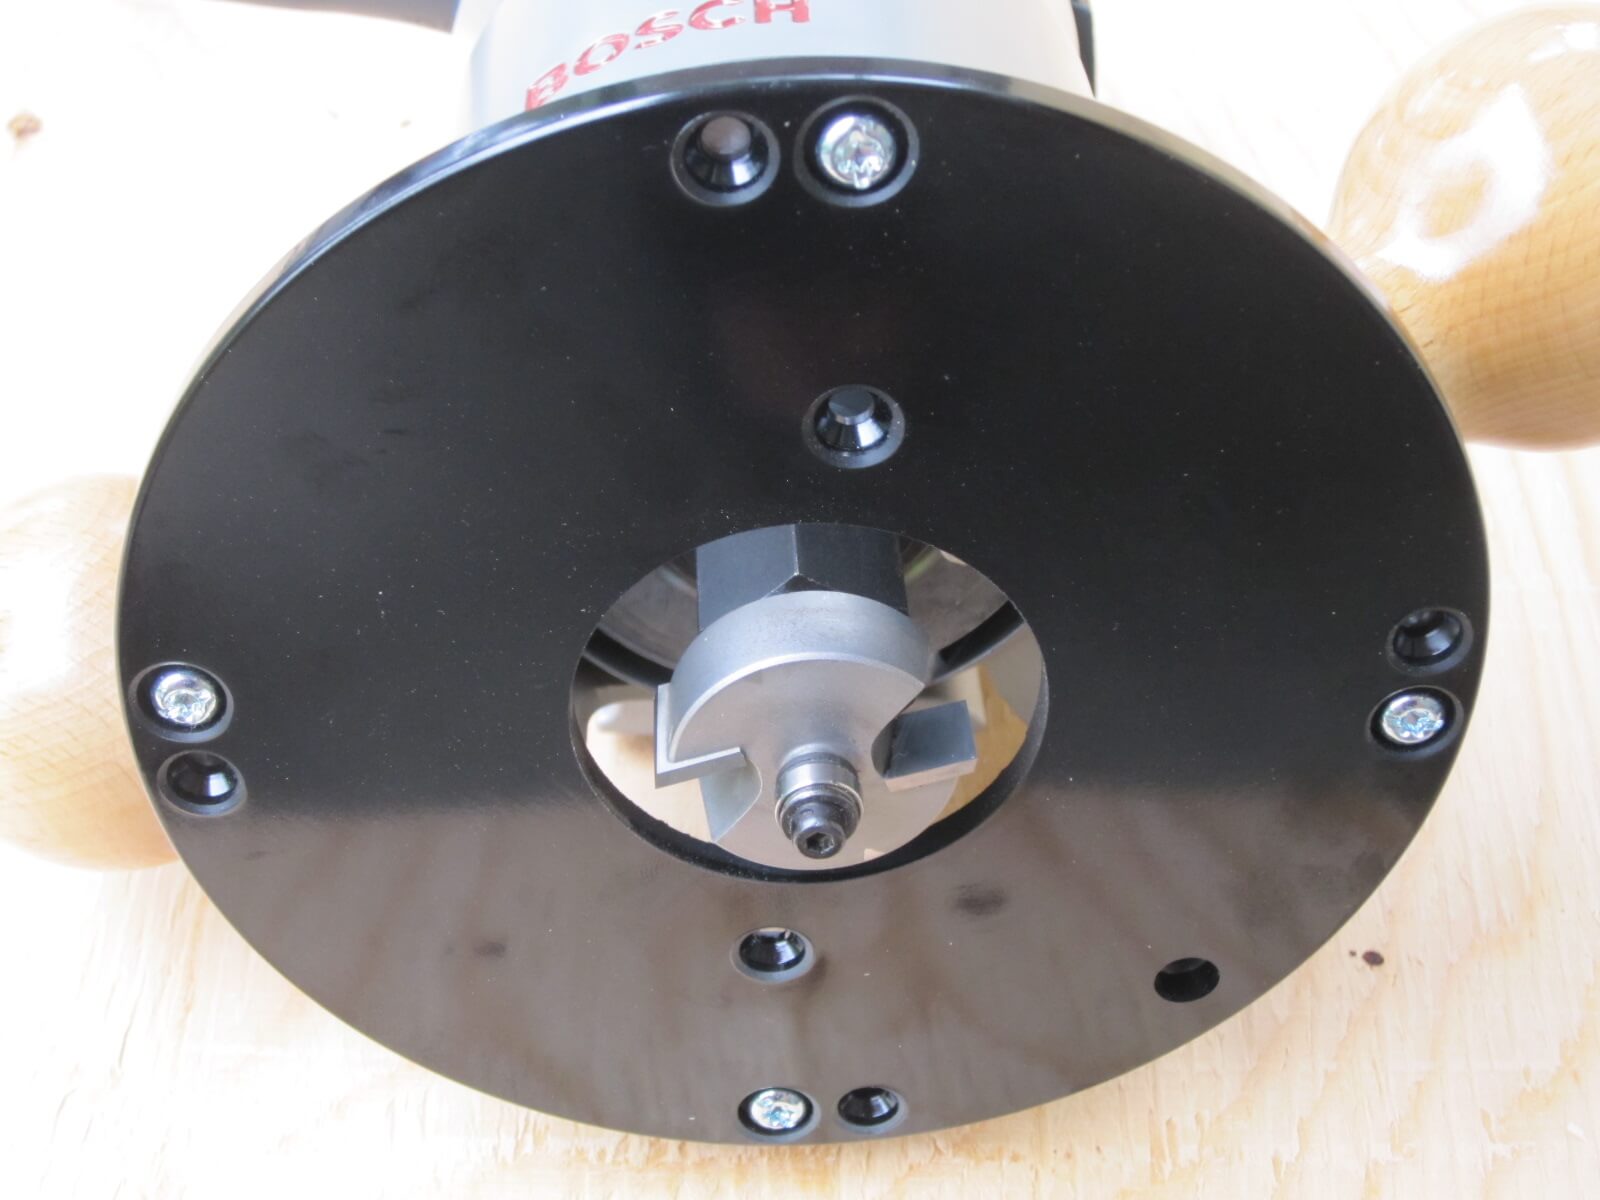
In order to achieve a successful herringbone installation, the quality of the floorboards is crucial. So I made myself a template for my miter saw to be more efficient and to avoid splinters of wood during the many cuts.
I replaced the stock light with a zero aperture one and the guides with sacrificial MDF boards. Wider and longer, they will offer more support. A shim installed 19 1/2″ from the blade will serve as my stop block.
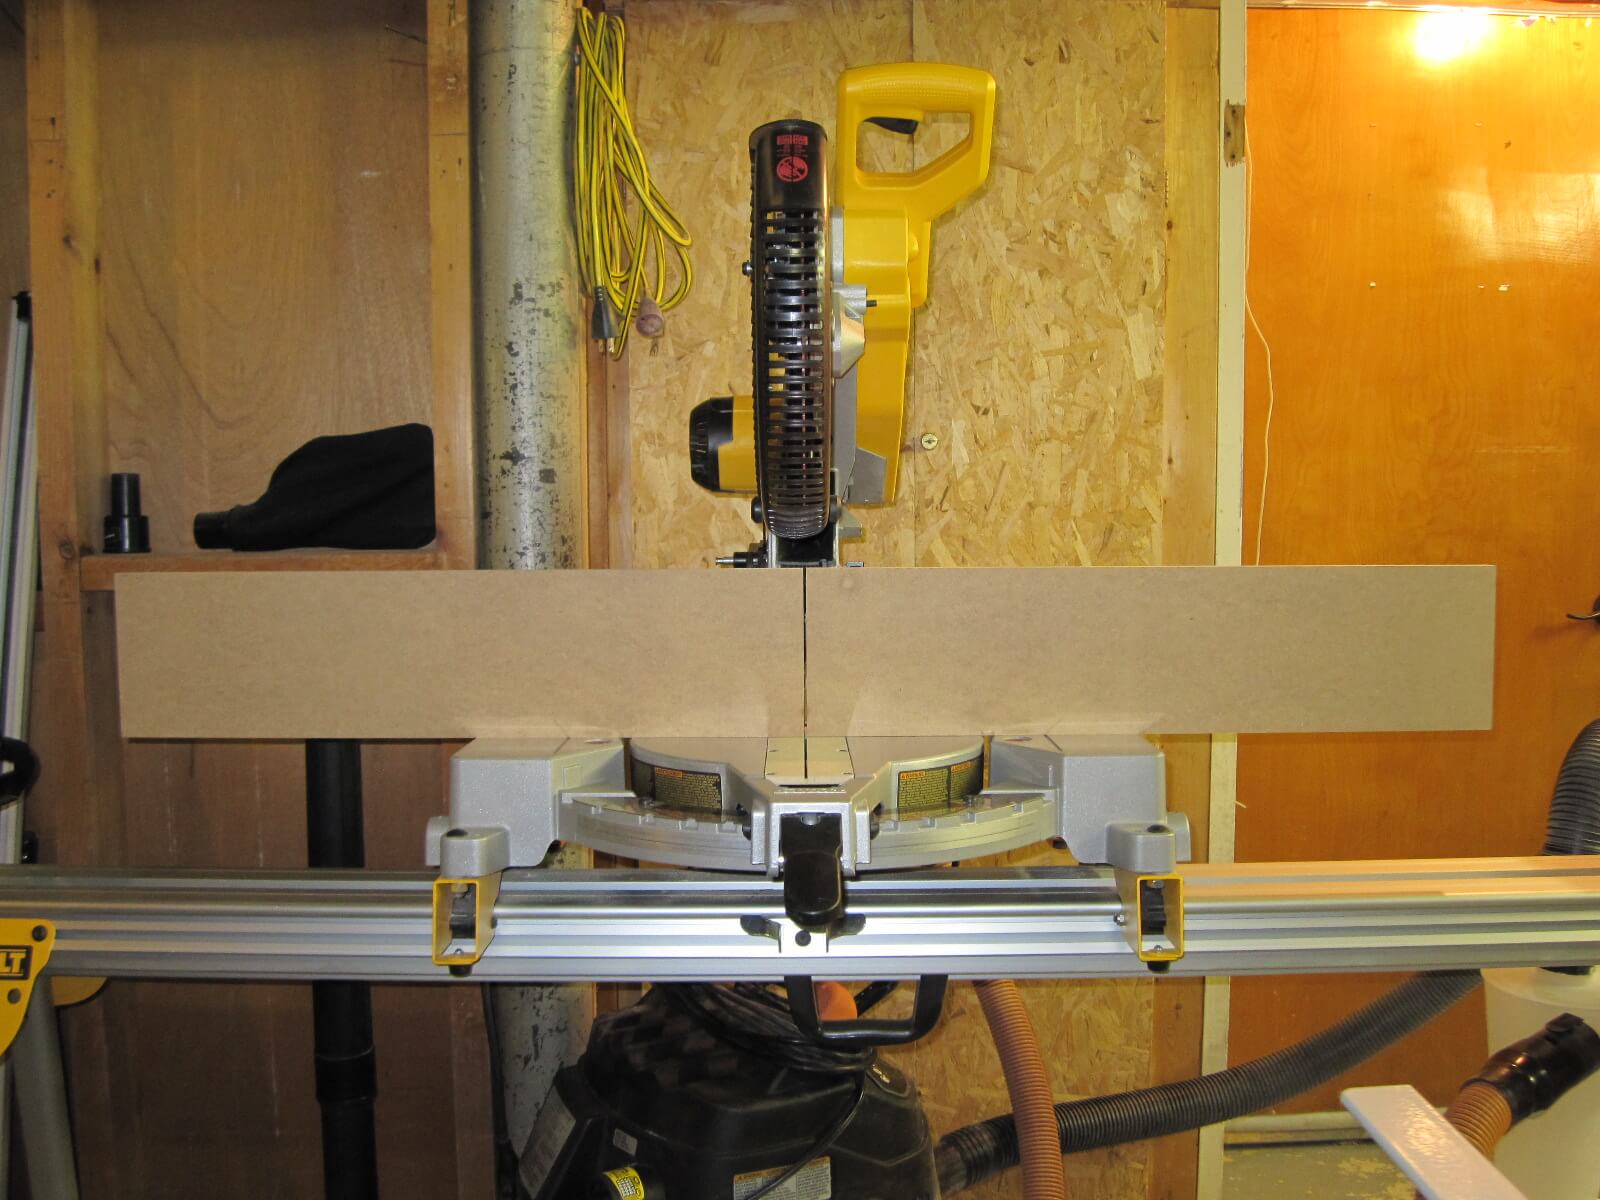

- The quality of the blade is essential on this type of tool. Investing in cheap blades is not worth it, you always end up regretting it. If your saw lacks power, replace the 1/8″ blade with a 3/32″ blade.
- Take the time necessary to adjust your tools before using them, you will not regret this investment.
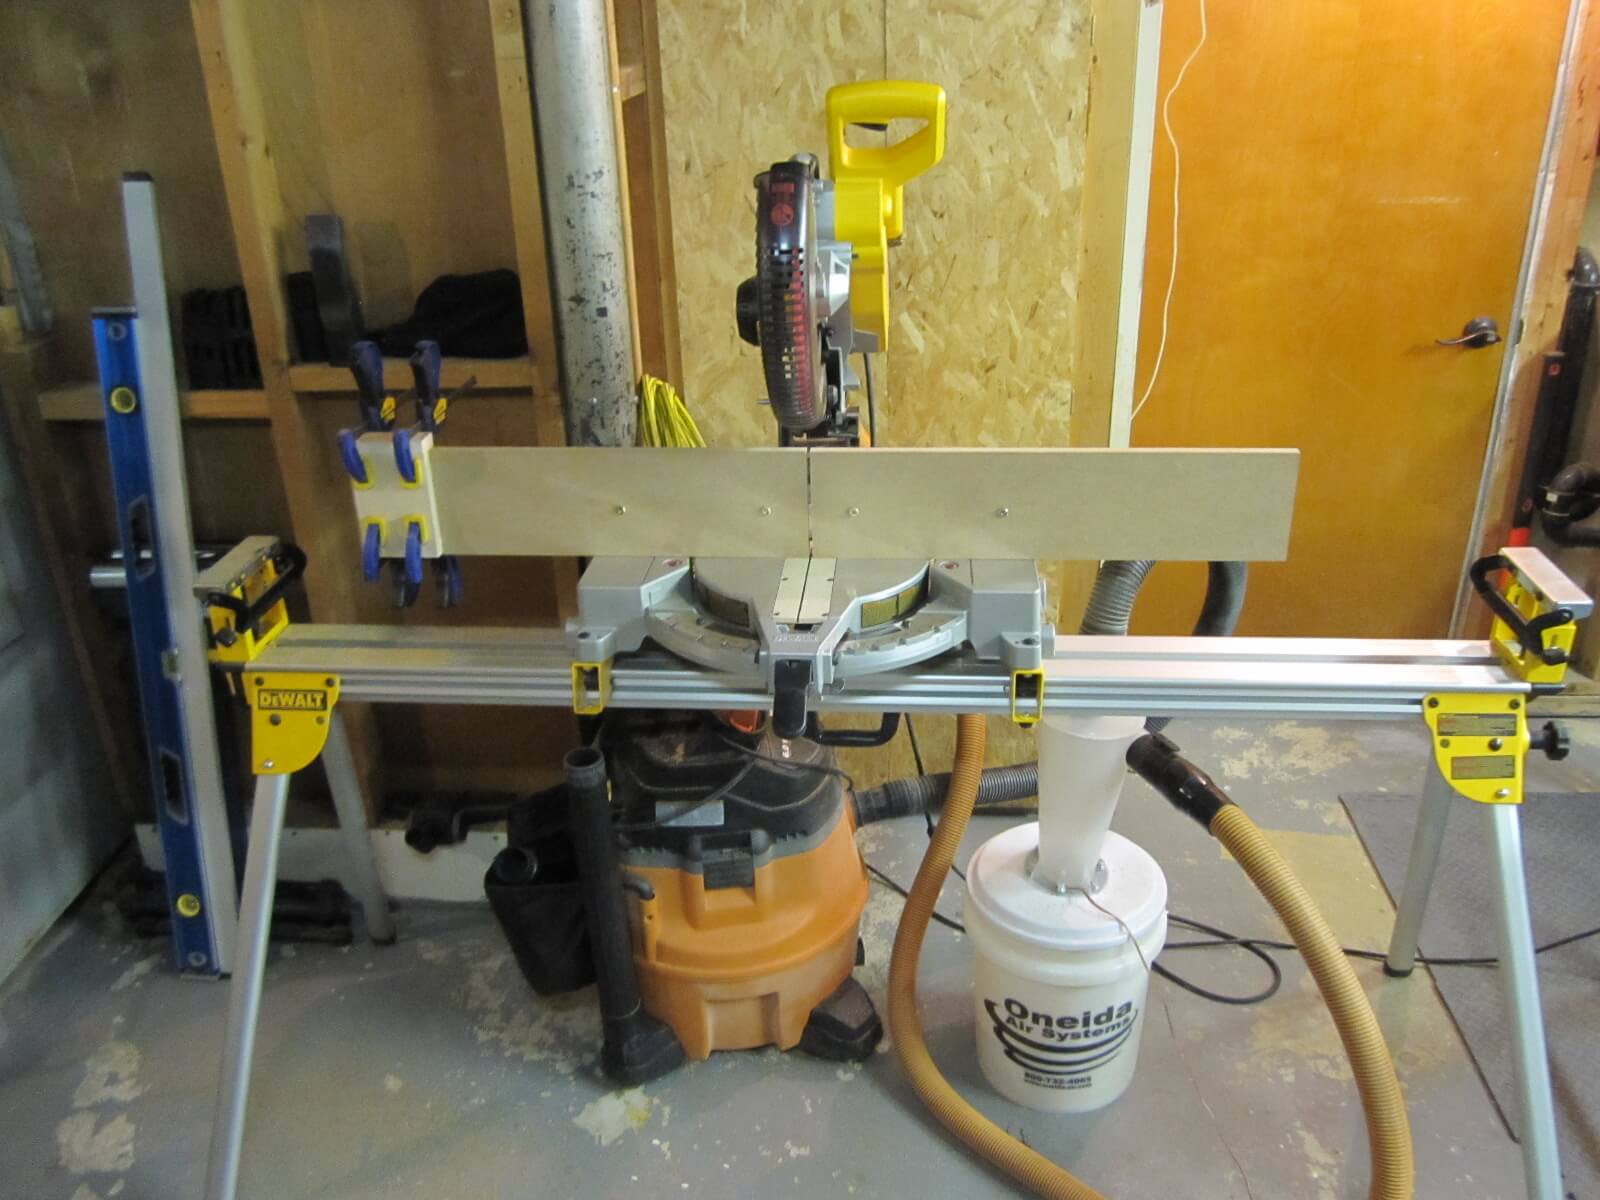
- My suction system is of the cyclone type and it is very efficient. The dust particles are separated and fall into the seal. The vacuum cleaner thus retains all its power throughout its use. At the time, I brought it from the United States but it can be easily found in Canada today.
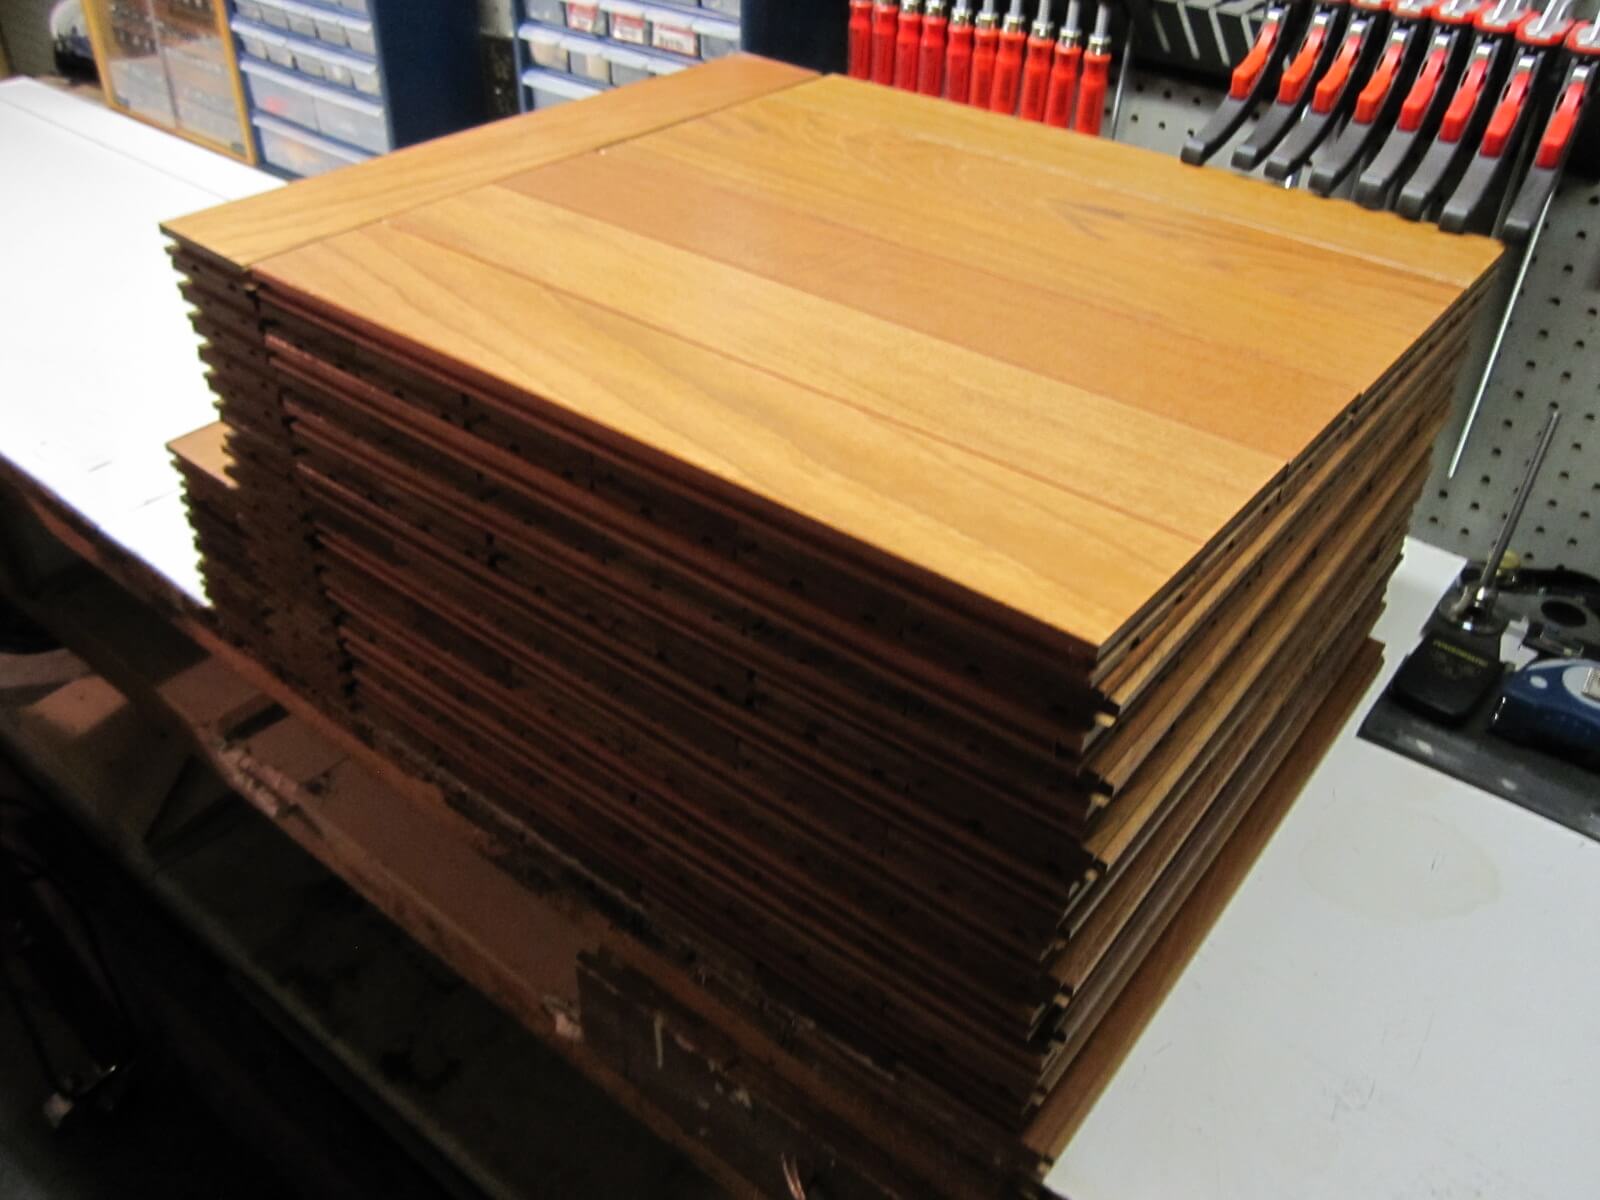
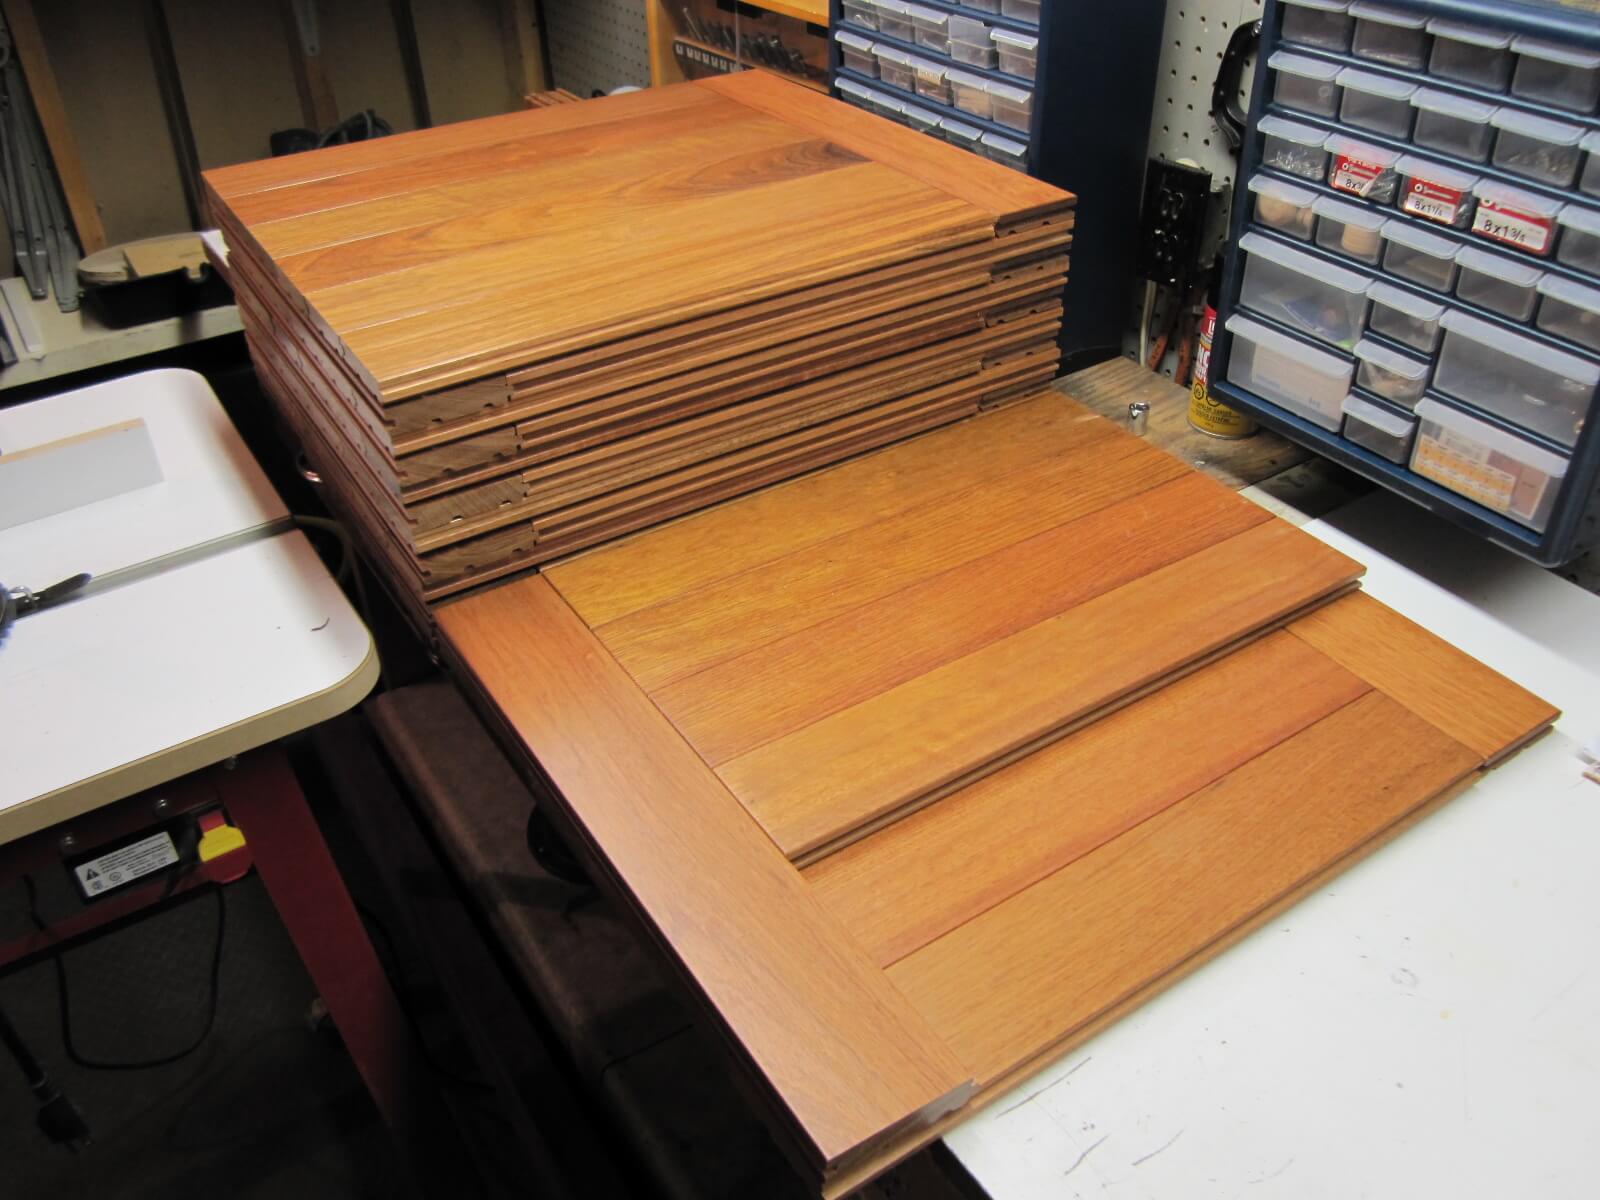
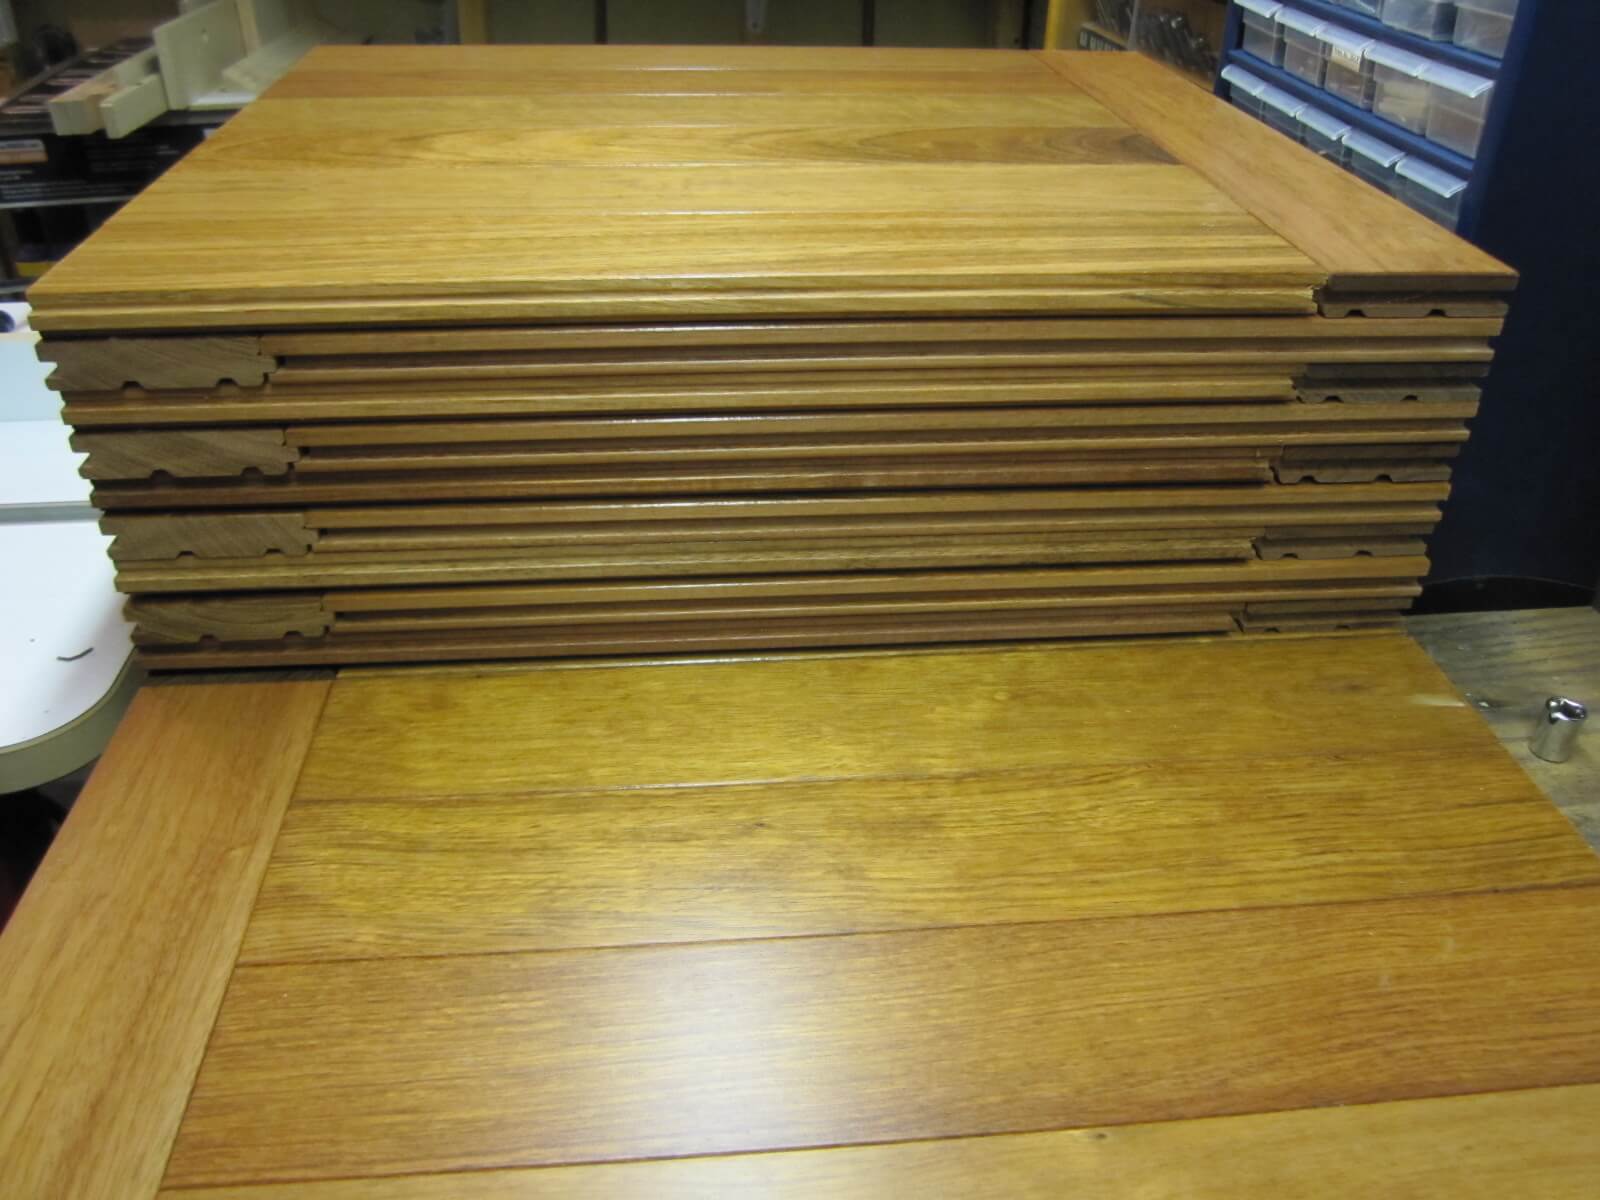
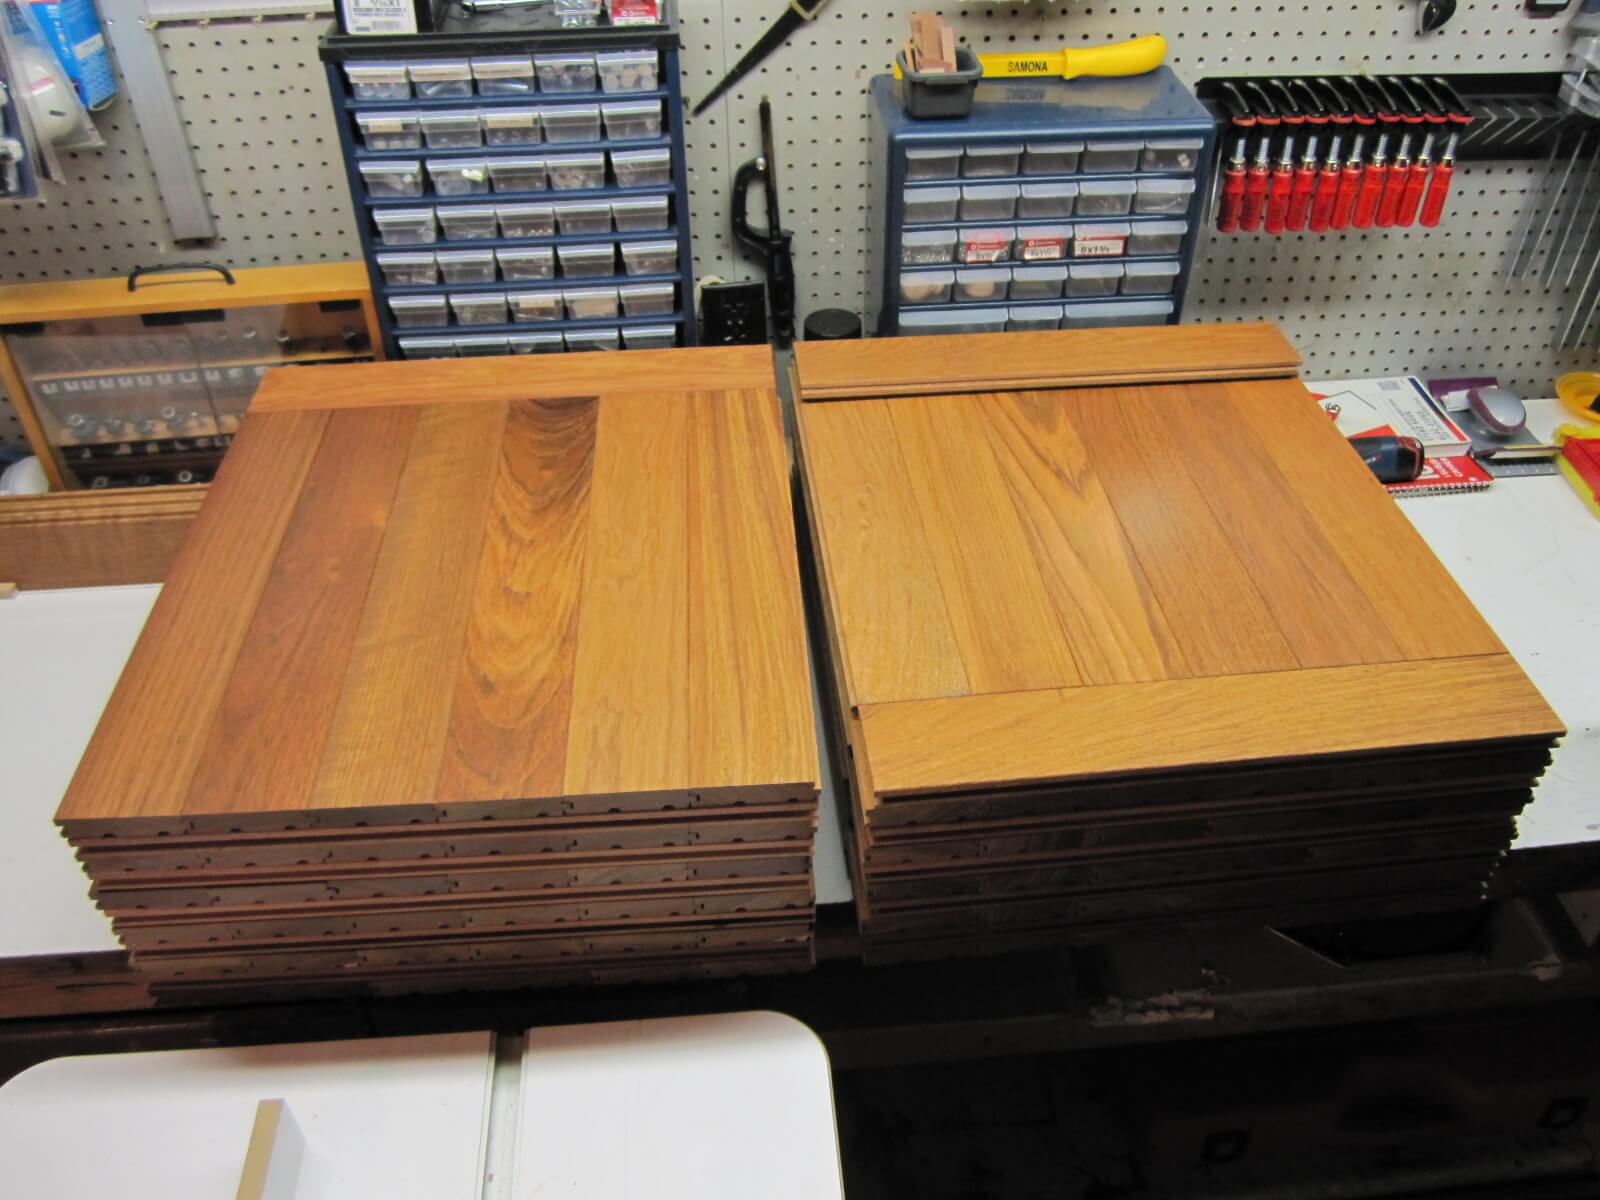
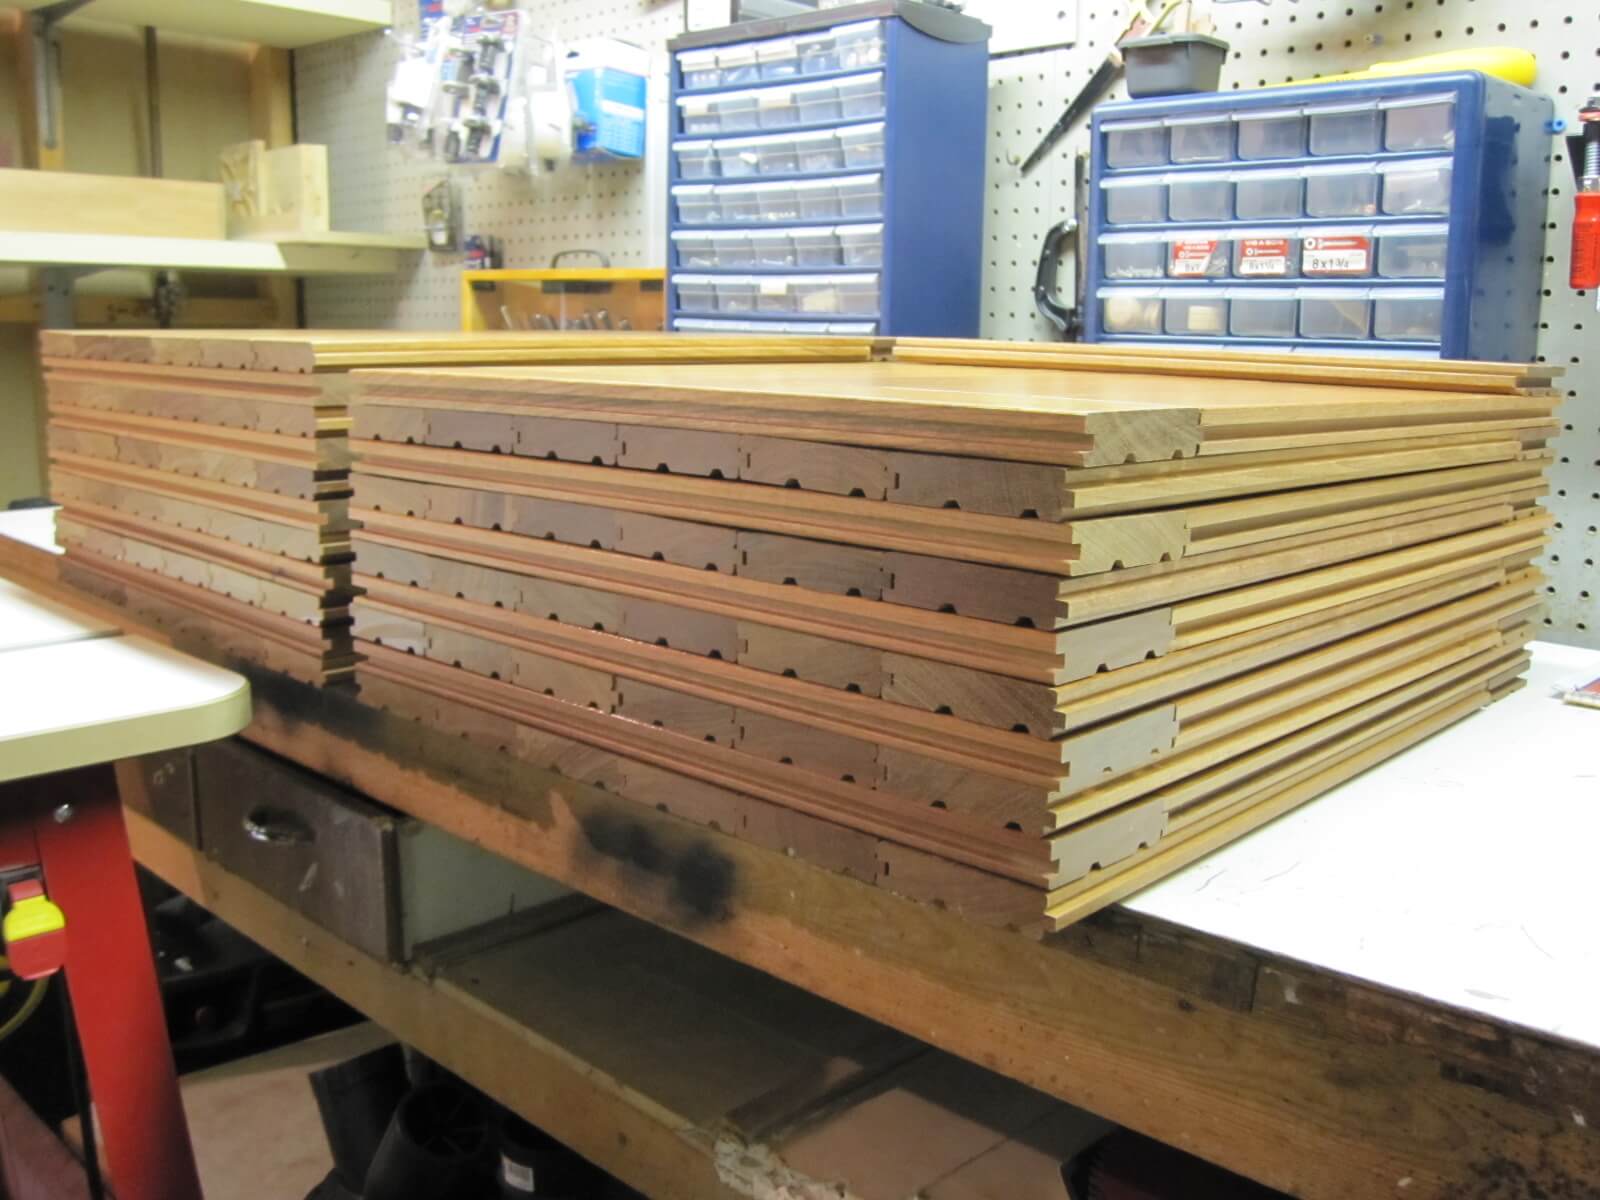
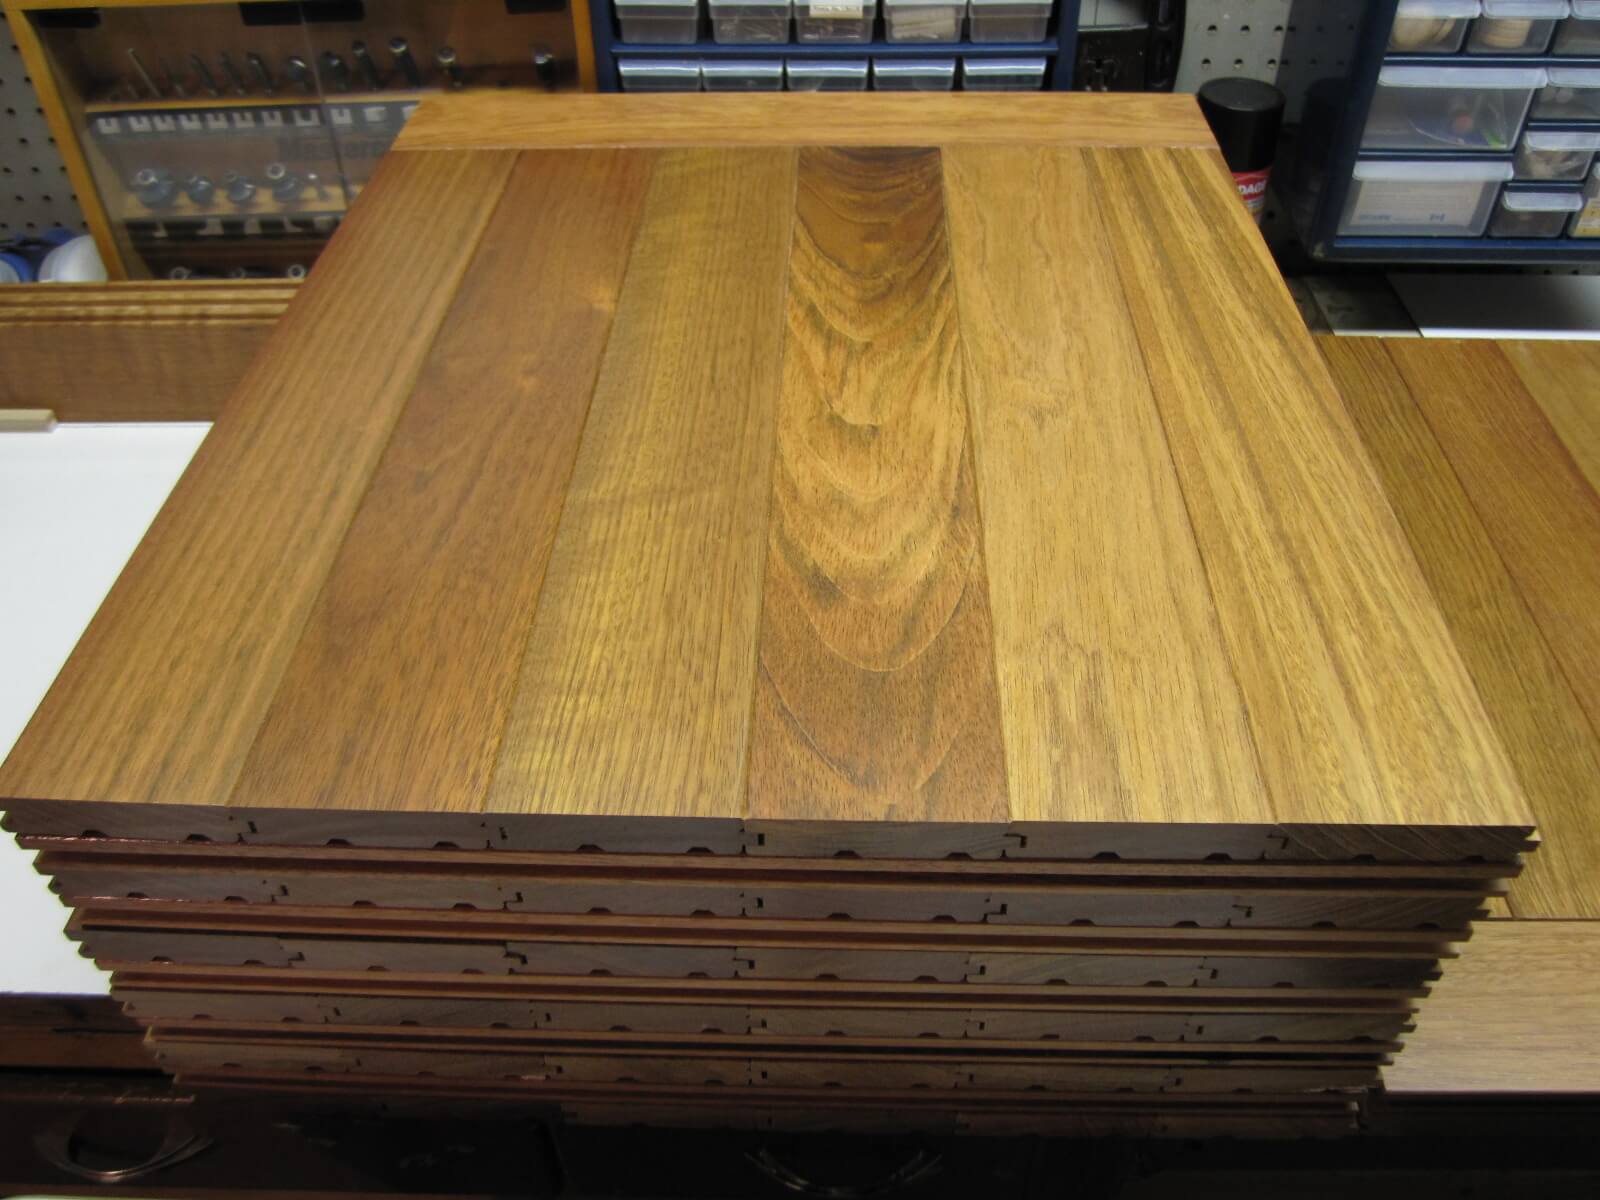

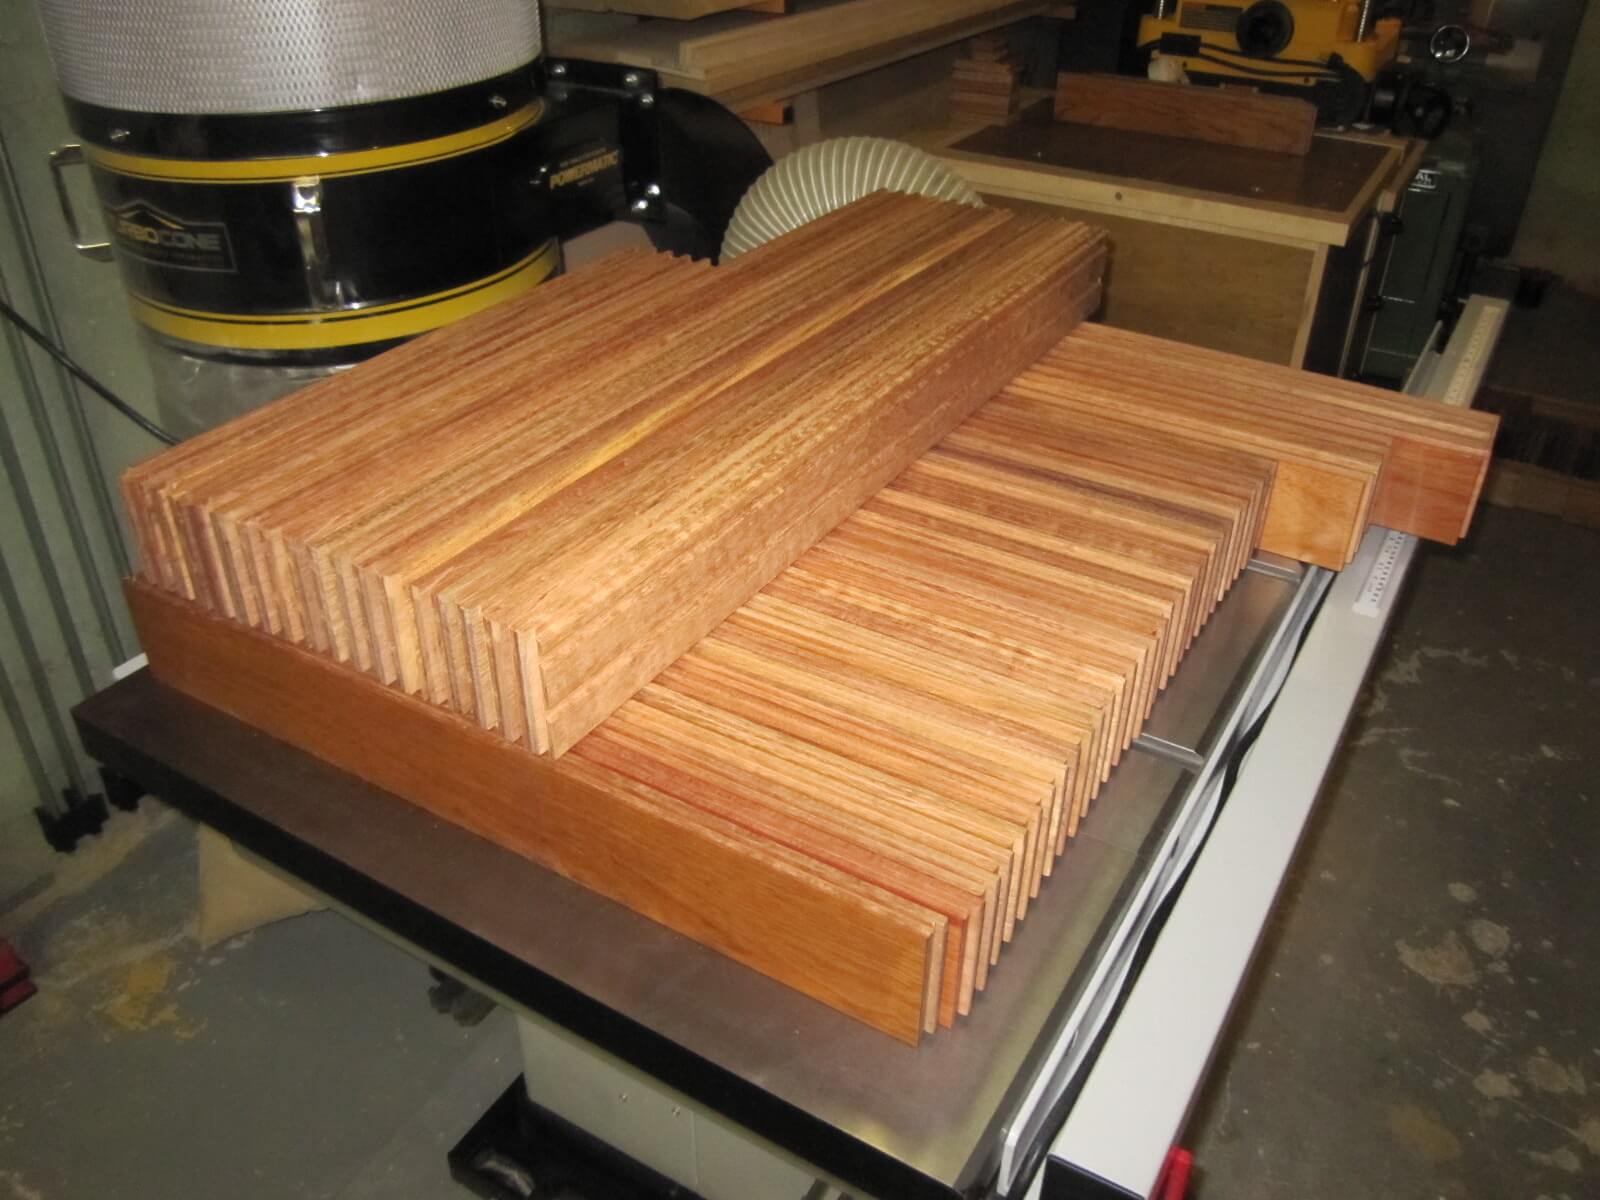
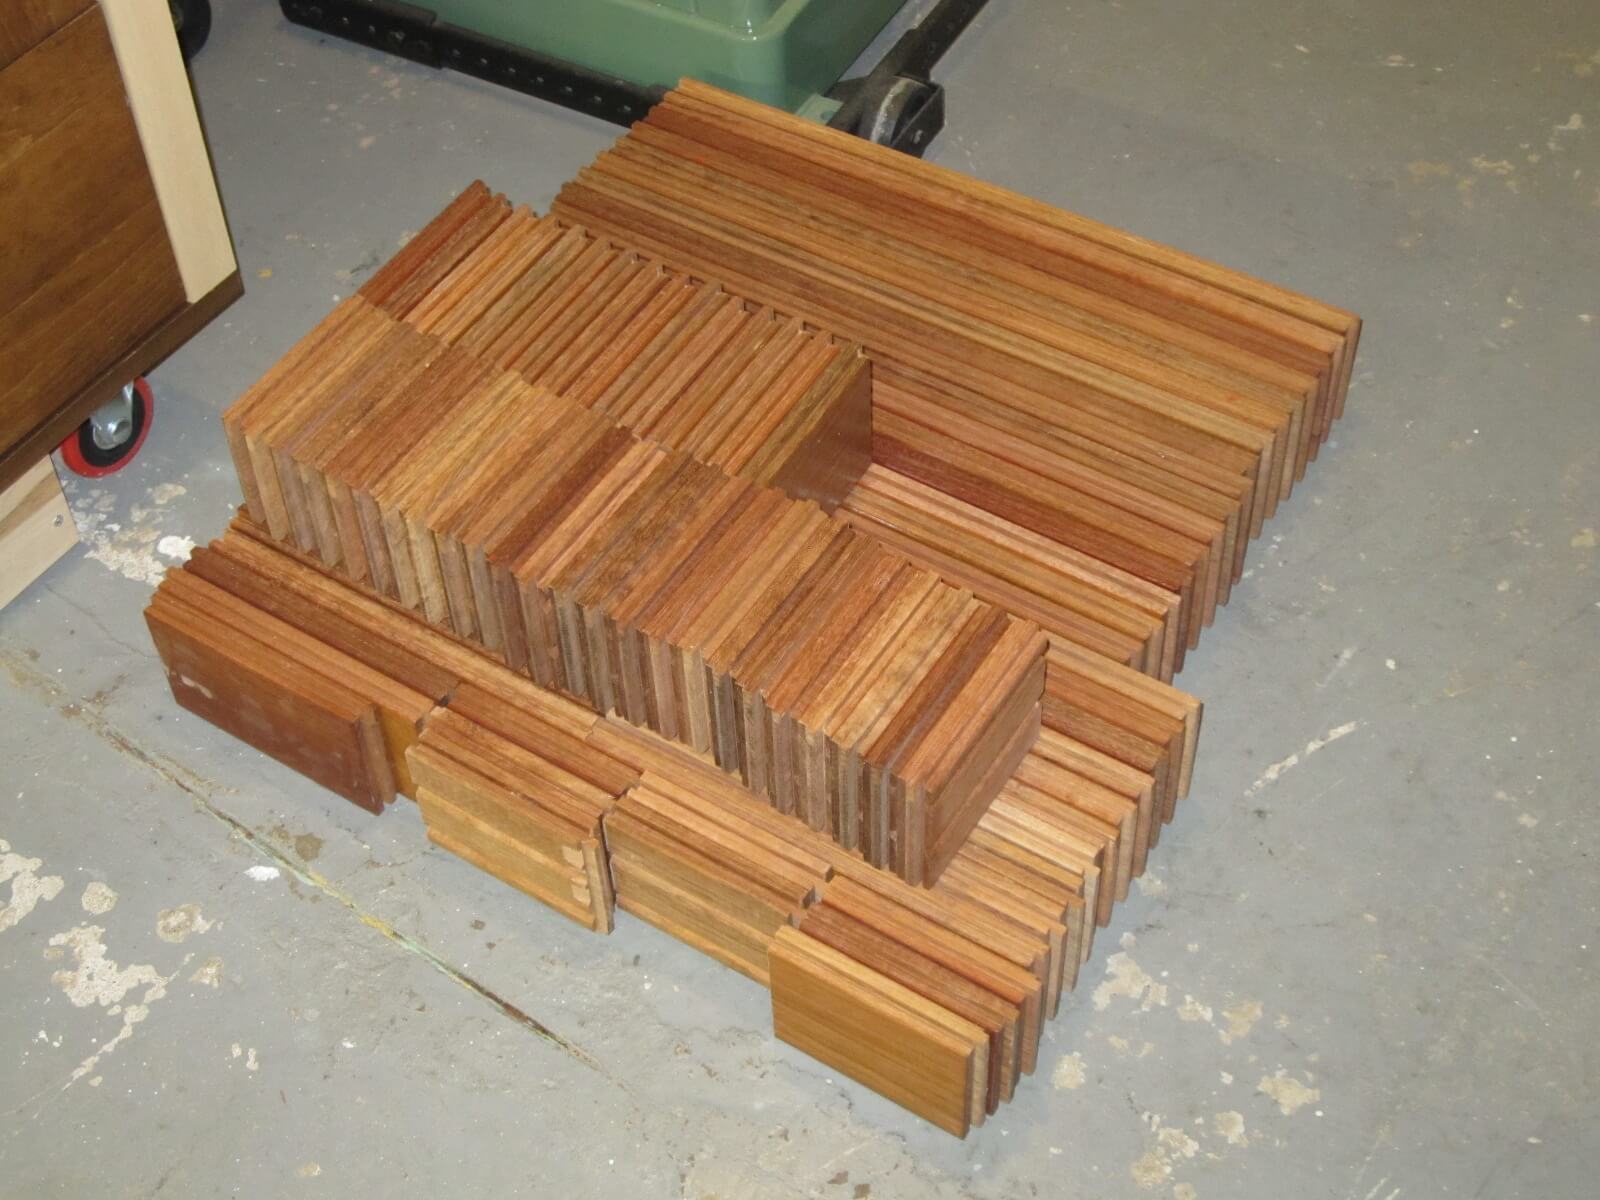
After sizing the boards, I made the grooves and 45 degree chamfers on the router table.
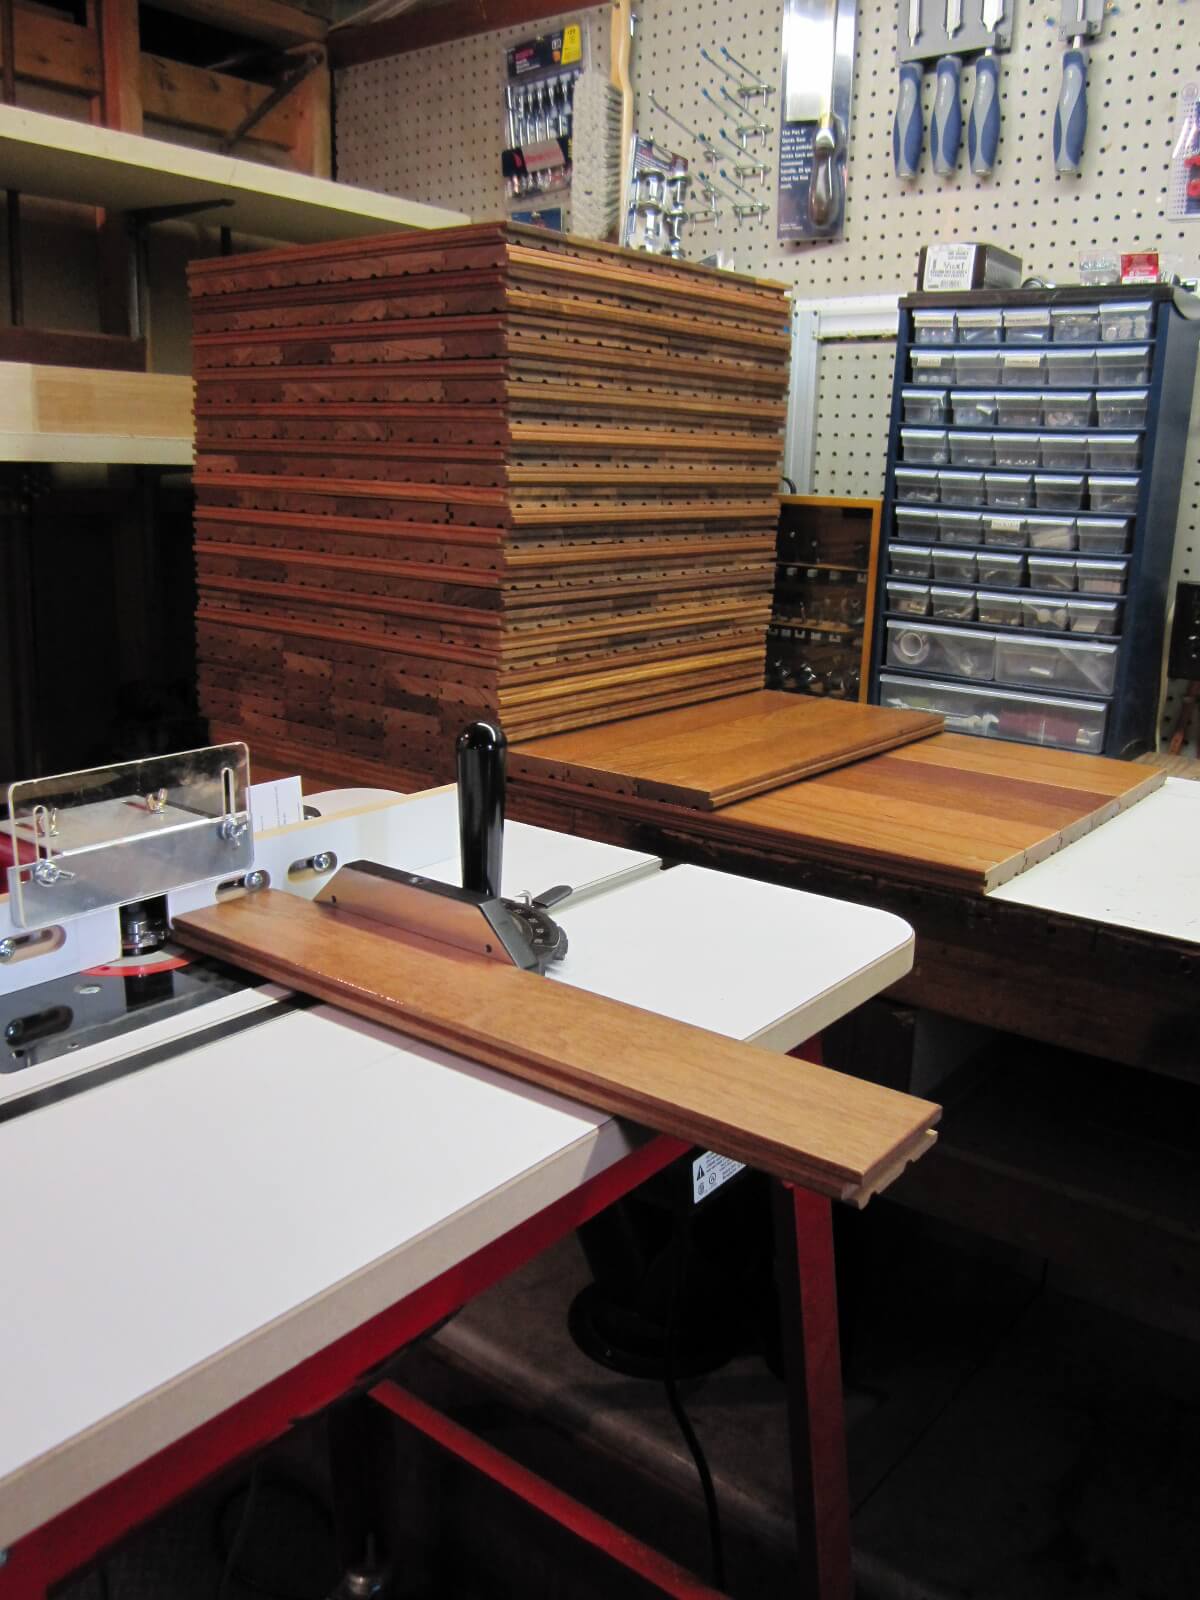
To finish, I applied several coats of floor varnish on the chamfers.
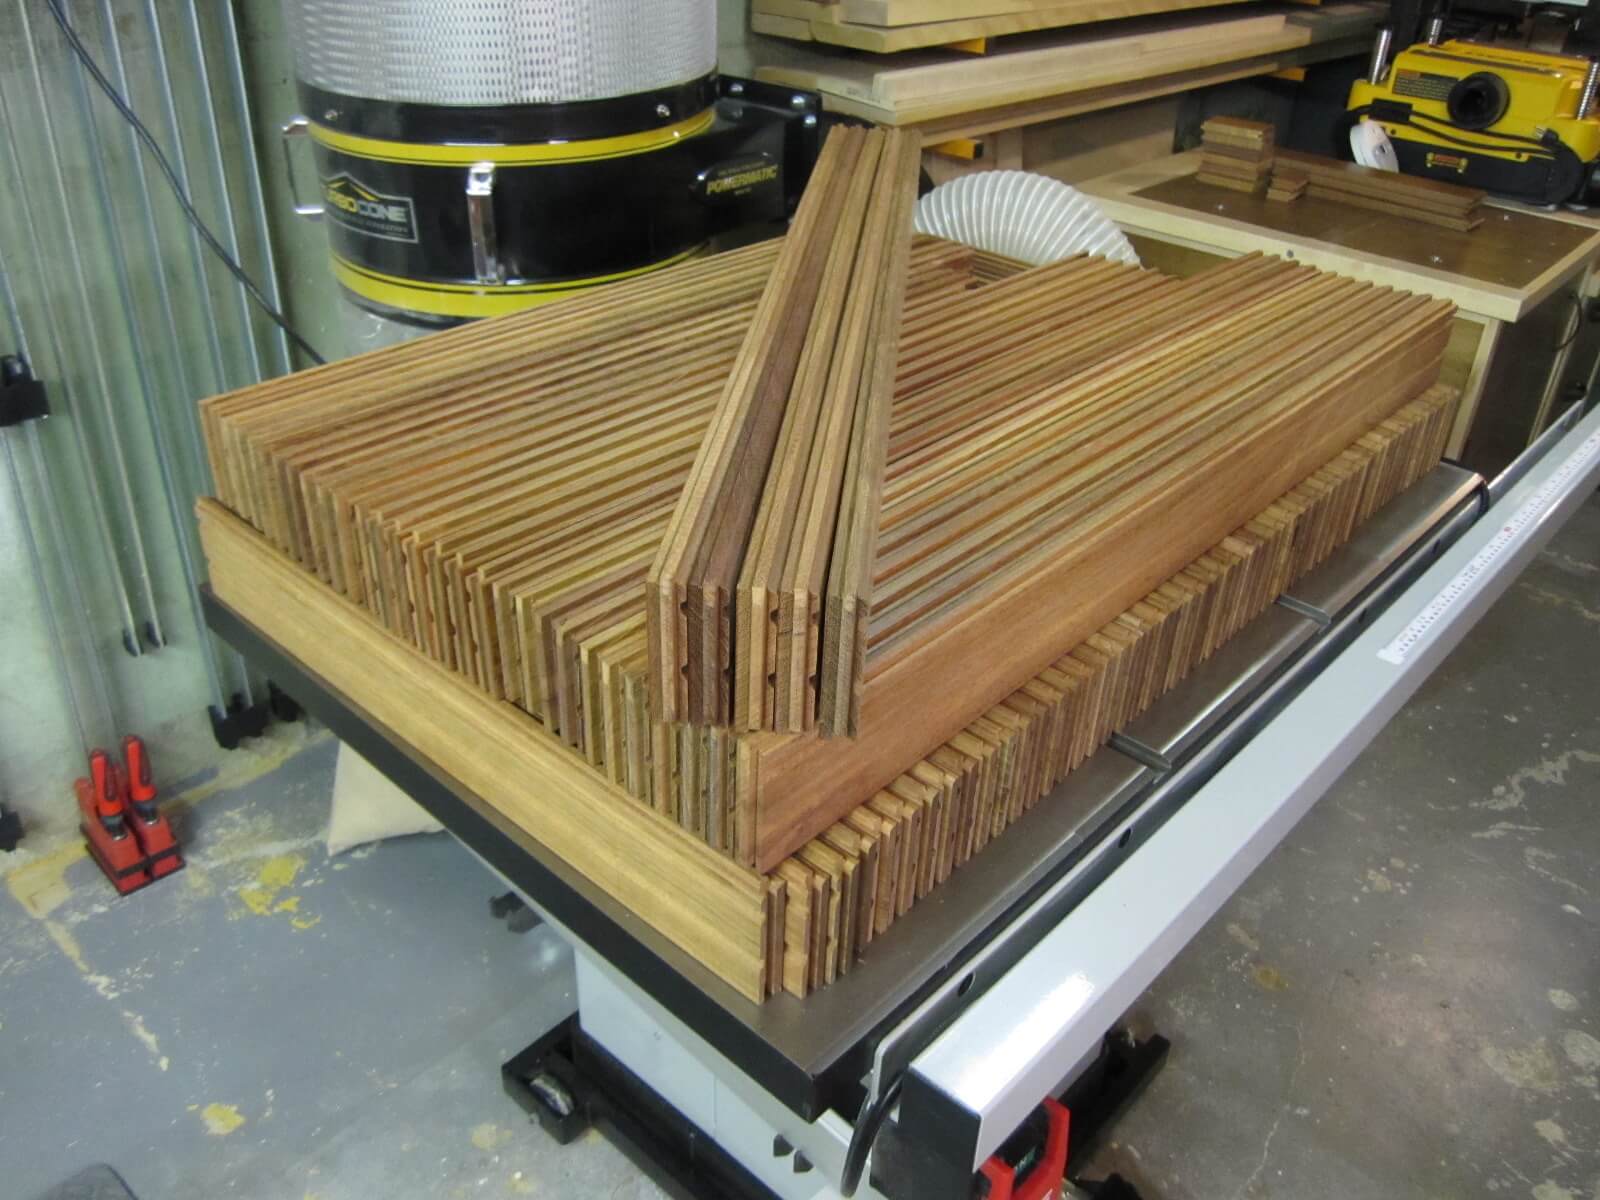
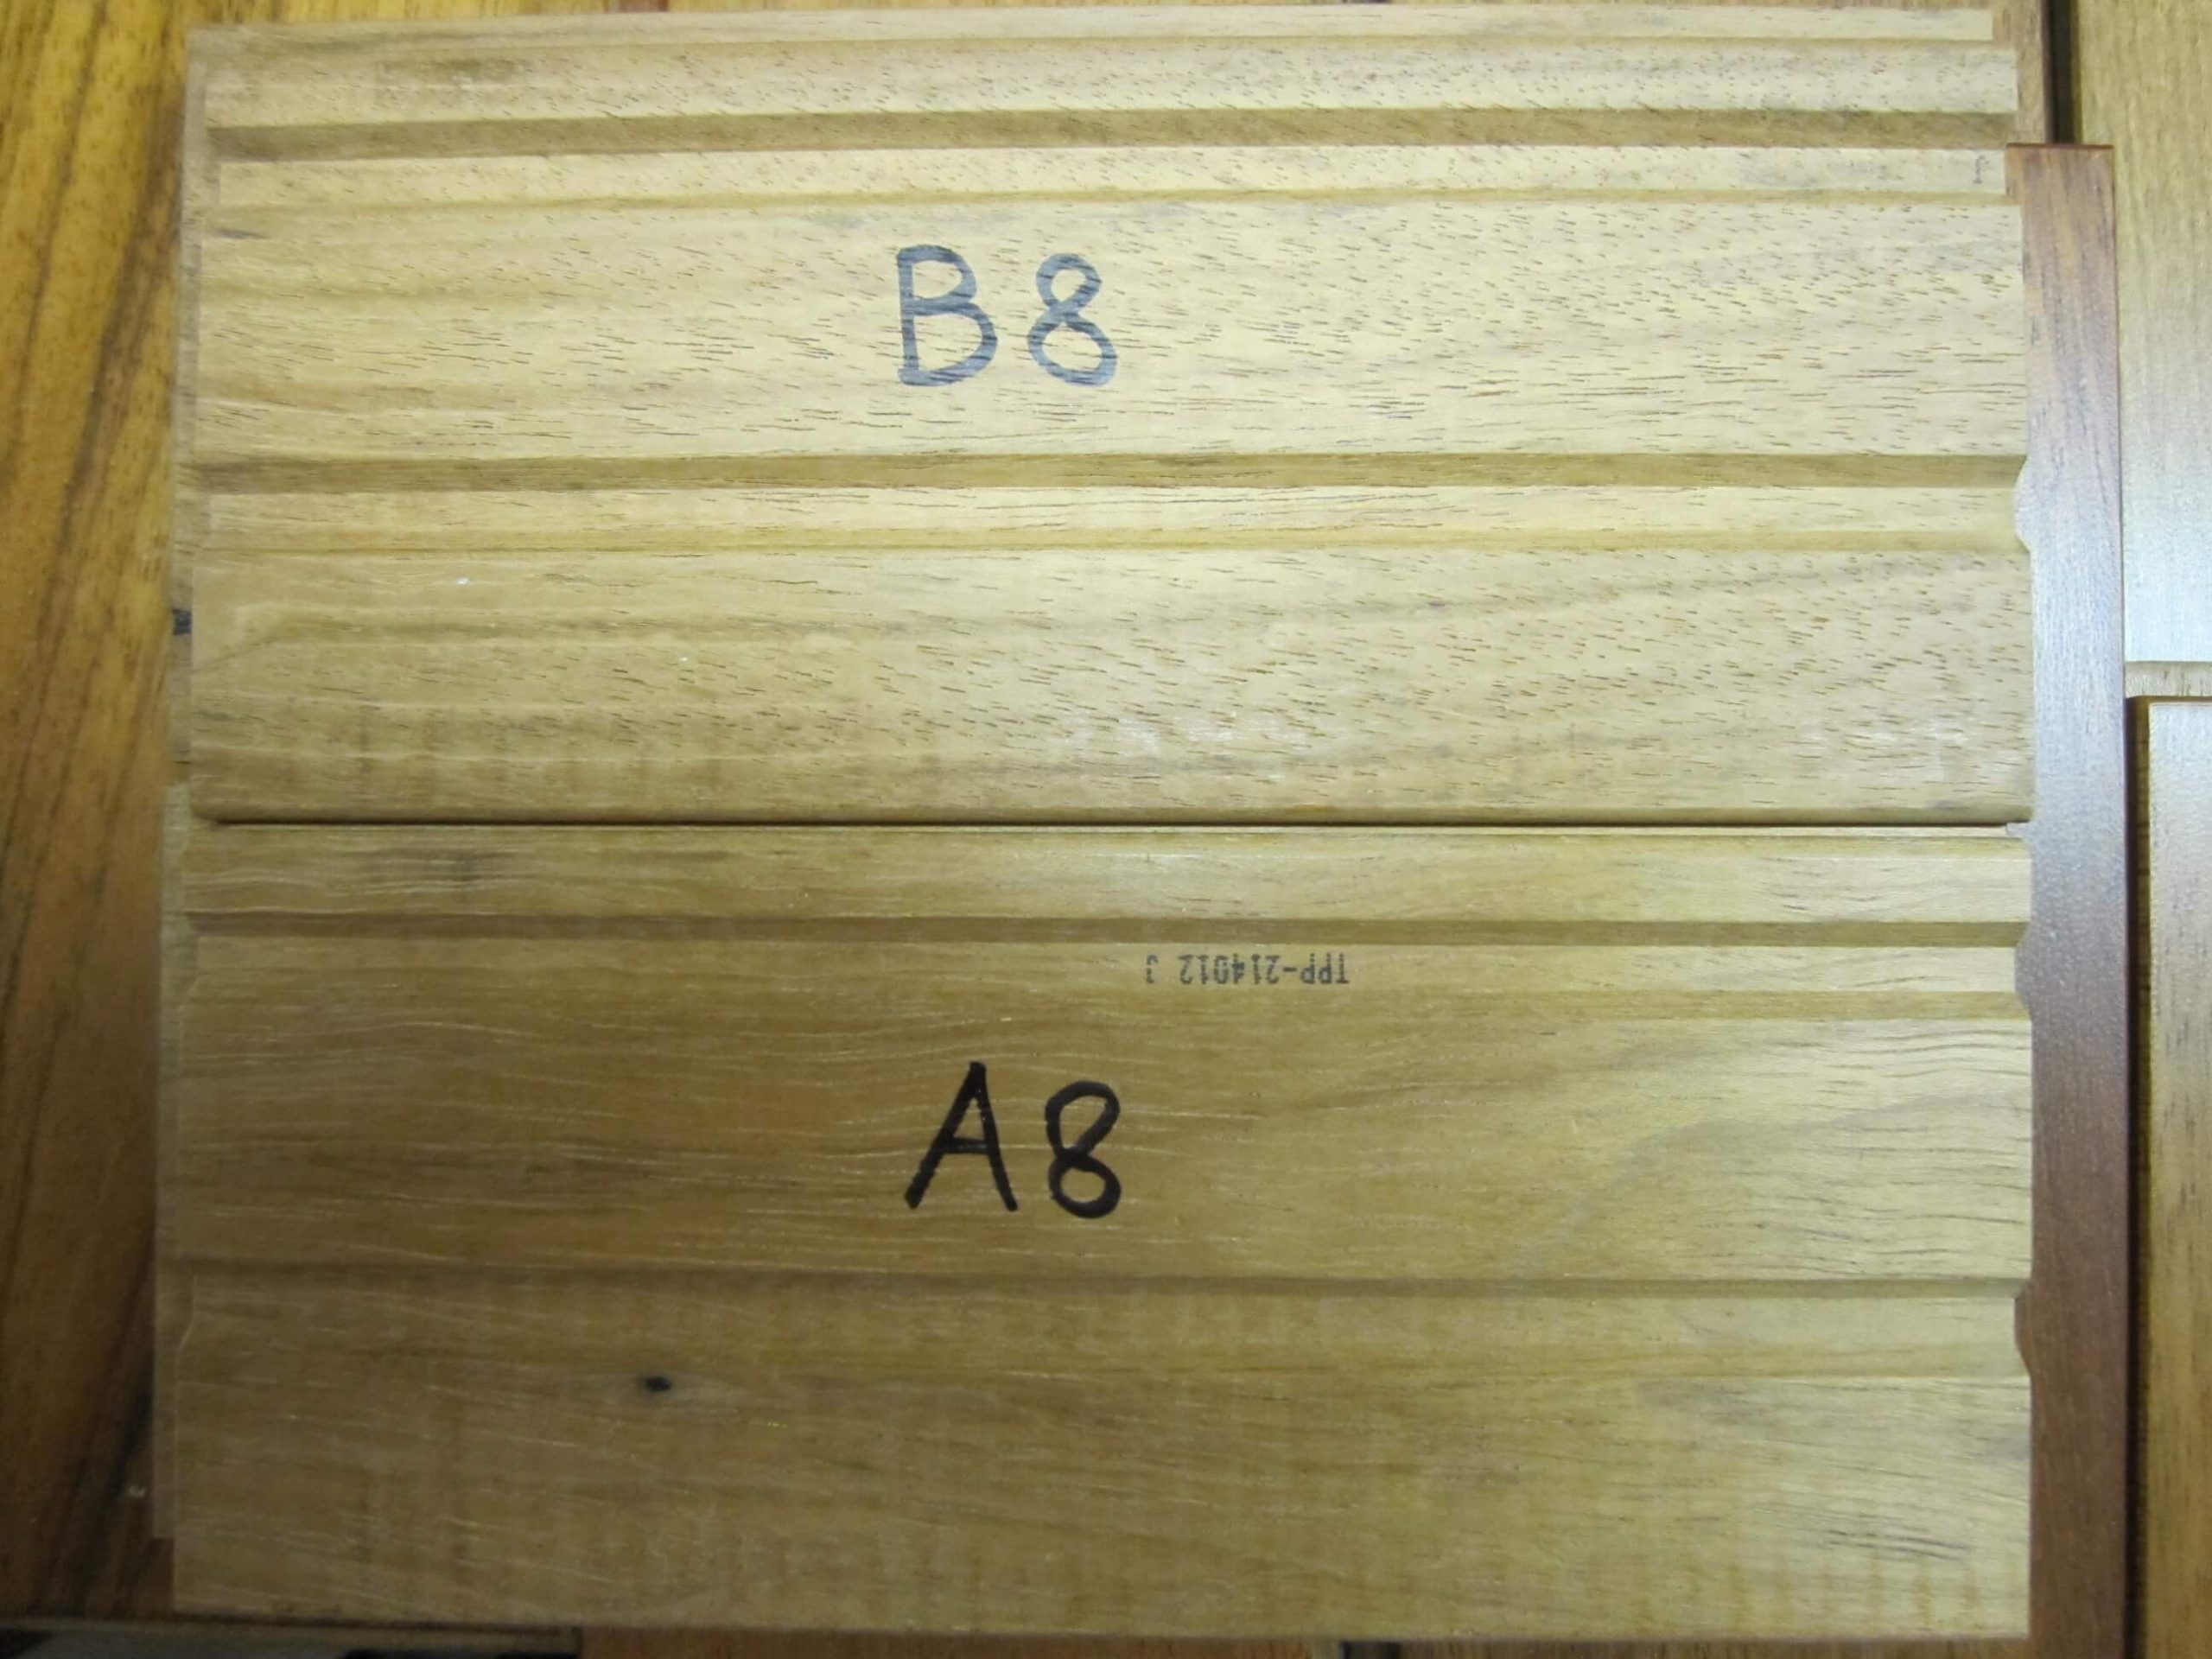
Sometimes, by using them, our tools go wrong. So, in order to ensure the regularity of the cuts, I created piles of 6 blades assembled perpendicularly (blank) to 1 blade. If the length had moved, I would have quickly detected it and could have intervened.
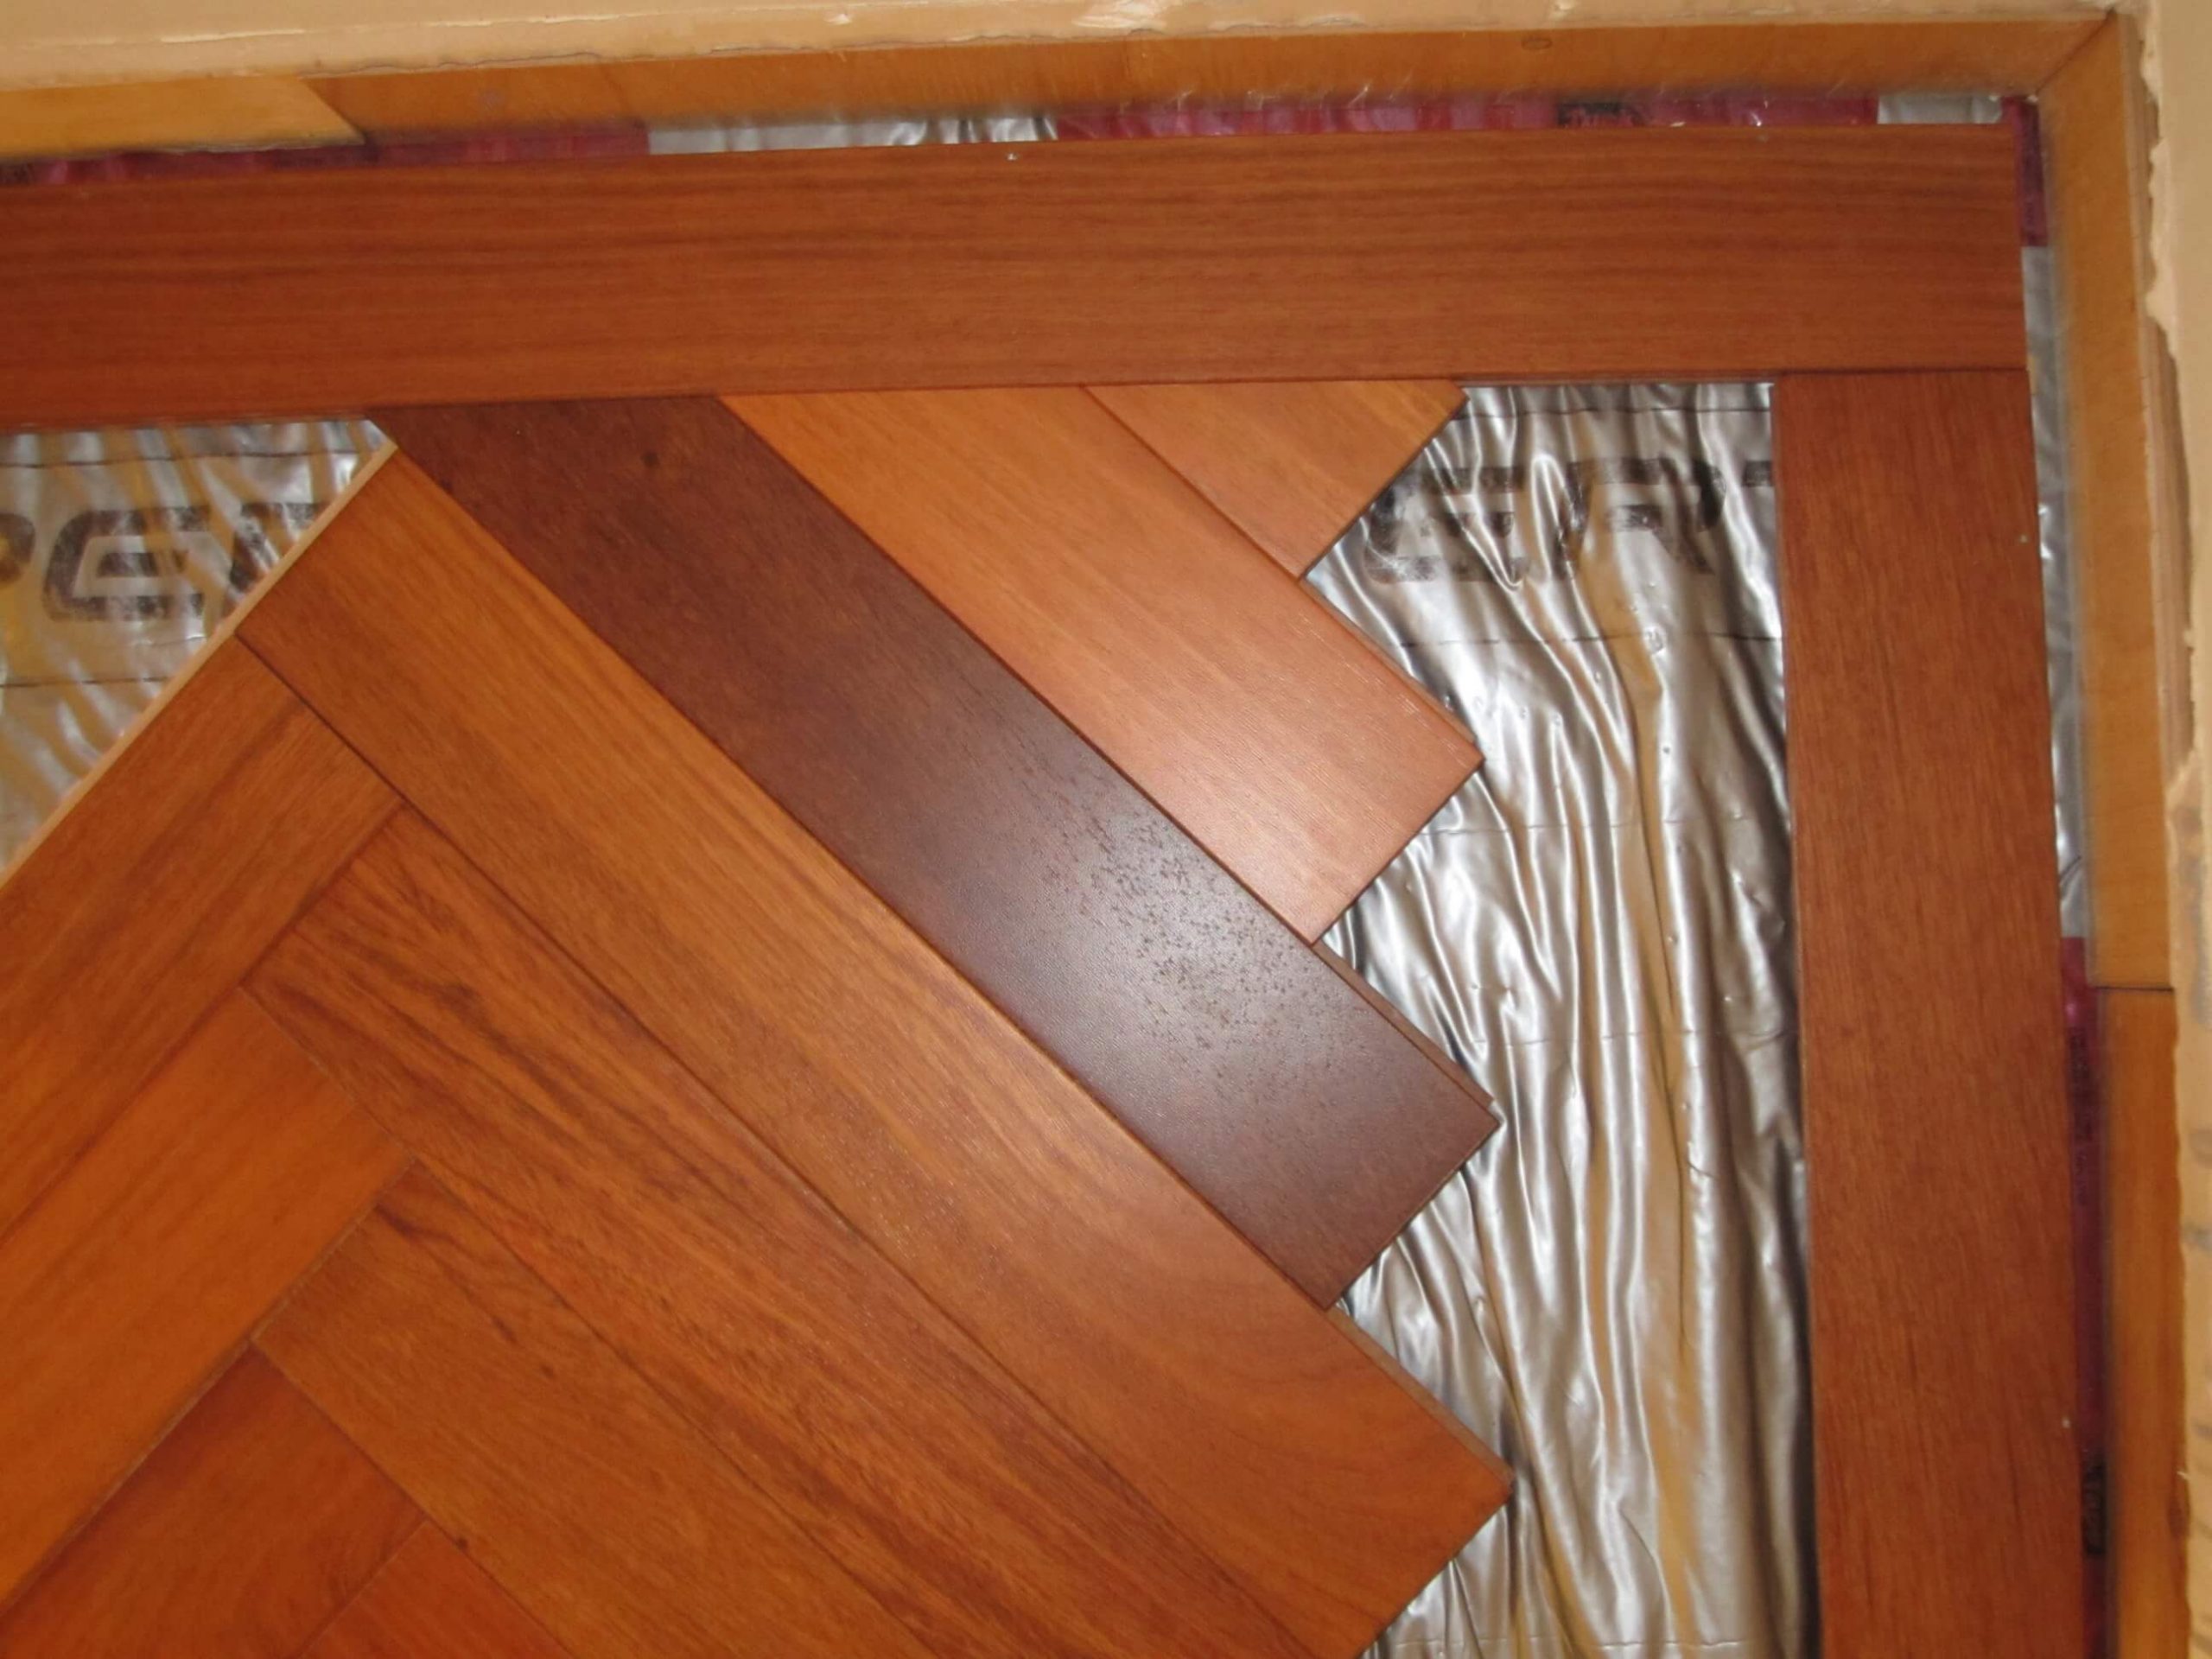
2nd step: laying the boards
The first and easiest thing is to lay the frame delimiting the new room. Then, the starting point of the pose is the center of the room. So I drew a center line through which the tops of the rafters will pass.
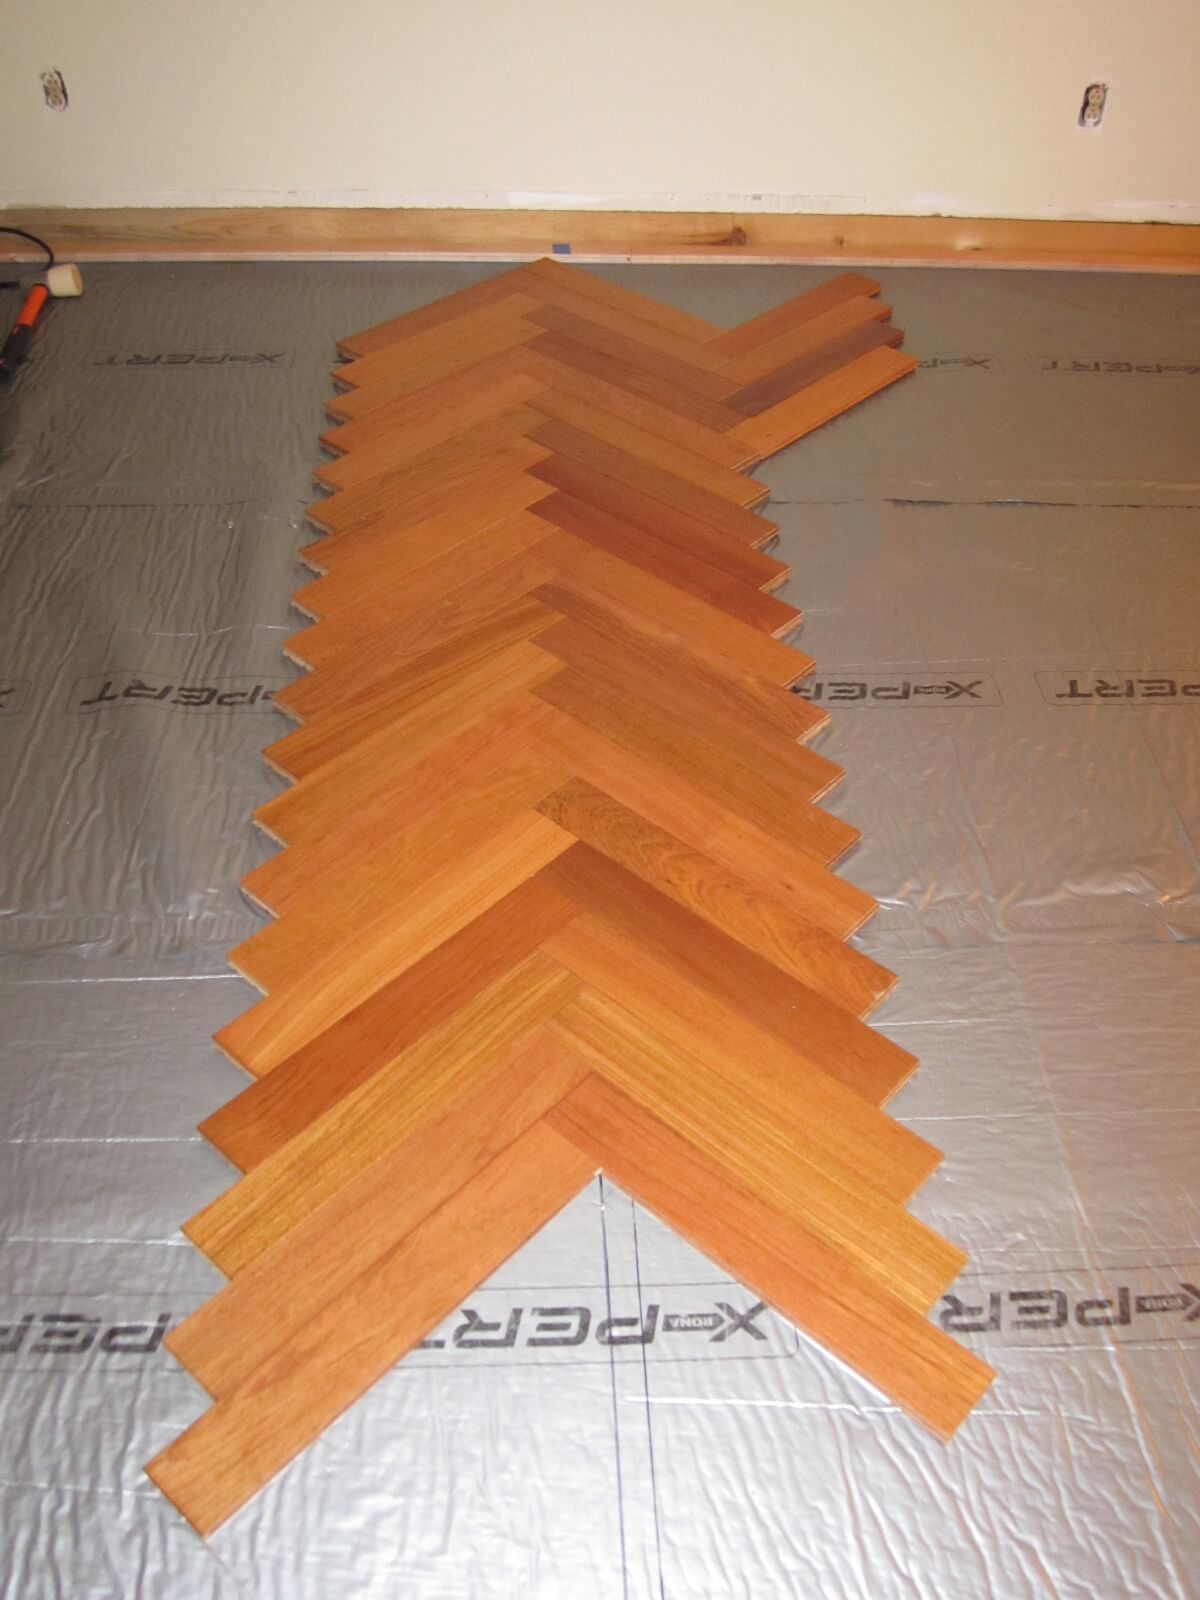
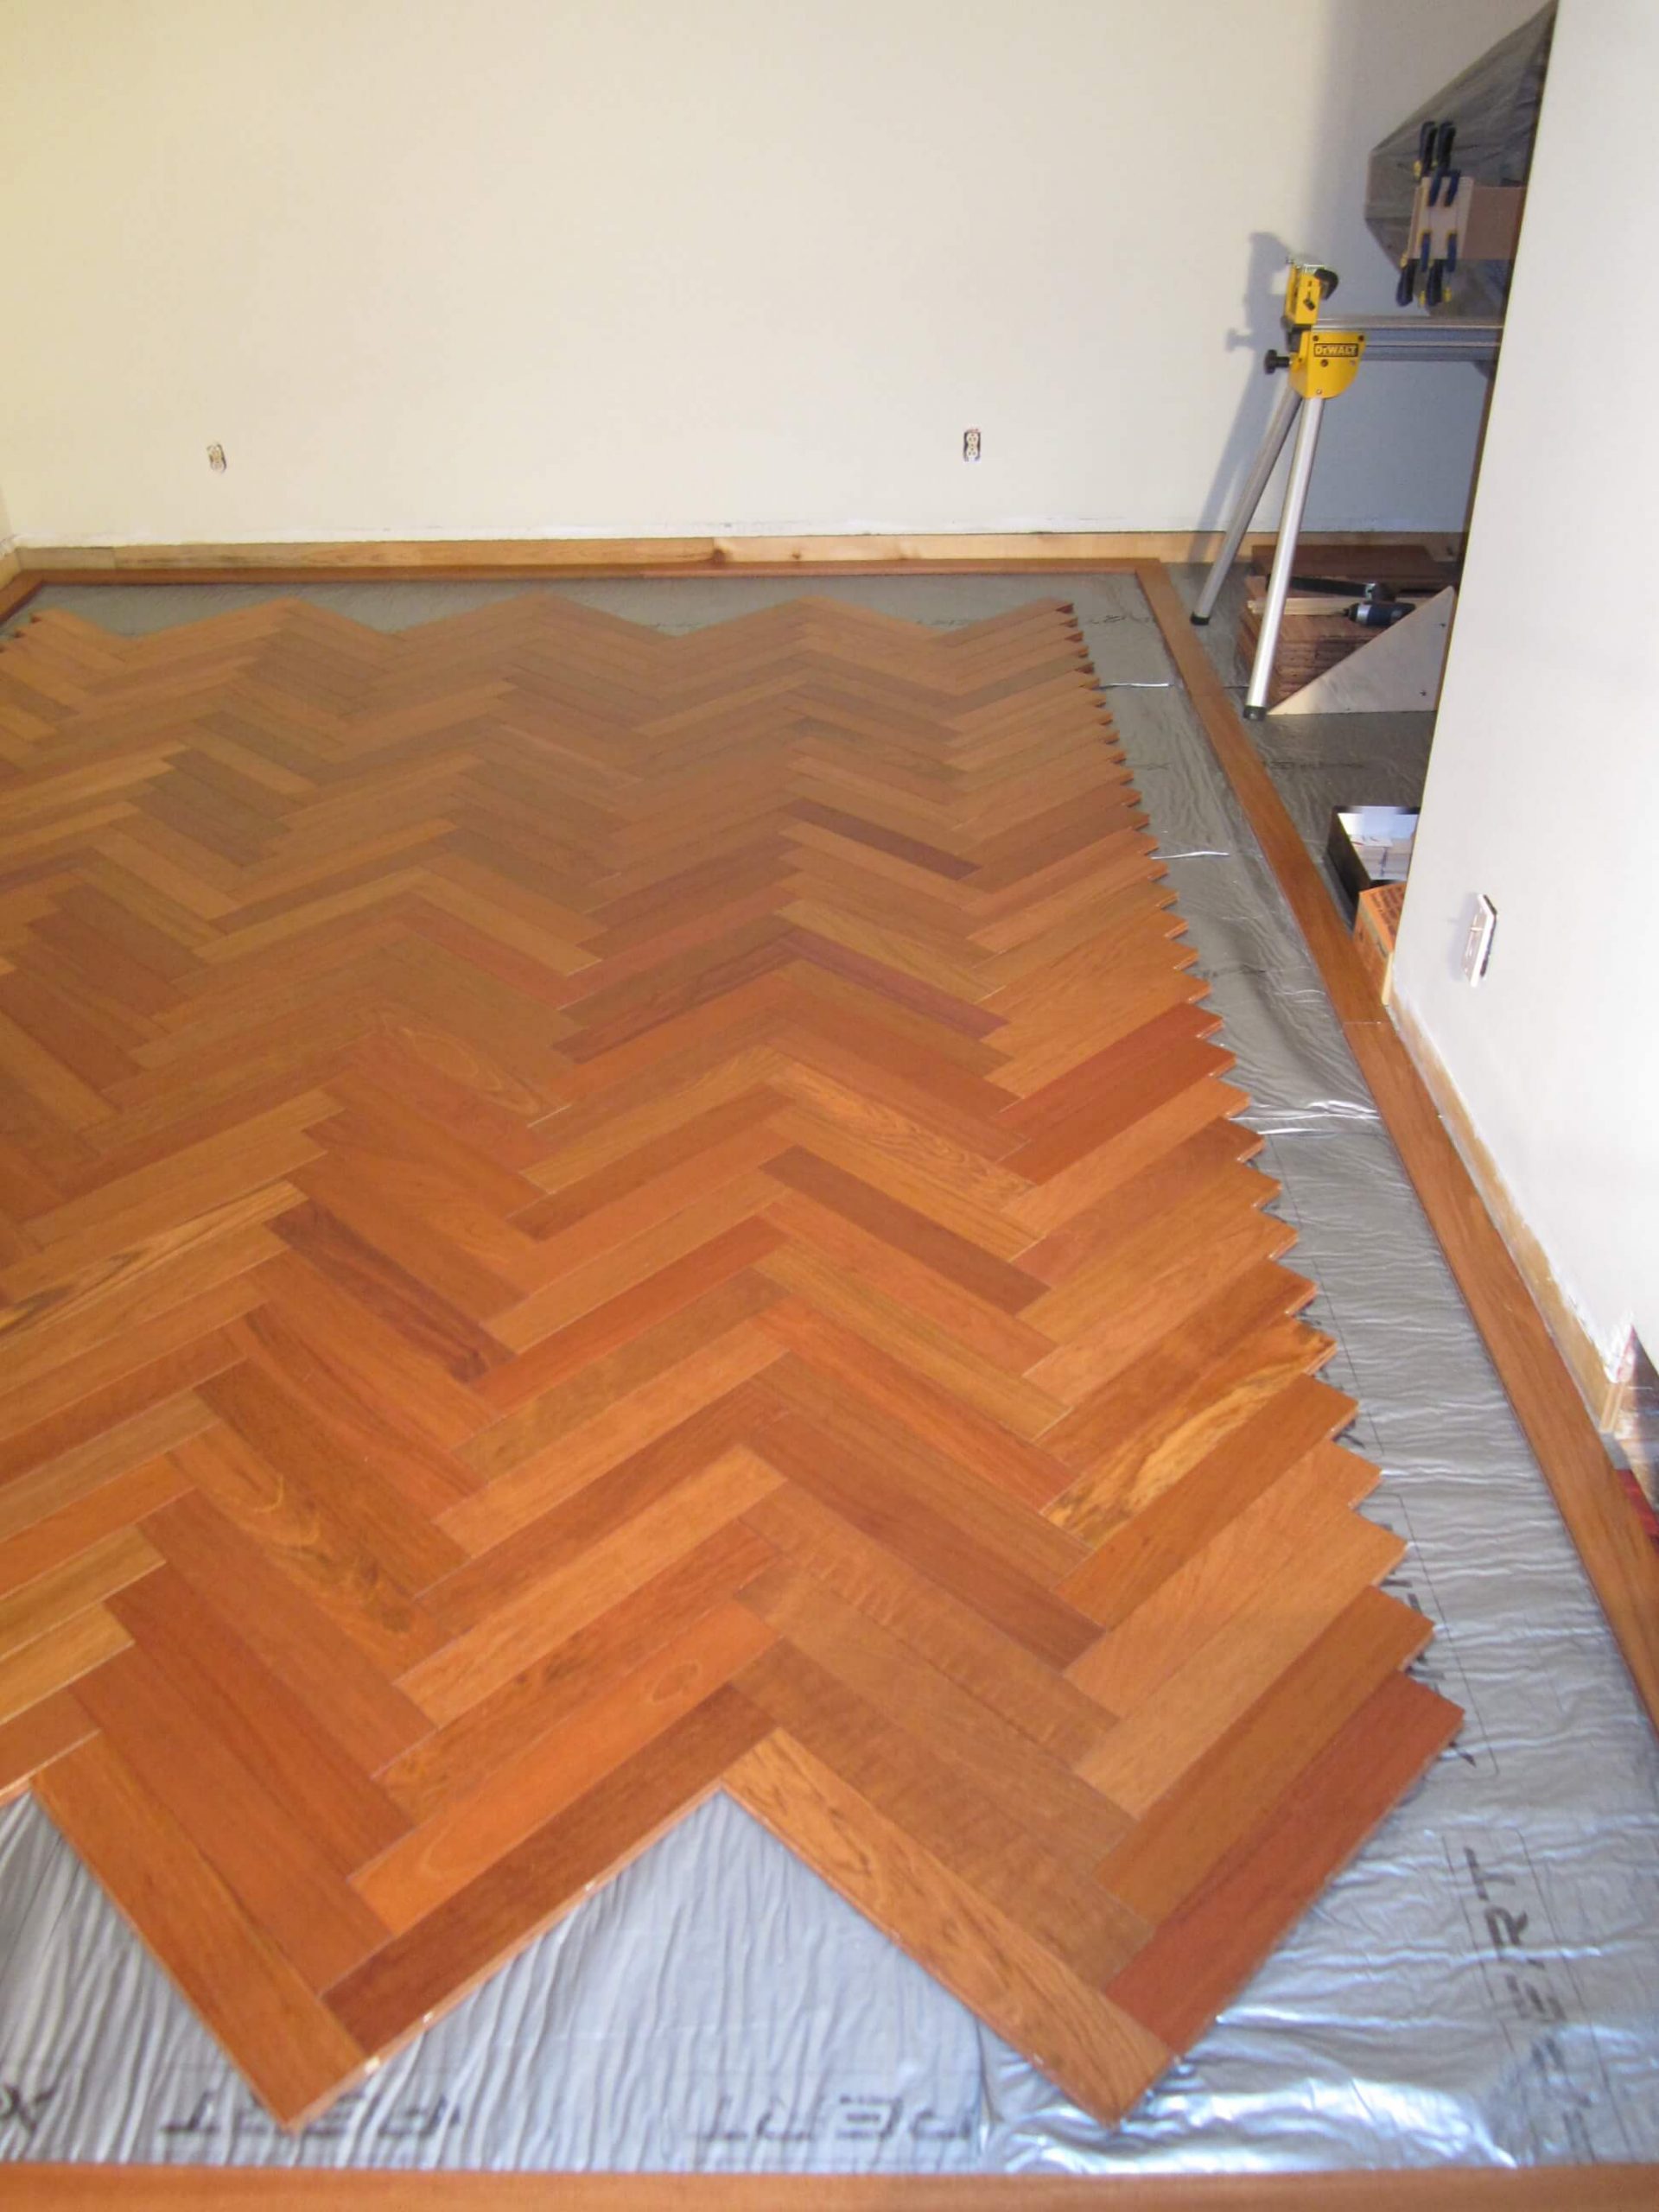
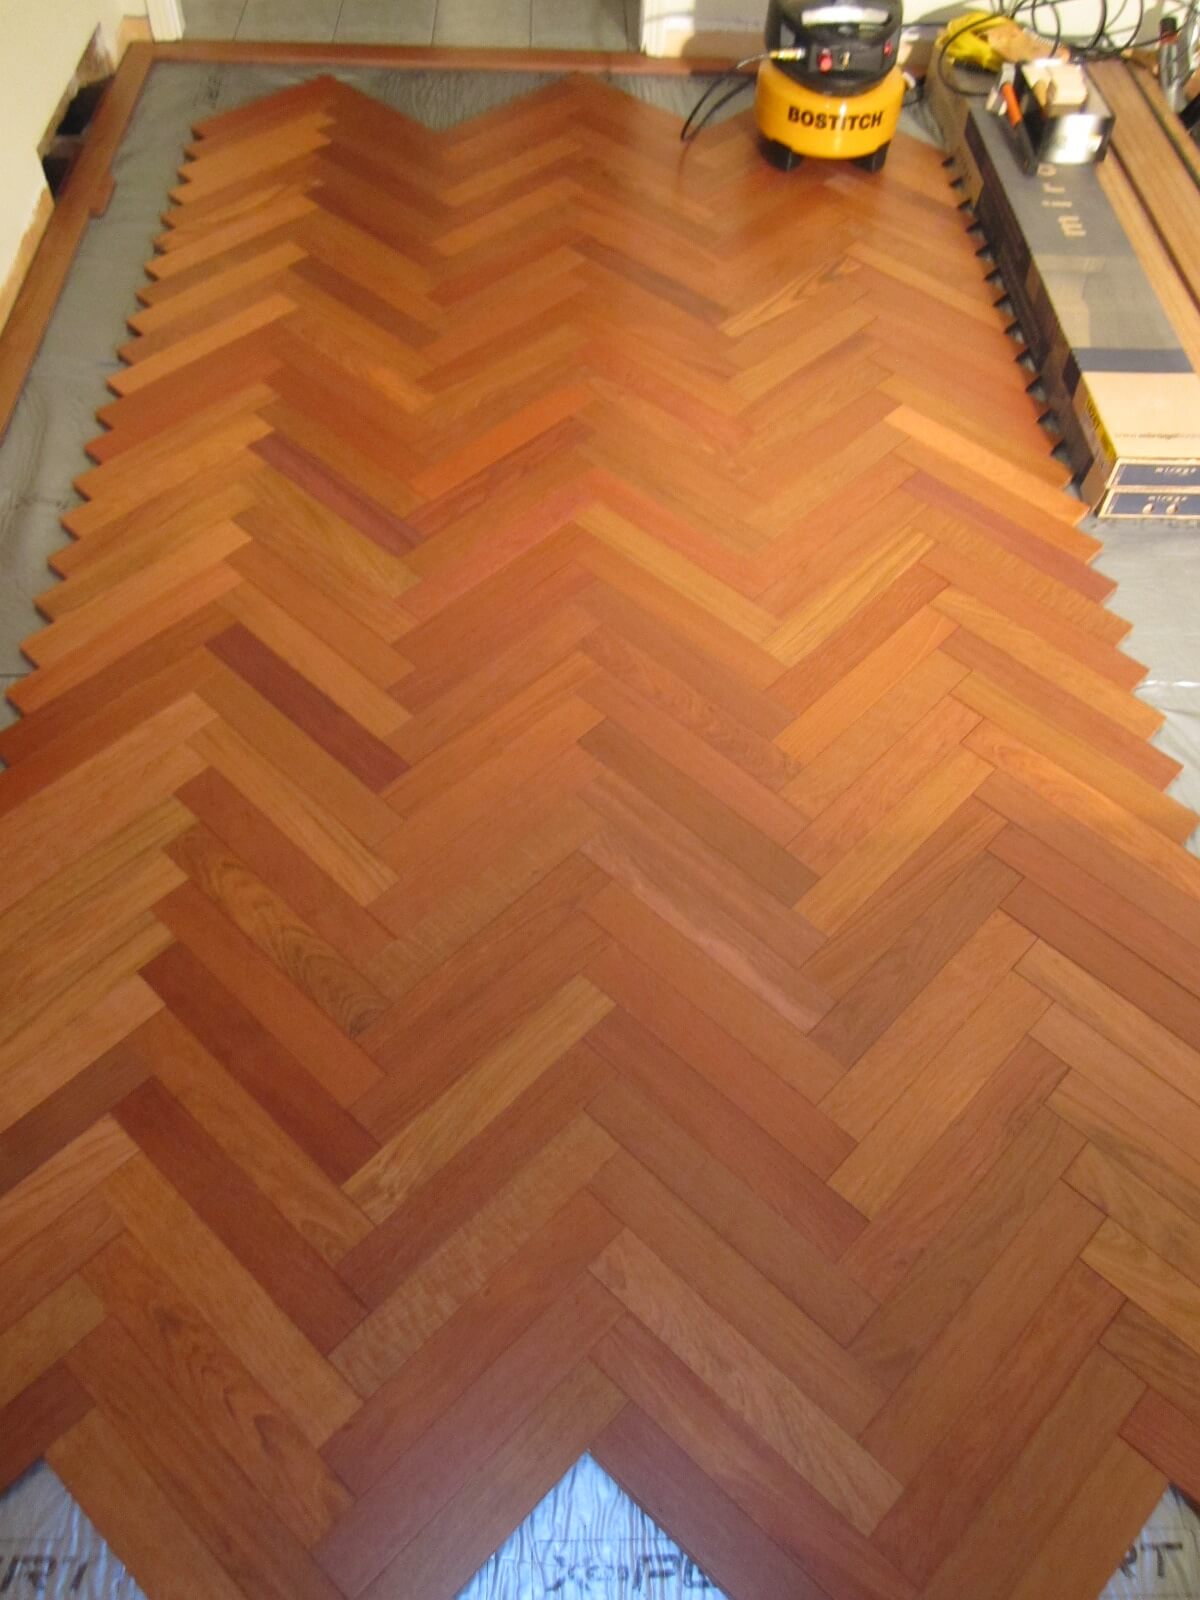
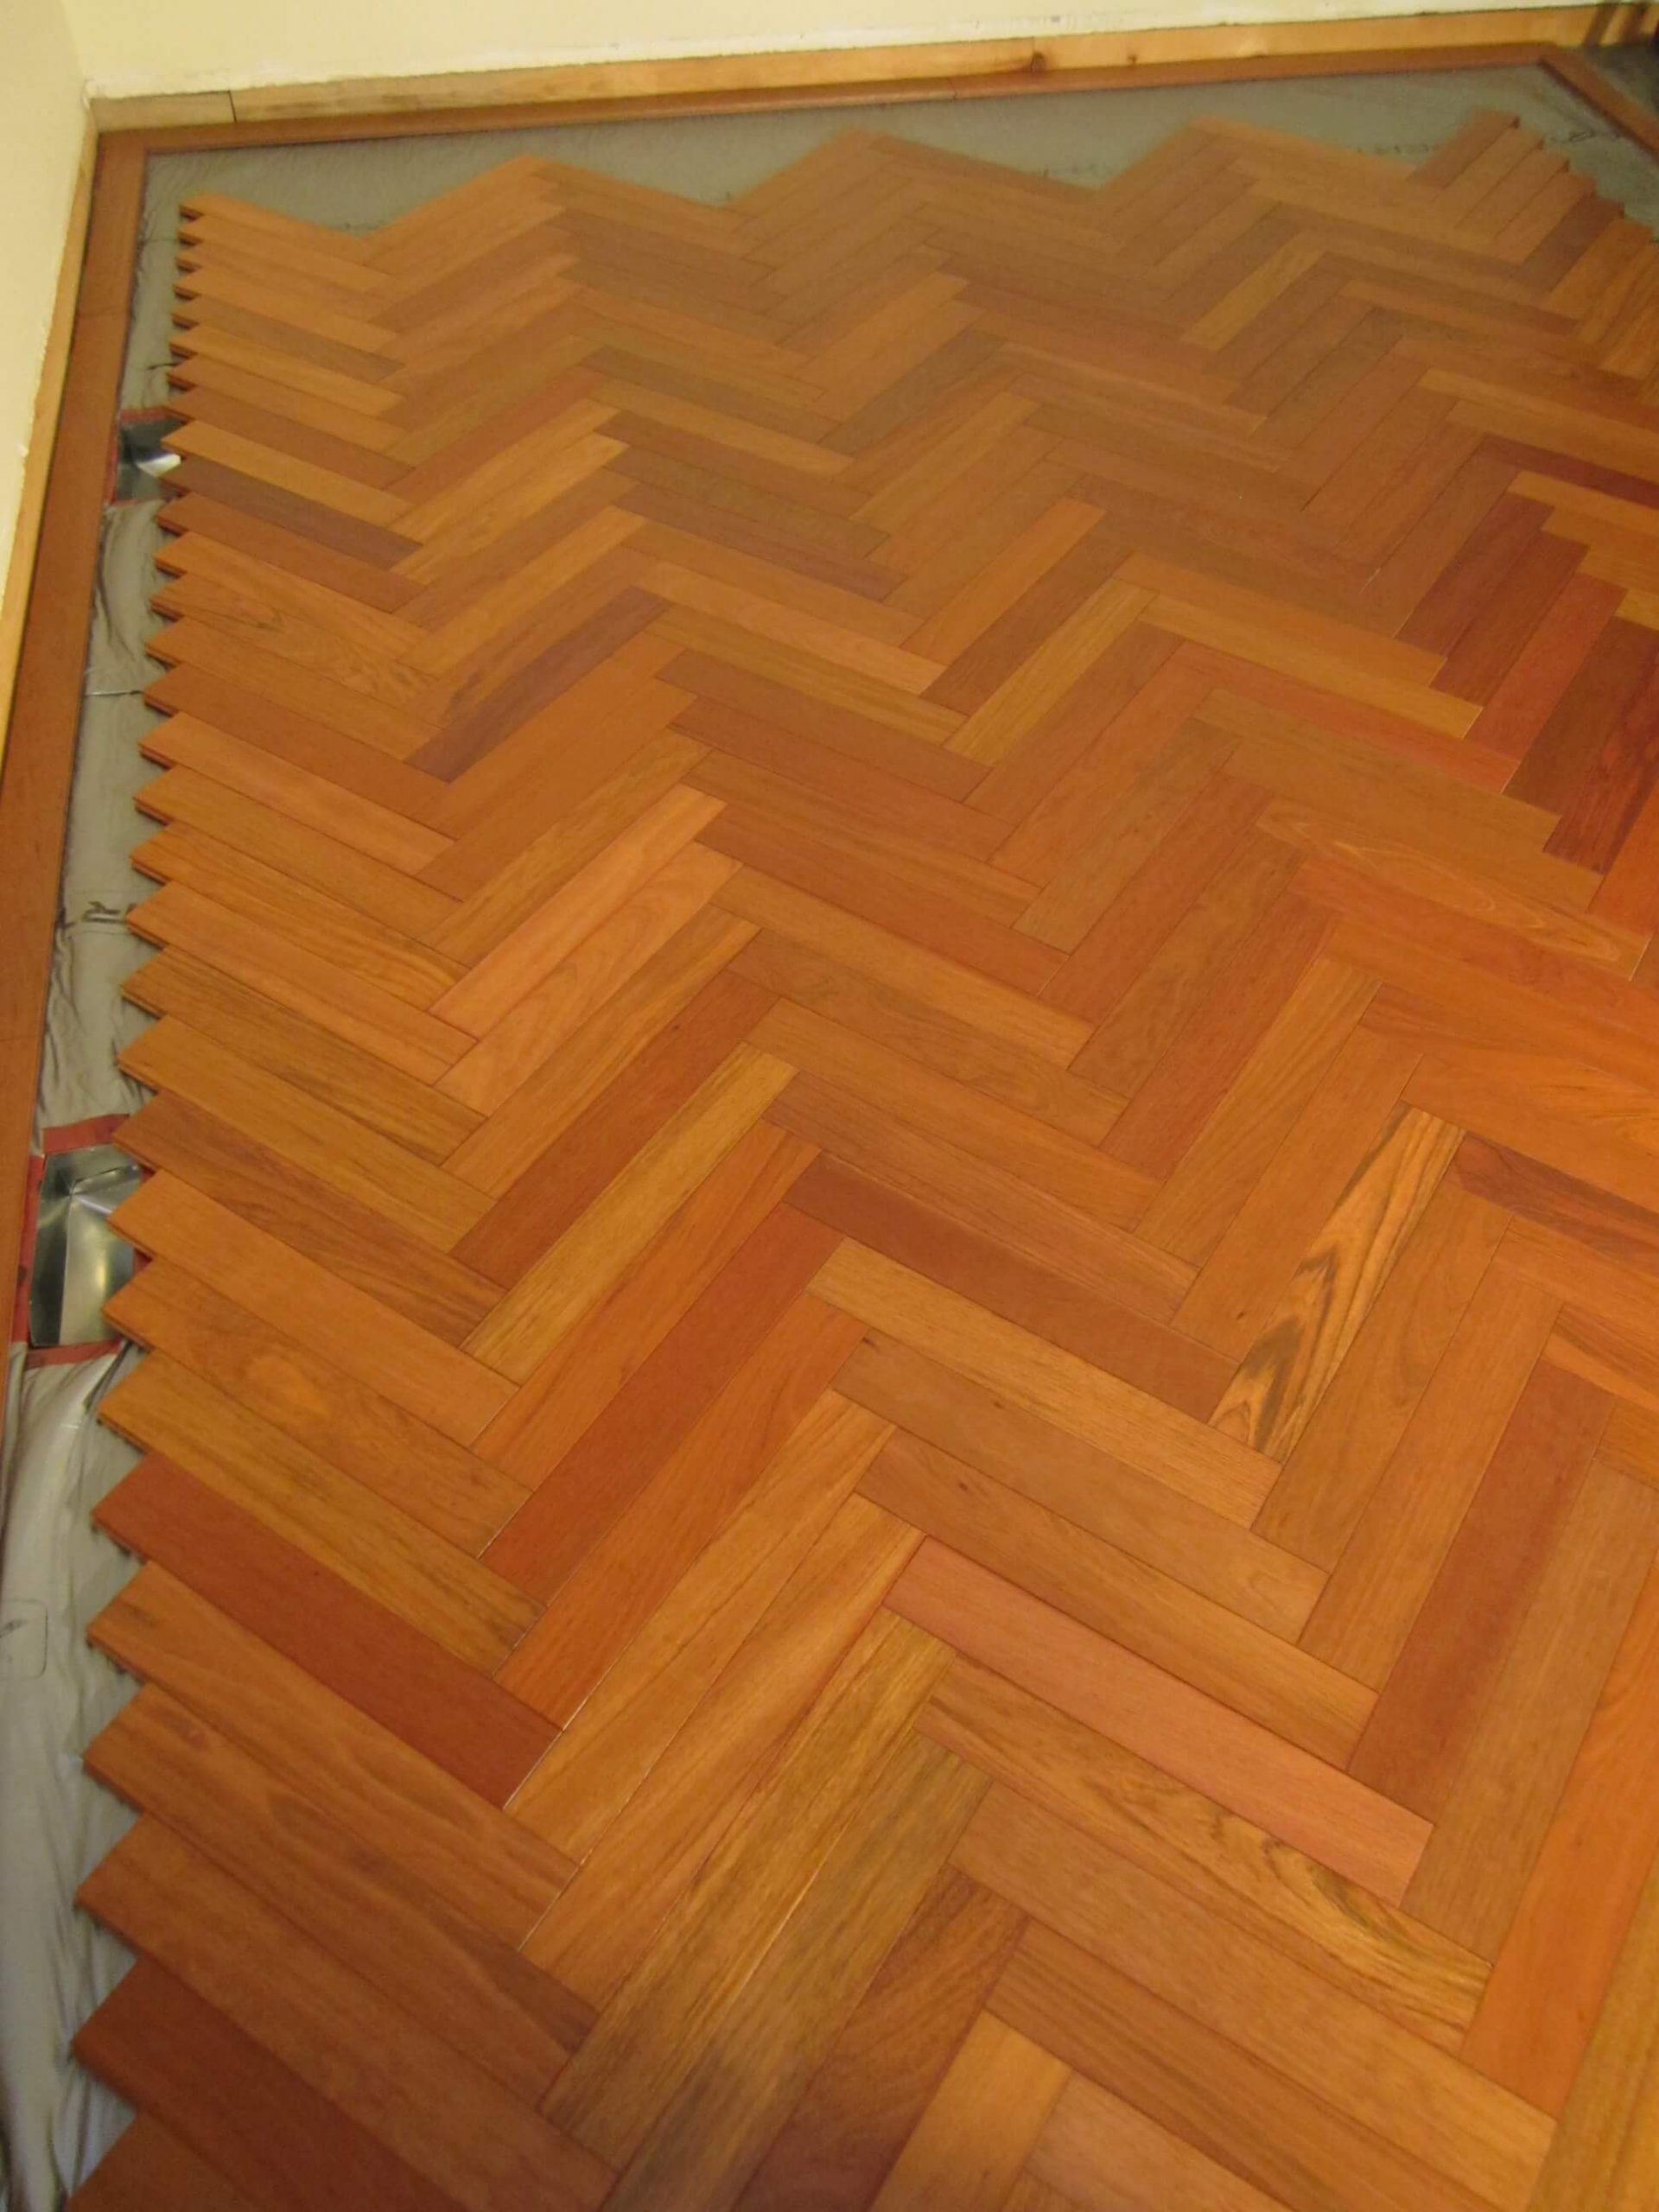
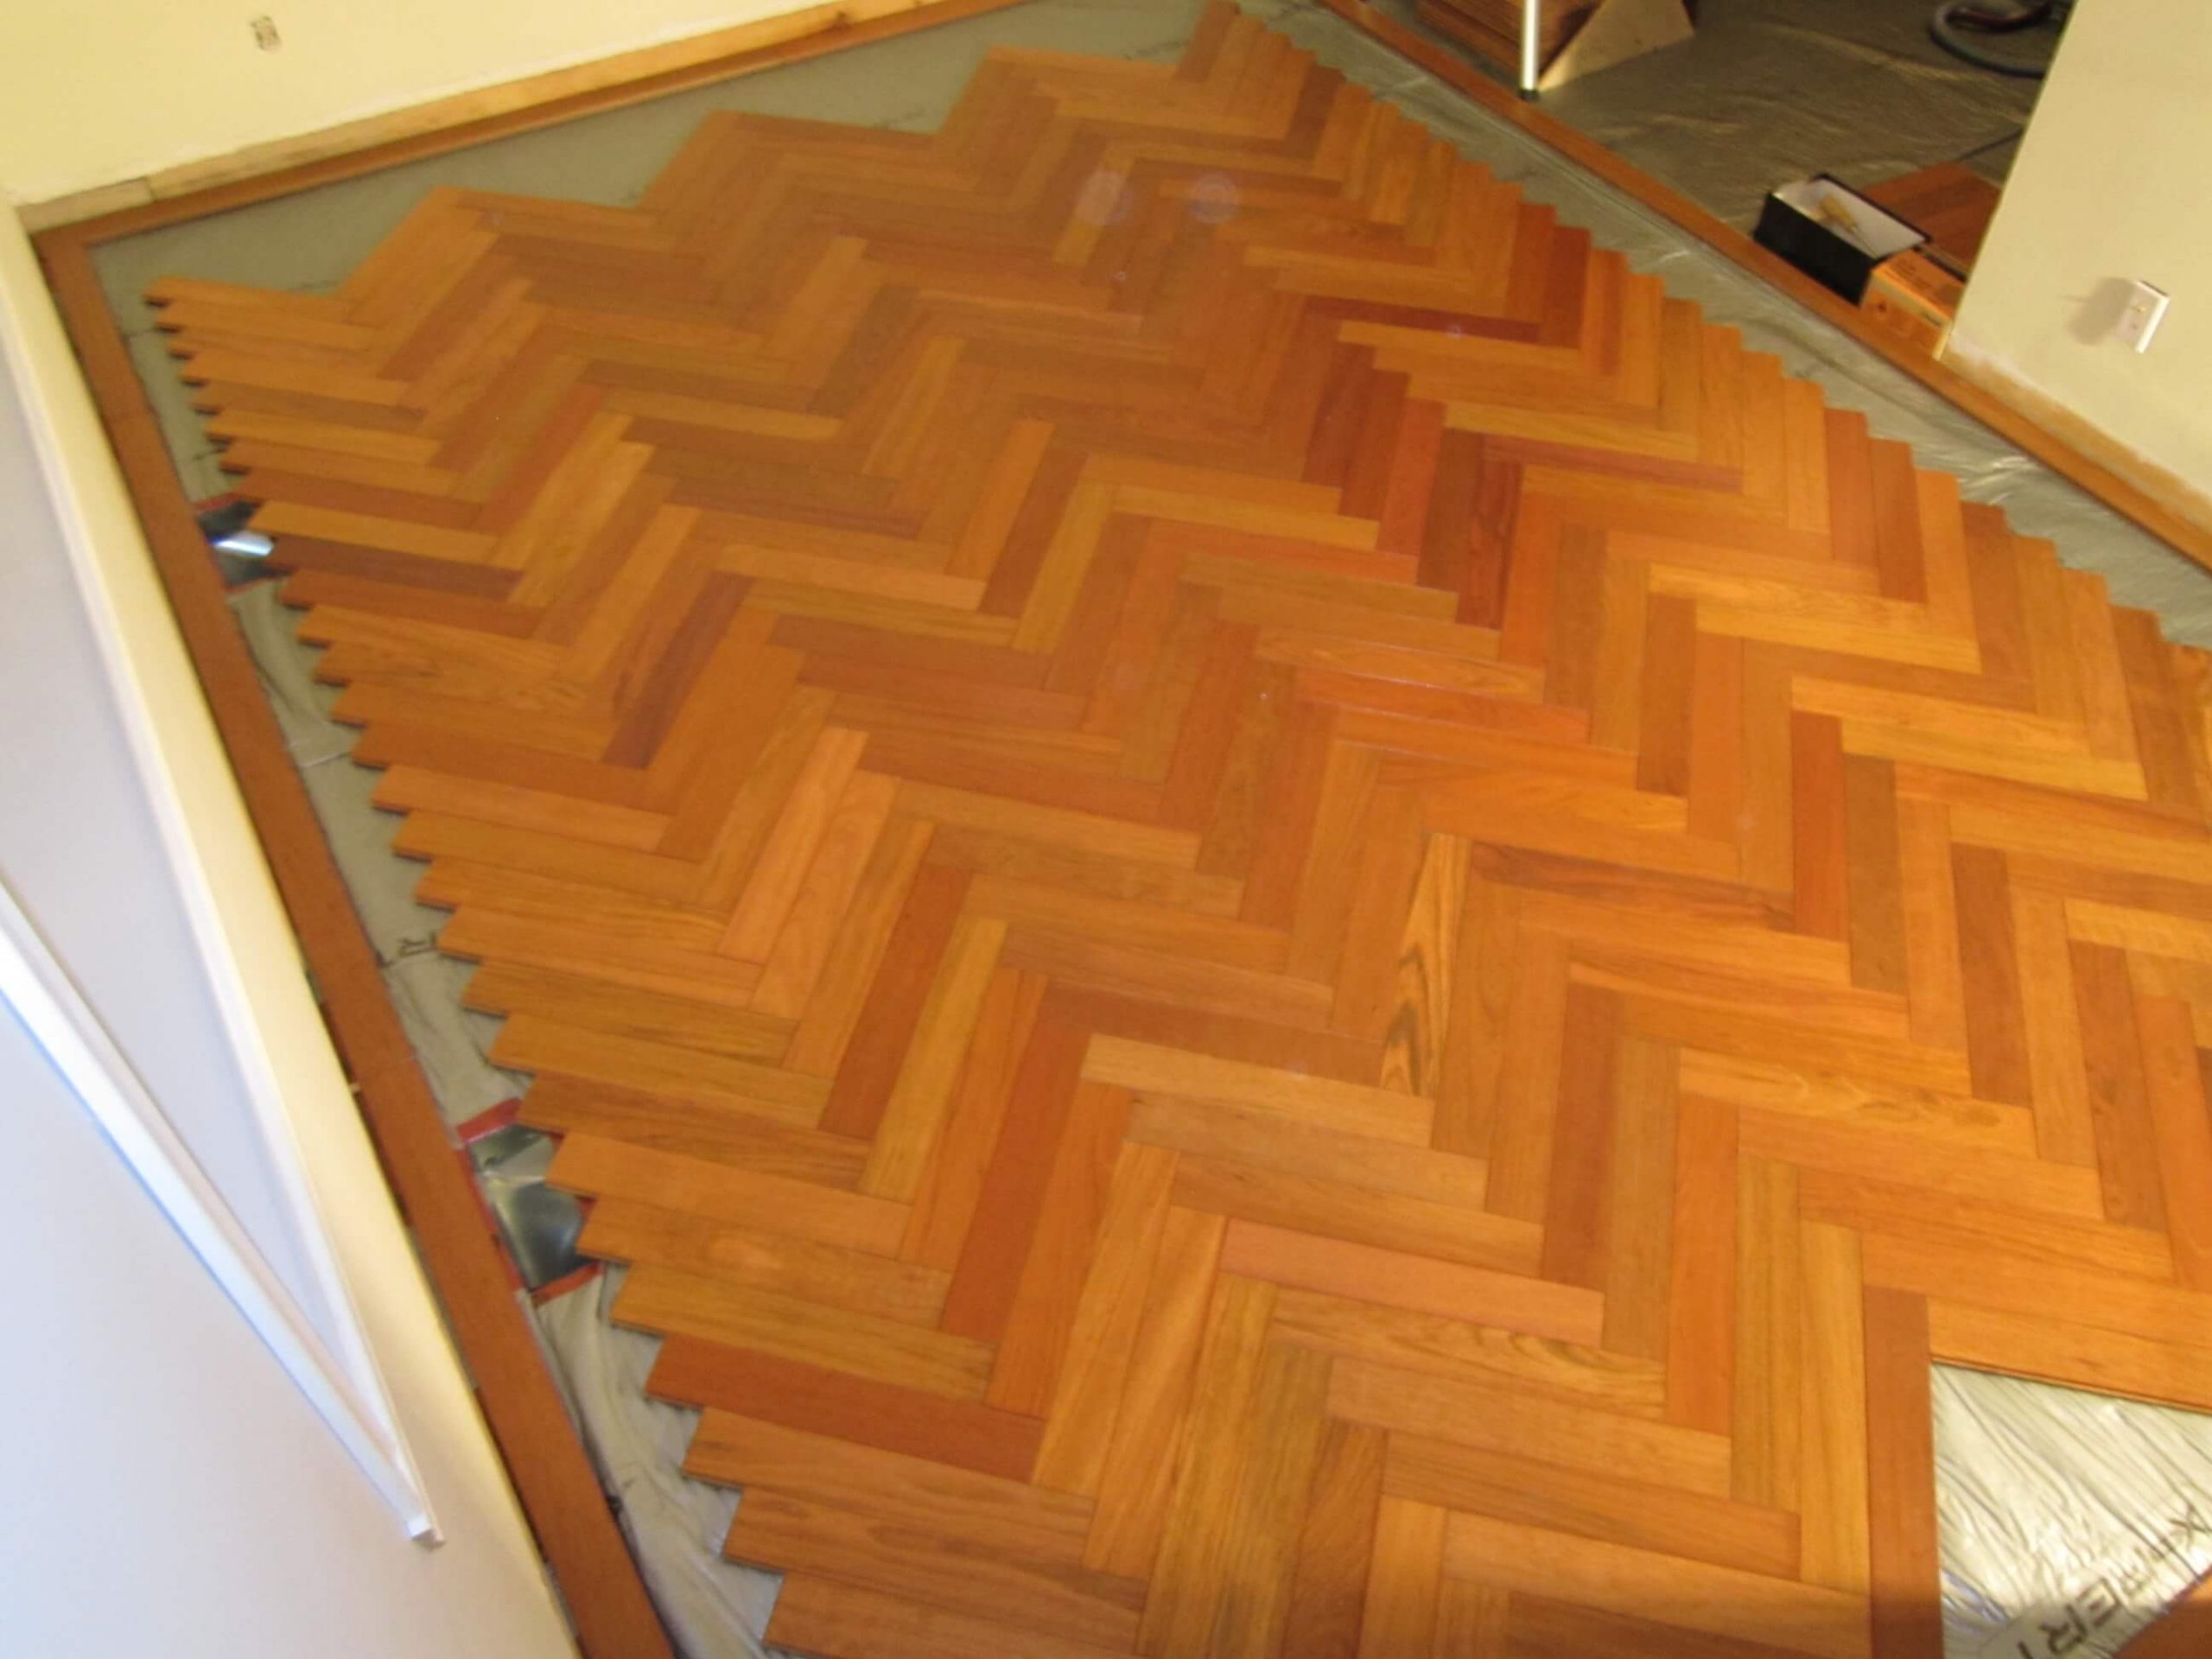
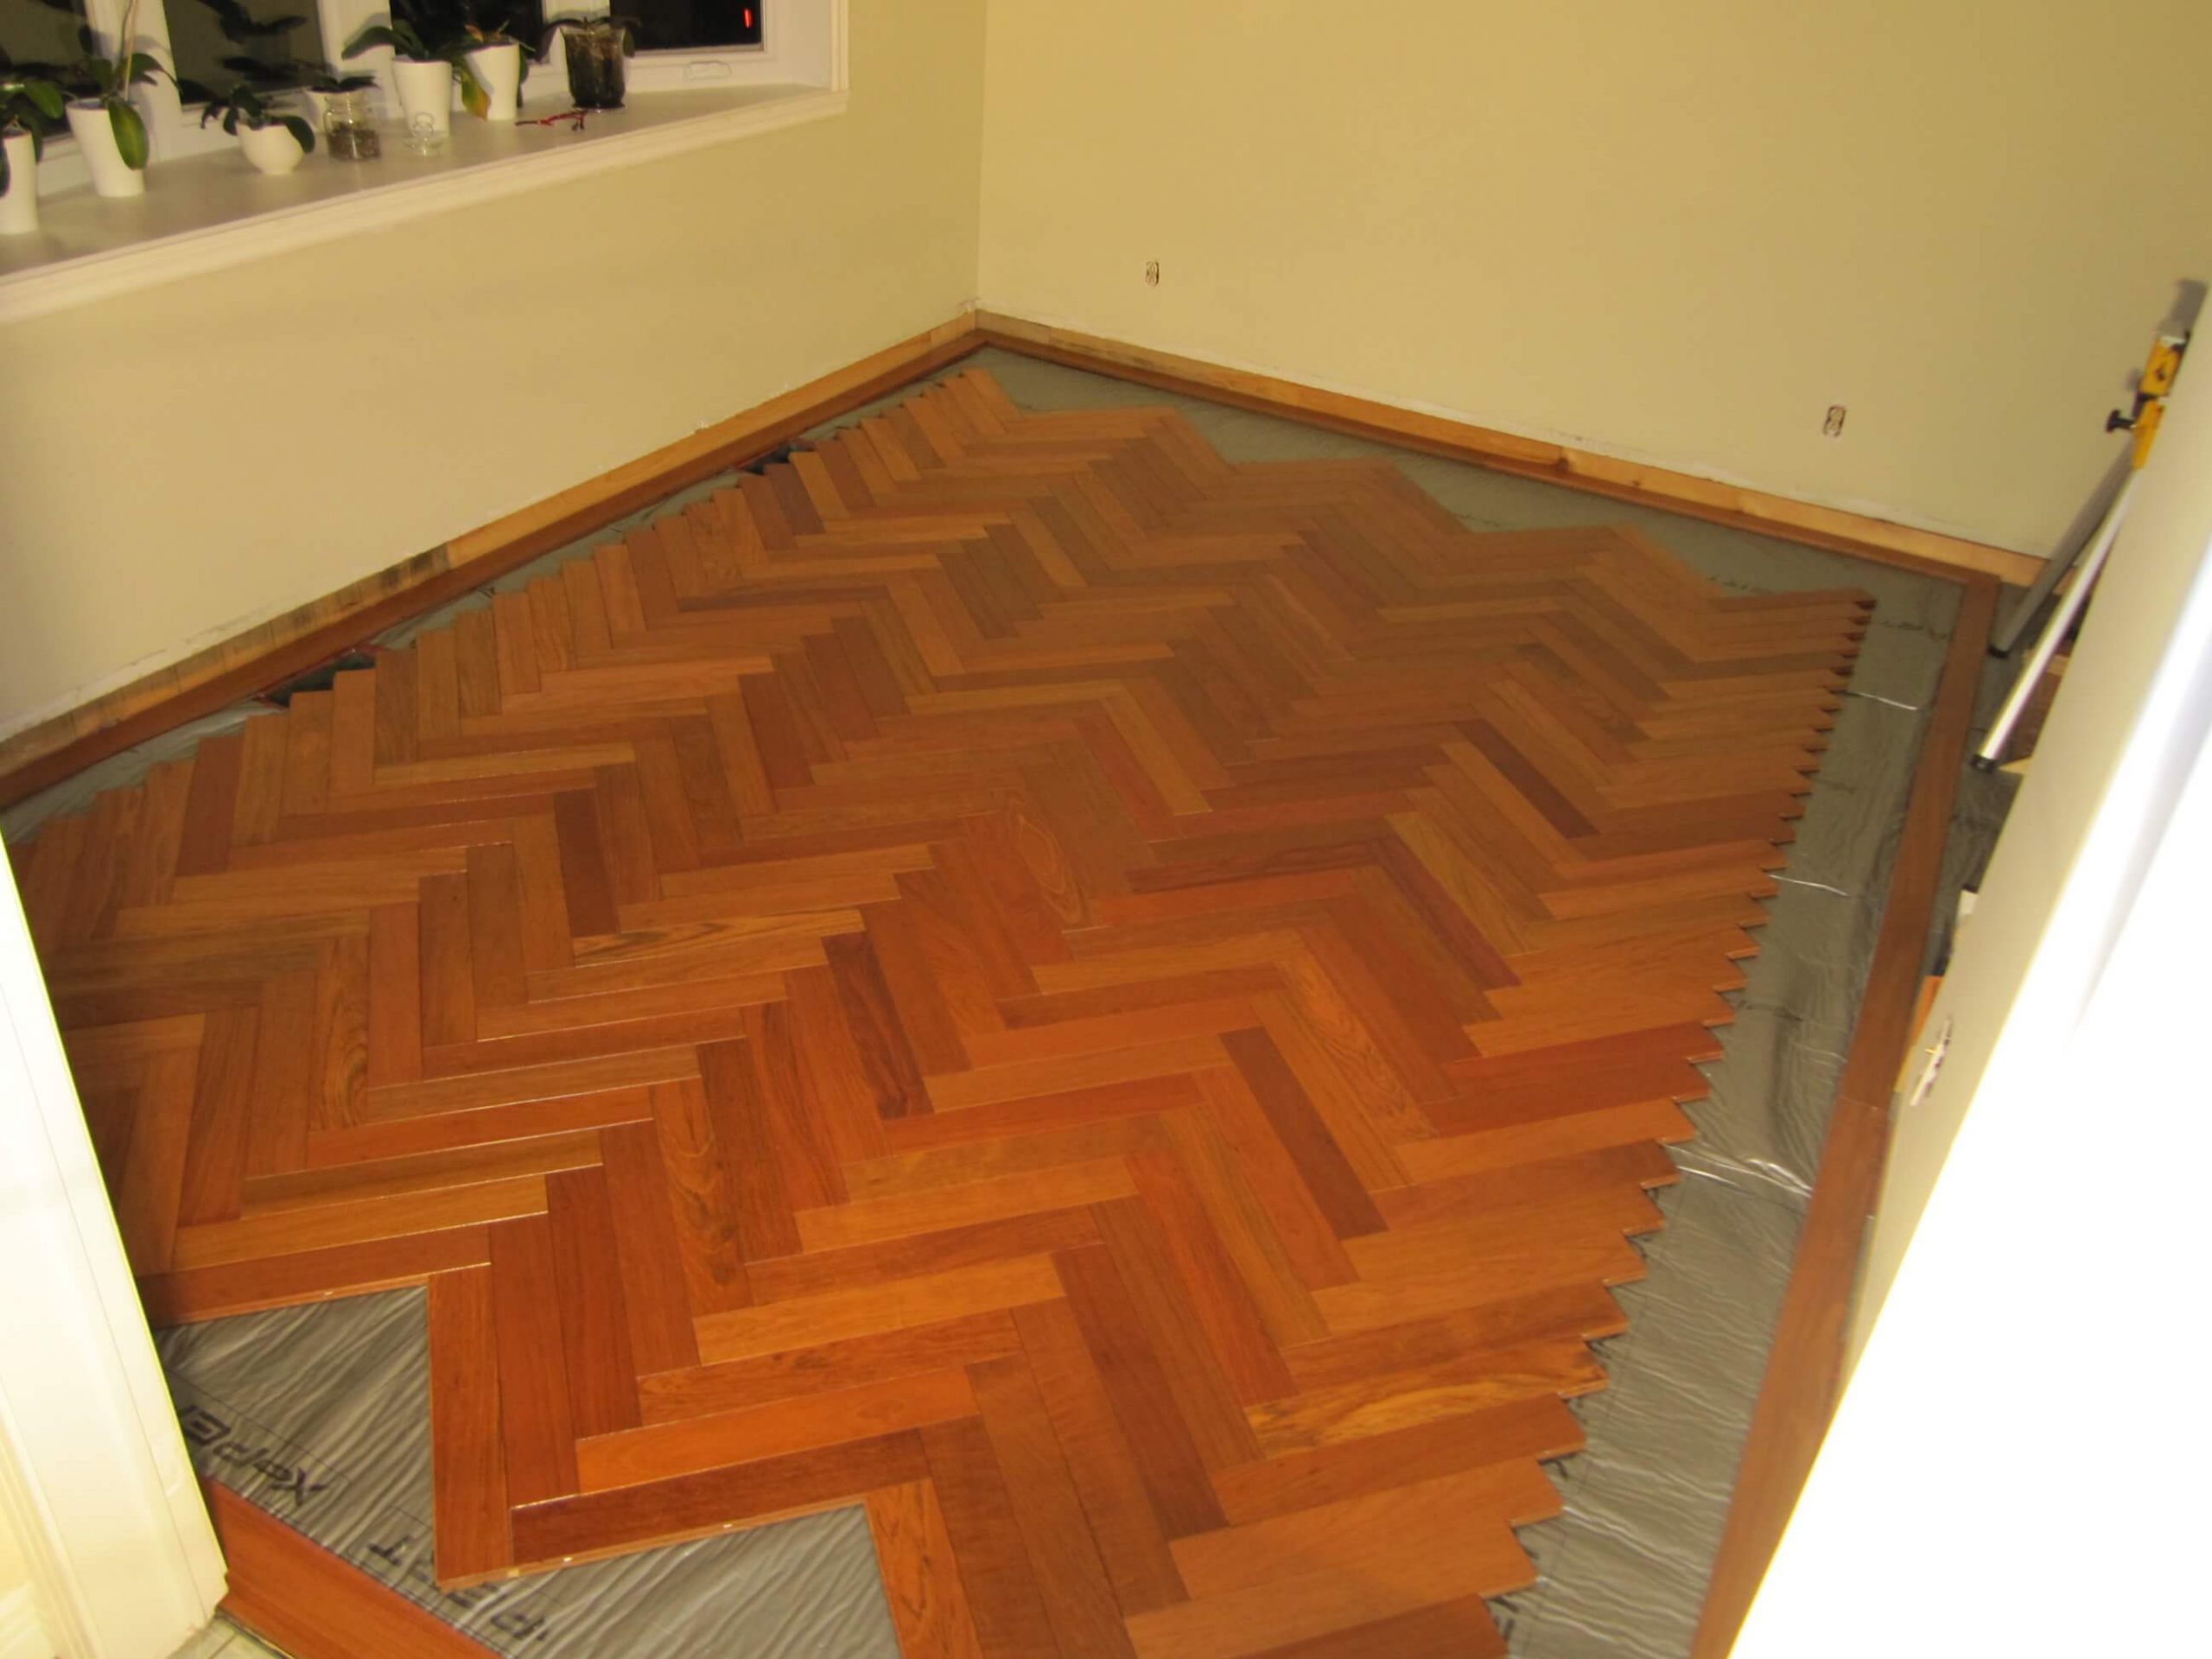
It is essential to start your installation correctly and constantly check the alignment of the rafters.
In a plywood scrap, I made myself a 90 degree isosceles triangle large enough for the blades to rest on it without moving. It will be screwed to the ground and will be used to come and lean against the starting boards constituting the first rafters.
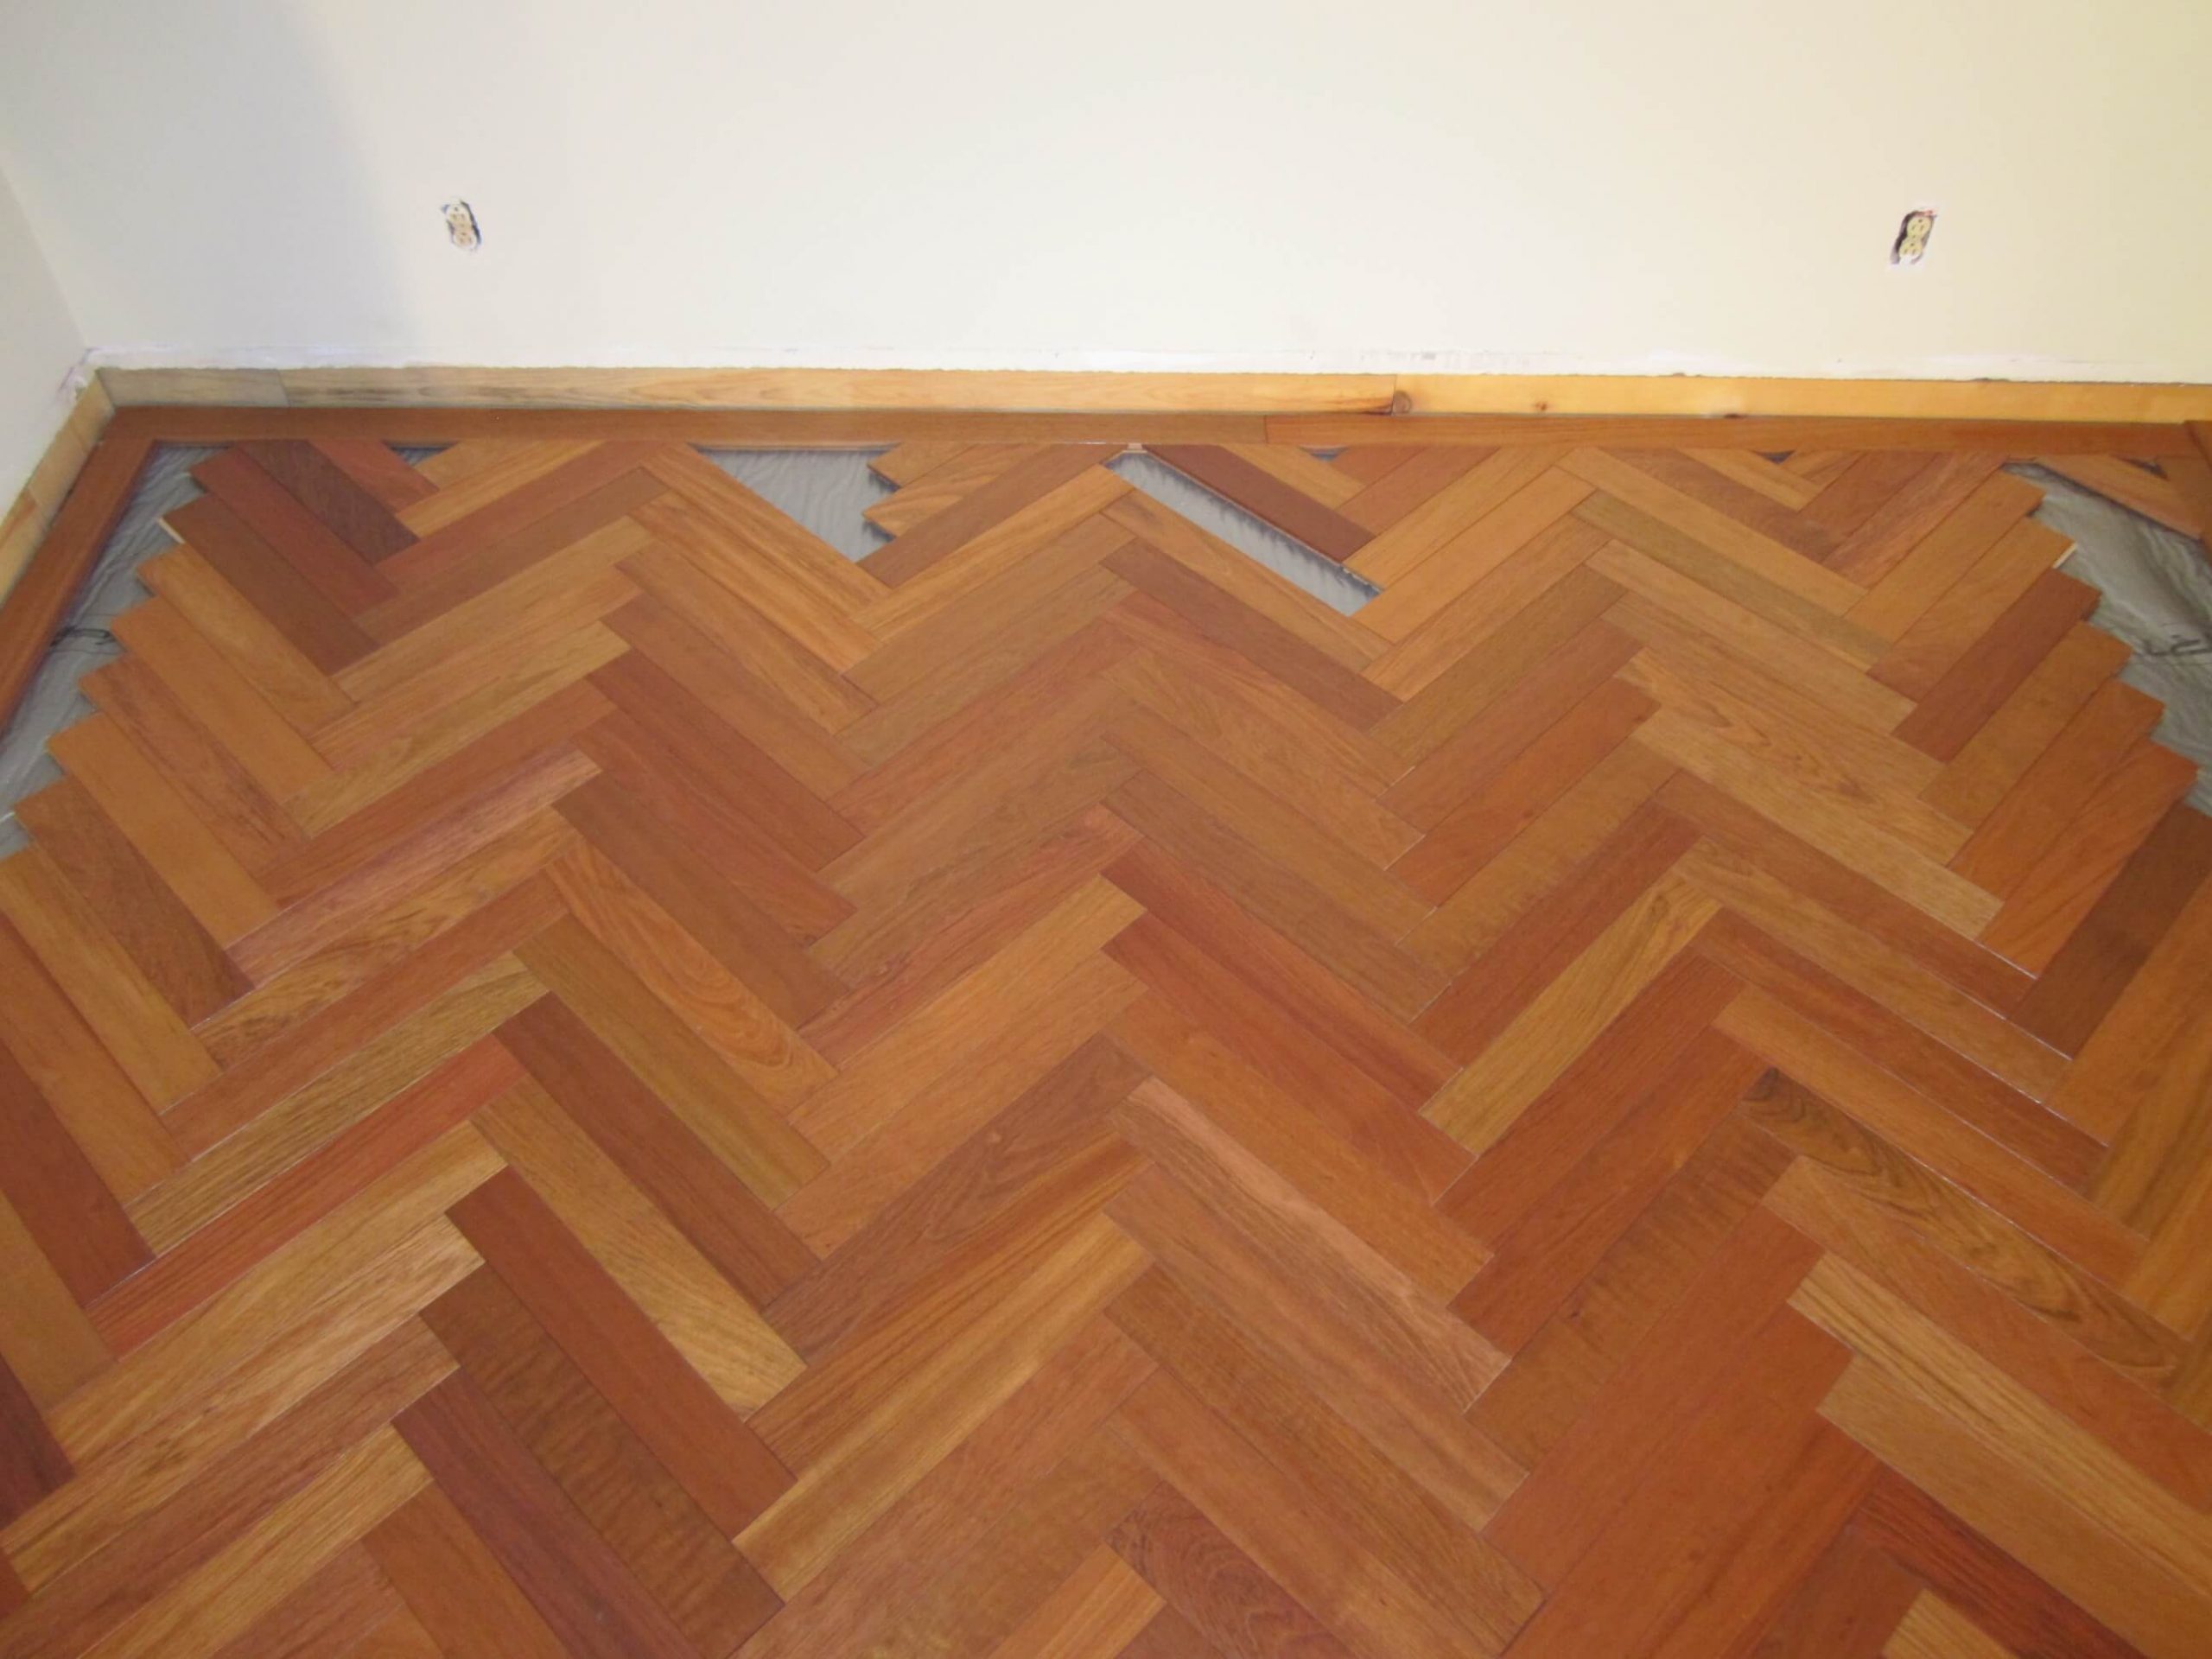
To complete the pose, I custom made all the remaining pieces and noted their locations.
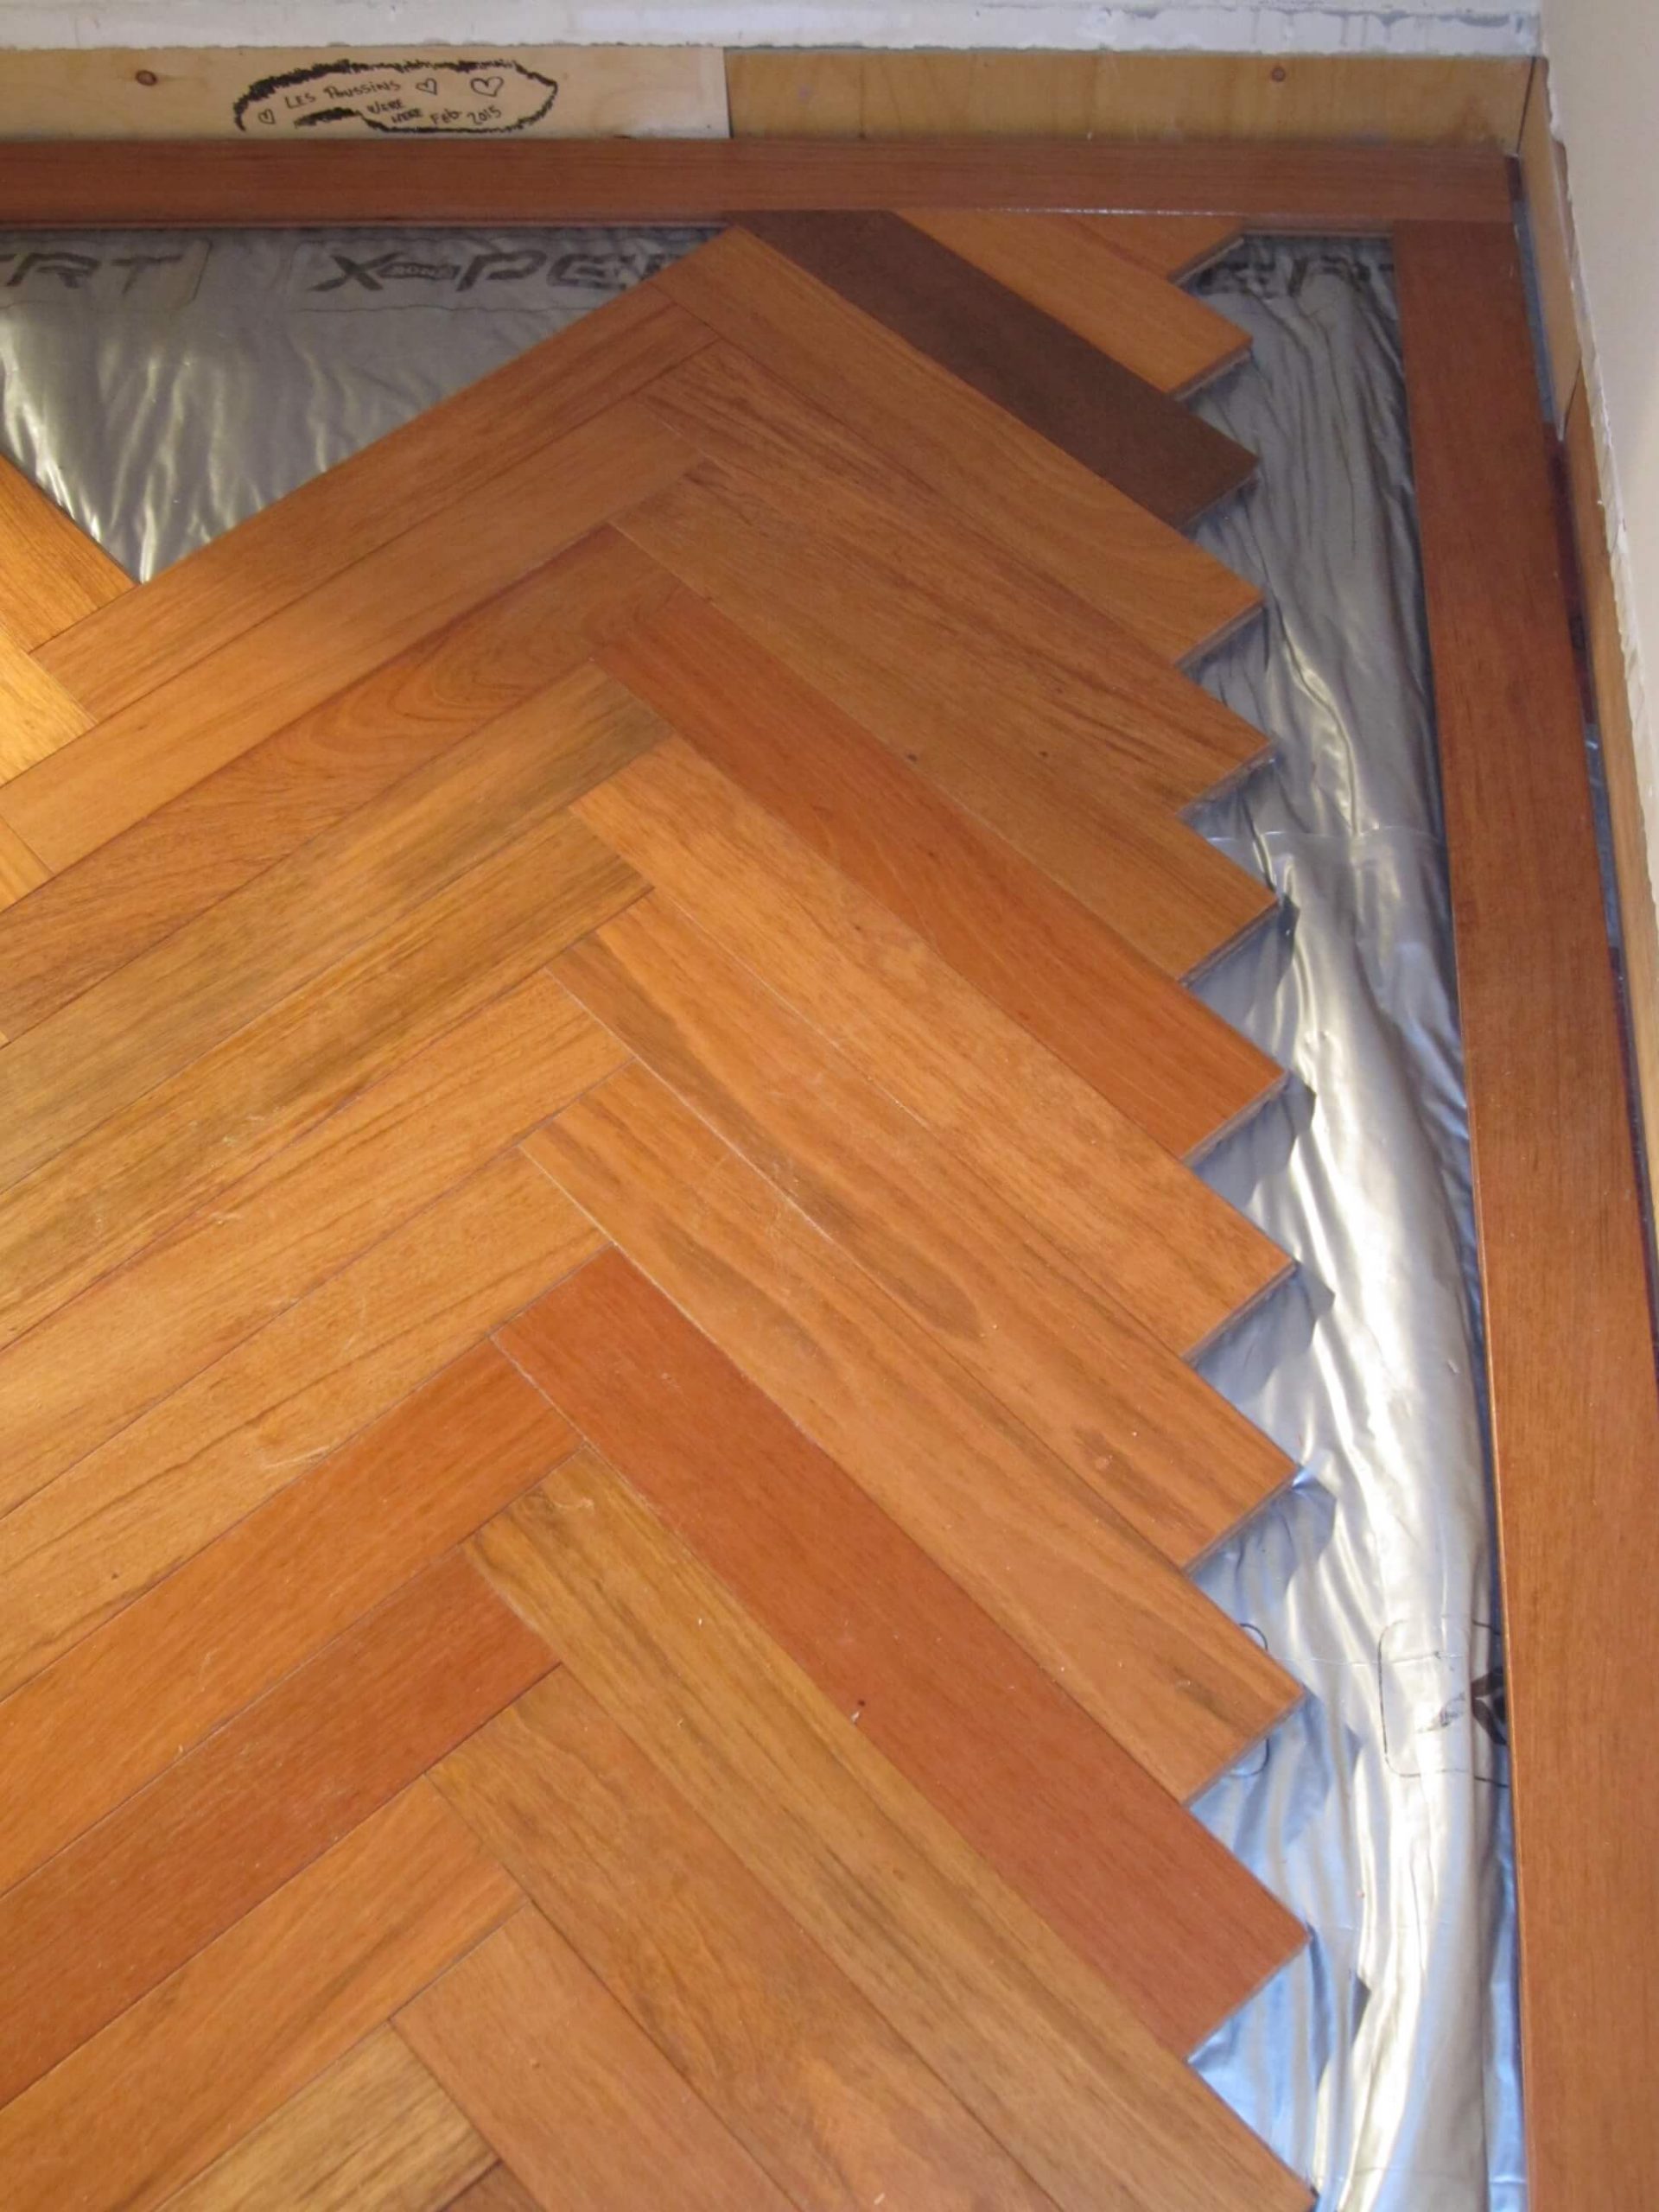
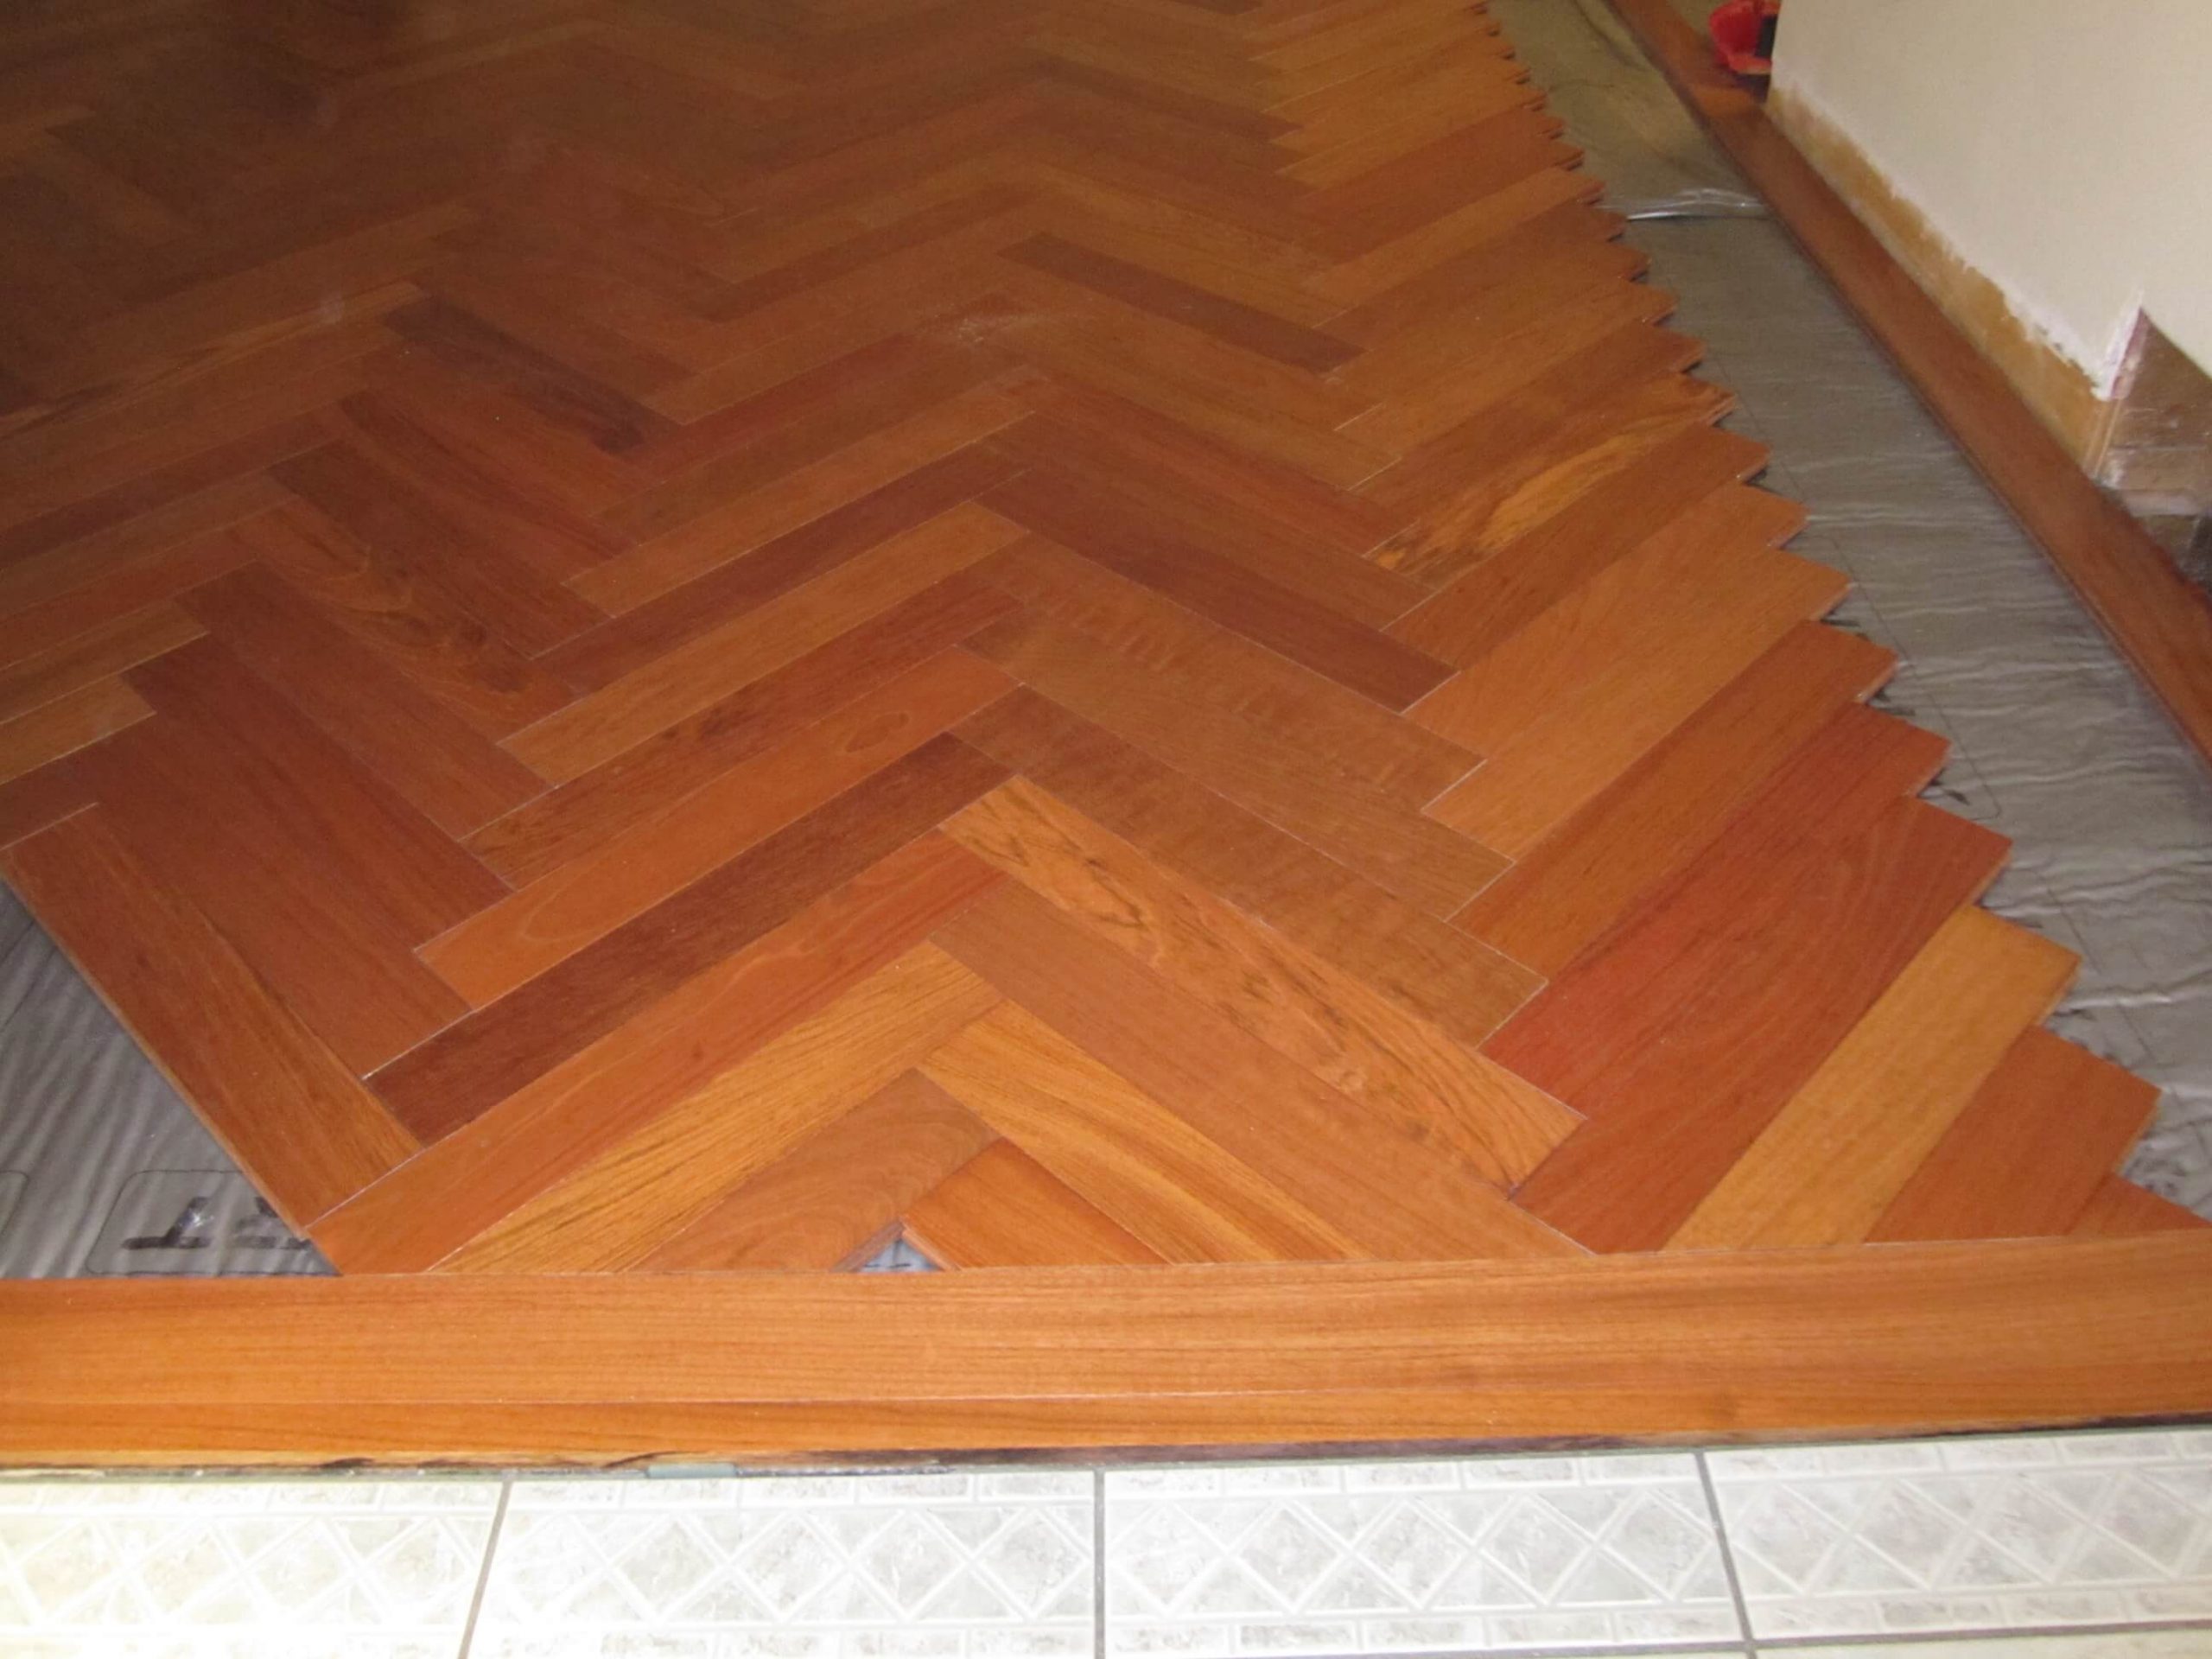
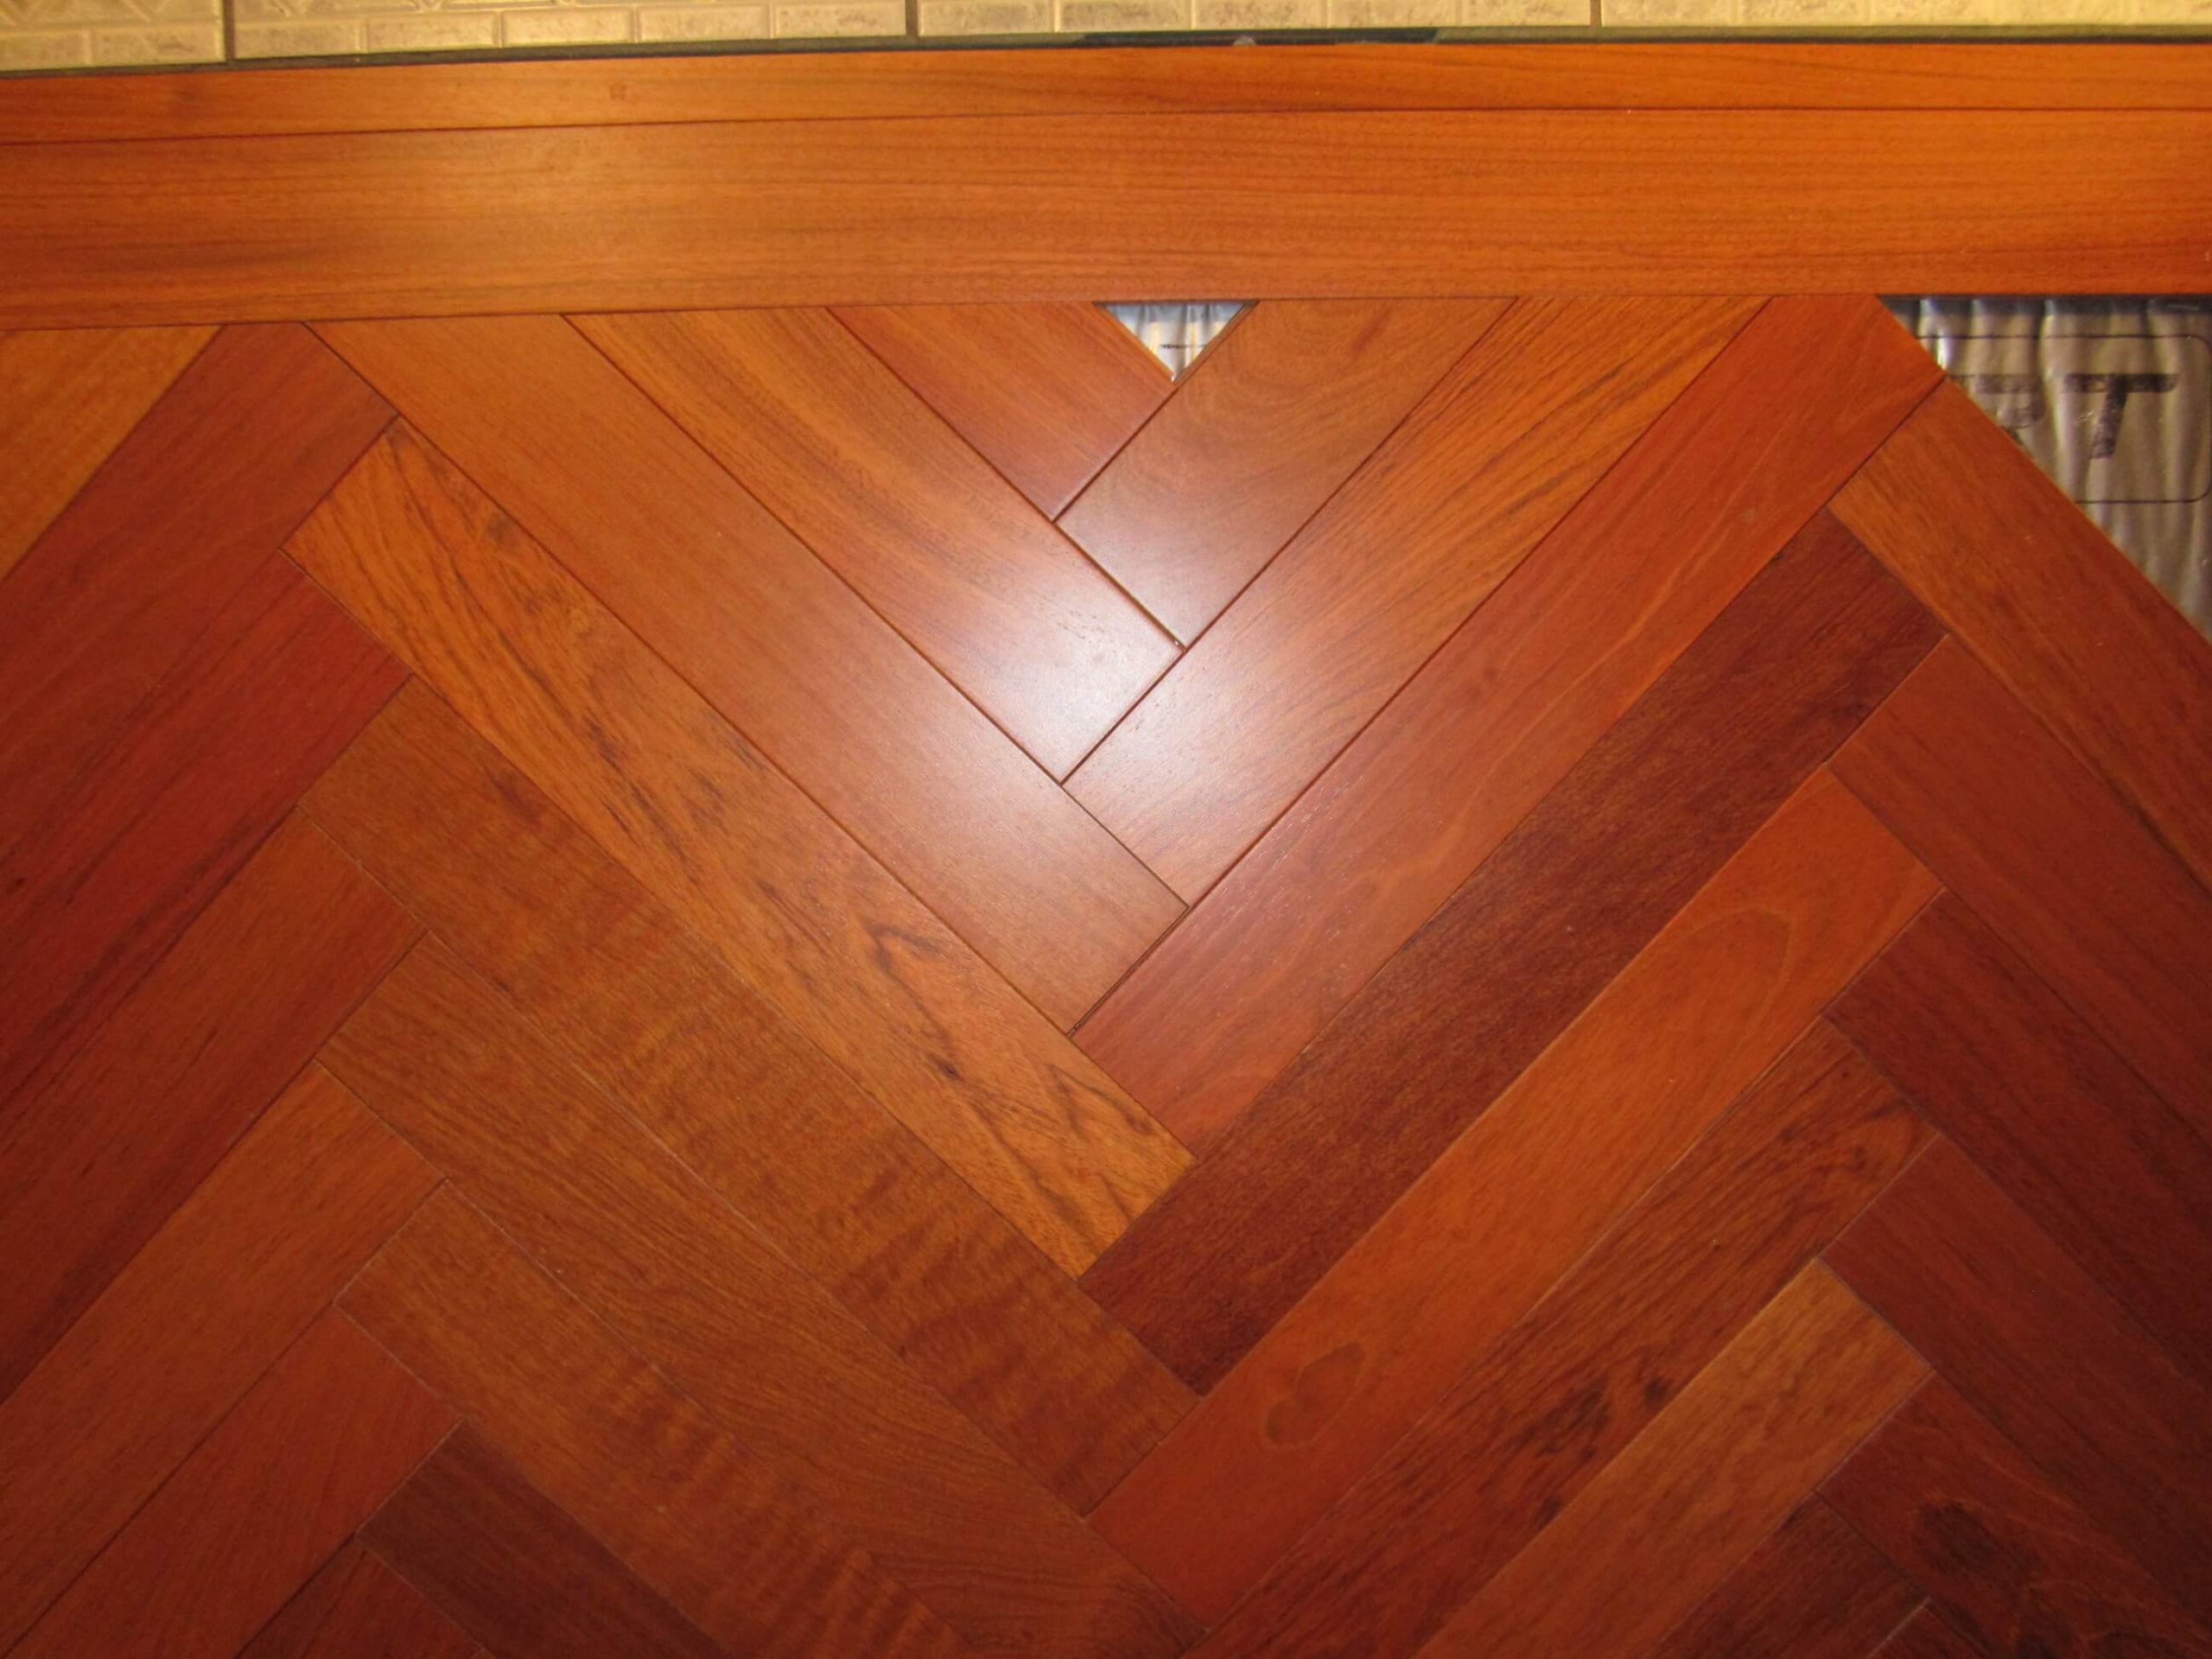
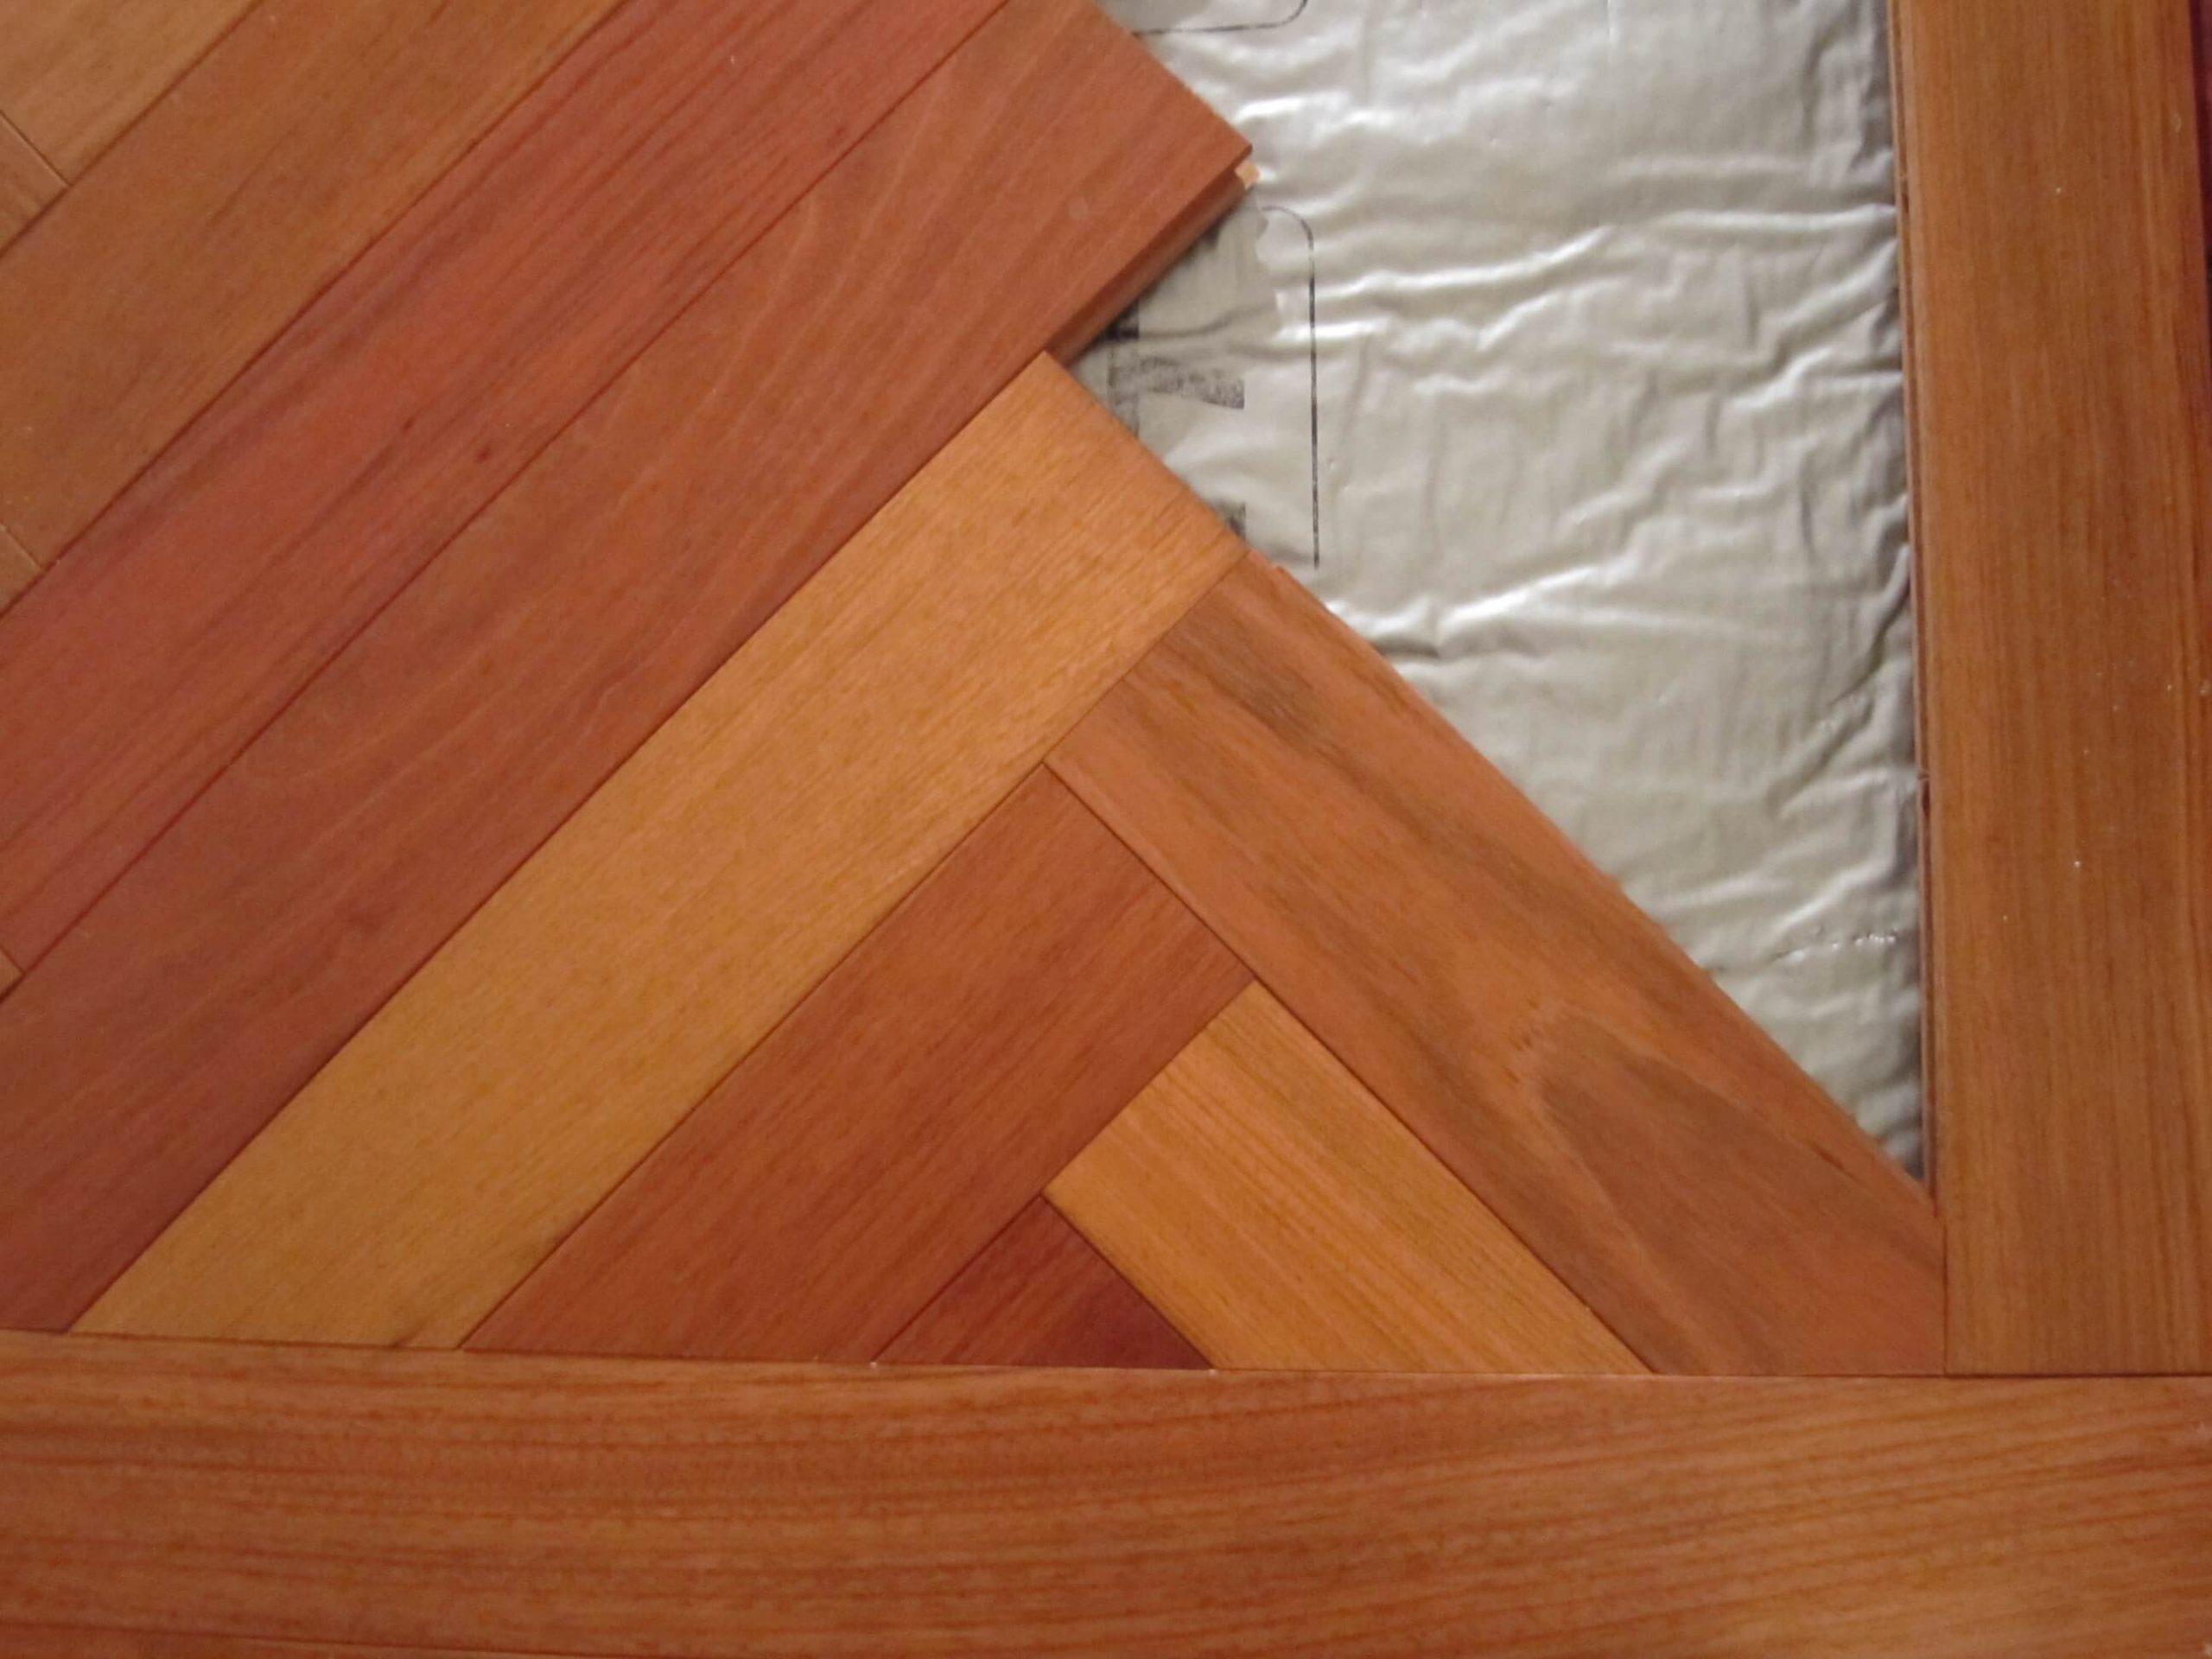

If I had to do it again, I would do all the herringbone installation slightly beyond the inside of the frame. Then, I would cut with a round saw and using a guide all the excess inside the frame. Finally, I would install the boards forming the frame and surrounding the herringbone installation. It would be more efficient and easier. What do you want, I’m learning 🙂
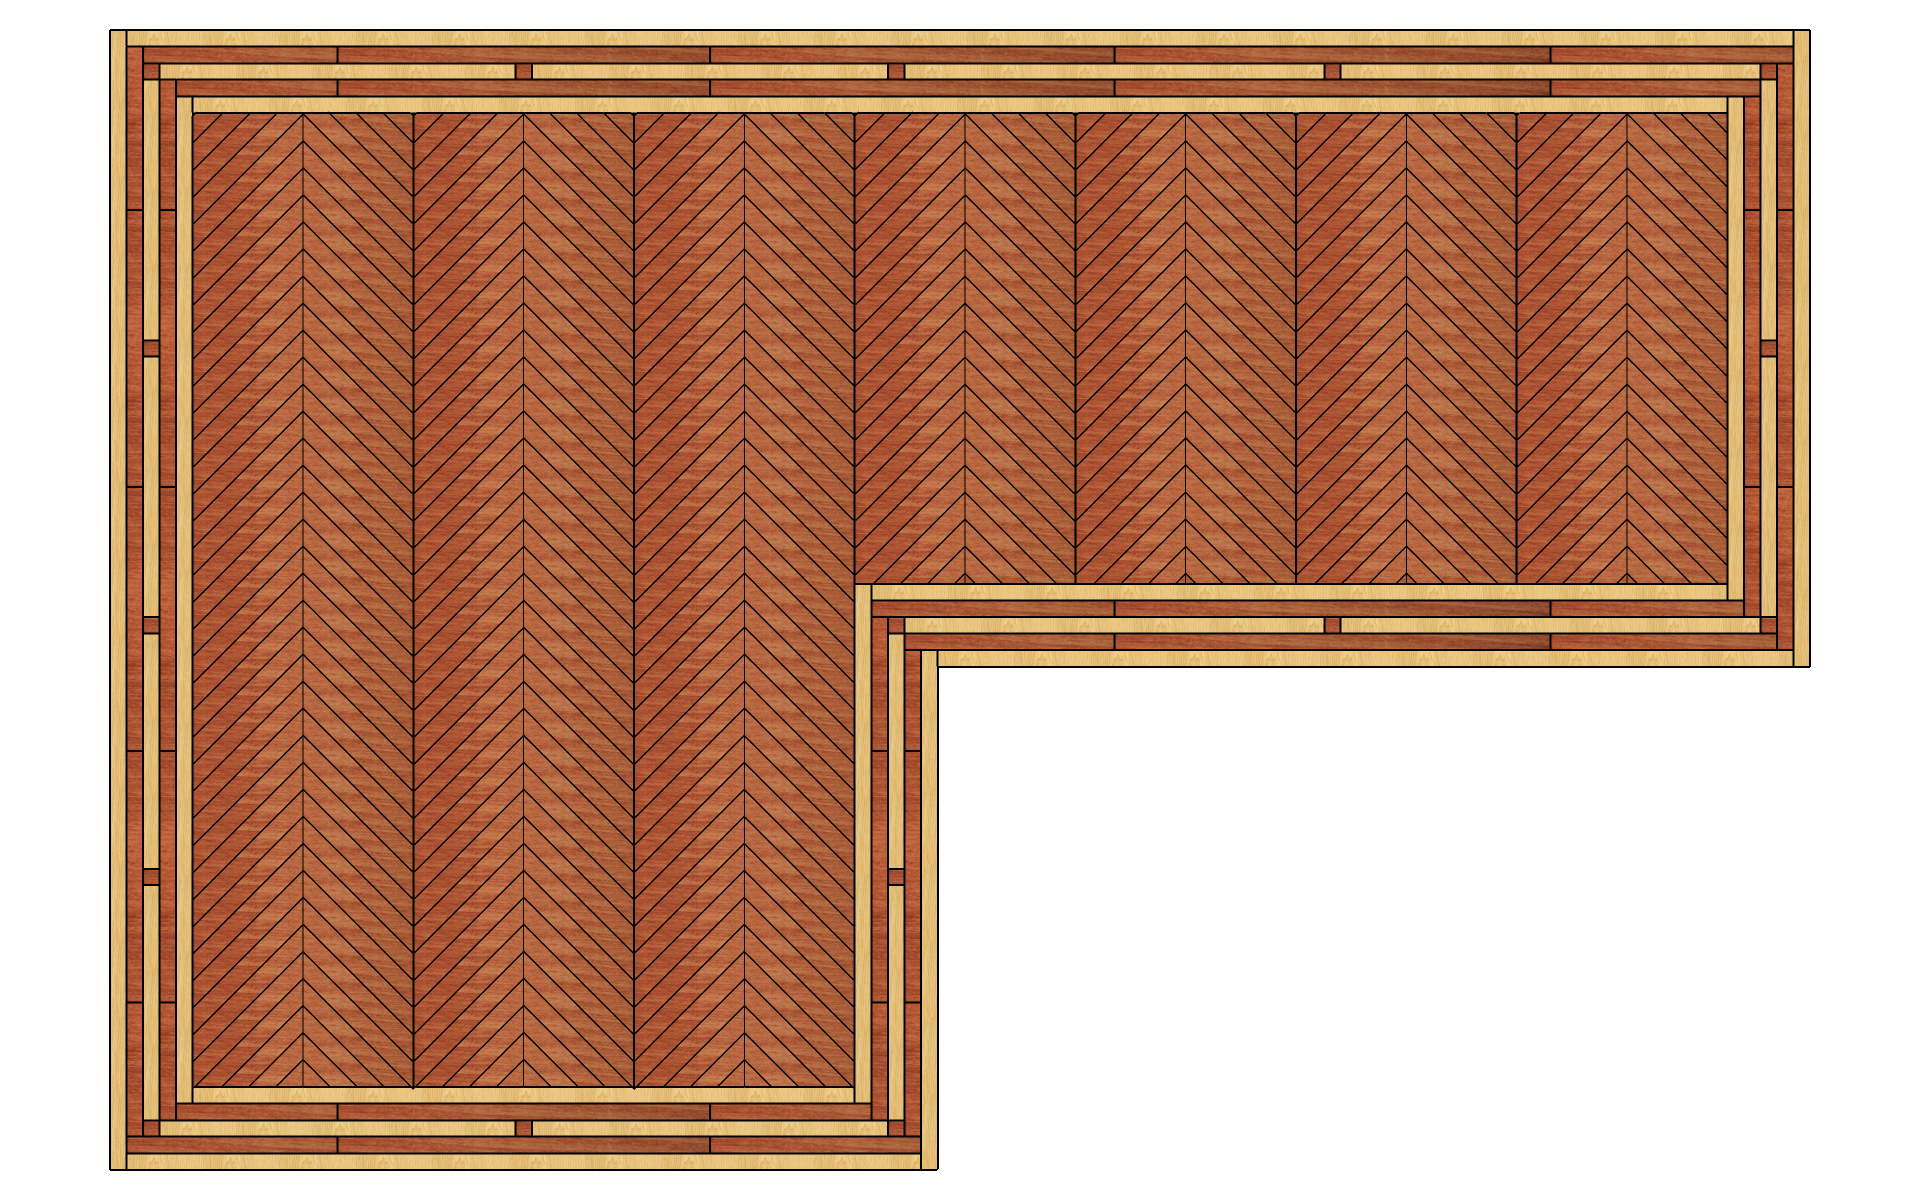
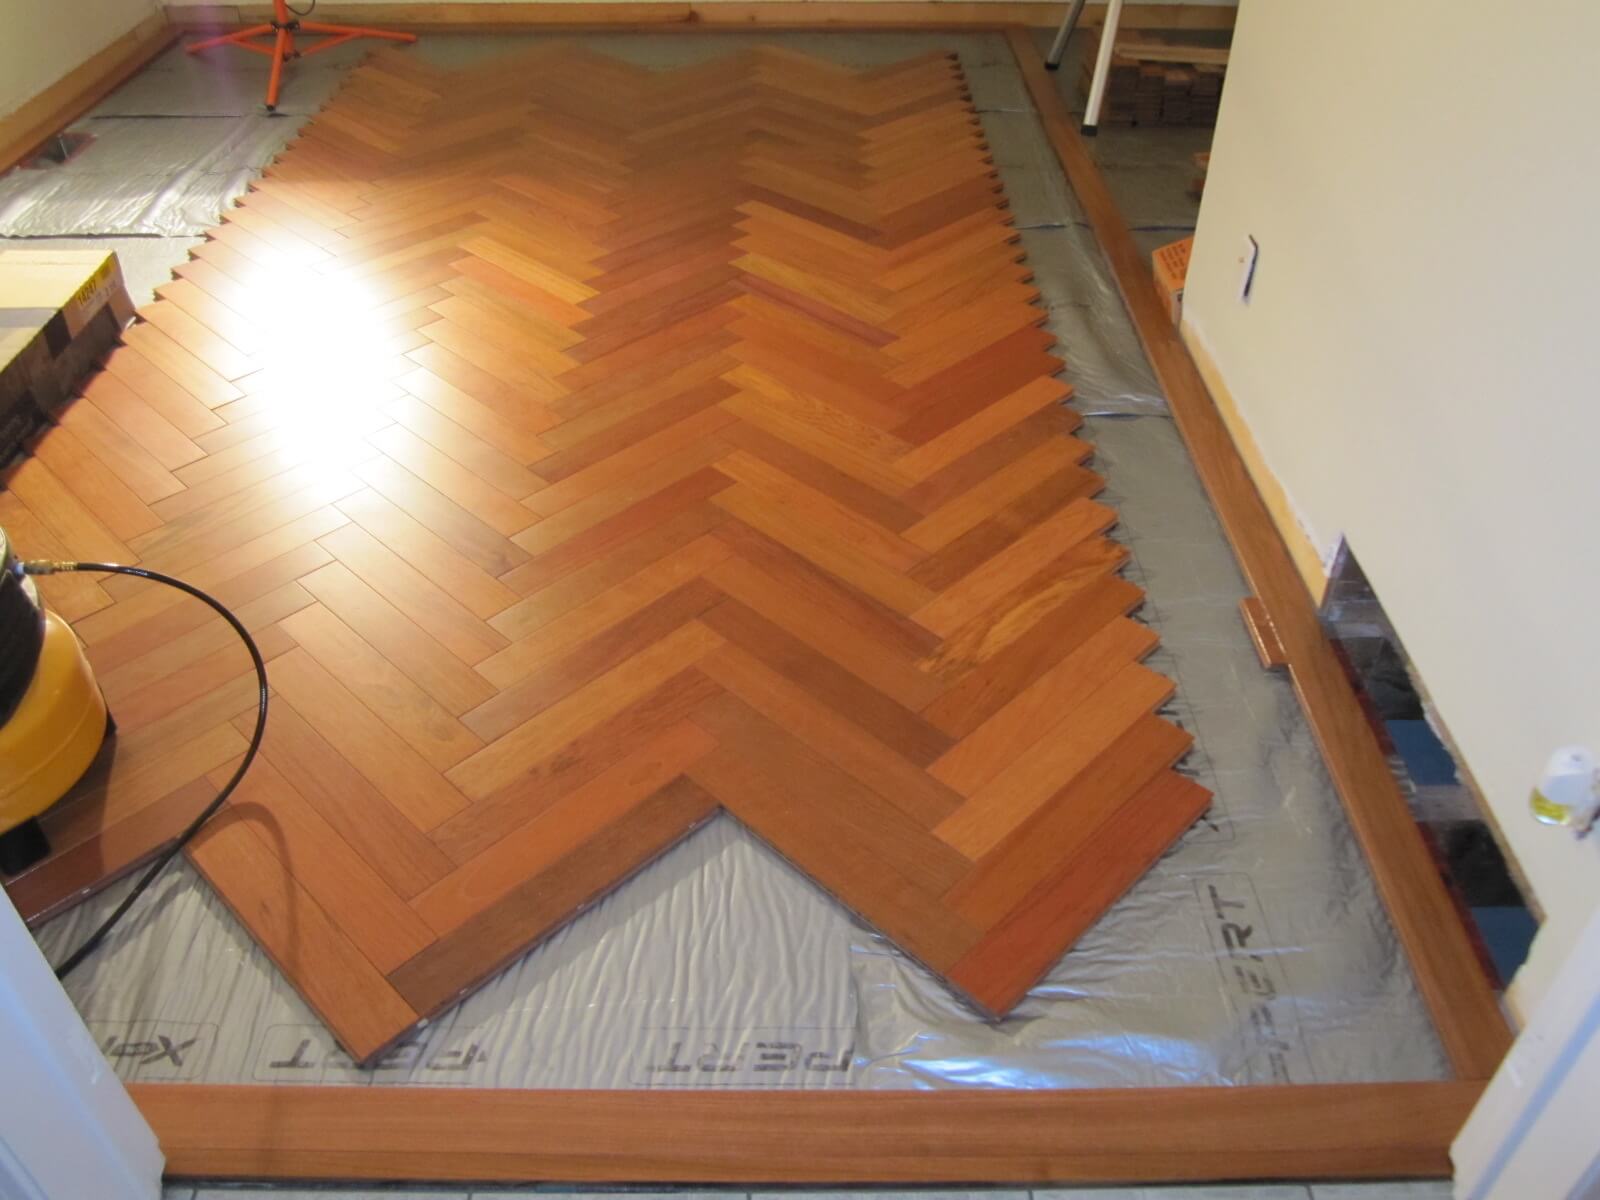
The installation is finished, here is the result:
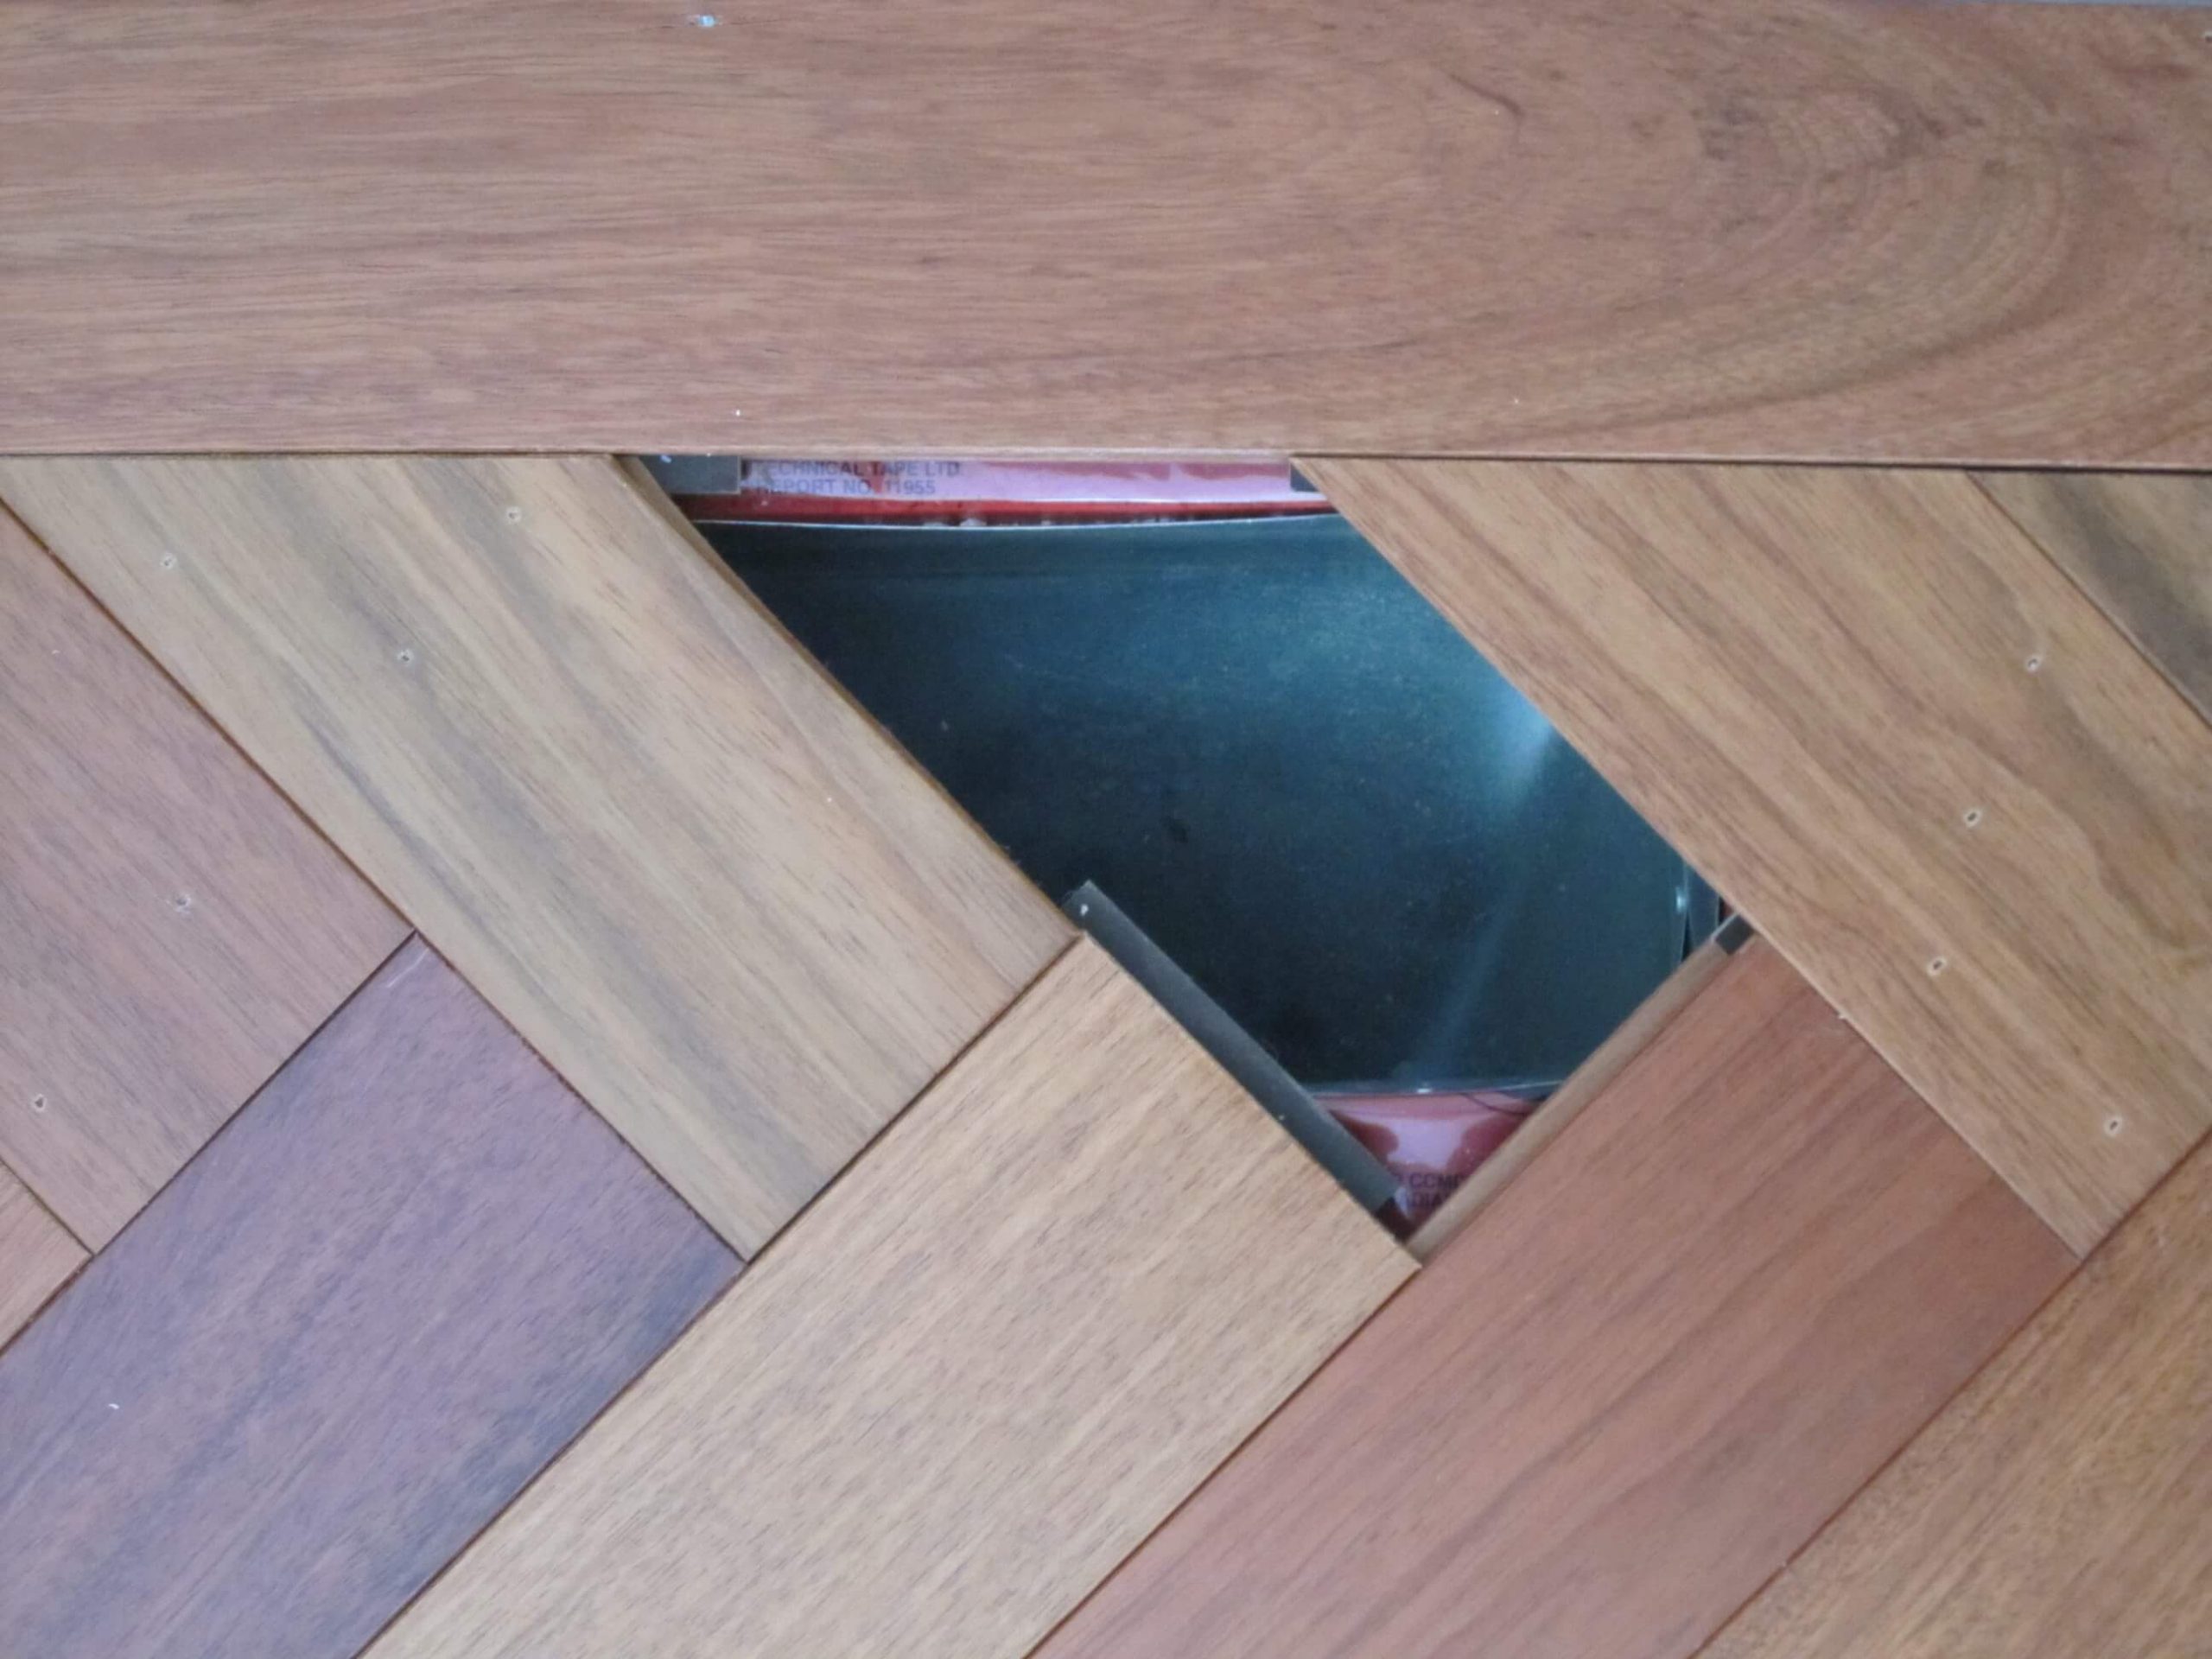
The holes for the floor registers were made with a router with a jig that I made myself out of MDF.
3rd and final step: installing moldings and ventilation registers
For the finish, I designed and made my own frames and plinths. This is the subject of an article that I invite you to read here.
In conclusion…
Even if the result does not correspond to the original plan, I am very satisfied. It took me a lot of patience, many evenings and weekends, to complete this project. I dare not imagine the carpenters who, in the past, laid the floors of castles and other buildings, entirely by hand. Hats off gentlemen!
During my research, I did not expect to find so many styles of poses. It is an artistic field in its own right, which is also linked to part of our historical legacy.

